Building Revell's 1/48 scale
Beaufighter TF.X Test Shot
by Brett Green
|
|
Revell 1/48 Beaufighter TF. Mk.X Test Shot Build |

Revell's 1/48 scale Beaufighter TF.X will be available online from Squadron
I started building Revell's test shot of their forthcoming Beaufighter TF.X, as reviewed earlier in my Squadron ScaleWorkshop video.
In this instalment, I describe basic construction.
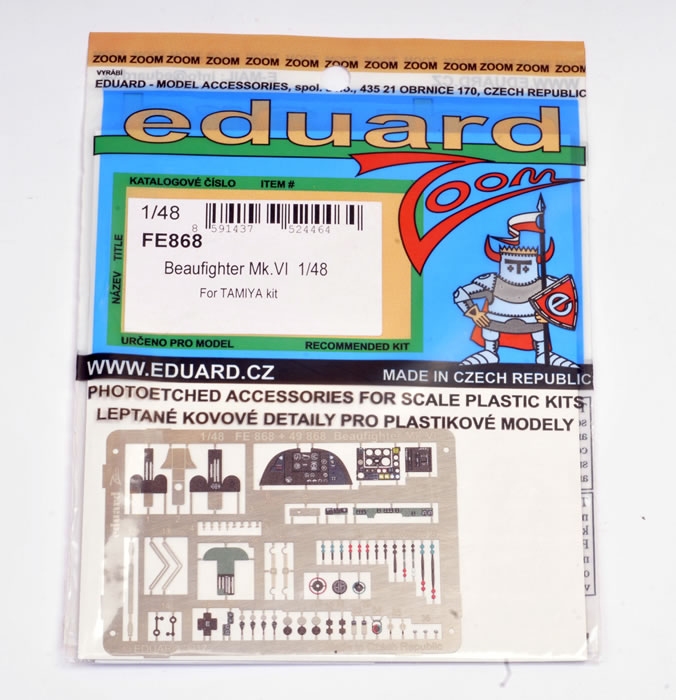
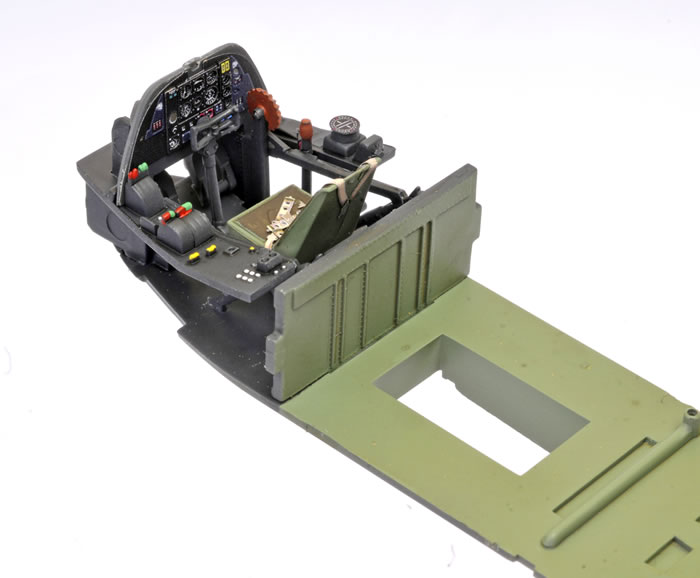
I have supplemented the model with parts from Eduard's Zoom photo-etched Item No. FE868. This is designed for the Tamiya kit but it may also be adapted to the new Revell kit. It contains a nice instrument panel and other cockpit elements
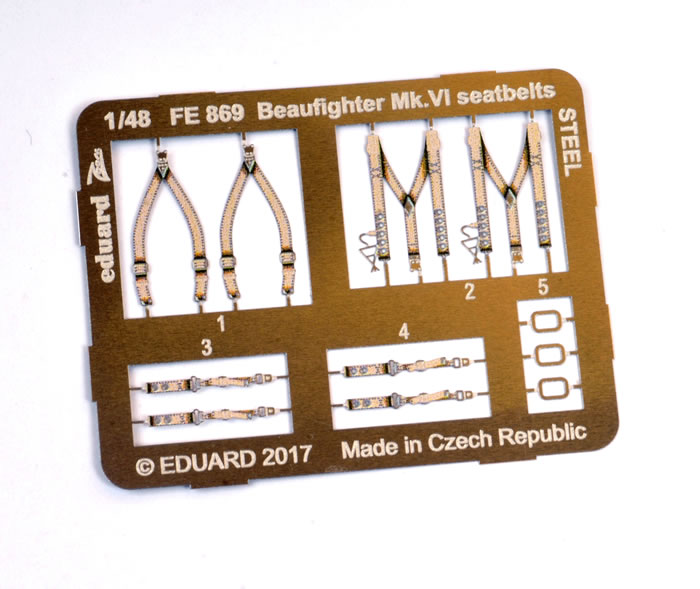
I also used Eduard's STEEL Beaufighter Mk.VI seat belts, Item No. FE869. These STEEL harnesses are terrific accessories and easy to use. Despite the implications of the STEEL label, they are super thin and very flexible. The printed half-tone shading is impressive too.
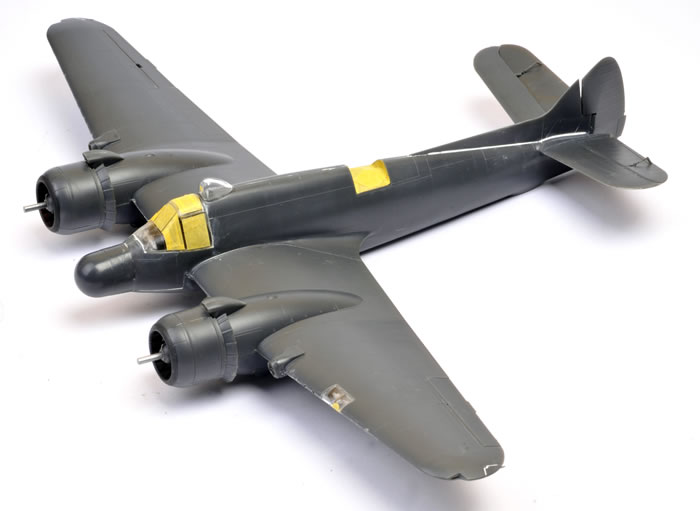
The subject I am building (from an Avieology decal sheet) has the late-version strike camera housing on the spine just behind the cockpit. The kit does not include this housing so I have modified the unused DF loop housing to represent this aerodynamic cover. The title photo shows the relocated but as yet unmodified DF loop cover in place.
Tamiya Extra Thin Liquid Cement was used for the larger assemblies, while smaller pieces were secured with Revell Contacta cement. Tamiya masking tape and/or plastic clamps were used to hold some of the major sub-assemblies while the cement dried.
As always, familiarise yourself thoroughly with the instructions before you start cutting parts from the sprues.
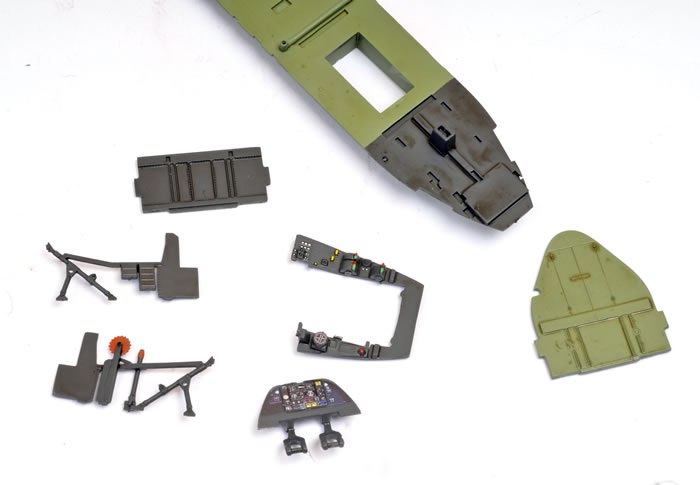
Cockpit and Nose Step-by-Step |
Remnants of the sprue attachments were carefully trimmed and sanded off the major fuselage parts.
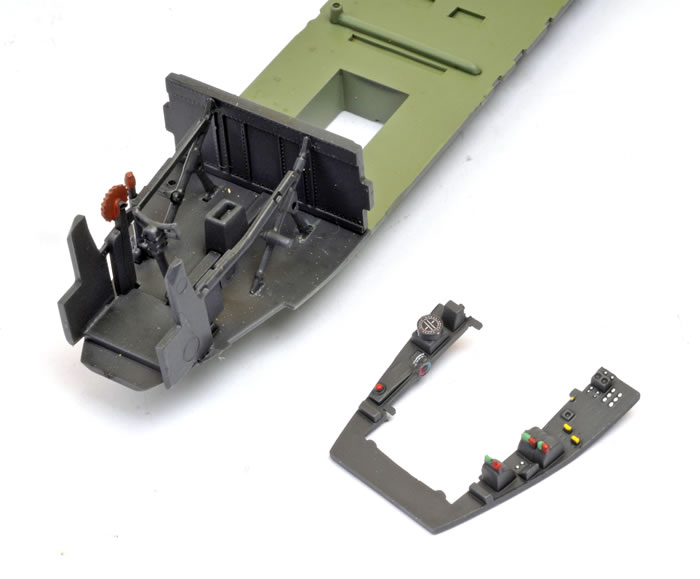
The interior was painted Tamiya XF-71 Cockpit Green - a Japanese colour but close enough to British Interior Grey Green after weathering in my opinion.
The pilot's cockpit was sprayed Tamiya XF-63 German Grey as a base colour representing faded black. Here, the fuselage interior has received a wash of Future Floor Polish, water and a dark brown mix as a wash for the recessed detail.
Eduard's ZOOM photo-etched detail set was used to upgrade the cockpit. This was designed for the Tamiya kit but works with minimal adaptation here too.
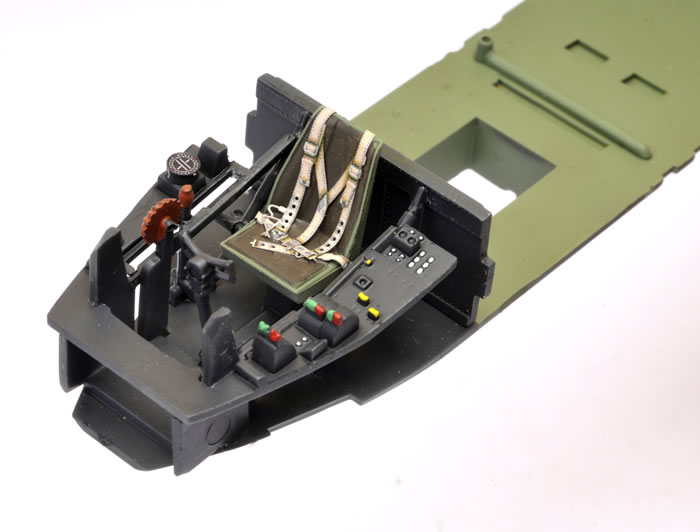
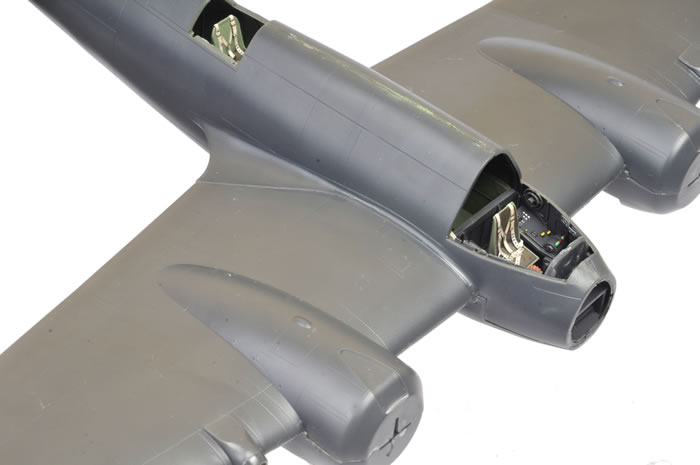
Forward cockpit components painted, washed, gloss coated and ready for assembly.
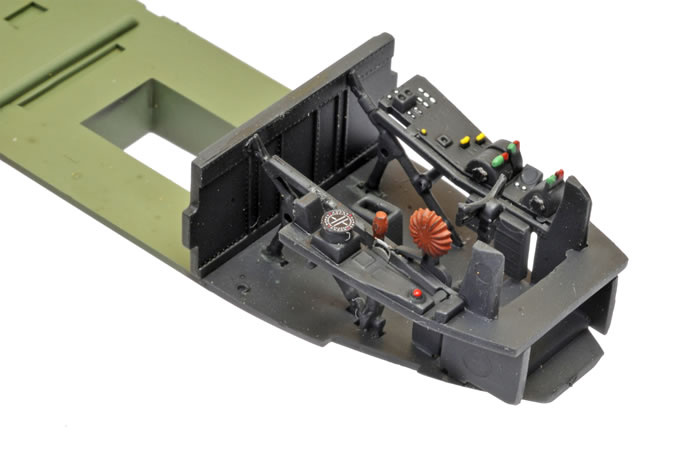
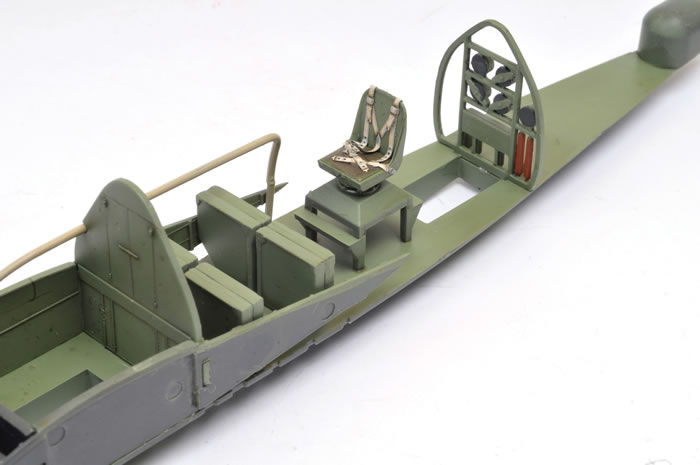
The pilot's cockpit is nicely detailed. Here, the tubular structure has been fitted and awaits the installation of the side consoles.
Side consoles in place. Revell has designed the area with minimal parts for maximum detail.
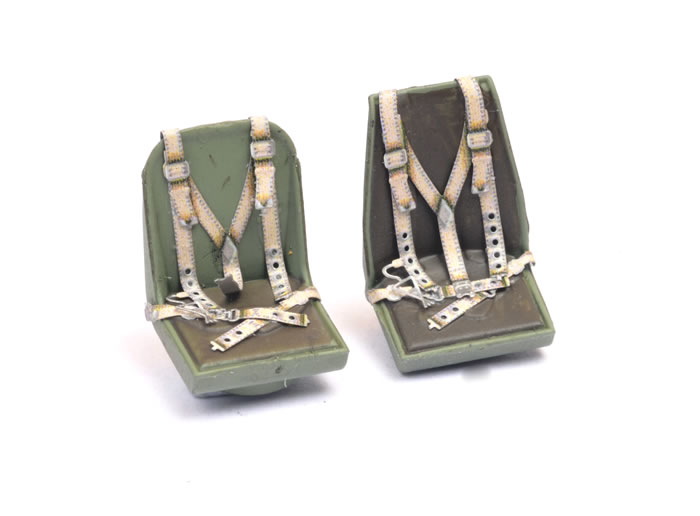
Eduard STEEL harness straps were used too.
To their credit, Revell has moulded faintly raised harness straps to their seats but the Eduard STEEL belts look fantastic for the small additional investment of time and money.
Pilot's seat in place.
Bulkheads, ammo containers, observer's cockpit and other interior details in place. Note the wing root blanking plates.
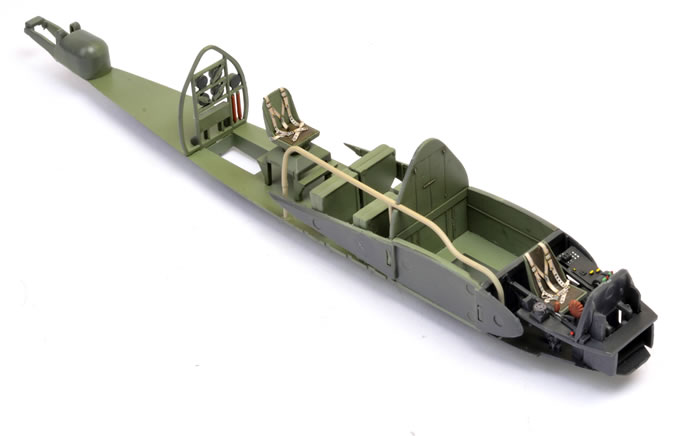
Observer's position.
A view of the pilot's cockpit from the rear. The Eduard colour photo-etched instrument panel looks great.
The cockpit floor and bulkhead is glued to the starboard sidewall.
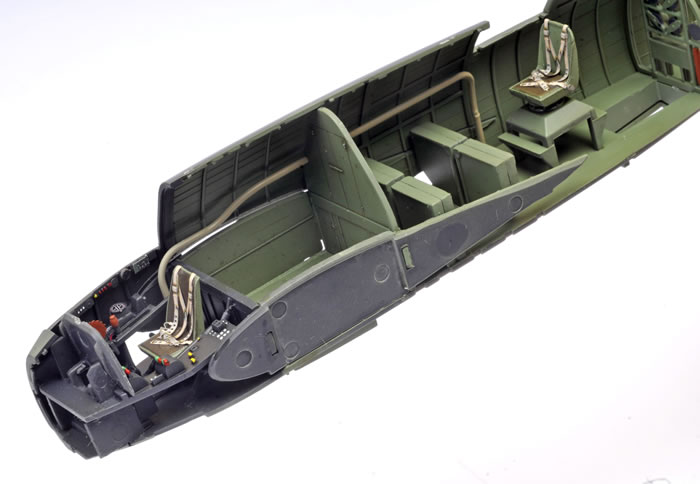
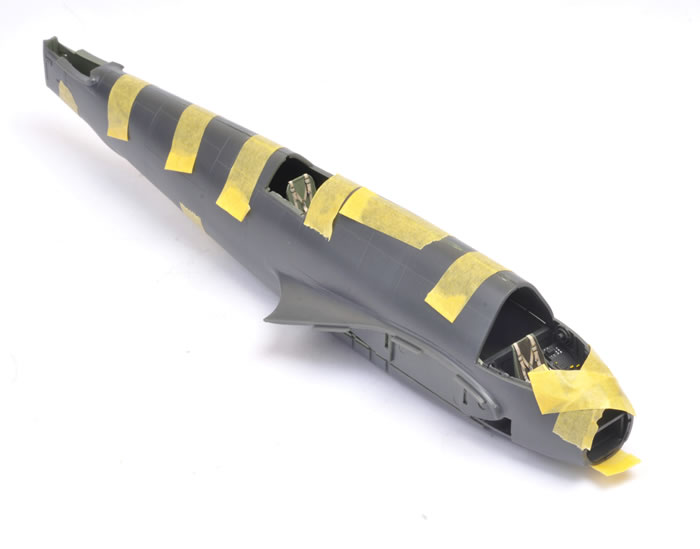
After a little fiddling and jiggling, the interior lines up with both fuselage halves and they were taped together as the glue set. These were secured with Revell Contacta cement.
The wheel well components were painted and weathered while they were still on the sprues.
The elements of one wheel well ready for assembly.
When complete, the wheel wells are deep and nicely detailed.
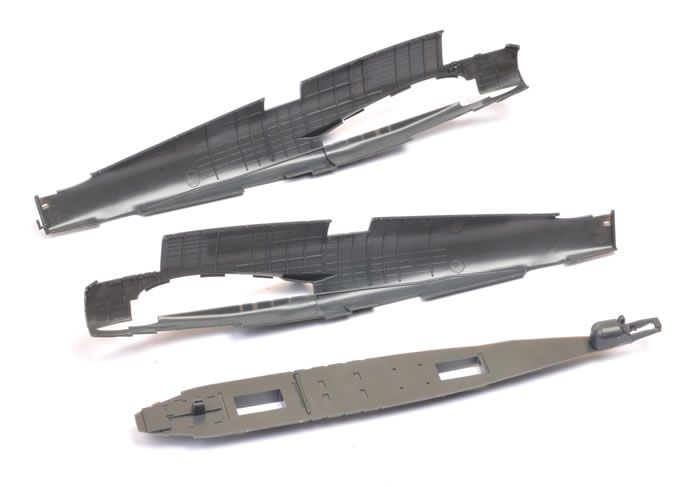
The full-span lower wing offers the option of dropped flaps and poseable ailerons.
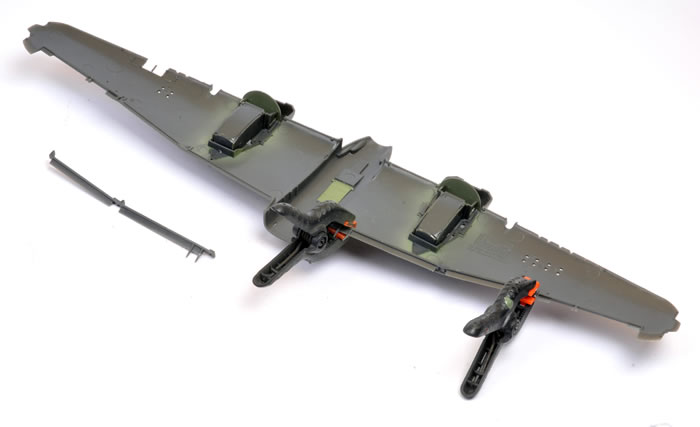
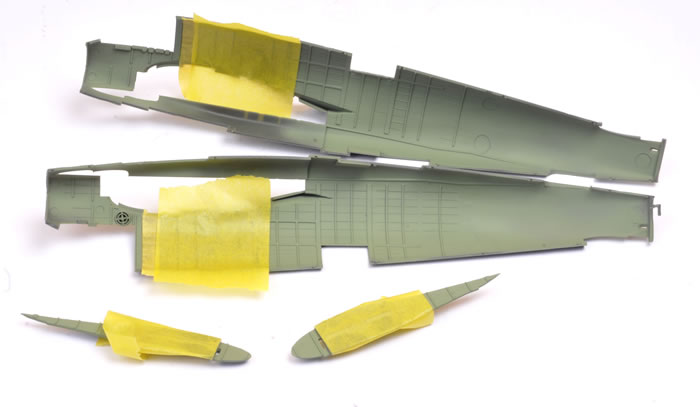
The wing also required a bit of fiddling and squeezing. Clamps and tapes were used here.
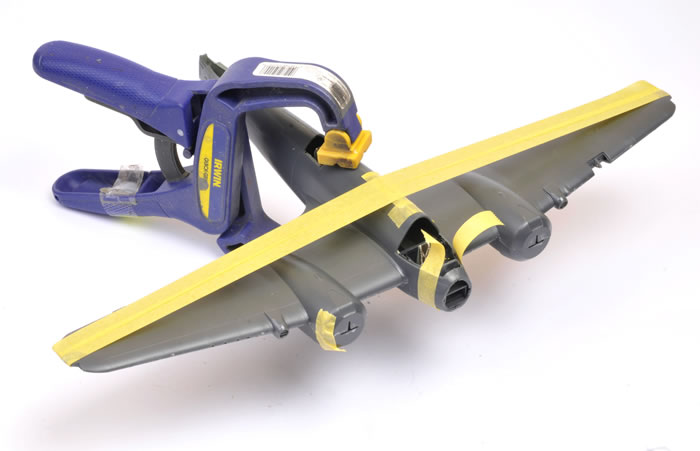
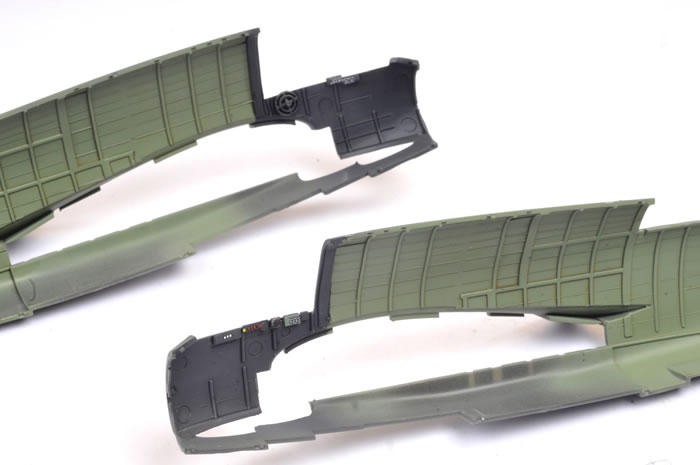
The end result was perfect fit at the top...
...and pretty good below too.
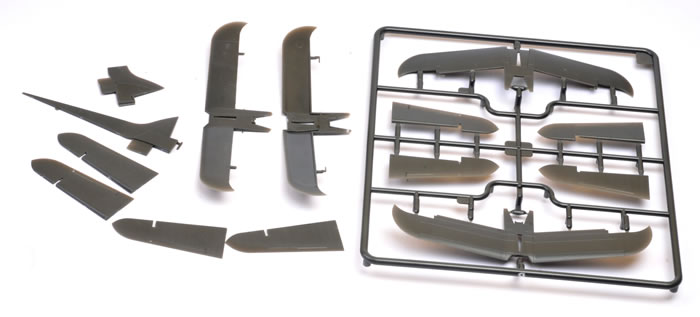
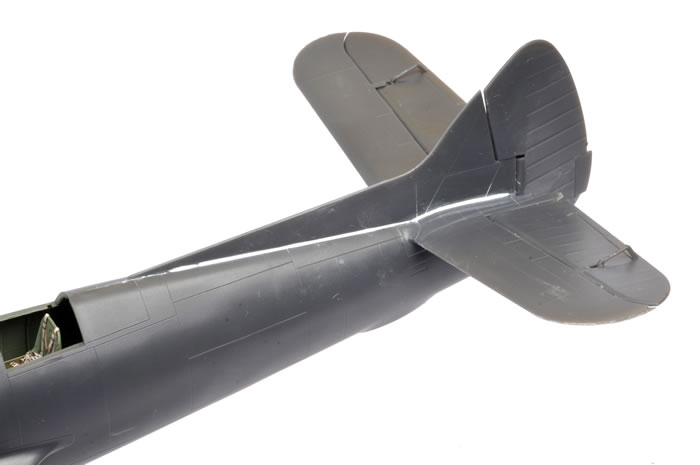
Optional parts are supplied for the long fin fillet and late-style horizontal stabilisers.
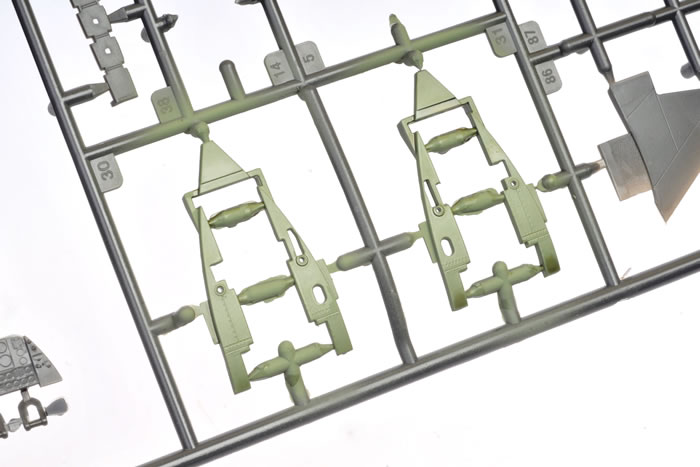
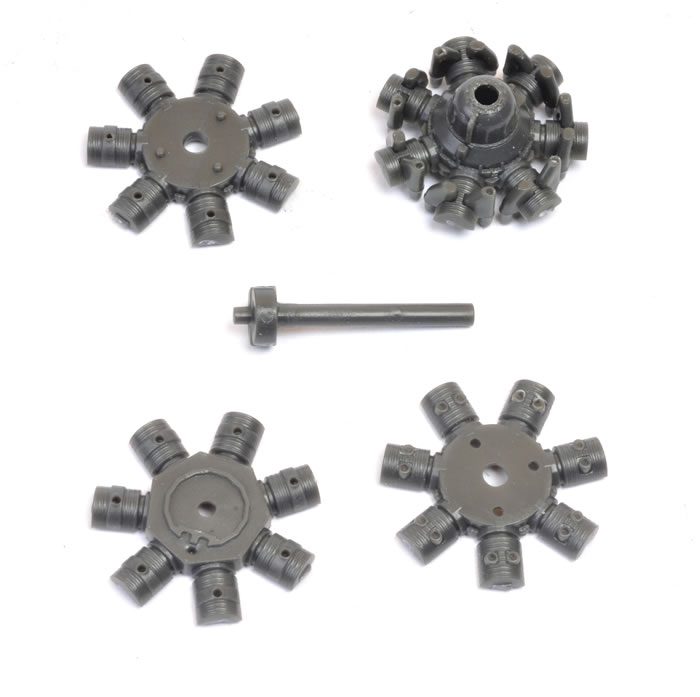
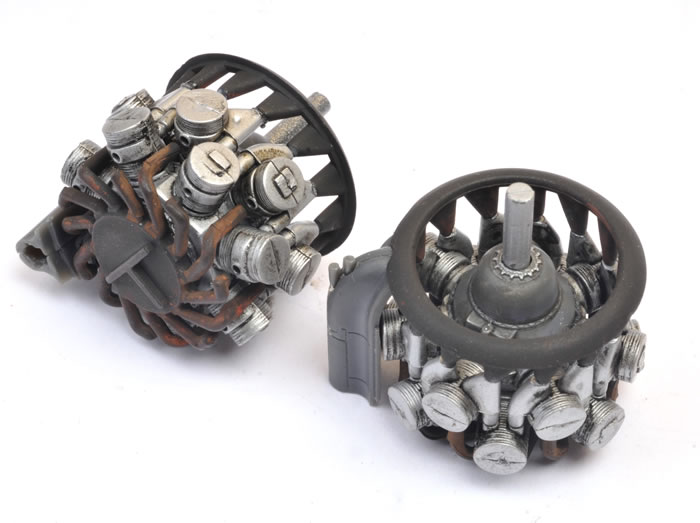
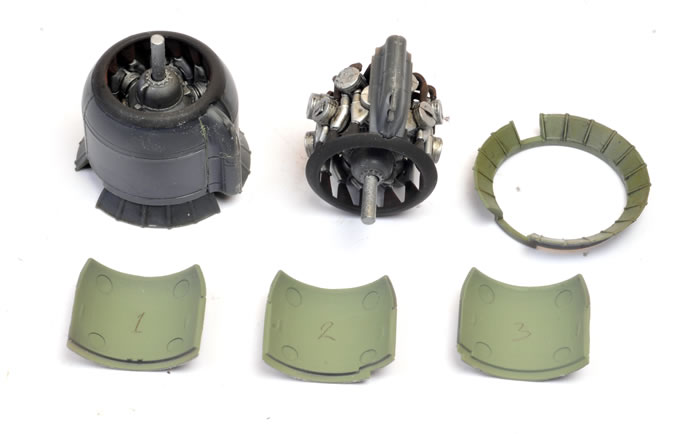
The engines are broken down simply but well detailed. Here are the five parts covering two rows of cylinders, the moulded-on crankcase and the propeller shaft
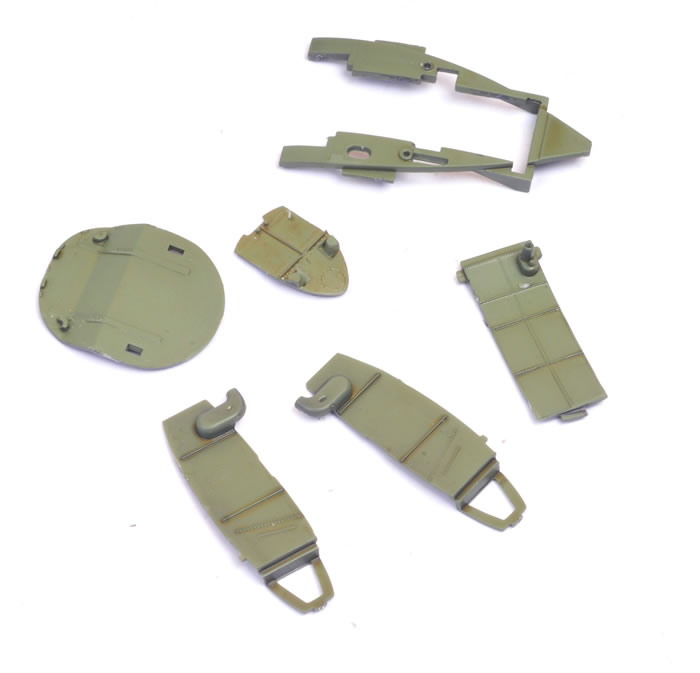
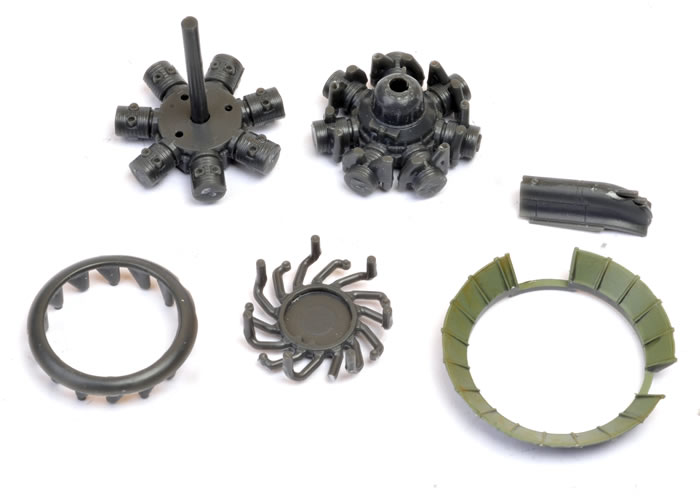
Sub-assemblies ready for paint.
The front cylinder bank painted and weathered.
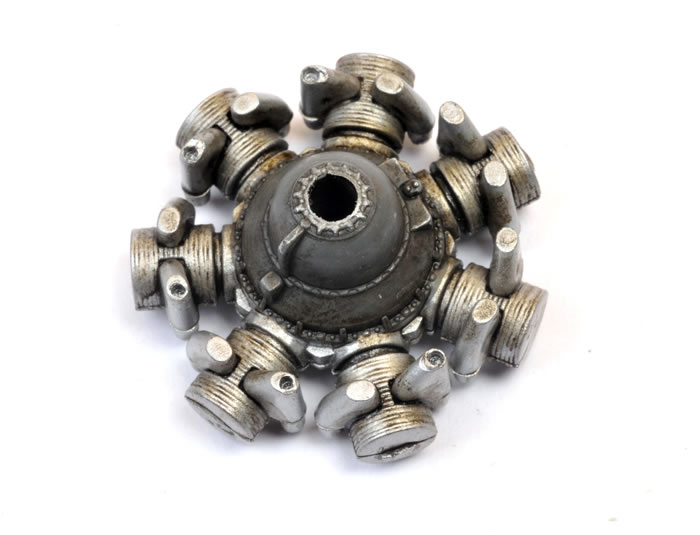
Engine parts painted and ready for assembly.
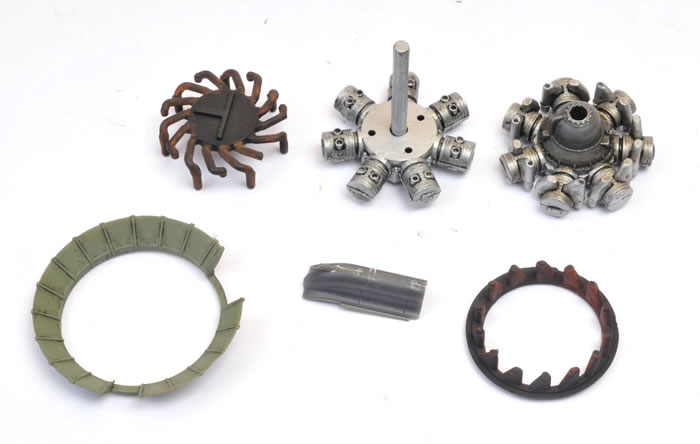
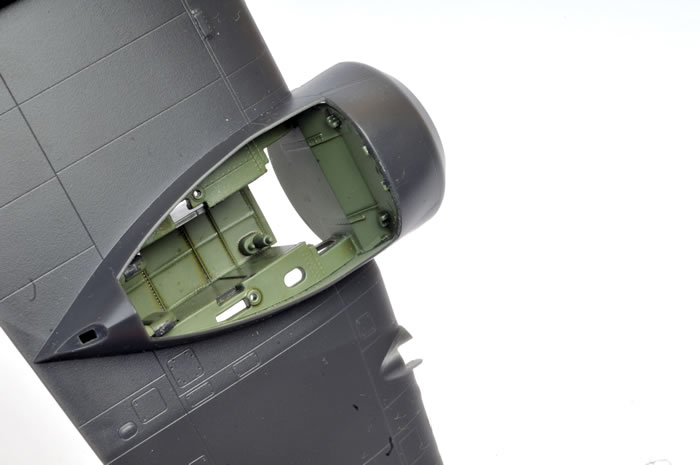
Engine with collector ring and exhaust manifolds in place.
The alignmnt of the collector ring is not entirely obvious as the sprue attachments look a lot like the locating pins. Take your time, check the instructions and test fit regularly before you apply glue. Your best clue is the small recess for the front of the exhaust fairing.
Mig pigments were used to weather the manifolds.
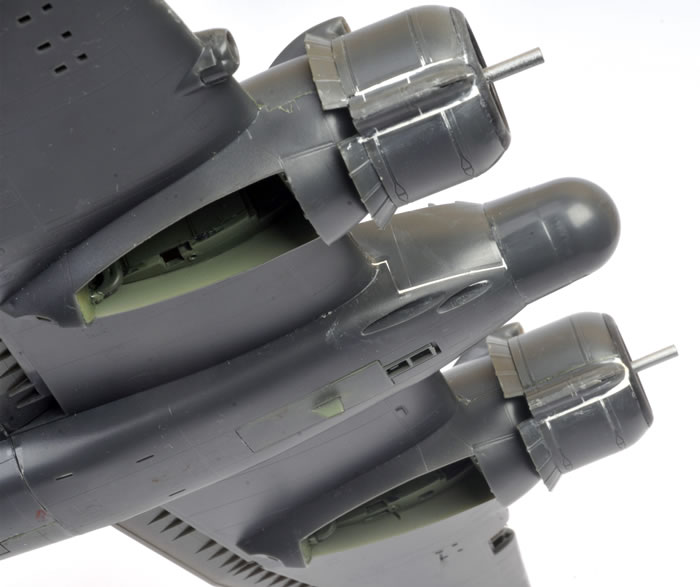
I was a bit concerned about the three-piece engine cowlings but they fitted well. The only change I would make is to leave the exhaust fairing loose until fitting the cowl parts.
It appears that Revell has moulded two styles of engine cowling - one with the small bumps (these provide clearance for the cylinder heads), and one without. The instructions indicate that the version with the bumps should be used, and most contemporary photos seem to confirm this, but my test shot only included the smooth style.
The bump version will probably be included in the production kit.
A little filler was needed to fair in the fin fillet. With the high contrast bewteen the White Milliput and the dark grey plastic, this looks worse than it really is!
Some filler was also required around the nose and the engine exhaust fairings.
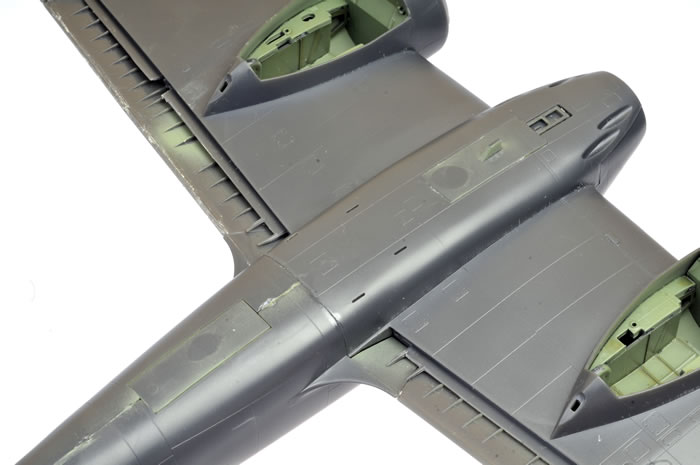
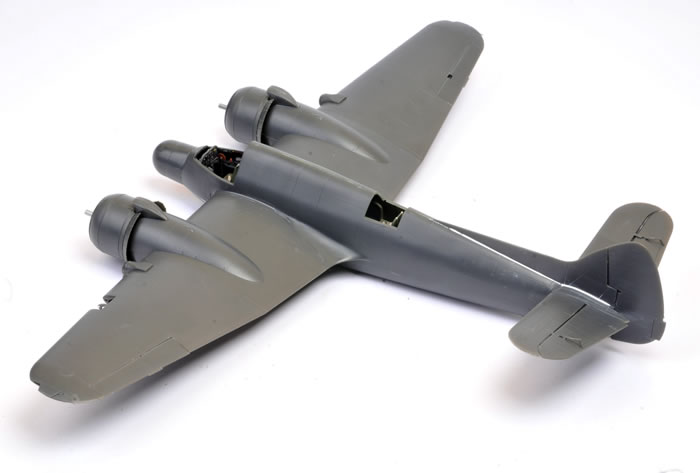
The basic airframe complete.
The main undercarriage components. The undercarriage is also very well detailed.

Revell's 1/48 scale Beaufighter TF.X is a very nice kit.
The high points are the strong attention to detail in depicting typical late Beaufighter features, the high level of detail of the cockpit, engines and main landing gear bays, the very fine recessed panel lines, the separate control surfaces - including the flaps, and the large number of optional parts.
We can see from some of the unused parts in my test shot and in the instructions - rockets, clear observer's canopy, radar etc - that Revell will release other versions in the future.
Shortcomings are few, but it would have been nice to have included some of the boxes and conduits that pepper the interior sidewalls of the real aircraft. It would also appear that the panel line arrangement on the wings is not 100% correct for this variant. The fin fillet should be rounded off at the front too, but this is a very simple modification to make.
Fit is good throughout. A little fiddling is required to get the fuselage halves together with the cockpit assembly in between, and the full-span lower wing needs some persuasion in the form of clamping and taping.
Overall, though, this is a very welcome depiction of a late-to-final Beaufighter, and in my opinion is now the best Beaufighter available in any scale. |
 Home
| What's New | Features | Gallery | Reviews | Reference | Resource Guides | Forum |
Home
| What's New | Features | Gallery | Reviews | Reference | Resource Guides | Forum |