Hasegawa's 1/48 scale
McDonnell Douglas F-4E Phantom II
by Jon Bryon
|
McDonnell Douglas F-4E Phantom II
307th TFS, 31st TFW US Air Force Thailand 1972
|

Hobby Boss's 1/48 F4U-7 Corsair is available online from Squadron.com
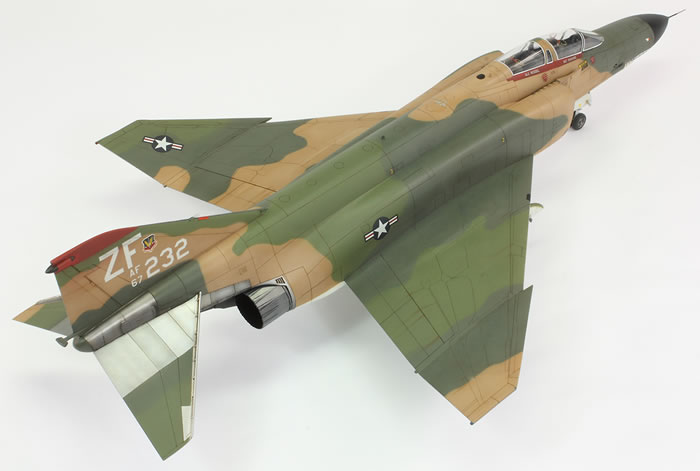
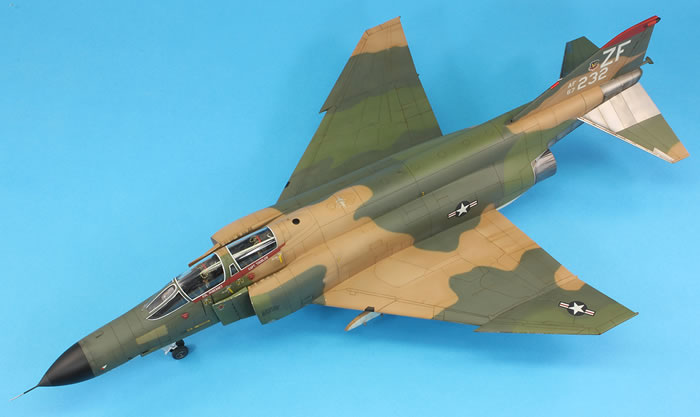
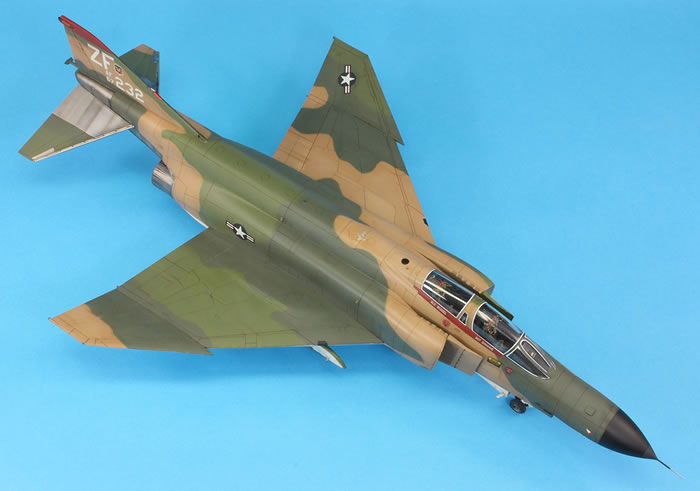
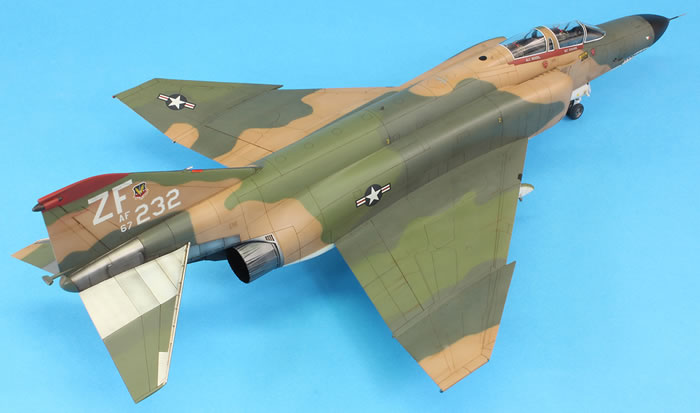
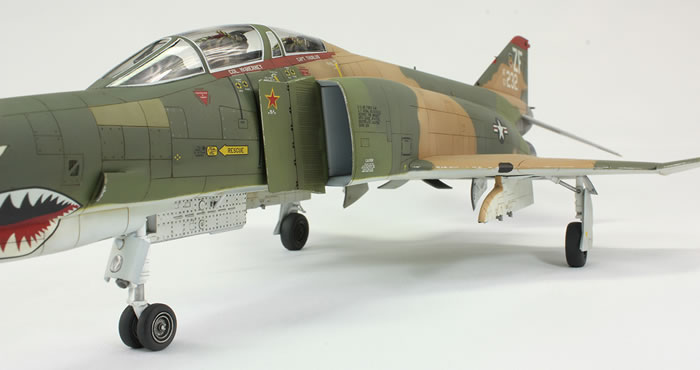
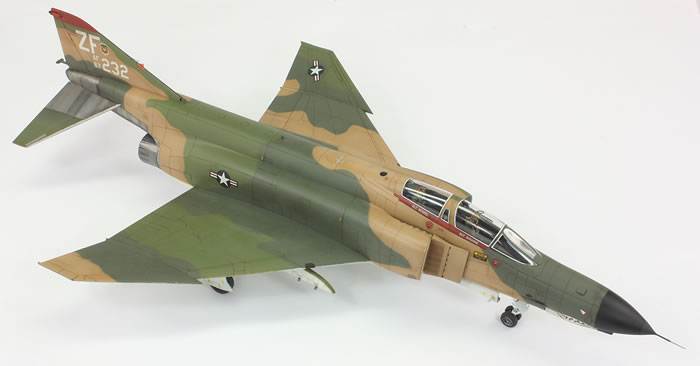
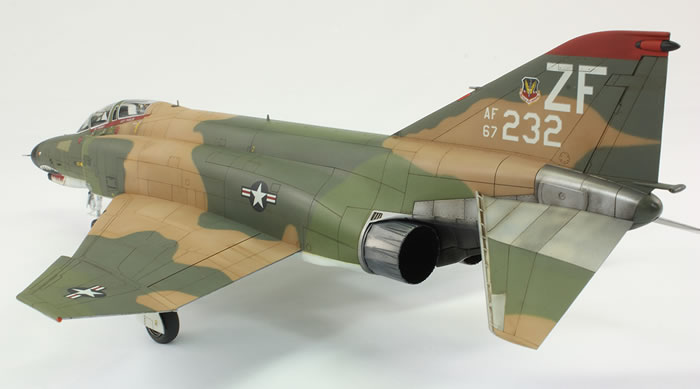
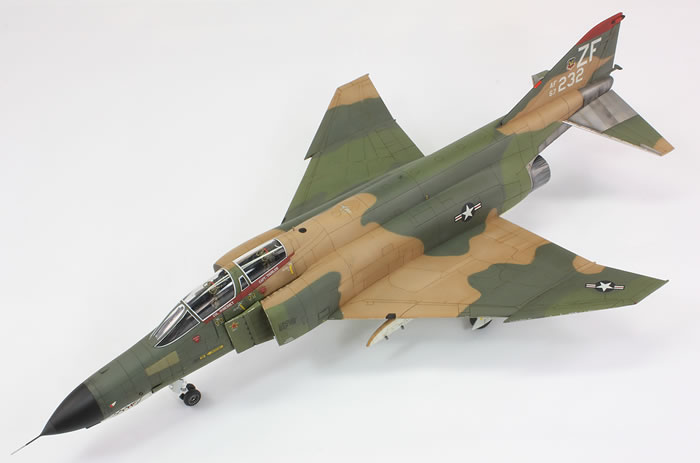
Hasegawa 1/48 McDonnell Douglas F-4E Phantom II
with True Details resin seats and pylons
307th TFS, 31st TFW US Air Force Thailand 1972
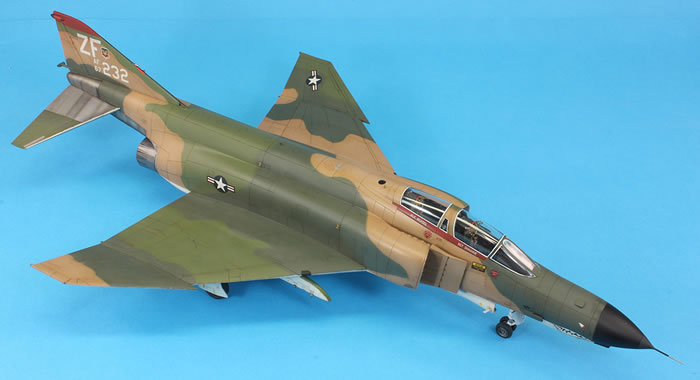
Oddly enough, in 2018 the most modern tooling of the iconic F-4E in 1/48 scale is by Hasegawa and dates from 1984. This version is a 2001 special edition, which again, oddly, comes with exactly the same box art and main decal version as the original 1984 boxing, but a different second marking scheme.
For all their faults, I’ve come to like Hasegawa 1/48 F-4s (well, the ones with recessed panel lines, anyway). They are simple, excellently moulded and fit fairly well. This F-4E was build alongside a Hasegawa F-4G and RF-4B (as well as an Academy F-4N masquerading as an F-4B), which represented the 7th, 8th and 9th Hasegawa Phantoms in my collection. I only ever intend to build one more…
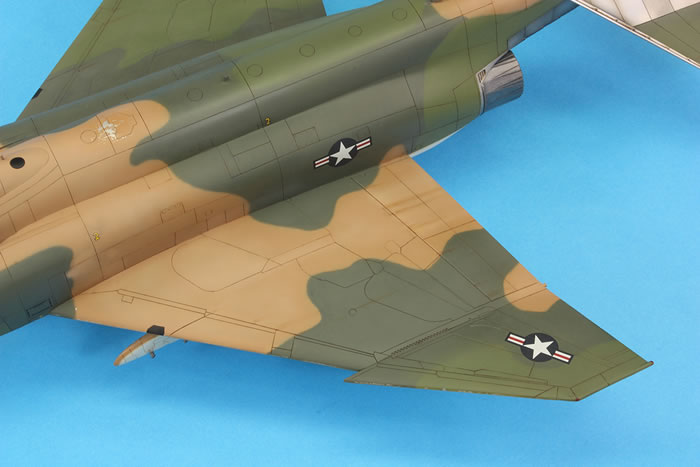
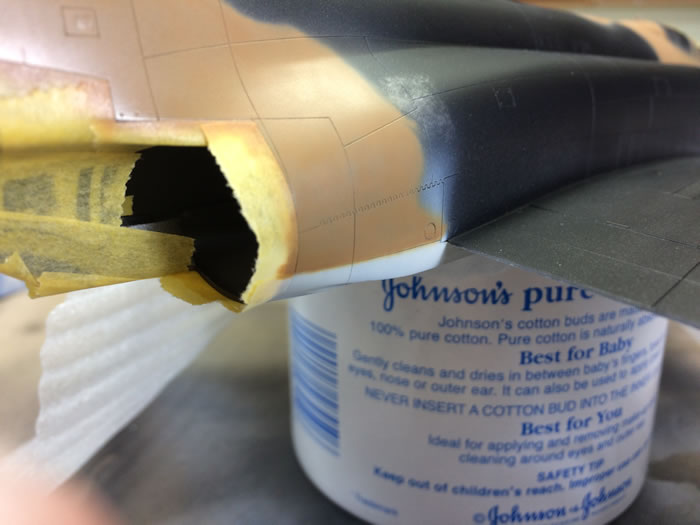
As much as I love them, there are weak spots. For the decal version I was building, a Vietnam-era F-4E from 1972, the wrong wing is in the kit: earlier F-4Es did not have slats. Fortunately, we now live in the era of the internet, and someone agreed to swap the wing sprue with me for a ‘hard’ wing. Less fortunately, the hard wing came from an F-4EJ, with substantially different wing tips to a regular early E. I therefore carved the wings tips to something that more closely resembled the airframe I was modelling.
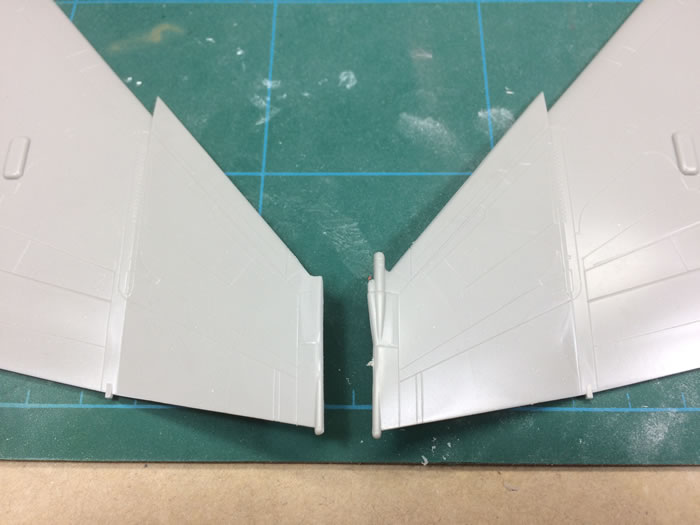
Modifying the wing tips. The modification isn’t quite finished in this photo. Those annoying lumps on top of the wing need to be removed as well.
I did find a single photo of this airframe, on the Detail and Scale website (http://www.detailandscale.com/f-4e_phantom_307th_tfs.html), which was low resolution and from a fairly restricted angle. I also spent ages poring over photos of similar early F-4Es in the various books I own and on this website: http://www.sharpshooter-maj.com/html/twtd02.htm. This helped establish some further details:
-
The tailplanes needed to have the triangular reinforcing plates removed
-
No mirror on the canopy for the WSO
-
The Midas gun was fitted
-
All moulded antennae under the wings/intakes needed to be removed
-
The blade aerials behind the canopy needed to be removed, and one replaced with a piece of plastic rod
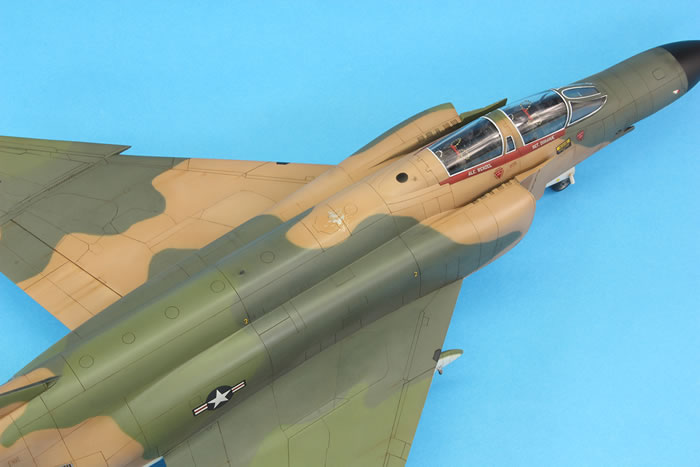
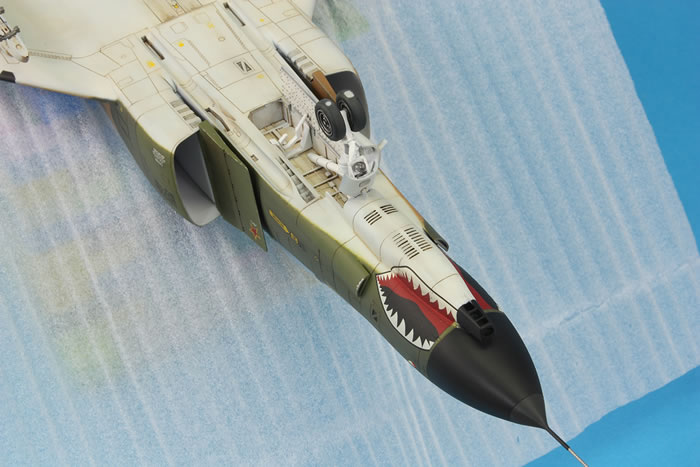
One further detail not included by Hasegawa is the gun gas purge door. This always sprung open on a powered-down F-4E and is visible on the upper nose. I spent a while trying to ascertain the dimensions and used something from my spares box to represent it. In the end though I got it a bit wrong: it’s too wide.
Further research revealed some complaints that the panel lines on the outer wings are completely wrong for an F-4E, but I ignored this issue.
Hasegawa Phantoms are relatively easy and quick to build. The main trouble spot is the fit of the lower forward wing to the fuselage. Careful application of CA as a filler, masking and focused sanding with small pieces of sanding stick resulted in a satisfactory finish.
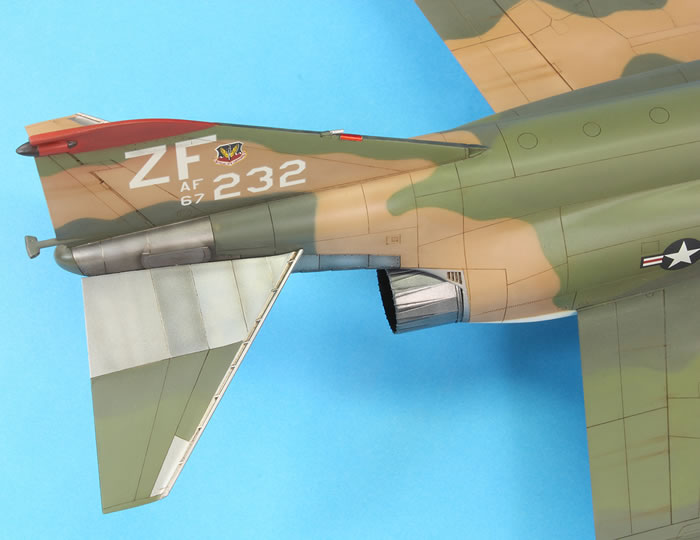
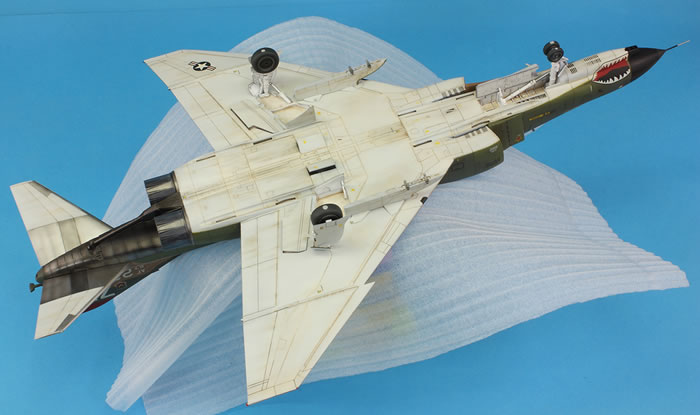
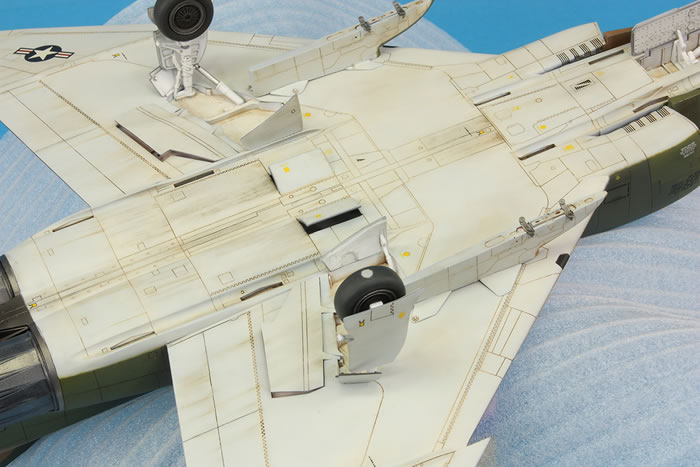
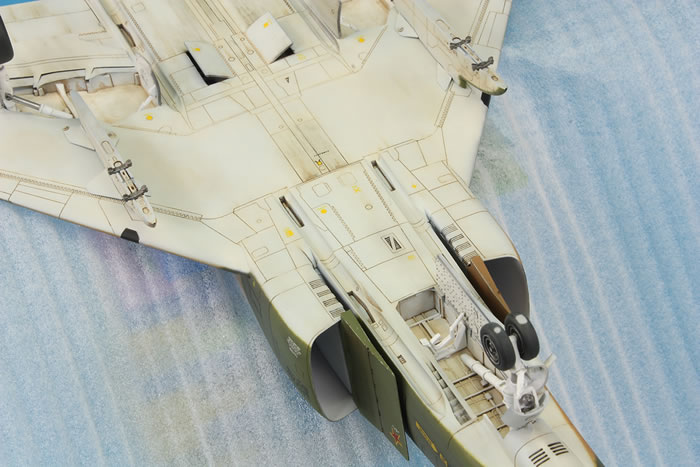
The biggest problem with this family of kits, in my opinion, are the intake interiors. There is no intake trunking or compressor fan; look in the intakes and you just see a wall of plastic above a gaping chasm. It looks ugly, but there was no way I was going to all the expense and hassle of obtaining and fitting one of the various resin seamless intake sets that are available. From most angles it looks fine, but I agree: the view down the intakes is not pretty.
Another issue, related to the intakes, is the rear side of the inner intake wall. This is moulded hollow and highly visible on the finished kit. I filled the gap with Milliput, which took a fair amount of sanding flat. There should also be some braces between the intake and the fuselage which I think, in this scale, have only ever been modelled by Zoukei-Mura (who have sadly yet to mould a version of the Phantom I don’t already have). Unlike my Trumpeter MiG-23, where I actually went to the effort of adding these, I left them off my Phantom.
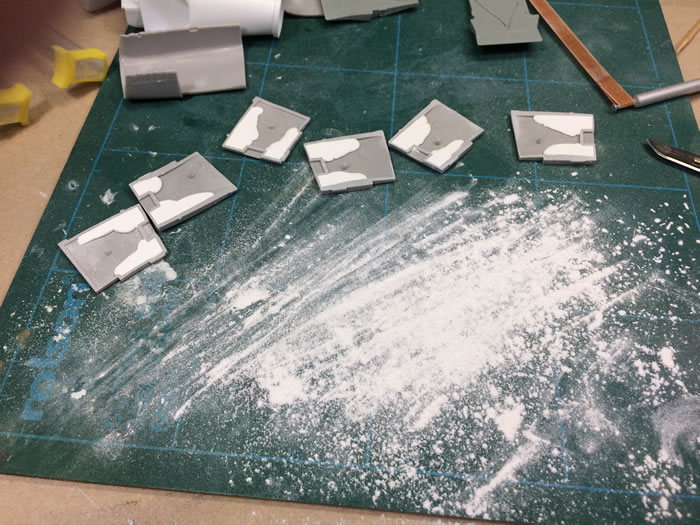
Removing the hollow backs of the inner intake walls.
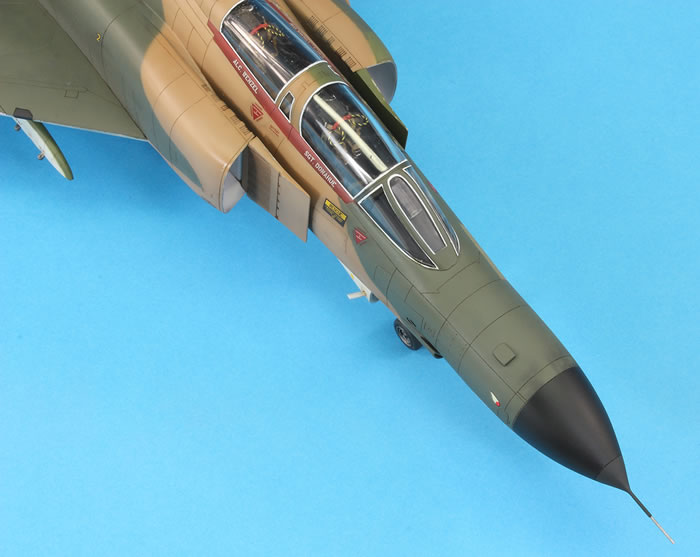
The cockpit itself is completely stock, but I replaced the seats with resin examples made by True Details. I’ve always liked these and I think they paint up well for a closed canopy. For the first time I tried to make the ejection grab handles with intertwined yellow and black thread. I’ve always been extremely sceptical about this method; how do you avoid it looking just like thread? My strategy was to coat two long threads of black and yellow cotton with white glue. I left these to dry. I then anchored one end with the two threads together and clipped a weight to the end and spun it. This resulted in a tightly wound thread of black and yellow which I again coated with white glue. Once dry I cut the appropriate length and superglued it to the plastic anchor I had cut from the kit handles (the bit painted red). It’s not perfect, but in 1/48 scale I cannot do better with paint and so I am happy.

Four Phantom cockpits (from left to right, RF-4B, F-4E, F-4G and F-4N).
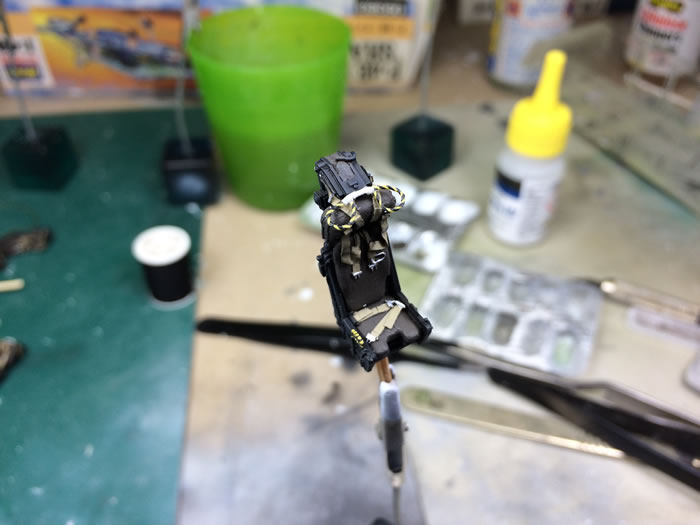
True Details seat with ejection pull handles made from thread.
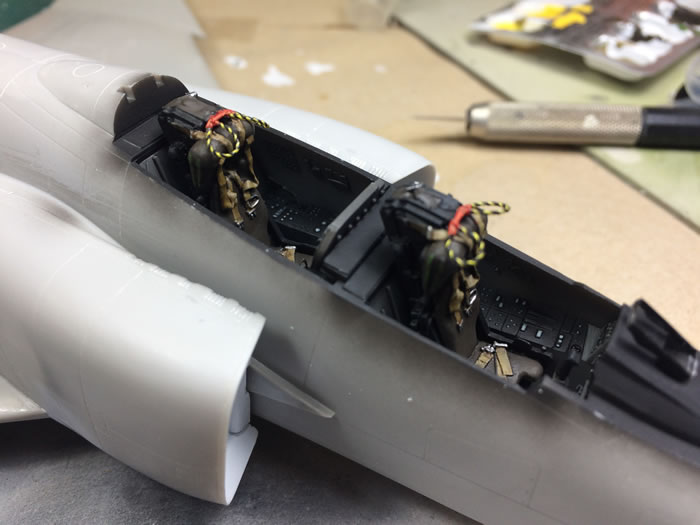
Seats installed in the cockpit.
The other aftermarket parts are True Details’ resin pylons. Those in the kit are annoying as Hasegawa never retooled the USAF pylons with recessed panel lines, and they’re a nightmare to rescribe. I found a good, cheap source in Switzerland and was very happy with the quality of these parts. They are fussy to make, as the sway braces are separate and you need to remove the moulded parts from under the wing, but the extra fidelity and consistency with the rest of the kit’s surface detail is worth it.
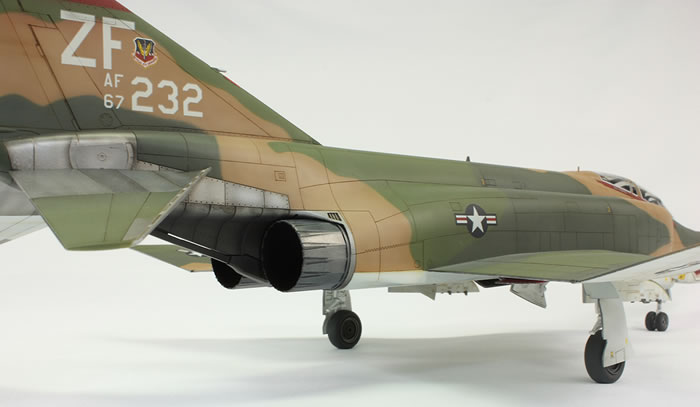
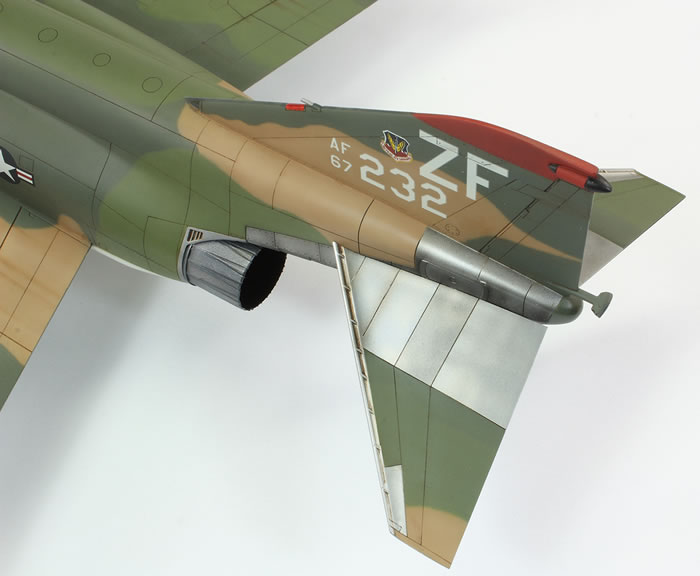
Aside from the reconnaissance versions, Hasegawa’s Phantom engines have always been very weak. Since I was not using the -10 engines from the Academy kit, I butchered them to fit this one. The improvement is slight (the Academy engines are not brilliant either), but noticeable.
The nose pitot was replaced with Albion Alloys telescoping brass tubing and fitted before painting so it could be faired in properly with super glue.
I used a one-piece canopy that I had, which makes life a lot easier than the multi-part version, and an Eduard masking set. This pleasingly came with masks for the one piece and multi-piece canopies, which meant I could mask two kits with it.
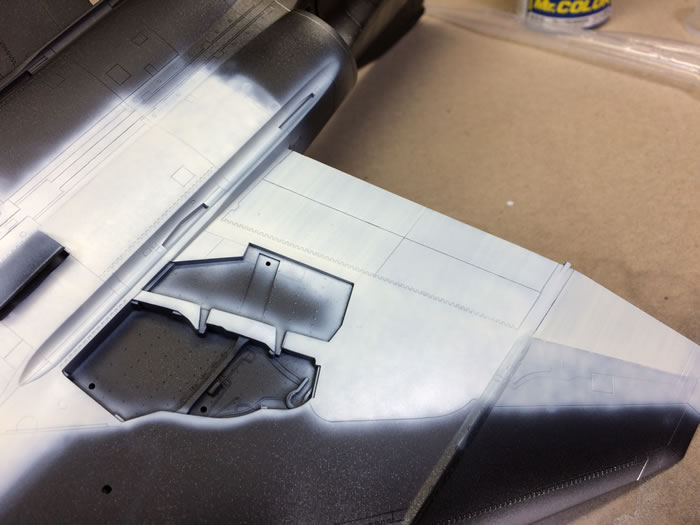
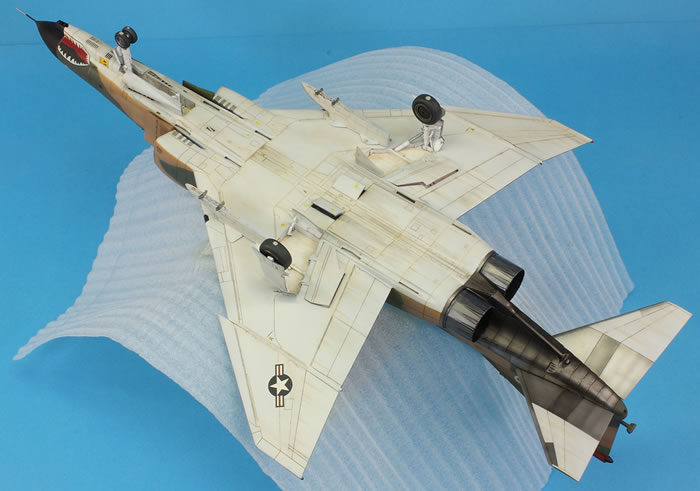
Black basing the underneath in light grey.
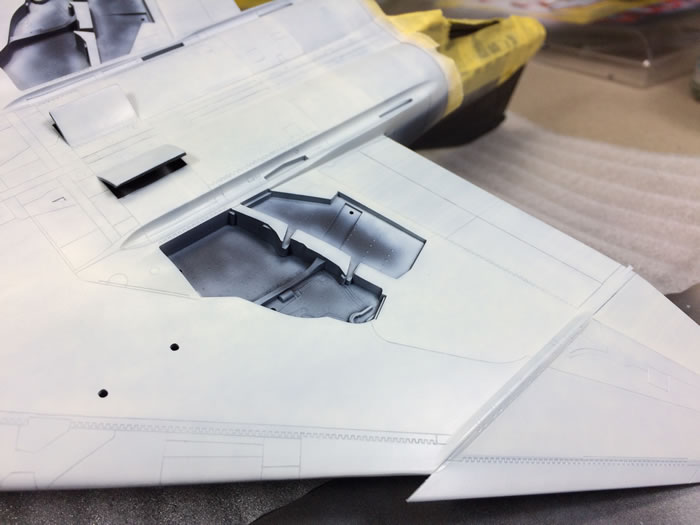
Freehand camouflage between the tan and the light grey.

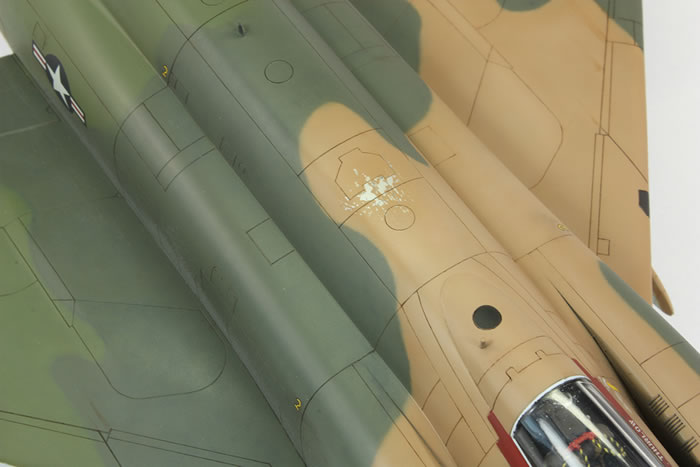
Scratches due to the refuelling probe. The paint has been scratched to reveal the underlying Alclad. I added more scratches later.
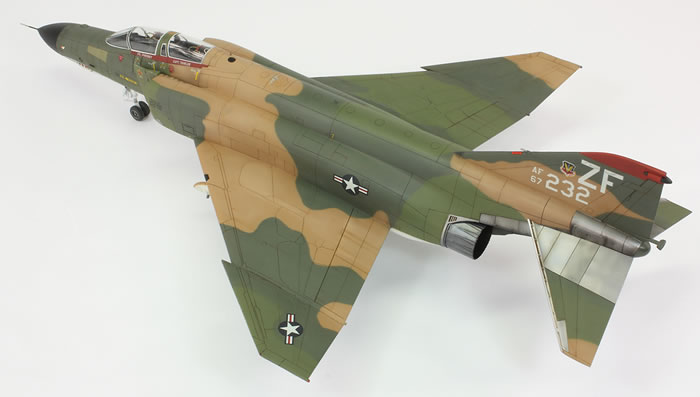
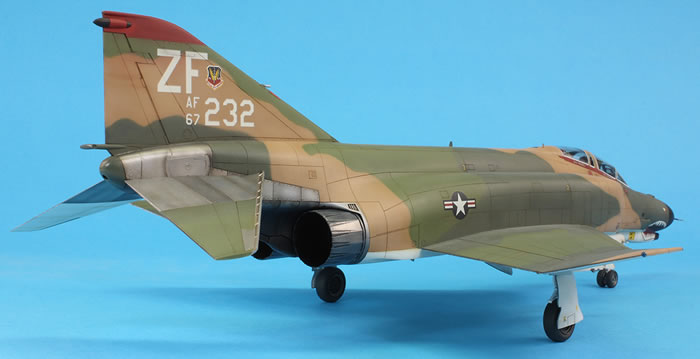
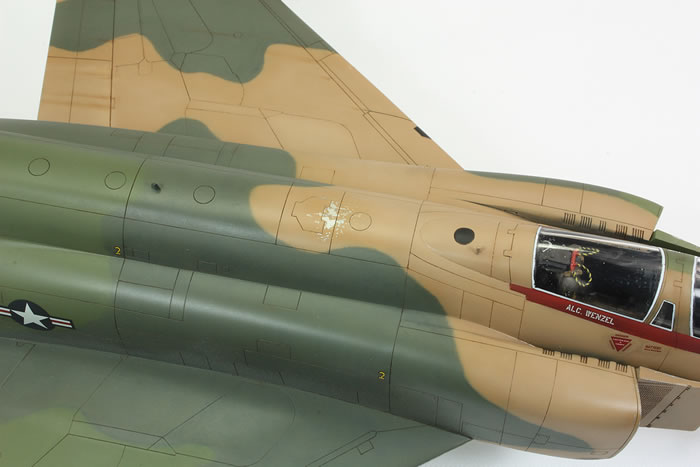
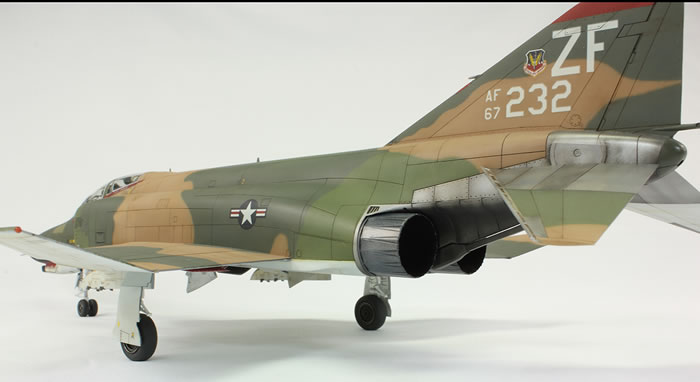
The paint is all Mr Color sprayed in a very tight pattern over Mr Finishing Surfacer Black 1500. The main scheme is all done freehand without masking using an Iwata Custom Micron. The black undercoat has resulted in the light grey being a bit too blue/green. For my next SEA scheme I will try a dark brown undercoat, which should give a better cast. The red trim is a mixture of Mr Color 29 and 327.
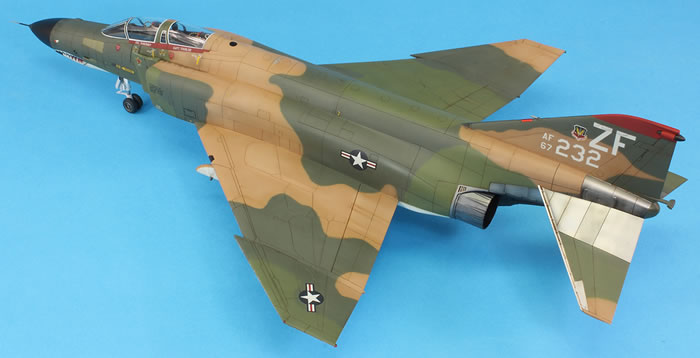
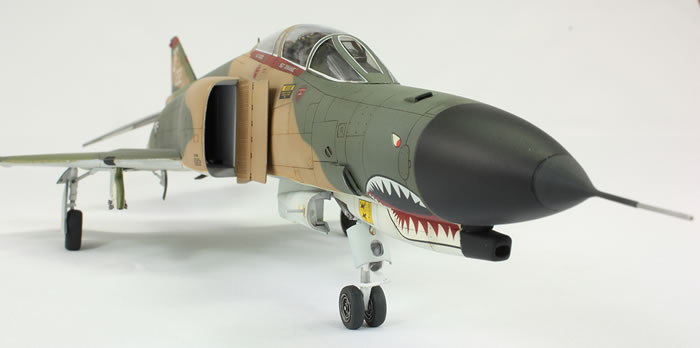
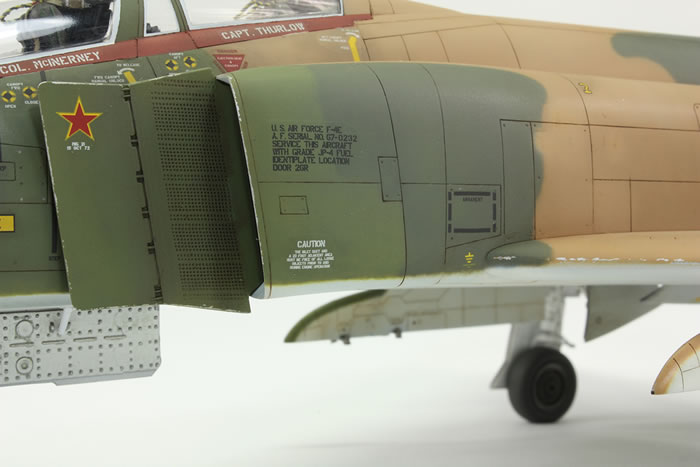
Photos show that the paintwork of F-4Es in Vietnam around 1972 did not chip particularly badly (unlike the F-4Cs and Ds) but that some did occur on the wing leading edges, intake edges and the fronts of the AC intakes. All USAF F-4s also show scratches in the paint in front of the air refuelling door where the probe would damage the paintwork. I replicated this by using an undercoat of Alclad Aluminium and then lightly scratching the overlying paint away with a scalpel or toothpick.
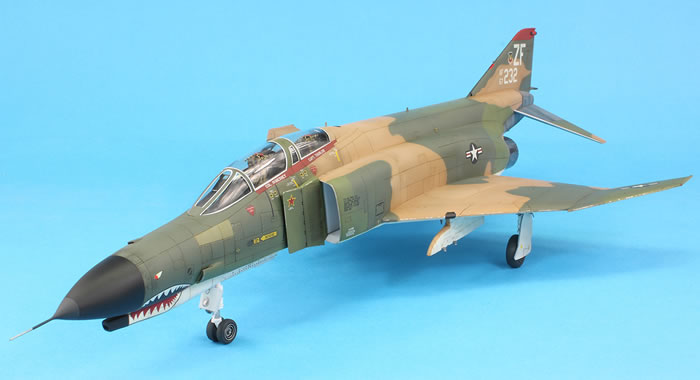
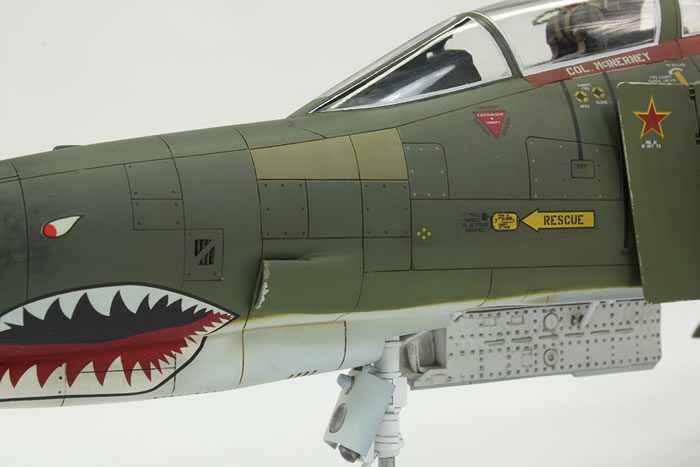
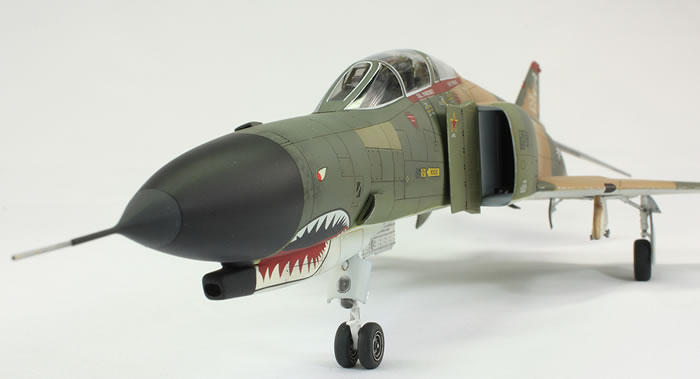
From the photo of 232 taken in 1972, not all the markings are visible. What is clear is that the eye decals provided by Hasegawa are completely wrong. I searched through all the decals I have (from more than 280 kits) and the closest I could find were some old decals from a Hasegawa A-7D. They’re still not right – the red part of the eye is not in the right place – but they’re more right than what comes in the kit. The shark teeth themselves don’t fit very well and I was able to utilise the unused red canopy trim decals to fill the gaps where I had to make some cuts.
The other error that jumped out straight away is that Hasegawa do not provide the white lettering for the crew names on the canopy rails. I pondered this for a while, but was stumped because I had no idea what the writing should say. In the end I just used the lettering from the first marking option, but I know the names and ranks are, sadly, wrong.
Most of the stencilling was left off as contemporary photos show it wasn’t generally used. I’ve probably still applied too many stencils anyway, especially under the canopy.
The decals themselves are typical Hasegawa from that era: very thick and they took forever to release from the backing paper. I’ve found that this often to happens to some Hasegawa decals as they age. The decals were each applied in a puddle of Mr Mark Setter and left to dry without being touched.
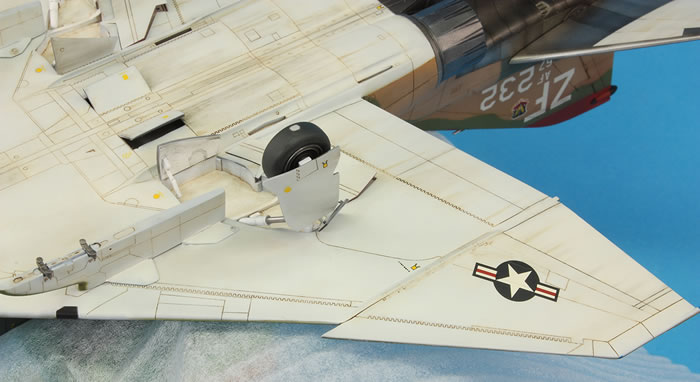
Hasegawa F-4s do have some very, very annoying engineering failures. The attachment points for the tailplanes are almost non-existent and fixing them accurately and neatly is an ordeal. The actuating arms for the main landing gear are a tad short, which results in them being crooked, with an inward cant. This is worse on the right side. I’d forgotten about this for the F-4E, and since I’d attached the legs with Tamiya Extra Thin and they still had a bit of give before they dried, I straightened them out by setting the plane on its legs and spreading the undercarriage using some Vernier callipers. On the other Hasegawa Phantoms I’ll cut the nubs off on the main undercarriage legs that the actuating arms are meant to attach to, which will allow them to be positioned vertically first time.
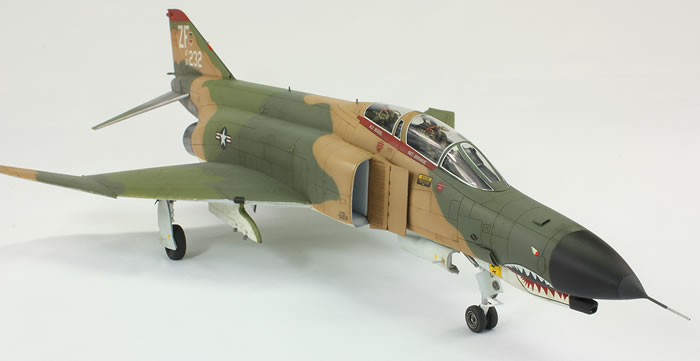
The final finish is Gunze GX113, which is very matt. This killed a lot of the contrast I had built into the paint through black-basing, post-shading and some oil paint rendering, which was a shame.
I was generally pleased with the masking of the canopy, but the white sealant did not come out properly on the front right of the windscreen. One oddity is that the twisted-thread ejection pull handles still clearly have some residual stress in them which has resulted in the pull handles slowly distorting a little. It will be interesting to see how this evolves with time. It may be a significant downside to this method of making the pull handles.
Overall, I am satisfied with the end result. Inevitably there are some areas where the repetition of doing the same thing four times over (dealing with four sets of undercarriage parts was especially tedious) means the final outcome is a bit sloppier than it could have been, and the paint is disappointingly uniform, but I’ve always wanted a Vietnam-era shark mouth F-4E and I’m very pleased to be able to add this to my collection.
For more modelling articles like this, please visit my website www.jonbryon.com
Text and Images Copyright ©
2018 by Jon Bryon
Page Created 22 November, 2018
Last Updated
22 November, 2018
Back to
HyperScale Main Page

|
 Home
| What's New |
Features |
Gallery |
Reviews |
Reference |
Forum |
Search
Home
| What's New |
Features |
Gallery |
Reviews |
Reference |
Forum |
Search