Hasegawa's 1/48 scale
McDonnell Douglas F-4G
Wild Weasel V
by Jon Bryon

|
McDonnell Douglas F-4G Wild Weasel V
563rd TFS 37th TFW US Air Force USA 1989
|

Hobby Boss's 1/48 F4U-7 Corsair is available online from Squadron.com
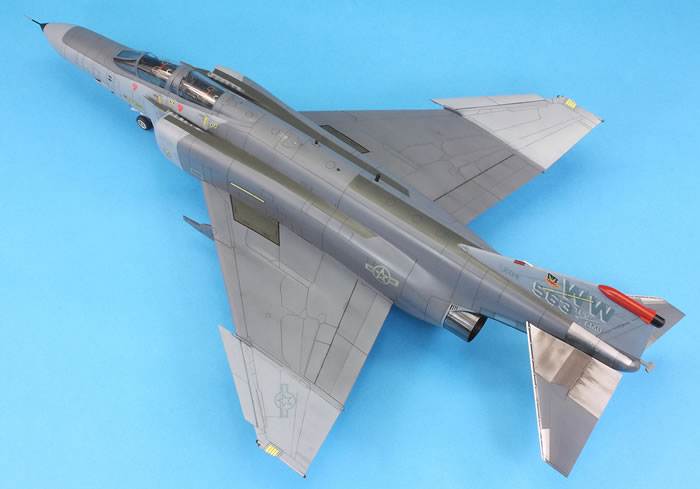
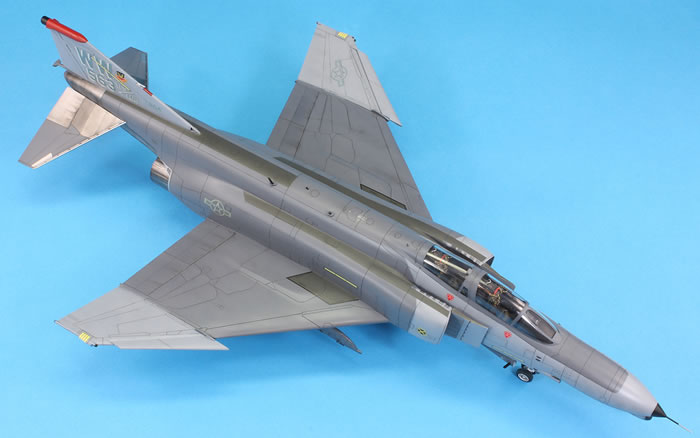
Hasegawa 1/48 McDonnell Douglas F-4G Wild Weasel V
with True Details resin seats and pylons
563rd TFS 37th TFW US Air Force USA 1989
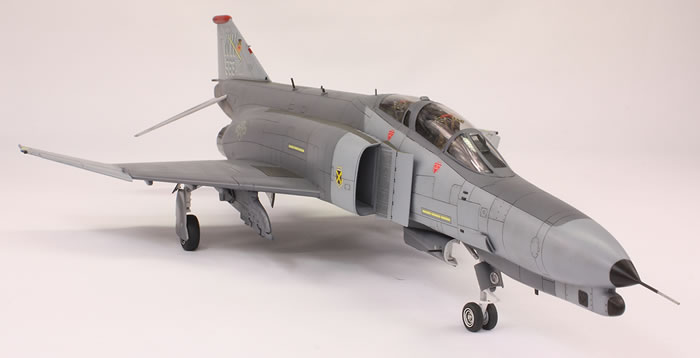
This is another sentimental kit, bought during a bout of illness in 2005. I’ve always thought the F-4G was a great looking version of the Phantom, especially in the two-tone grey scheme.
I built this F-4 alongside an F-4E and RF-4B from Hasegawa, and an F-4N from Academy. That was possibly biting off a bit more than I can chew, but I did thoroughly enjoy it.
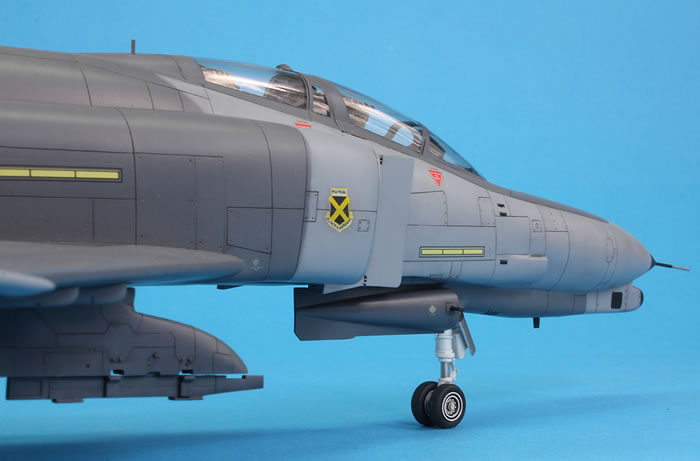
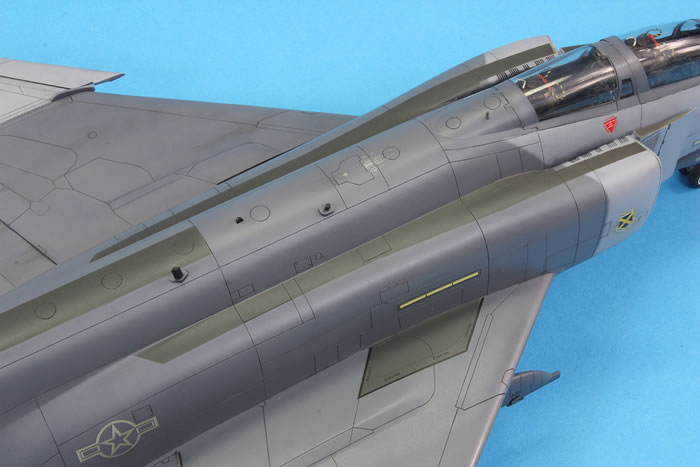
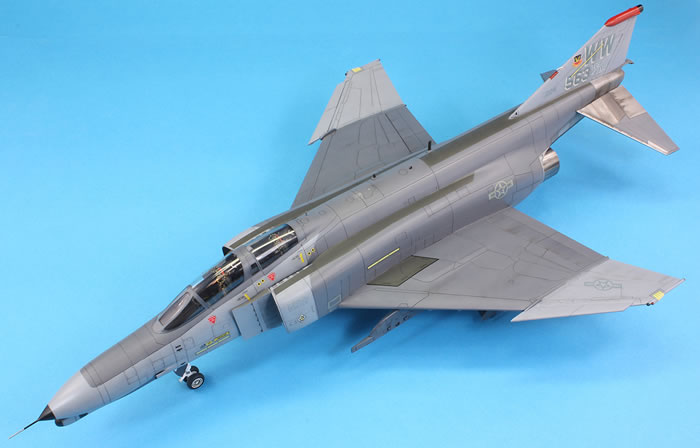
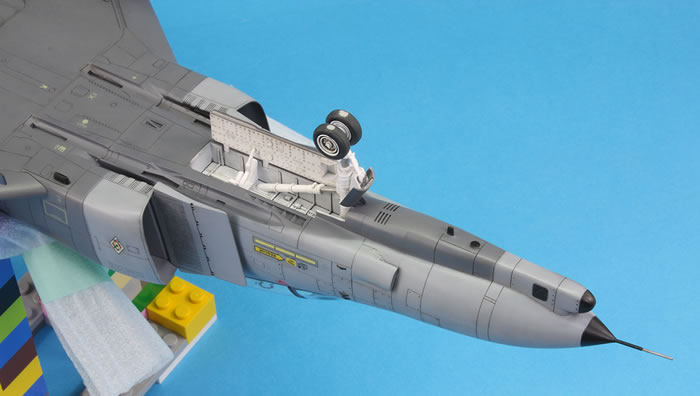
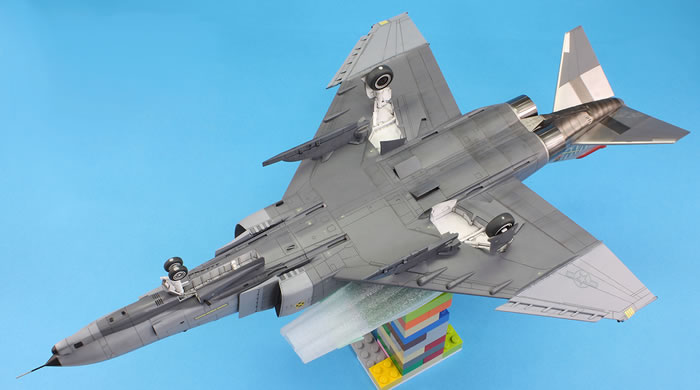
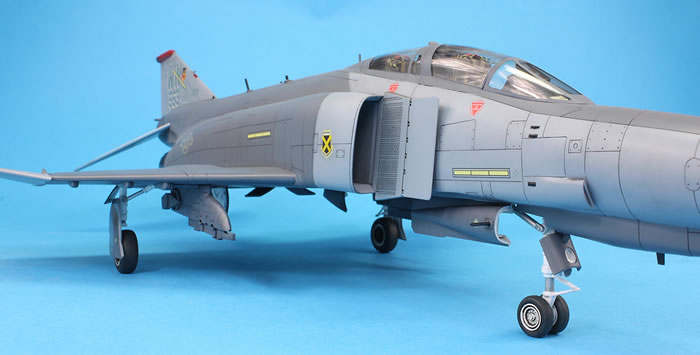
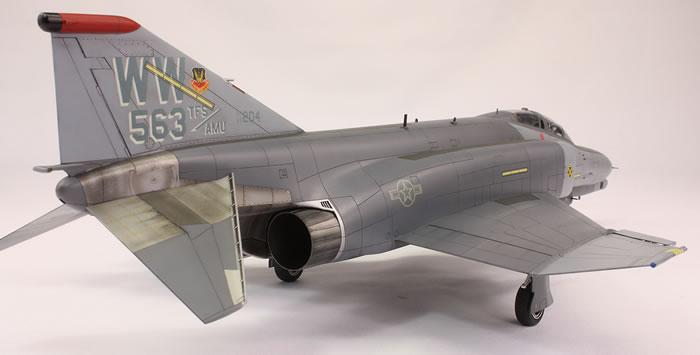
Not much really needs to be done to the kit. The aerials on the spine need to be located carefully as they should be well to the right of the centreline – the instruction diagram has this wrong, but the markings diagram is correct. The aerials themselves are rather too chunky and don’t sit vertically as they should. This also reveals that the decal for the walkway on the spine is, I think, too wide.
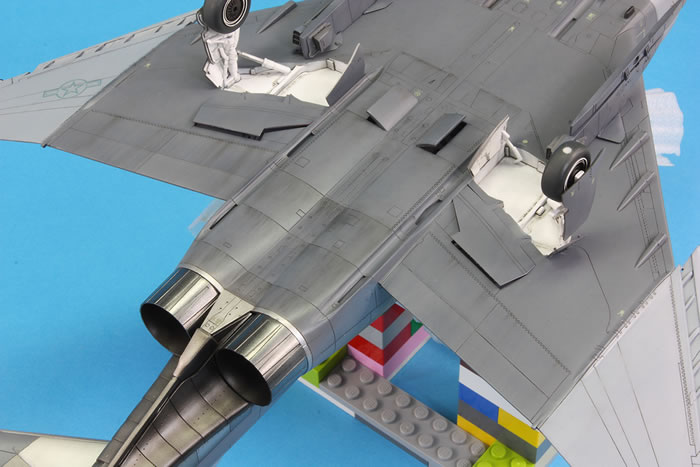
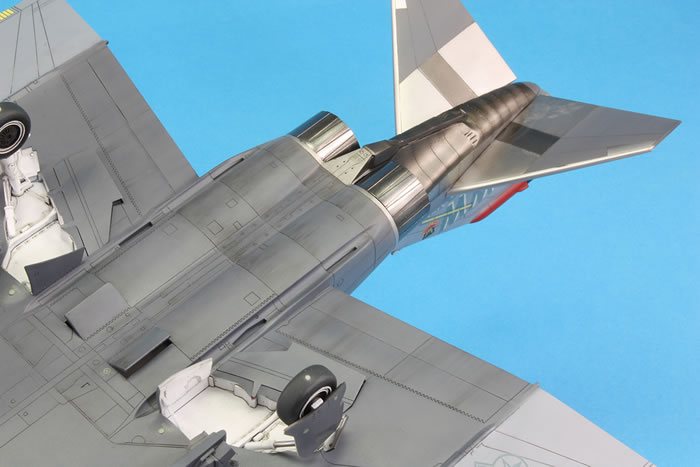
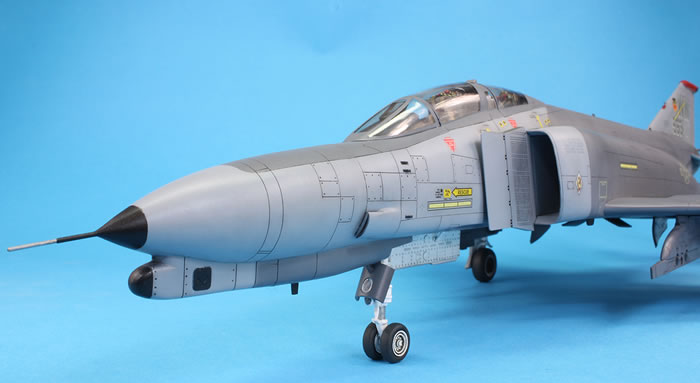
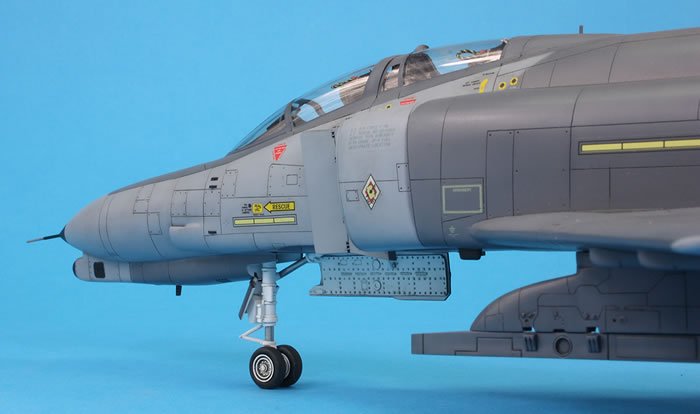
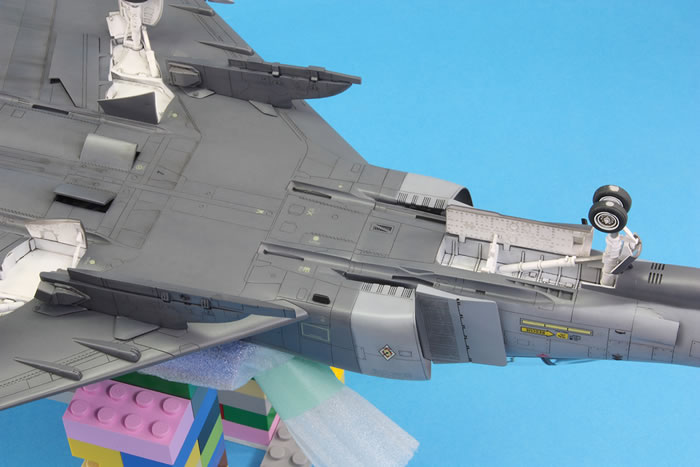
My recent article on my F-4E covers most of the advantages and shortcomings of the Hasegawa Phantom family. In summary, the intakes have no interiors (boo!), the exhausts have no detail (boo!), the tailplanes have non-existent attachment points (boo!), and the pylons are from a different kit (boo!). On the plus side, the plastic is nicely moulded, the fit is adequate and Hasegawa did get most of the changes for an F-4G correct. The only aftermarket additions I made were resin seats and pylons from True Details which, in my opinion, were well worth adding. The nose pitot is some Albion Alloys tubing faired into the nose with super glue.
I’ve built a few Hasegawa Phantoms in 1/48 scale now (this is my 8th). Building three at one time showed me that there are some imperfections that I had always put down to careless construction on my behalf, but are actually mould imperfections as they appear on all the kits. I did not realise this until too late, but there are a few pits on the lower wings, a scratch in the plastic between the wing trailing edge and the exhaust, and an imperfection that runs along the centre line in between the forward Sparrow wells. These are on all the Hasegawa F-4s I have.
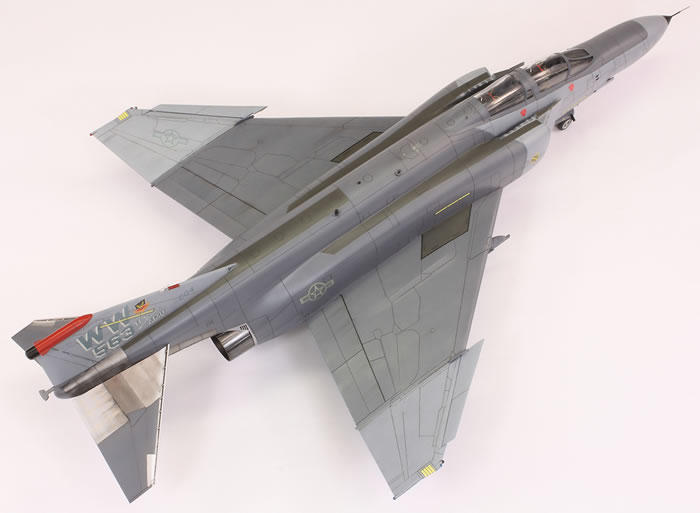
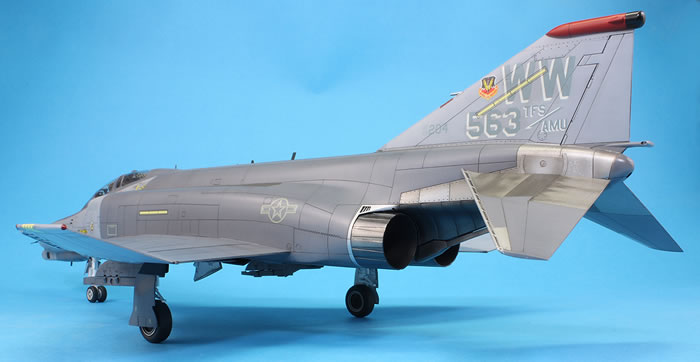
I wanted to make the two-tone grey example that came in the kit. The decals were, as usual for many Hasegawa kits, extremely thick. I think my boxing came from 1990. Because I am stubborn, I used them anyway.
I found three excellent photos via a Google image search of the exact airframe in the same markings, and further photos of it in a later incarnation with the Idaho ANG. In general I noted that the aircraft was very clean and appeared quite well-maintained.
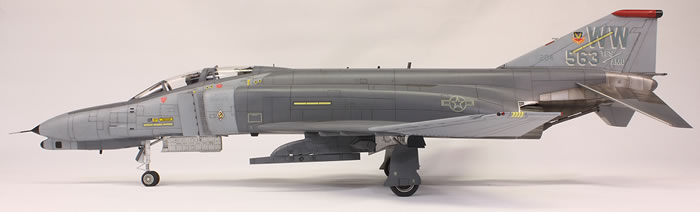
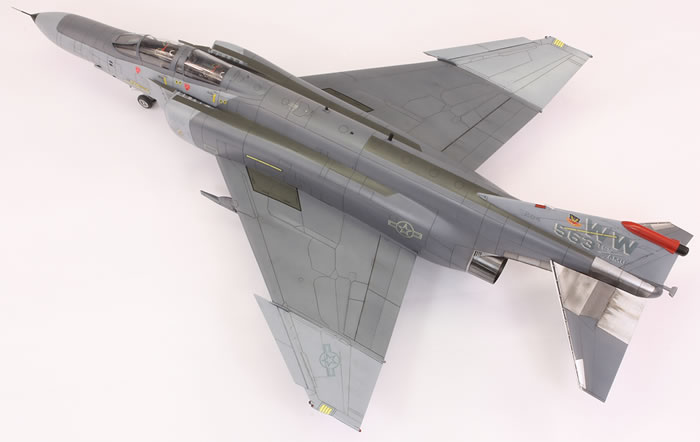
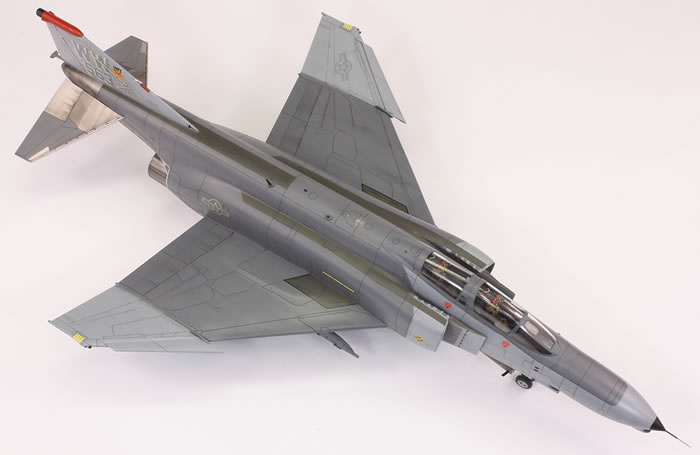
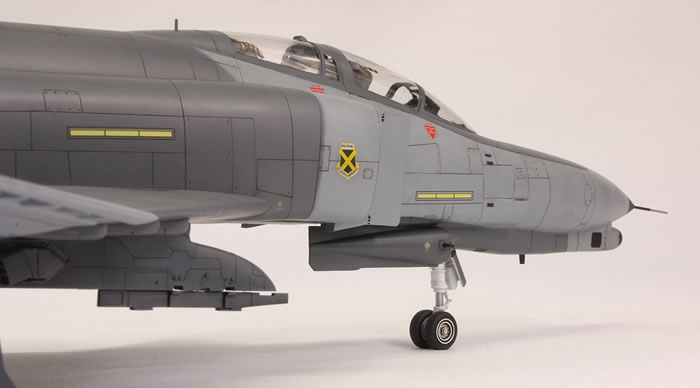
To get some depth into the finish, I primed the whole thing in Mr Black Finishing Surfacer 1500. Over the top of this I marbled a the darker grey (Mr Color 305) using an Iwata Custom Micron and spraying extremely fine lines. The demarcation with the lighter grey was hard up the nose to behind the canopy, but soft down the intakes and on the wings. The former was thus masked using tape, and the latter was sprayed freehand using the Custom Micron. The lighter grey is Mr Color 306 also sprayed extremely small. The demarcation on the instructions around the undernose pod (where the gun is on an E) does not match the photos.
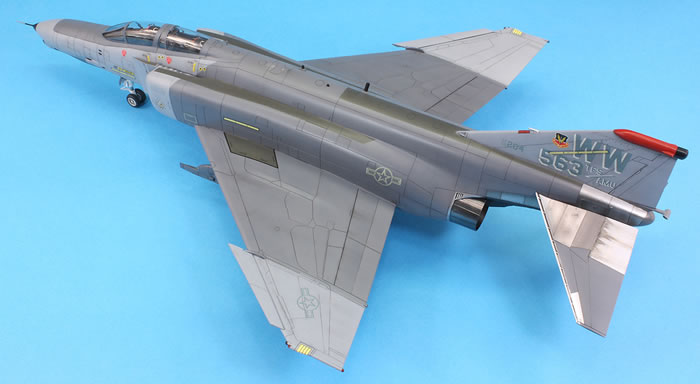
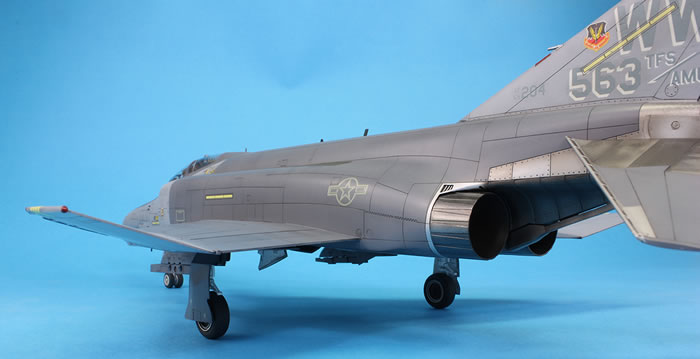
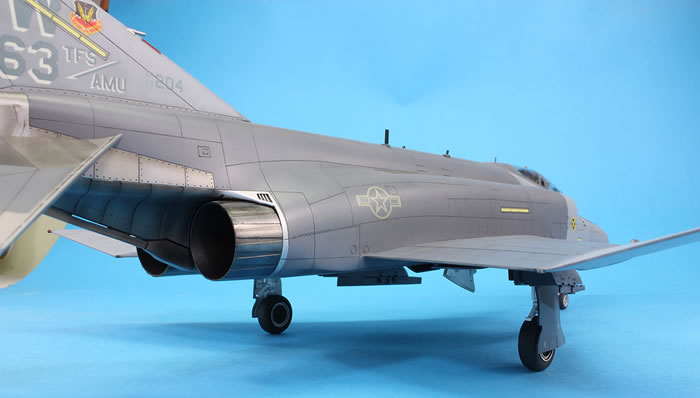
As mentioned above, I think the decals for the dark-grey walkways are not quite the right shape, so I masked them out and used Mr Color 301 instead. The black edging and ‘walkway’ text for the areas on the wing were added later using some spare decals from an F-4E. The exhaust areas were painted with various shades of Alclad II and the red fin tip with Mr Color 327. There are numerous black aerials that needed masking and spraying with Mr Color 33. When airbrushing Mr Color paints through the Custom Micron I thin the paint highly with Mr Leveling Thinner and add a few additional drops of Mr Retarder Mild. Whilst this method of painting is time consuming, it is efficient on paint: the whole airframe was painted with less than 1ml of 305 and 1ml of 306.
Once all the paint was down, a generous coat of Tamiya X-22 thinned about 50% with Mr Leveling Thinner was sprayed with an Iwata RG-3. I applied the decals with Mr Mark Setter as the only additional agent. Photos showed that there should be crew name lettering added on the canopy rails in white, but none of the photos showed what it should be. Hasegawa do not provide these markings, so the rails have been left blank. As well as being incredibly thick, the decals were also slightly out of register and the colours not quite right for matching the recommended Gunze paints.
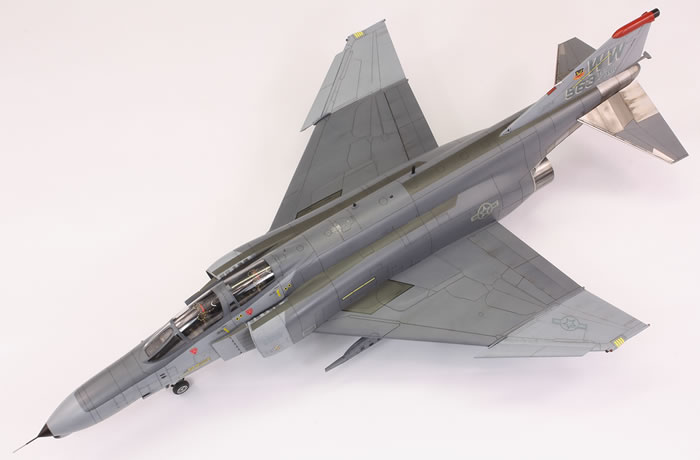
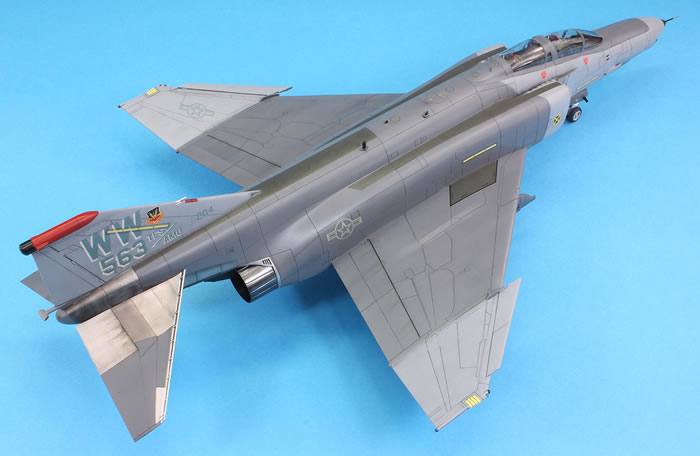
I kept weathering to a minimum, limiting it to a dark grey pin wash of oil paint and some streaking with the same paint mix. I had added an Alclad II aluminium undercoat just forward of the air-to-air refuelling door and scratched back the Mr Color 305 with a scalpel to create some scratches. I feel I did a better job this time than on my F-4E.
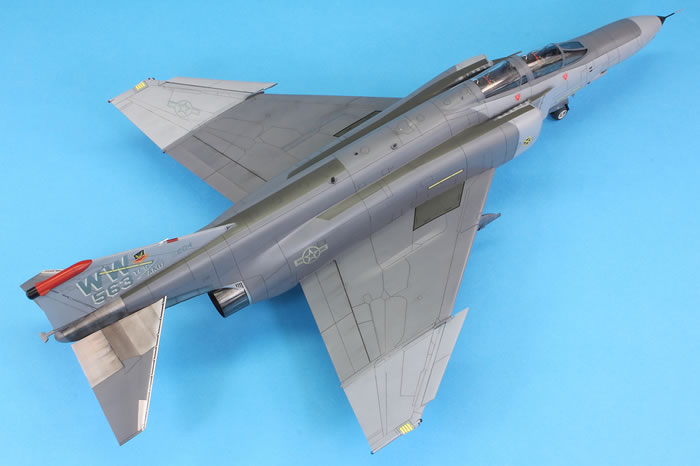
Photos showed this Wild Weasel was quite shiny. I was out of any semi-gloss varnish and decided to mix Gunze GX113 and GX100 in a 50/50 ratio and thinned about 60% with Mr Leveling Thinner. This came out a bit flatter than I intended, but I’m quite happy with it. Photographing glossier finishes is extremely difficult and I do prefer a matter finish than the real thing.
The pylon adaptors are in the kit and for Standard and Shrike anti-radiation missiles. I added them for interest knowing that they were probably inappropriate for 1989.
This is a fairly workmanlike model, but I am generally satisfied with it. My biggest area of dissatisfaction is that the forward canopy shut line is poorly defined; in fact, the canopy overall is not that good. But at the moment my modelling philosophy is to complete as many kits as I can to an acceptable, rather than exceptional, level of finish, and I think I’ve achieved that. This year I’m on track to complete nine models, which will be the most I have managed for many years.
Now, just the RF-4B and F-4N to get through the paint shop and I can move on from Phantoms…for a while!
For more modelling articles like this, please visit my website www.jonbryon.com
Text and Images Copyright ©
2018 by Jon Bryon
Page Created 21 December, 2018
Last Updated
21 December, 2018
Back to
HyperScale Main Page

|
 Home
| What's New |
Features |
Gallery |
Reviews |
Reference |
Forum |
Search
Home
| What's New |
Features |
Gallery |
Reviews |
Reference |
Forum |
Search