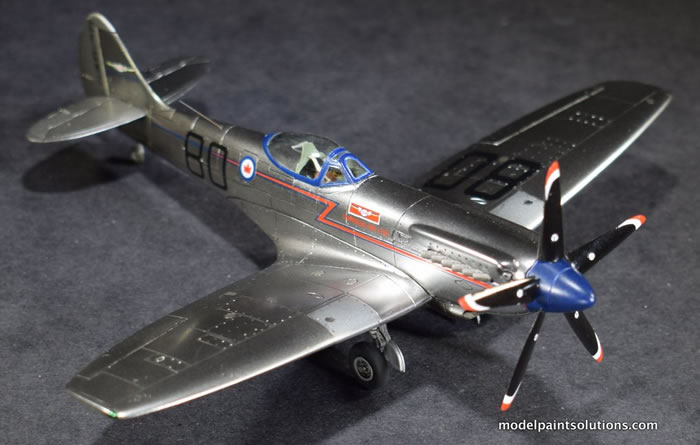
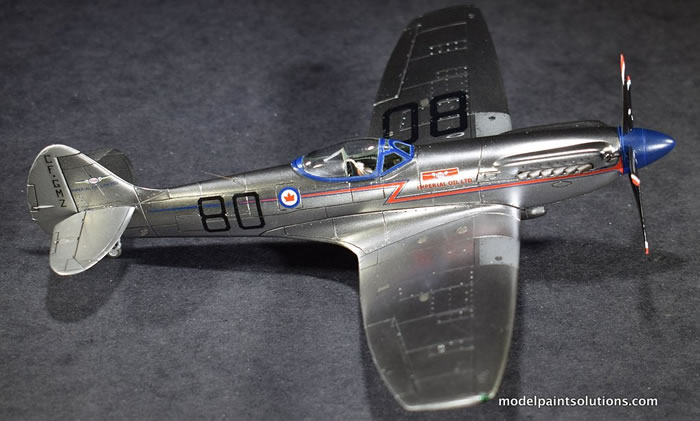
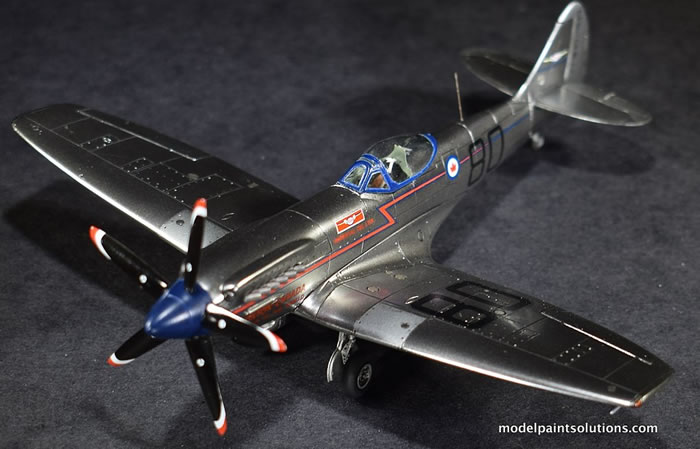
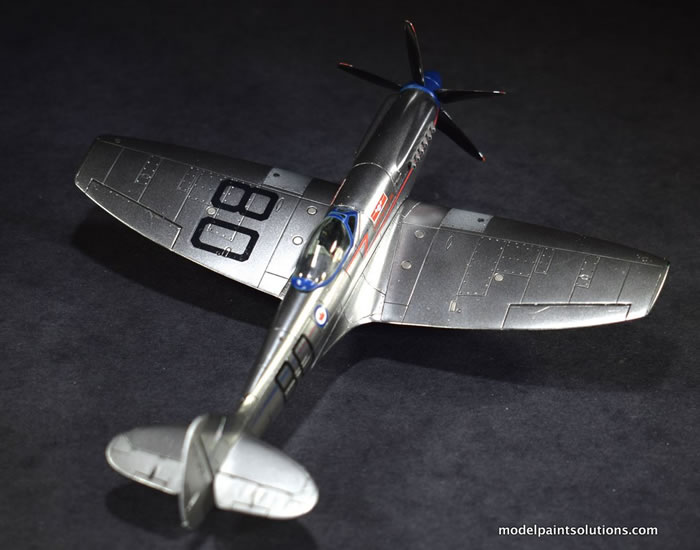
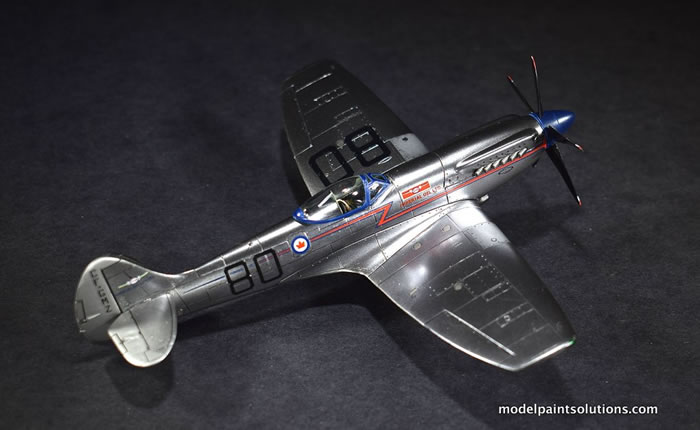
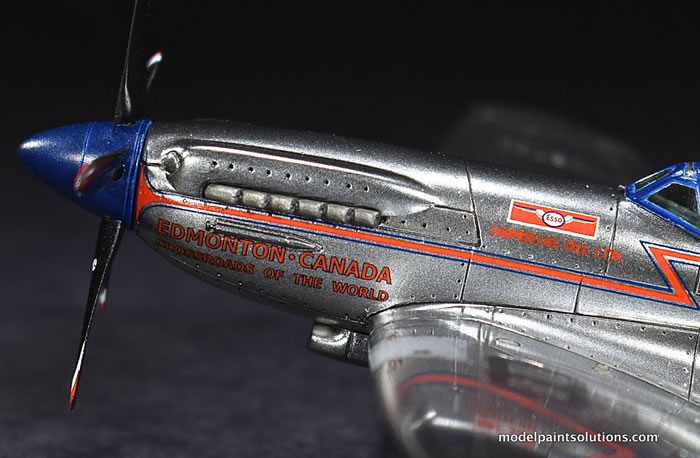
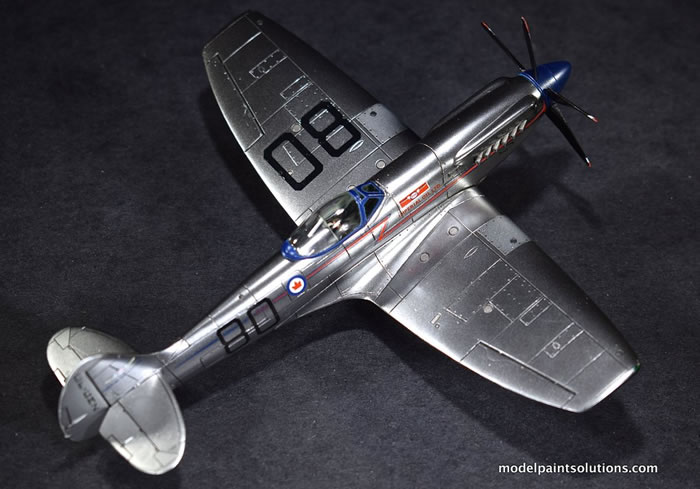
Spitfire Mk.XIVe in Polished Aluminum Racing Scheme
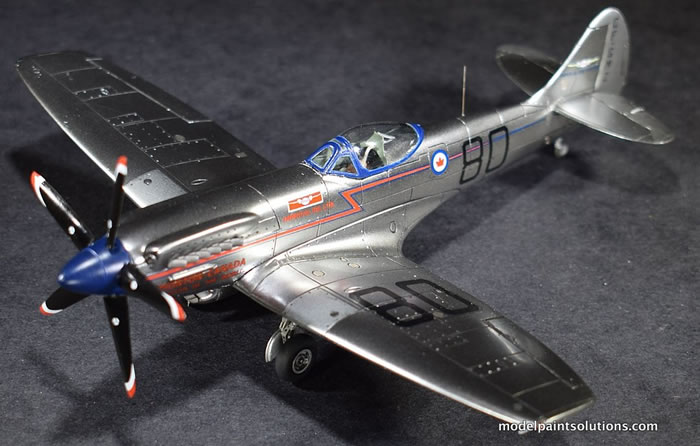
Fujimi, 1/72 scale
S
u m m a r y : |
Description and Item No.: |
Fujimi Kit No. 72010 - Spitfire Mk.XIVe |
Contents and Media: |
Plastic parts and decals. |
Price: |
Out of production but available.
|
Scale: |
1/72 |
Review Type: |
Build |
Advantages: |
The kit has crisply recessed details, a low parts count, and simple, engineering that makes for a quick build. The Thunderbird decals were simply excellent: some of the thinnest and best decals I’ve used. The durability of Mission Models Chrome made doing a polished natural metal finish (NMF) a breeze. |
Disadvantages: |
The fuselage dorsal spine, upper cowl, and canopy need work to achieve a passable fit. |
Recommendation: |
It’s an oldie but with a little patience, a goodie. There are better Spit Mk.XIV/XVI kits out there (Hello Eduard, Sword, and Academy?) but I think the Fujimi kit captures the lines of the Mk.XIVe quite nicely. The addition of the propeller hub and blades from Quick Boost Resins really dressed up the finished model. Still very suitable for those with a taste for nostalgic kits. |
Reviewed and Built by John Miller

Hobby Boss' 1/72 P-61A Black Widow is available online from Squadron.com
I’m fortunate to be a member of NorthWest Scale Modelers based out of Seattle’s Museum of Flight located on historic Boeing Field. The group maintains a themed display of mostly scale aircraft models that sits at the entrance to the Wings Café, the museum’s diner, which offers a view of the airports active runway.
The current display “Aircraft of Canada,” includes the subject of this article as well as other model aircraft relating to our neighbors to the North. Previous displays have focused on “Reconnaissance Aircraft” and “Planes of the Suez Canal Crisis.”
History
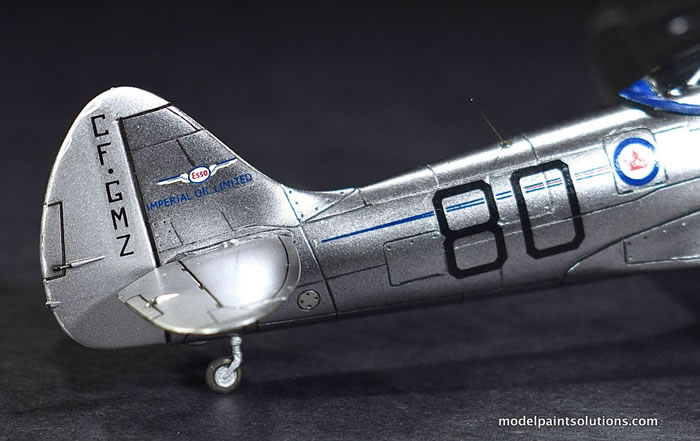
In 1946 Supermarine Spitfire Mk.XIVe, TZ138 was sent to Fort Nelson British Columbia for cold weather trials. The aircraft remained in RCAF service until 1949 when it was acquired by former Damnbuster pilot Ken Brown and Flight Lieutenant J. H. MacArthur for the grand sum of $1,250 dollars. Re-registered CF-GMZ (#80) and stripped of its armament it competed in the Tinnerman Trophy Race in Cleveland Ohio that same year placing third with an average speed of 370.110 mph. After passing through many hands TZ138 was returned to Canada and is currently under restoration in Vancouver.
This kit has a few issues that can be dealt with pretty easily using shims and internal supports.
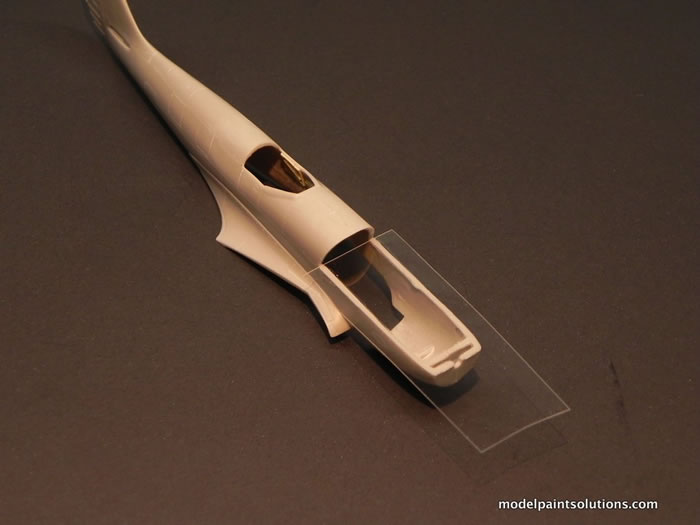
The upper nose cowl is comprised of halves with a seam that has to be dealt with. In addition, the assembled cowl was too narrow for the fuselage. This was corrected by adding a support to the underside of the cowl that increased it’s width by ~0.75mm.
Test fitting of the upper cowl revealed that it sat too low producing a nasty ridge that would be a lot of work to fix. I opted to raise the height of the upper cowl by inserting a clear piece of acetate between the cowl and the fuselage. Tamiya thin cement was used to glue the acetate in place after which the excess was trimmed with a sharp blade.
Lastly, the dorsal spine fuselage piece just doesn’t fit very well--period. It was glued in place with Tamiya thin cement and when dry, the gaps between it and the fuselage were filled with a mixture of CA glue (Bob Smith) and talcum powder. CA/Talc is a great filler as it can be scribed much like plastic making the restoration of panel lines and other surface details easy.
With the fuselage and wings assembled, the cockpit and floorboard areas were shot with Mission Models R.A.F. Interior Green.
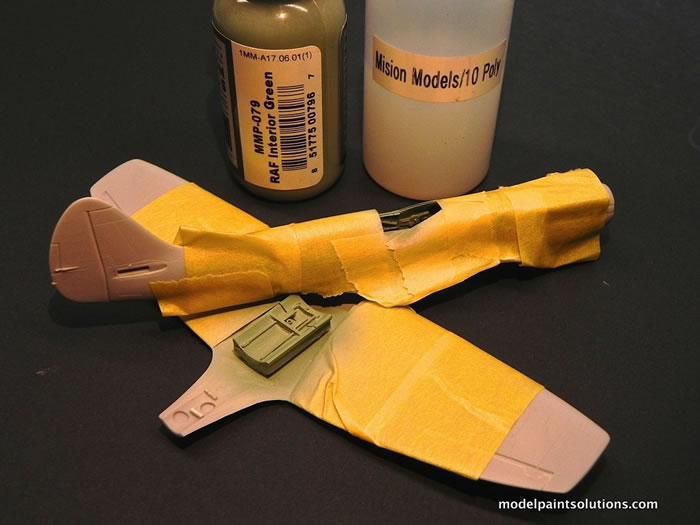
Parts of a resin Aires cockpit set were used to replace the rather minimal kit cockpit.
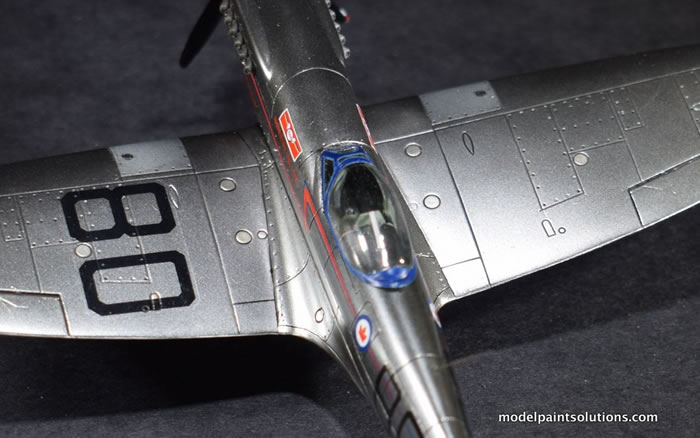
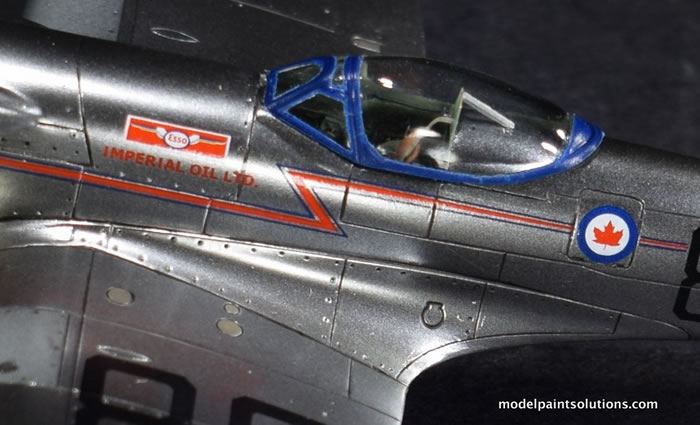
The Canopy:
As I’ve admitted before, I have a canopy fetish: I can’t deny it. That being the case, I always put a little extra effort into the clear parts that cover the pilot’s office.
As usual the canopy was buffed, dipped in a clear coat, and the canopy framing outlines with using micro masking tapes of 0.4 and 0.7mm wide (Aizu). The panels were covered with liquid mask.
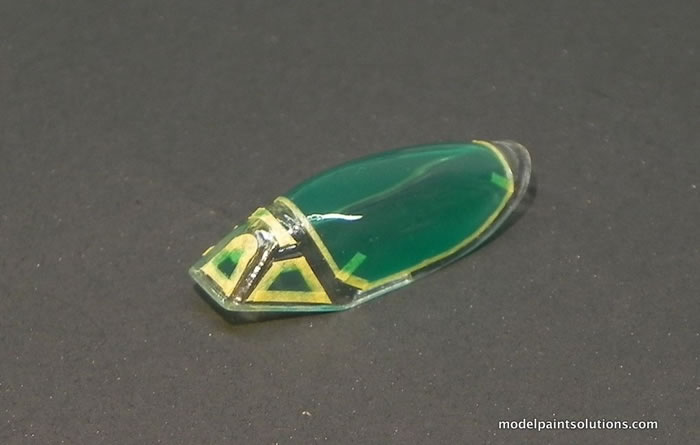
With the canopy mounted on a painting board, it was sprayed with Mission R.A.F. Interior Green. By doing so the internal canopy framing will appear to be the correct interior green when viewed through the finished canopy. To ensure that the green wouldn’t affect the color or hue of the blue that was to be painted over it, Mission White Primer was shot over the R.A.F. Green.

When dry the canopy was shot with a custom mix of Mission Blue formulated to match the blue fuselage stripes on the decal sheet.
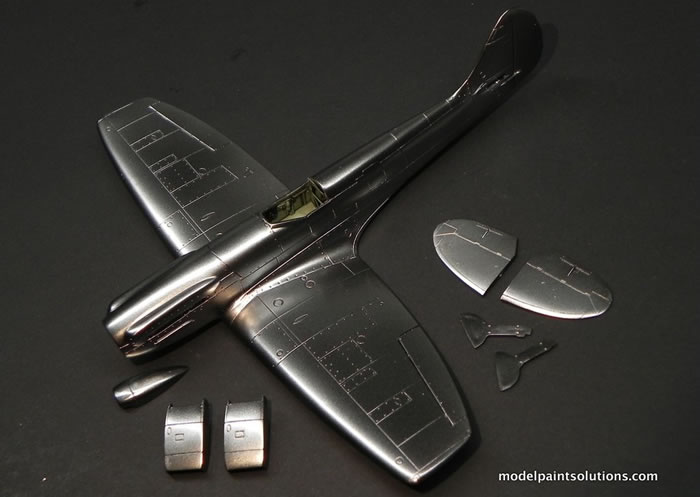
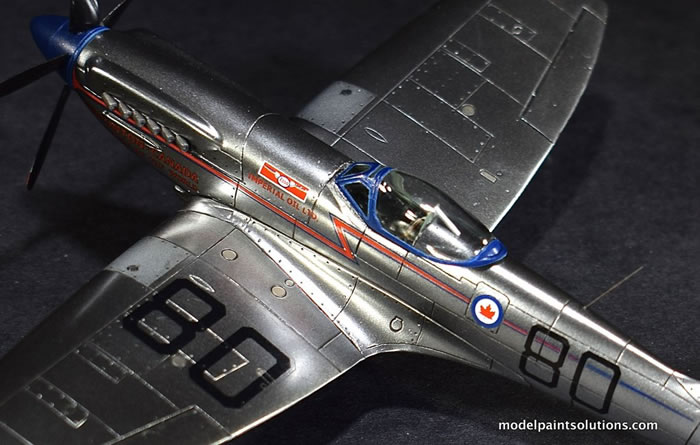
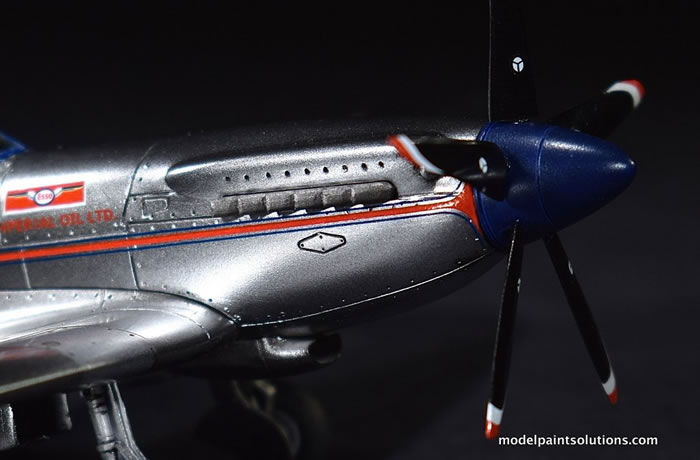
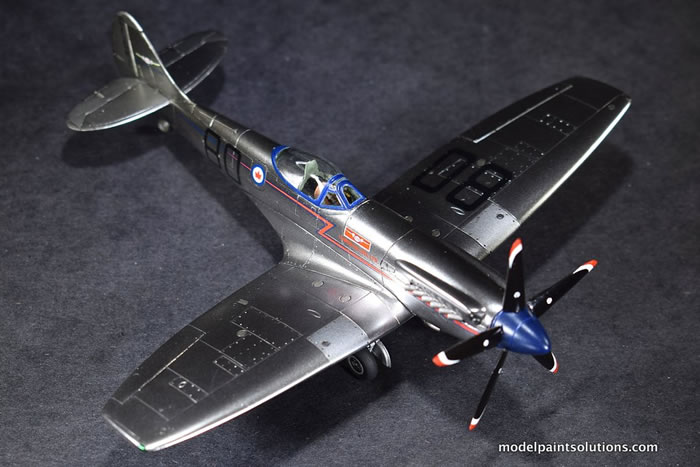
Prior to shooting Mission Chrome, the model was shot with Mission Models Gloss Black Base. When dry, the Black Base was wet buffed with 8,000 followed by 12,000 Micromesh.
The buffed parts were then shot with Mission Models Chrome straight from the bottle with a few drops of Mission Polymix added per 2ml paint cup. The Chrome (and all the paint and clear coats on this build) was applied with a Harder-Steenbeck Infinity dual-action airbrush fitted with a 0.2mm tip.
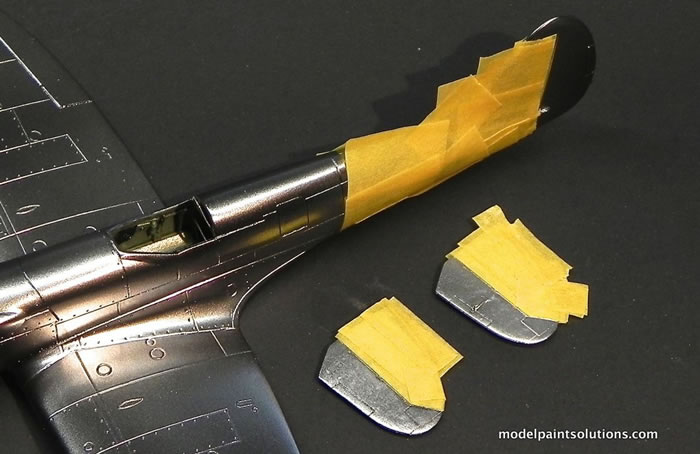
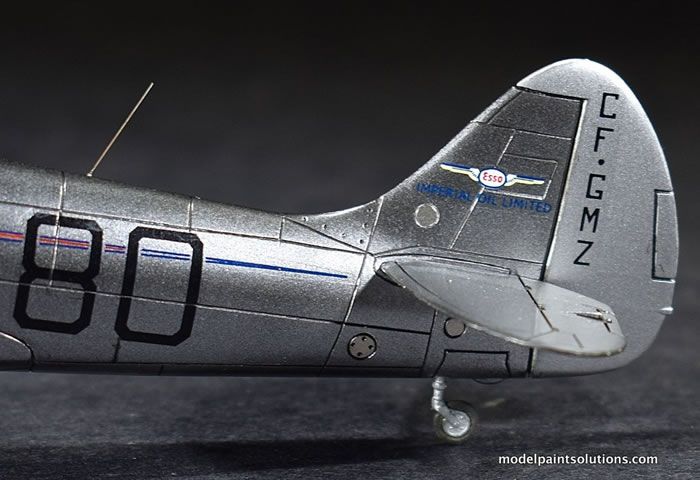
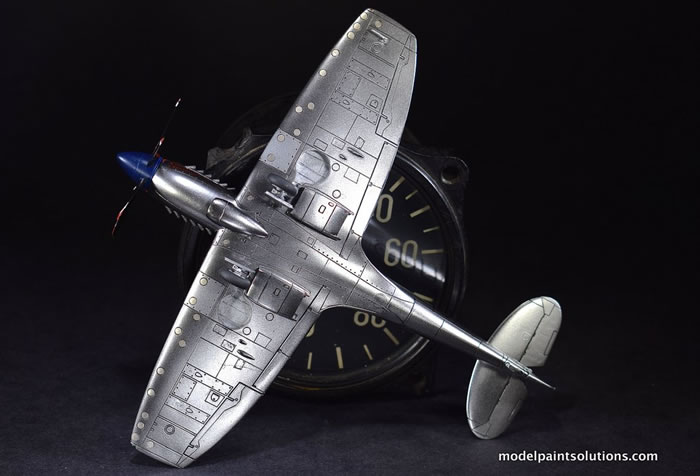
After allowing the Chrome to dry for 12hrs, the ruder and elevators were masked off and shot with Mission Models Silver to represent doped fabric.
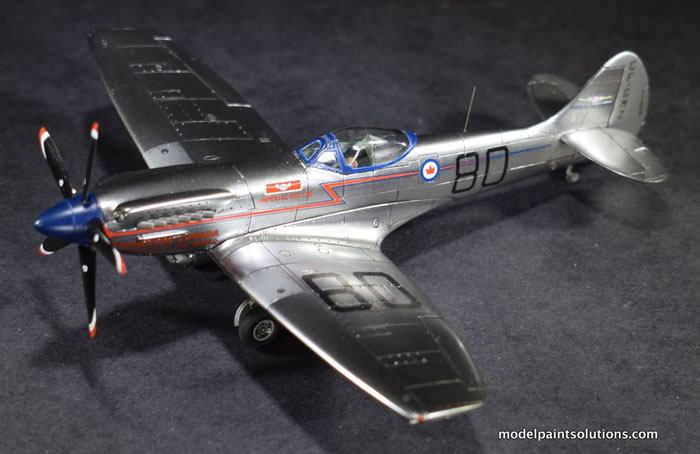
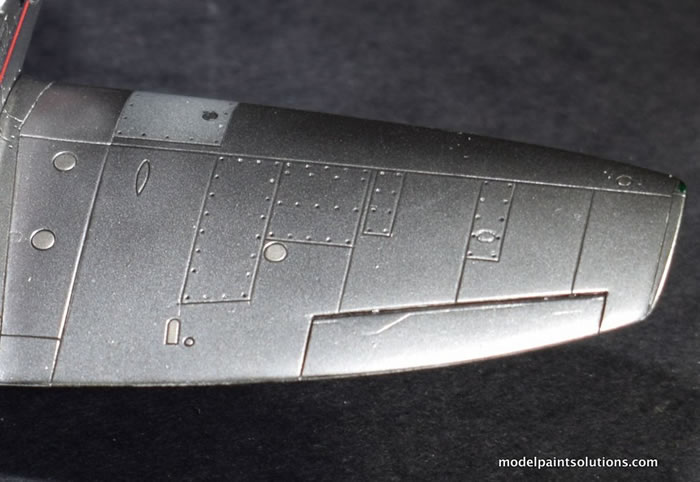
The many round access covers on Number 80 appeared to have had an alodine-like yellow tint. To replicate this, circles of the same diameter as the access panels were cut from small square pieces of Tamiya tape using a photo-etch stencil.

These holed squares were then placed over the access covers and the exposed areas covered with additional strips of Tamiya tape.
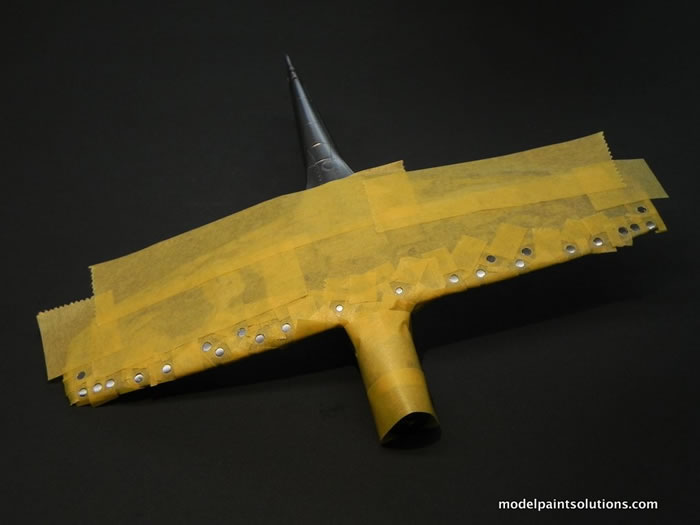
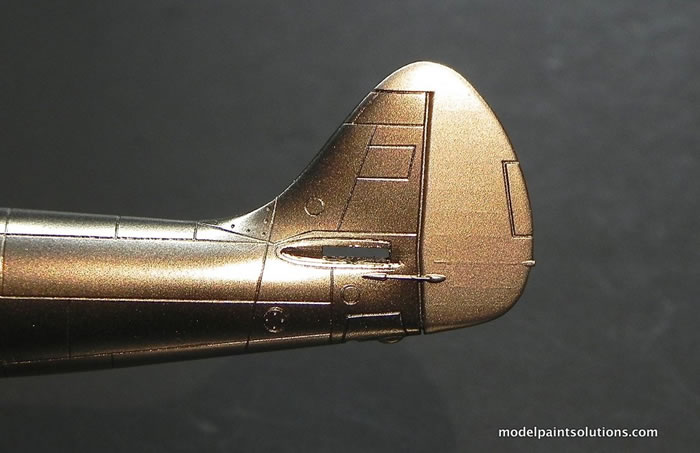
The alodine-like yellow was replicated by adding Mission Bronze and Mission Yellow directly to Mission Chrome (2-3 drops of each were added to a 5ml mixing tube filled with Chrome).
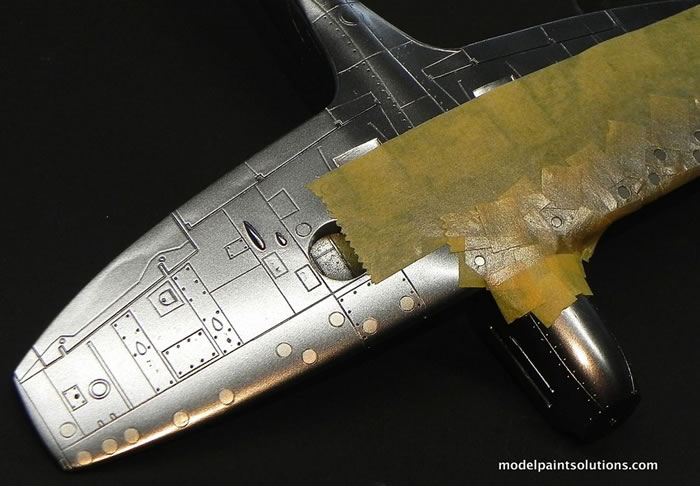
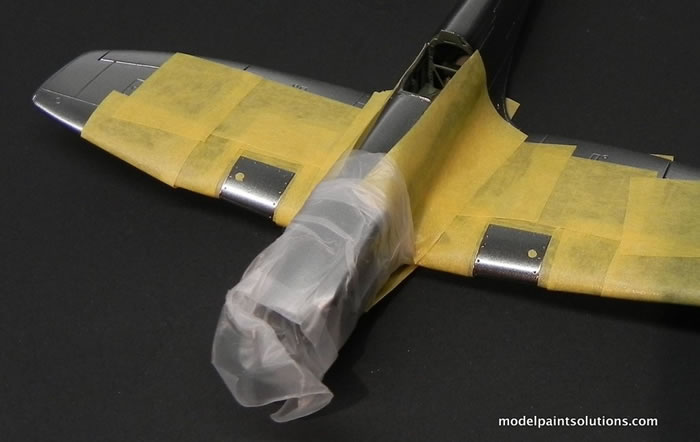
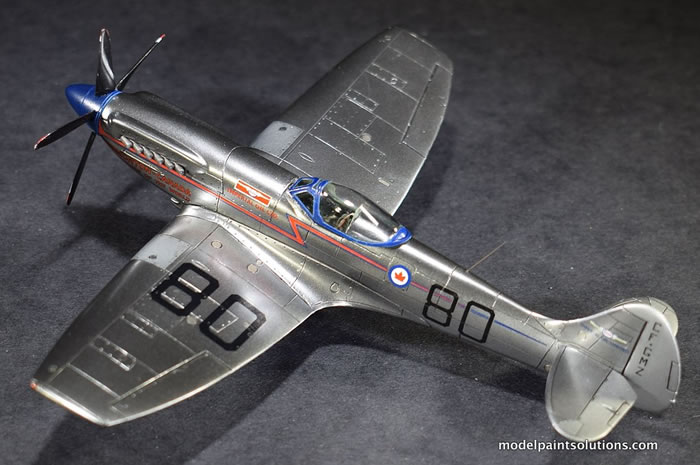
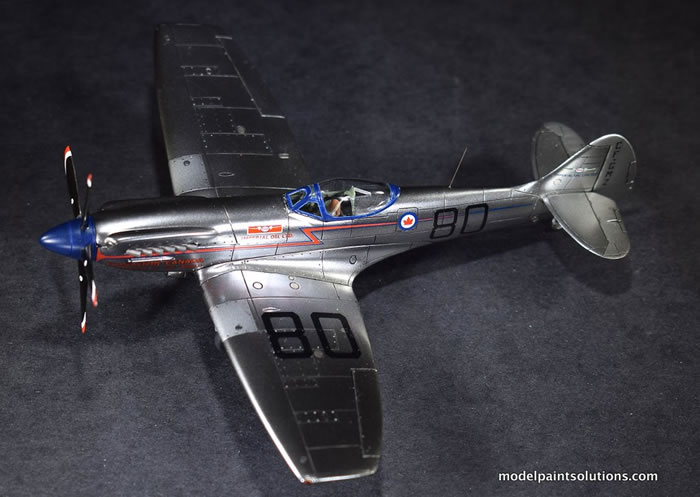
With the access covers done I set about masking off the lighter shaded panels on the leading edge of each wing. Prior to spraying, the small access covers within these panels were masked with circles of the appropriate diameter while the nose was covered with a sheet of stretched Para-Film.
Mission Models White Aluminum was then sprayed on the wing leading edge panels and with that, the airframe was complete: what a blast!
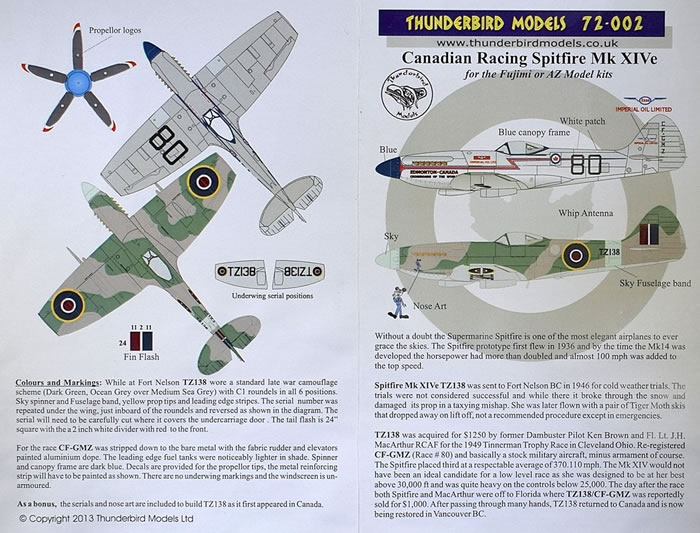
Decals
The decal sheet, by Thunderbird Models, is simply awesome. The decals are crisply printed, opaque, and the color and hue is dead-on. There is very little carrier film and they responded beautifully to Micro-Set and –Sol. I’ll be using the unused roundels and RAF fin flash on another build for sure.
After the decals were allowed to dry overnight, they were sealed with a light, carefully applied coat of Mission Models Gloss.
Finishing Up
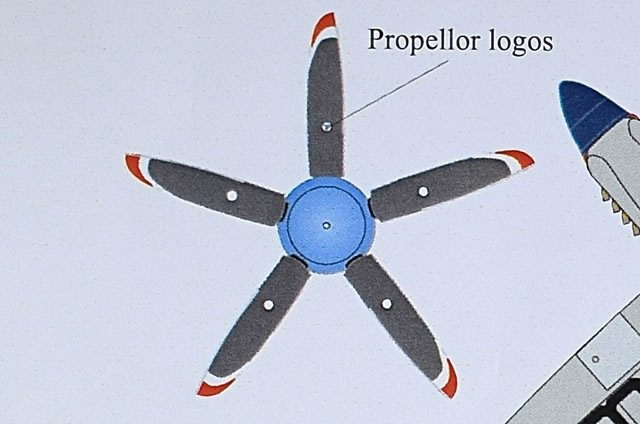
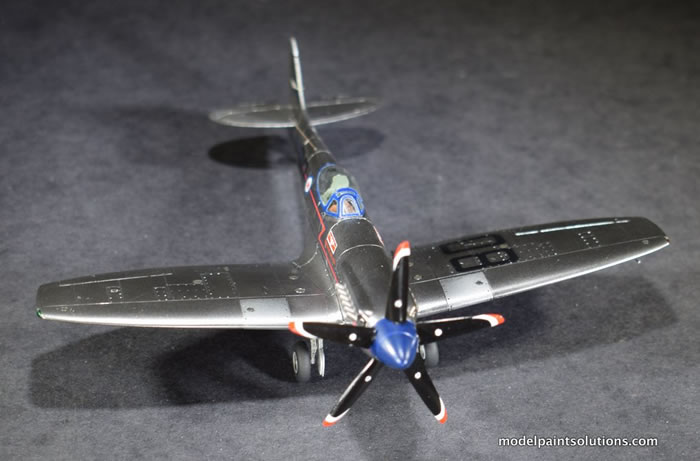
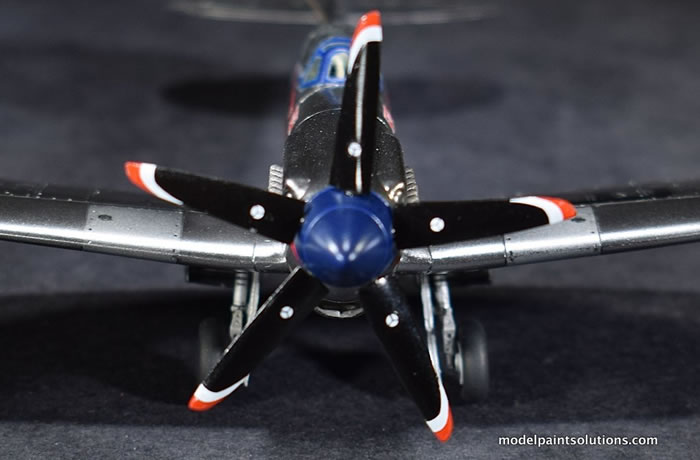
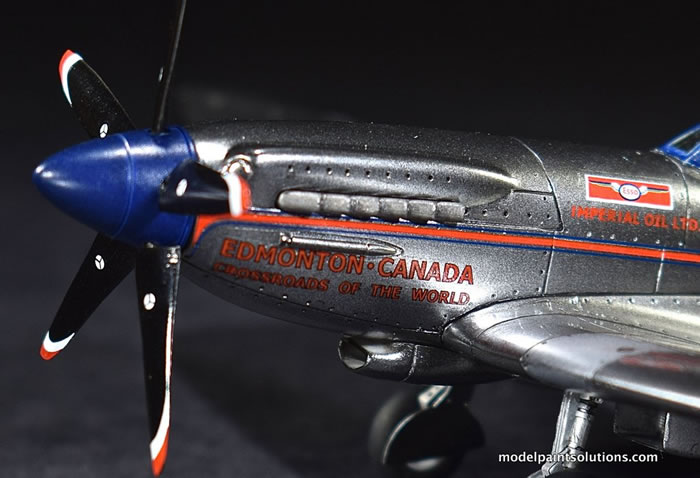
The propeller hub (Quick Boost Resins) was shot with Mission White Primer followed by the same custom mix of blue used on the canopy.
The propeller blades (Quick Boost Resins) were shot black (with a few drops of white added) followed by a coat of gloss in preparation for decaling.
As with the fuselage decals, the propeller tip decals and manufacturers logo’s went on with no trouble. Once sealed with gloss, the propeller and hub were done.
The final assemblies (propeller/hub, main gear, gear doors, and tail wheel) were then glued in place with thick CA (Bob Smith).
The canopy was unmasked, the panels carefully buffed with a Kimwipe, and the finished canopy glued in place with Bob Smith Gold “Odorless” CA.
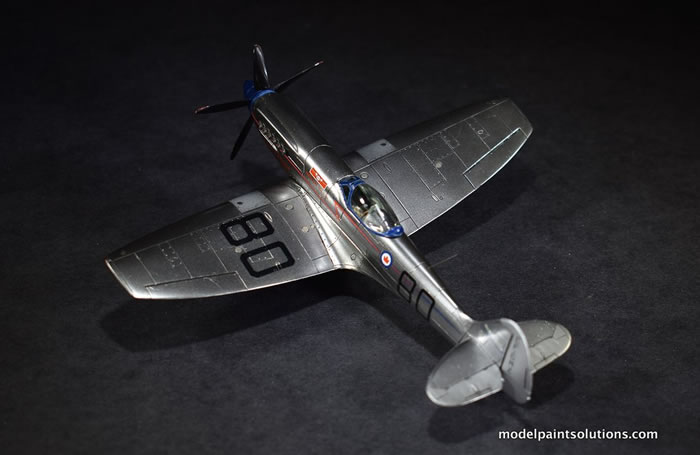
My polished aluminum, clipped-wing Spit-XVI was done!
This kit is simple and fun to build. It does have its challenges in the form of a bad fitting nose cowl and fuselage dorsal spine but these issues are easily dealt with.
Best of all, the kit’s simplicity permitted a quick build time and allowed me to try out the new Mission Models Chrome on a NMF aircraft: awesome stuff. Both kit and paint are highly recommended!
Now go paint something!
For more on this review visit Modelpaintsolutions.com.
Kit purchased by reviewer many, many years ago
Review Text and Images Copyright © 2018 by John Miller
Page Created 24 August, 2018
Last updated
24 August, 2018
Back to HyperScale Main Page
Back to Reviews Page

|
 Home
| What's New |
Features |
Gallery |
Reviews |
Reference |
Forum |
Search
Home
| What's New |
Features |
Gallery |
Reviews |
Reference |
Forum |
Search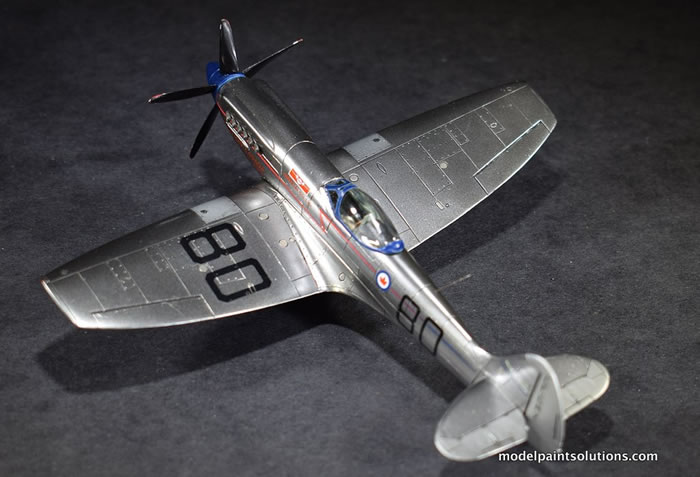


