|
IAR-80A
Azur FRROM, 1/32 scale
S u m m a r y : |
Catalogue Number: |
Azur FFROM Kit No. FR8002 - IAR-80A |
Scale: |
1/32 |
Contents & Media |
201 grey styrene parts (17 marked not for use); 11 resin parts; one photo-etched fret with 27 parts; six clear styrene parts; decals for four subjects. |
Price: |
£46.80 EU Price (£39.00 Export Price) plus shipping available online from Hannants |
Review Type: |
First Look. |
Advantages: |
High level of detail; subtle and convincing surface textures; staightforward parts breakdown; high quality decals; significant revised and new parts for this earlier version; the type has never before been available in 1/32 scale. |
Disadvantages: |
Being a limited run kit, you will need to spend extra time cleaning up and preparing parts. |
Conclusions: |
This is a superbly detailed kit, but perhaps one that needs just a little more attention and skill than your standard off the shelf kit, due to the main airframe components and the alignment and clean-up required. In all though, this is a superb kit of an important and oft-forgotten fighter type, and Frrom-Azue/Special Hobby (with Radu) have given it the attention it truly deserves. For the price, with both PE and resin, this is a very attractive package. . |
Reviewed by James Hatch

ICM's 1/48 scale Ju 88 A-4/Torpis available online from Squadron.com
The IAR 80 was a Romanian World War II low-wing monoplane, all-metal monocoque fighter and ground-attack aircraft. When it first flew, in 1939, it was comparable to contemporary designs being deployed by the air-forces of the most advanced military powers. Production problems and lack of available armament delayed entry of the IAR 80 into service until 1941. It remained in frontline use until May 1945. In 1930, the Romanian government issued specifications for a new fighter. Although the government was not anticipating bids from its own aircraft industry, IAR produced several prototypes in response to the tender. A second contest was also fought between the newer IAR 14 and PZL P.24 designs, and once again the PZL design won a contract for another 50 aircraft. Although IAR's own designs had not entered production, they nevertheless won the contracts to build PZLs and Gnome-Rhone 14K engines under license. As a result of these and other license contracts the company had enough money to fund a design shop even, if its designs never saw production. Despite losing to PZL, an IAR design team led by Dr. Ion Grosu continued work on fighter designs. He was convinced that the low-wing design of the IAR 24 represented a better design than the PZL gull-wing design. Once again, the team studied the new PZL fighter looking to incorporate its best features into a new aircraft, and the result was the IAR 80.
By April 1941 the Romanians were firmly in the German sphere, and as a result the Germans released more FN guns for their use. These were quickly installed, and the resulting 80A model finally mounted the original complement of six guns. Armoured glass in the windscreen, seat-back armour, and a new gun sight were also added at the same time, along with the newer 1,025 hp (764 kW) K14-1000A engine. The extra engine power proved to be more than the fuselage structure was designed to handle, and it had to be reinforced with a duralumin "belt" just behind the cockpit (in the first 95 A series aircraft built before the fuselage could be modified). Although the IAR 80A had a more powerful engine, the added weight of the guns, ammunition and armour plating reduced the top speed slightly to 316 mph (509 km/h). Nevertheless, the new model was clearly an advancement, and the A model replaced the earlier one on the assembly line starting with the 51st airframe. Eight of these had been completed in time for the invasion of the Soviet Union on 22 June 1941.
FN guns remained in short supply, so throughout late 1941 and early 1942, guns were stripped from PZLs and observation aircraft for use in the IARs.
Courtesy of Wikipedia.
We’ve not exactly been endowed with 1/32 kits of this extraordinary-looking fighter aircraft, which is a real shame. When it comes to WW2 protagonists, I suppose we rarely look at participants in the south-east of Europe.
Thankfully, with the foresight of Azur-Frrom, and with help from Special Hobby, the stunning IAR-80A is now with us in a real scale!
Of course, this isn’t the first of the line from these companies, with two previous incarnations available from them as the IAR-81C, dating back to 2014. This isn’t a simple reincarnation of the IAR-81C though. The fuselage and wings are indeed different.
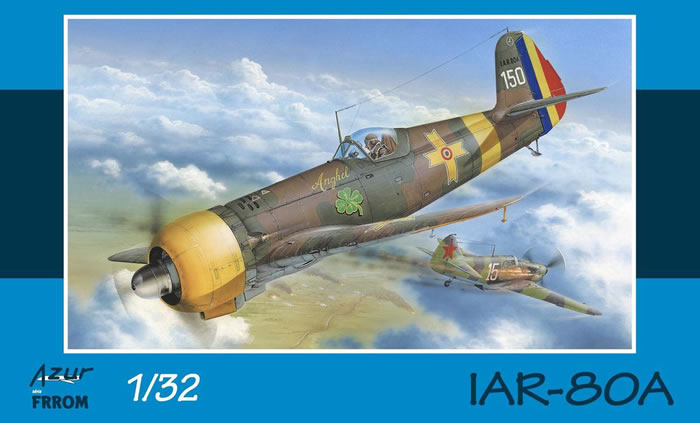
Inside the box, this kit is comprised of six sprues of light grey styrene and a single clear sprue. A packet of small clear parts, another of resin parts, plus a wallet with decals and PE, conclude the contents. Oh yes, an instruction manual too! The clear parts in this release are thankfully packed into a separate zip-lock wallet to protect them. The box for this is very attractive too, depicting an IAR-80A from Escadrila 47 Vanatoare, Grupul 9, after a successful combat against a Russian Yak. That’s also a very tight lid to lift from the box…cue package of parts on the floor when it finally comes apart!
Sprue A
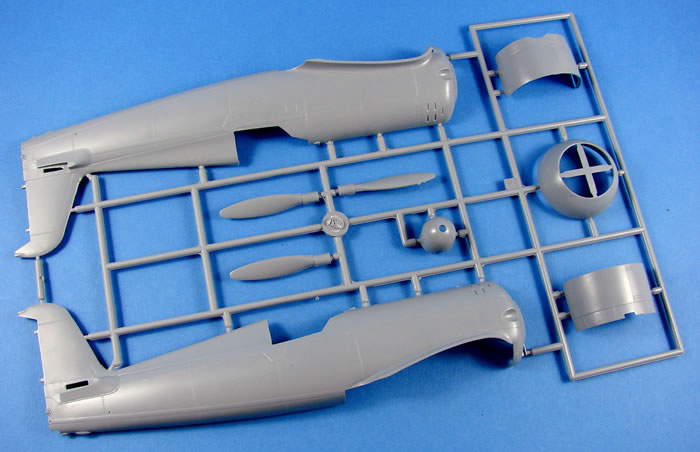
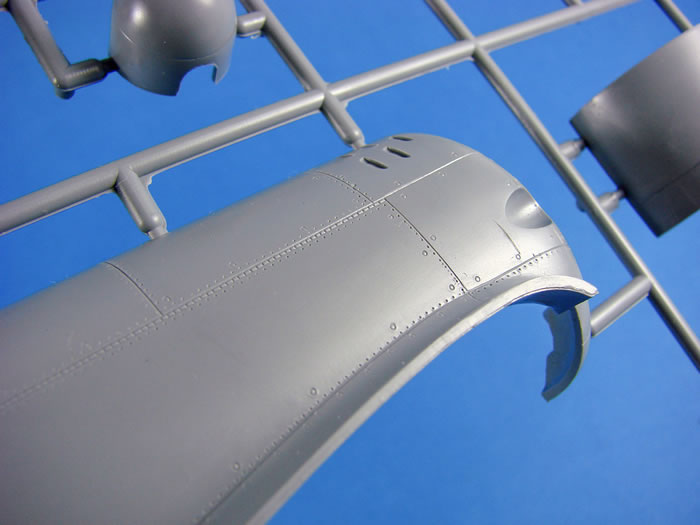
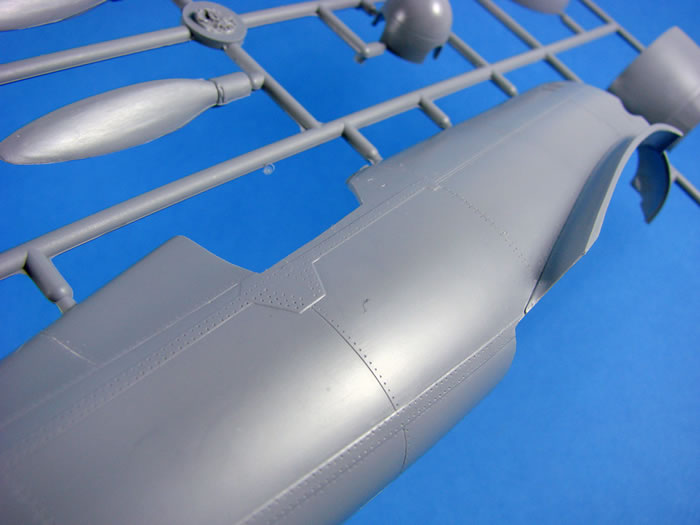
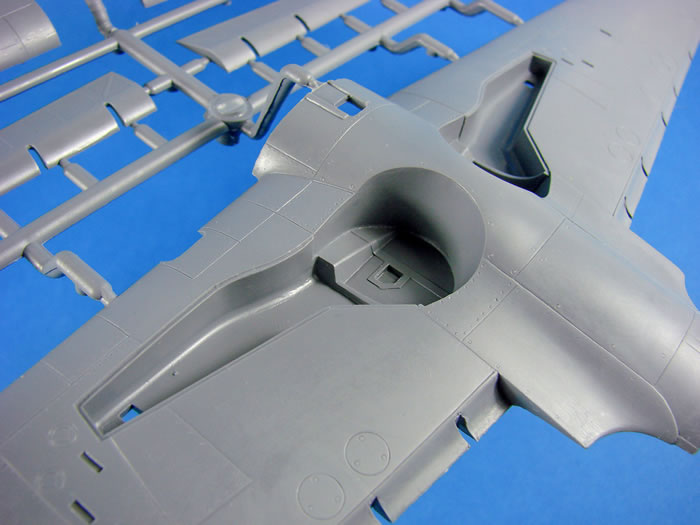
This sprue is very similar to the previous IAR-81C releases, but not identical. I did believe that there were changes in the length of the fuselage on the IAR-81C, but this new kit has the fuselages at exactly the same length. However, there are detail changes around the cockpit opening, in the area to the rear of the opening. I also note that the wing on this seems to be in a very slightly different position to the previous release. Externally, detail is nice and refined, with subtle and even panel lines, with rivets only seen along those panel lines, and not in between. The stiffening strip which runs from the cockpit to the tailplane is also nicely defined, and with rivet detail. Louvre detail just in front of the cowl position, is also very nice, but open. Internally, cockpit wall detail is excellent and very sharp, with nicely defined stringers and former detail. Please note that as is typical of low-pressure injected kits as this, that there are no locating pins to help you align the parts, so care will be needed (i.e. tape one side and glue from the opposing side!). The rudder is separately moulded, and the stabilisers will fit via the traditional tab and slot method.
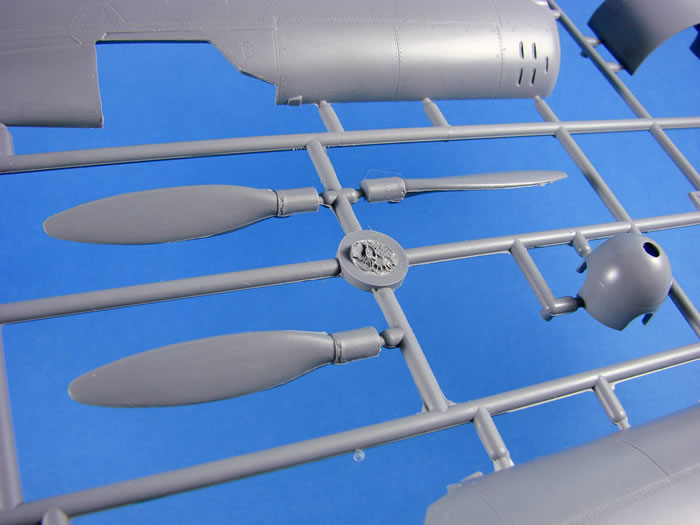
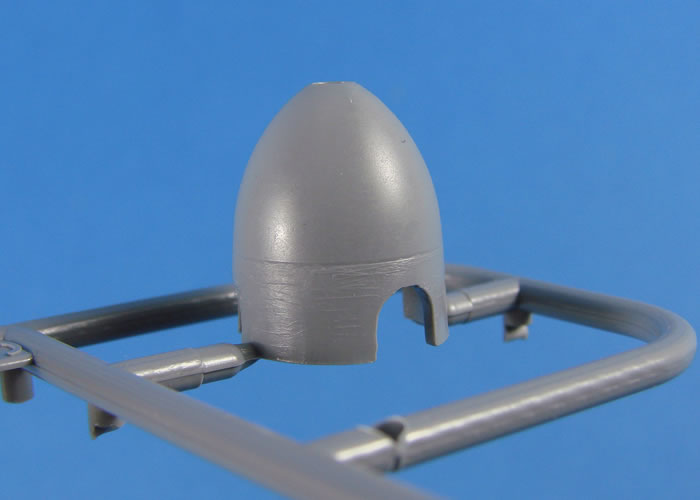
Also on here are the parts for the engine cowl. This is moulded as port/starboard halves, plus the nose cowl ring. There is a very slight short shot to one of the flaps on the rear of a cowl half, but this will be covered by the PE parts that are supplied and help to improve this area. The propeller blades are also moulded separately here, as is the bulbous spinner.
Sprue B
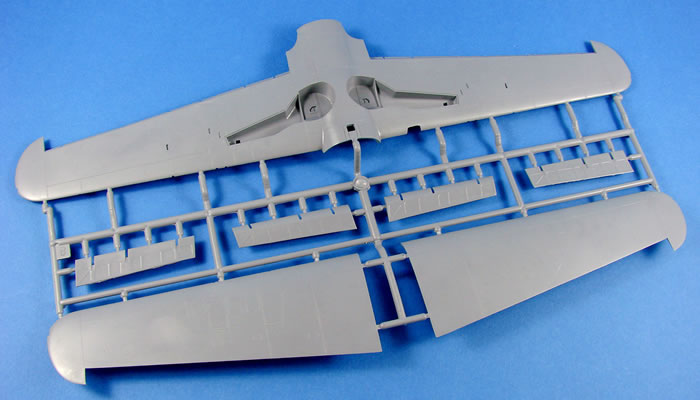
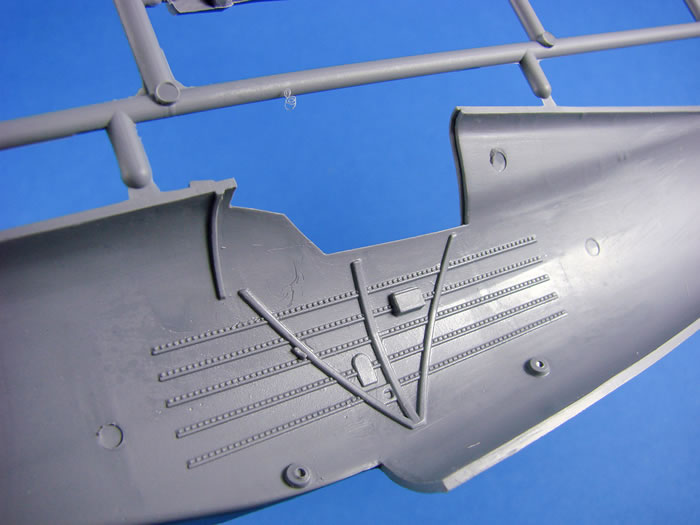
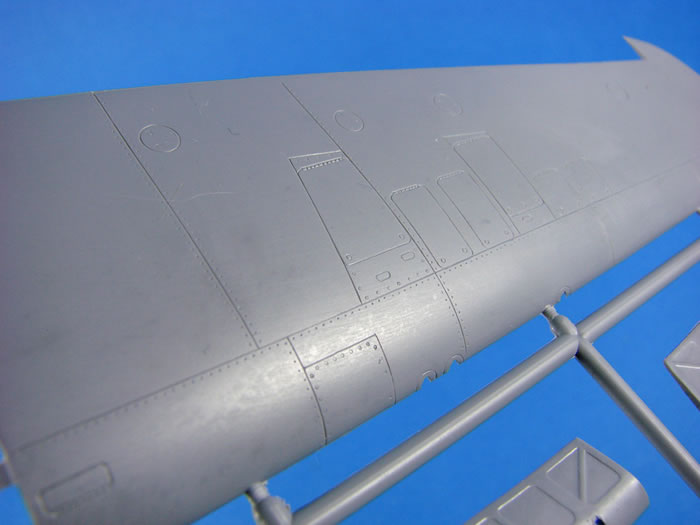
Again, at first glance, this looks identical to the previous IAR-81C, but it isn’t. The span of this machine was shorter, and this can be seen in the wingtips on this kit. Everything else looks the same except for the fact that the centreline on this lower wing has no provision for the bomb rack that fits to the previous releases. That lower wing is a full-span part with some exquisite panel line and access port detail. As with the fuselage, rivets are only to be found alongside those panel lines and ports. For me, I will most certainly want to enliven the surface by adding extra rivet lines. The main gears wells are just that…..wells, and they are moulded into the lower wing. As is traditional, the upper wing panels are individual pieces, and exhibit some of the very finest in engraved detail that I have ever seen, and I really do mean that. I just hope they take a wash after paint!
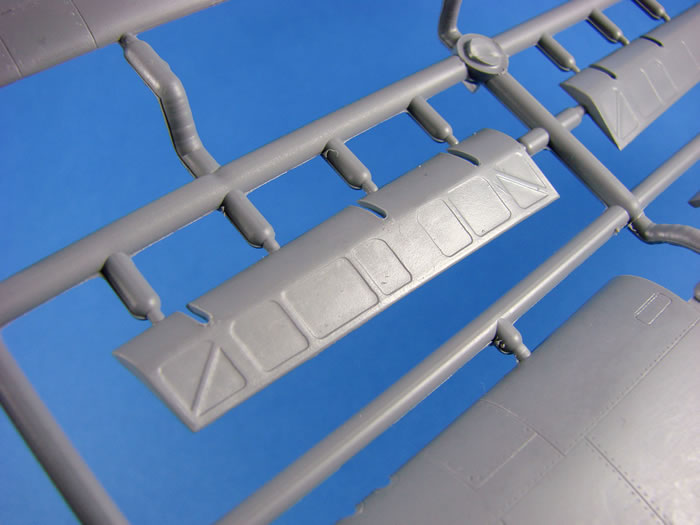
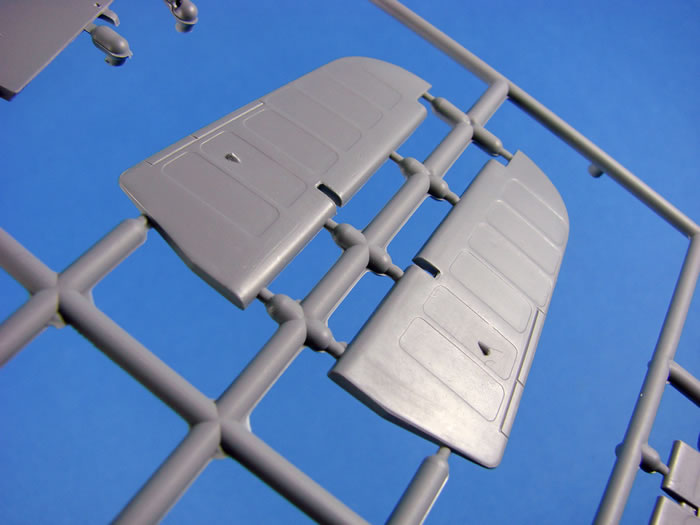
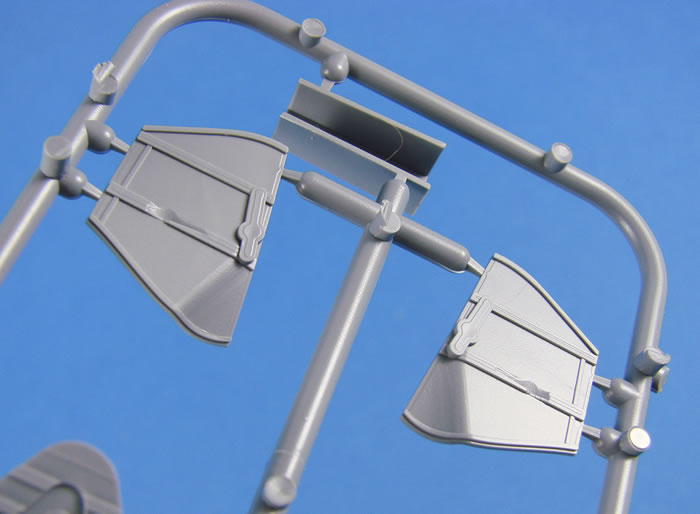
The wings are moulded without ailerons and landing flaps, and the remaining parts on this sprue cater to the latter and are moulded as upper and lower halves. The frame and fabric depiction is very nice too. As with the fuselage, there are no locating pins on any parts here.
Sprue C
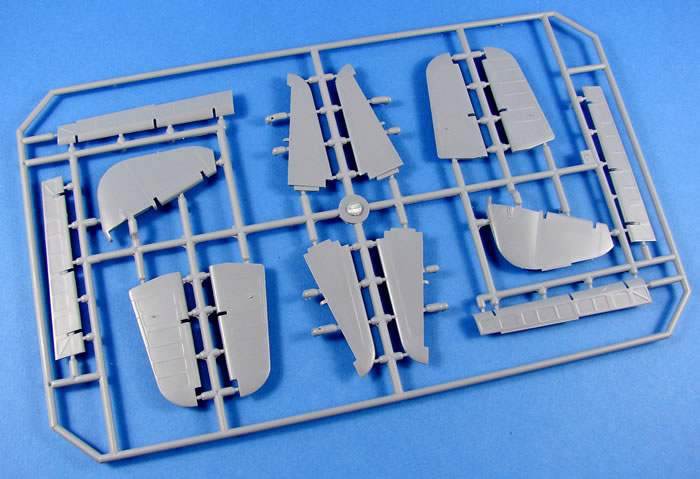
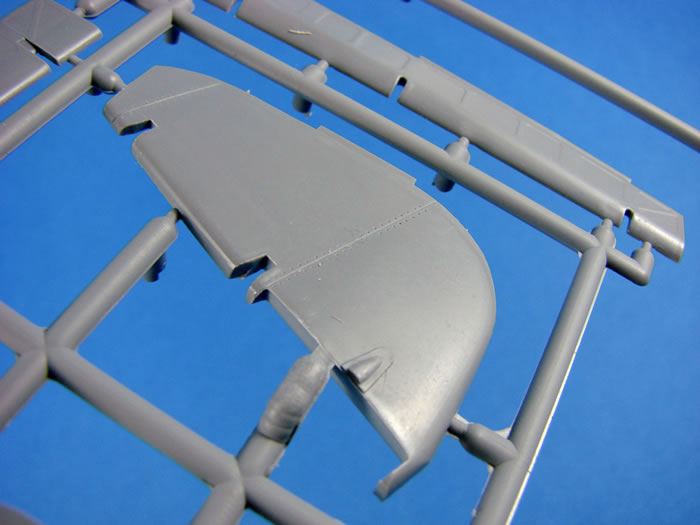
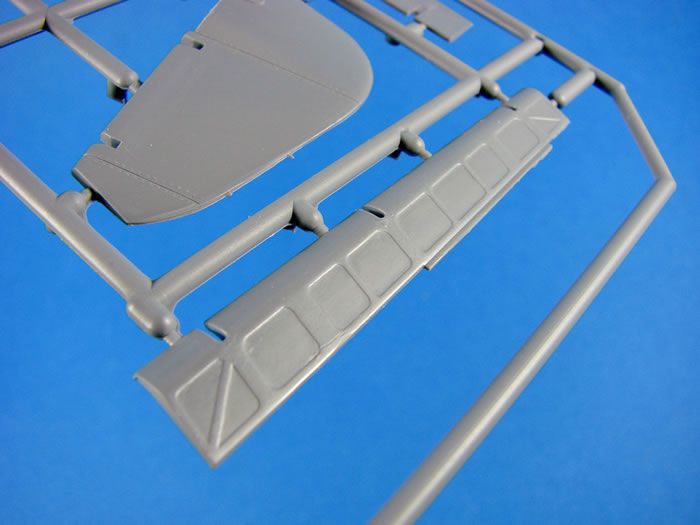
This sprue is identical to that of the previous release, and contains the ailerons, stabilisers, elevators and rudder. All are traditional construction, i.e. halves, and moulding is very nice indeed with the same attractive fabric and frame rendition on the control surfaces as I noted on the landing flaps. There are a few ejector pin towers on the reverse side, and you’ll need to snip them off before construction.
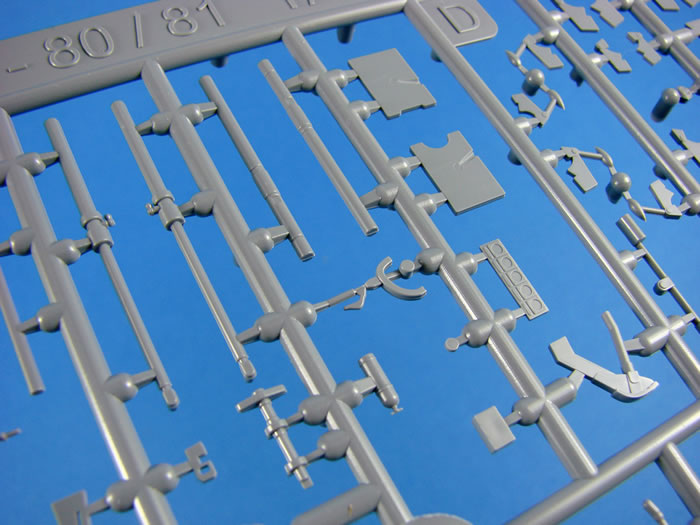
Sprue D

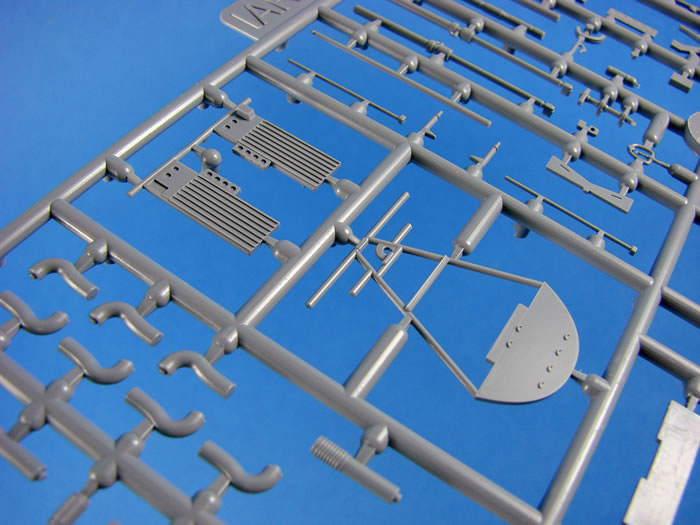
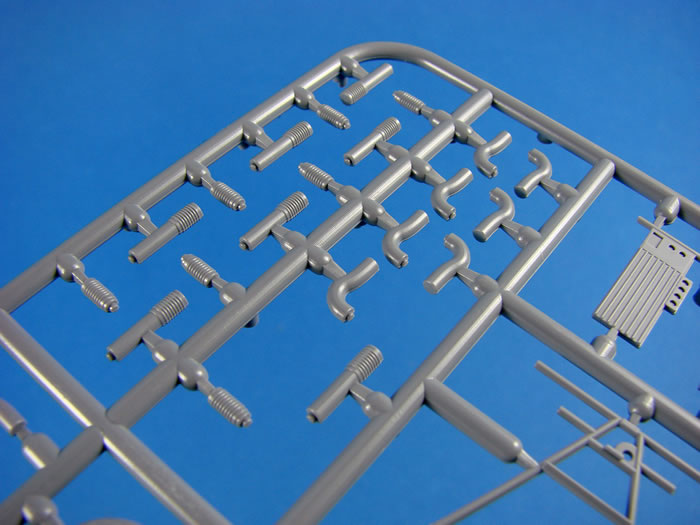
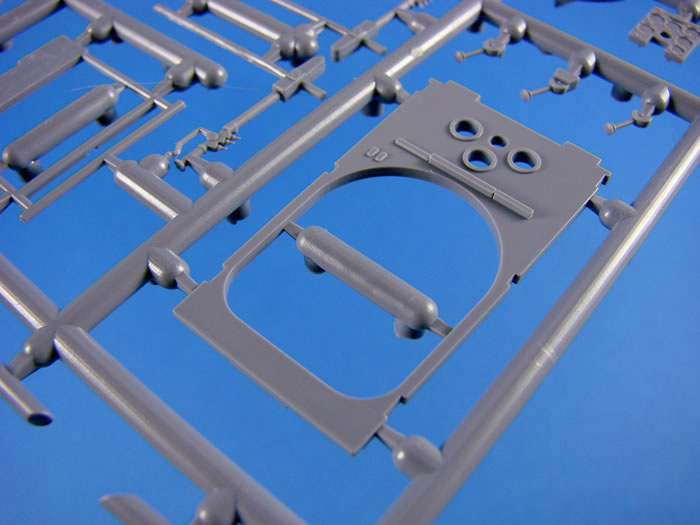
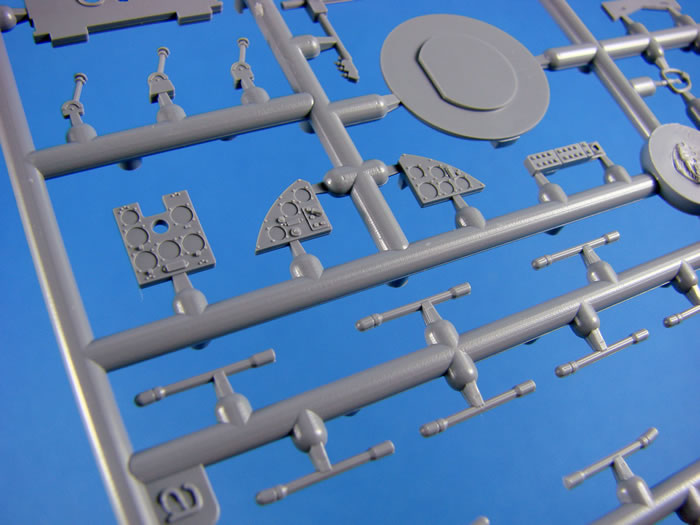
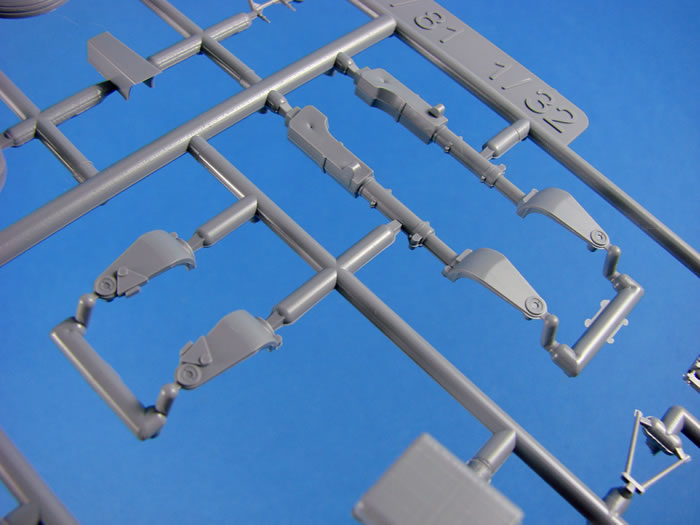
Now, unlike the main airframe components with low pressure injection, these are very different in appearance insomuch as the parts are glossy and extremely sharp with no real flash. I came across this sort of thing on the Special Hobby Tempest kits. The reason for the different moulding technique is due to the nature of the parts with them being intricate and relatively small. A good number of the key cockpit parts are found here, such as the upper tub frame, footboards, multi-part instrument panel, seat sides, optional control sticks with both regular stick grip and spade types, forward instrument panel mounting frame and rear frame etc.
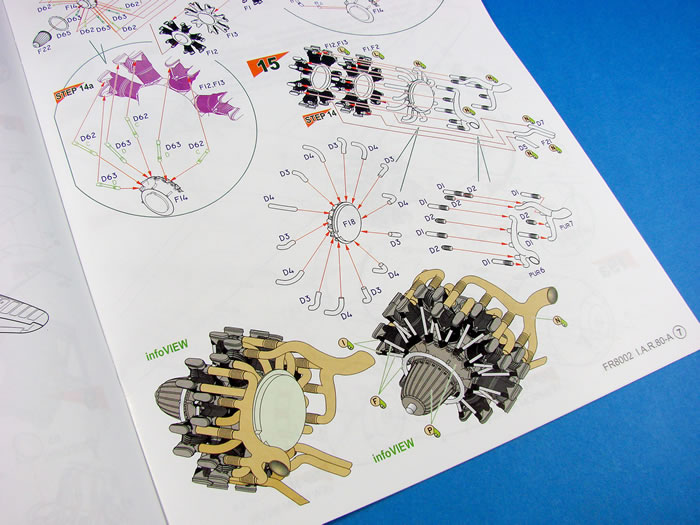
Also to be found here are the parts for the engine exhaust, control surface horns, and individual engine pushrods...yup, you’re gonna have to apply them one by one, all TWENTY-EIGHT of them! That’s a little different from the regular approach of attaching them to a central hub.
Sprue E
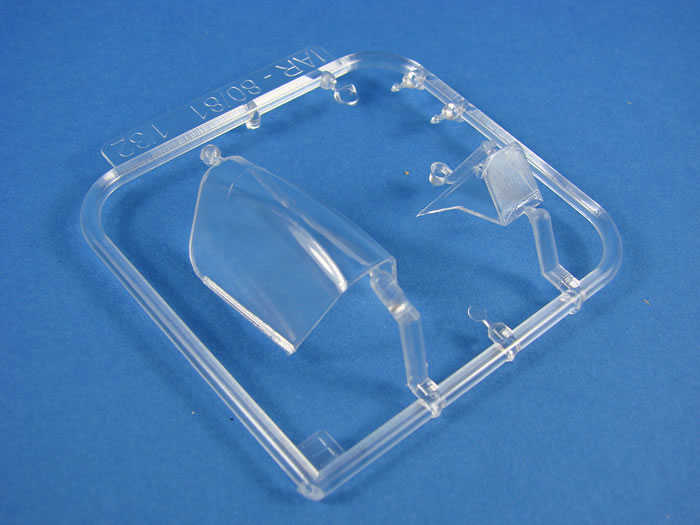
The clear parts. Special Hobby has packed these into two little wallets, with the canopy parts in one wallet, and the gunsight lenses and wingtip lights in another.
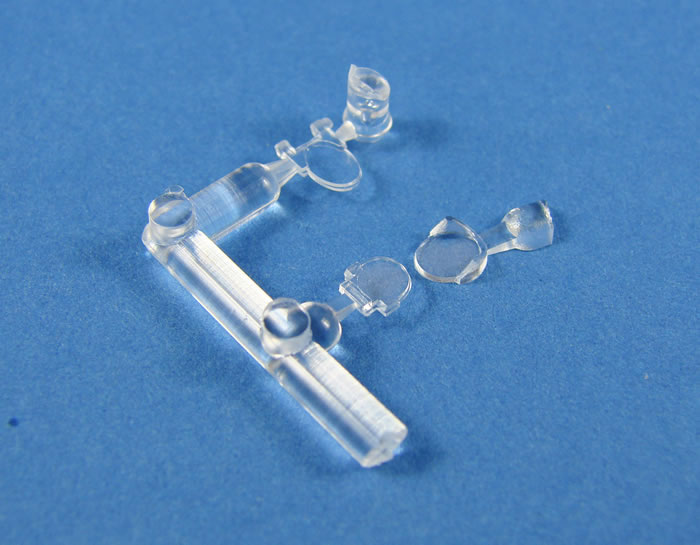
Clarity is very good, with no visible distortion.
Sprue F
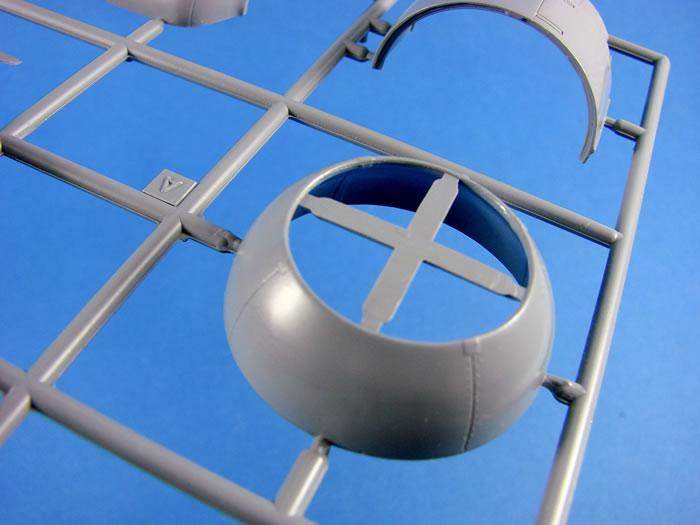
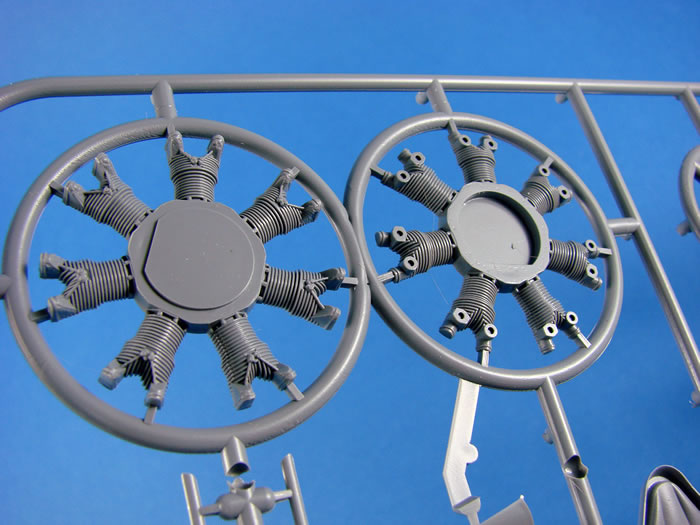
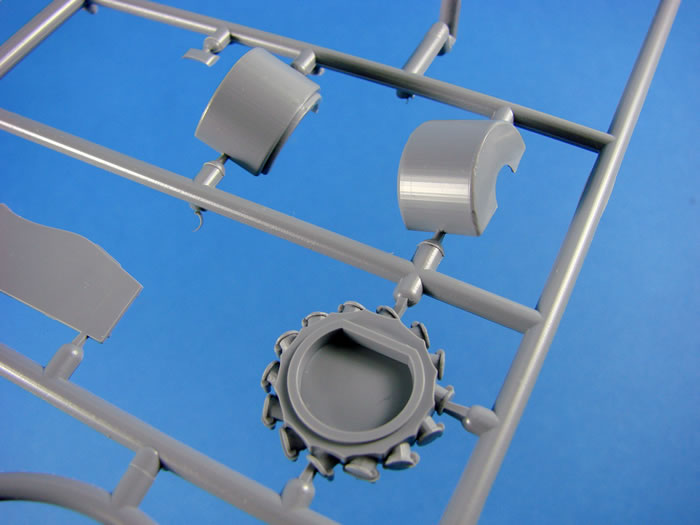
Another high-pressure moulded sprue here, with many main parts for the IAR K14-1000A engine. The front and rear radial banks are moulded as halves, and the details are excellent with fine cooling fin reproduction and cylinder head details. You will also find the hub here, plus the main exhaust hub section. It’s such as shame that the beautiful hub and its detail will be totally hidden by the shroud which sits behind the spinner, totally obscuring the aforementioned detail. Talking of spinners, the rear plate is moulded on this sprue.
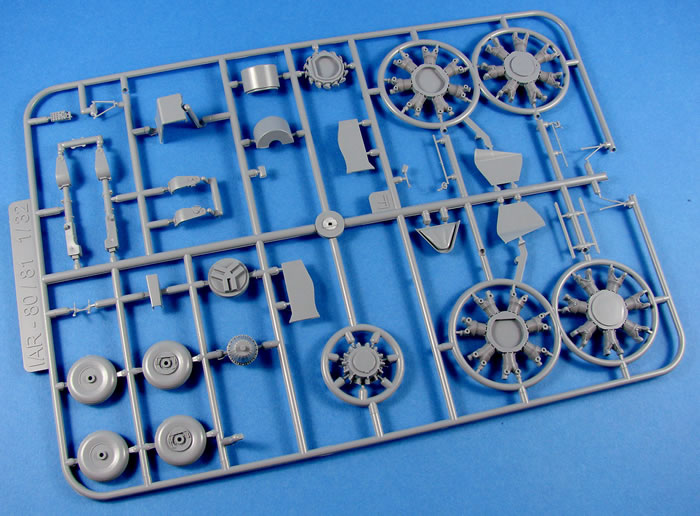
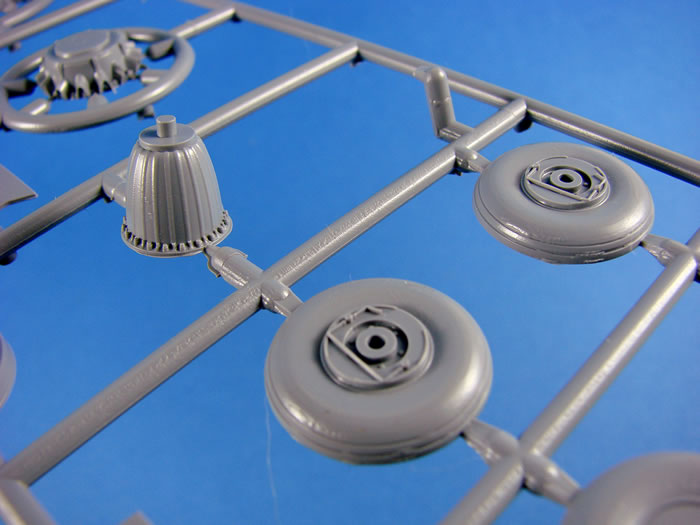
The main gear struts are found here, as are the wheels. There is no weighted effect to the latter, so you’ll need to sort that yourself or purchase the resin wheels from CMK. Hub details on these are very nice, but as they are integral to the wheels, you’ll need to mask them for airbrushing. No masks are included with this release. A couple of inner gear doors are moulded here but not for use, and you will also find a few remaining cockpit parts such as sidewall detail and the main seat part.
Of note are a couple of parts here at the edge of the sprue, near the engines. The sprue here is cut-out and the delicate parts in that area have suffered some breakage and will need repair or re-fabrication. These parts concern the instrument panel mounting.
Sprue G
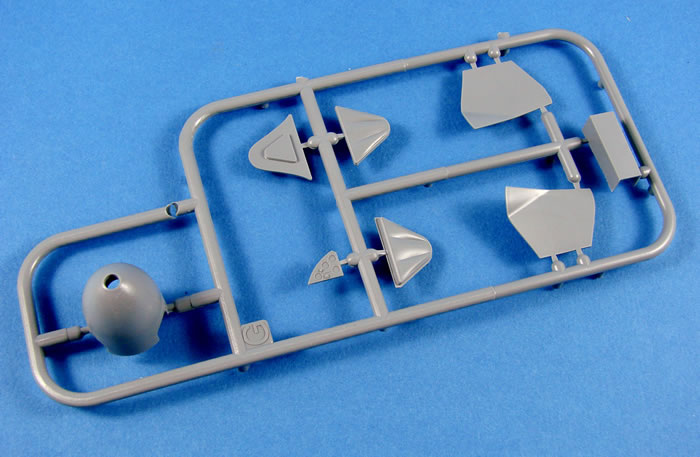
Here we have our last sprue, and this contains, amongst other things, a longer spinner version that that found on Sprue A. The instructions do state that either can be used, but you might want to look at reference photos of your specific machine before committing to either one. Other parts include replacement inner gear bay doors, alternative instrument panel section, under-cowl scoop, and two headrest parts as an alternative to the part on Sprue F.
Resin Parts
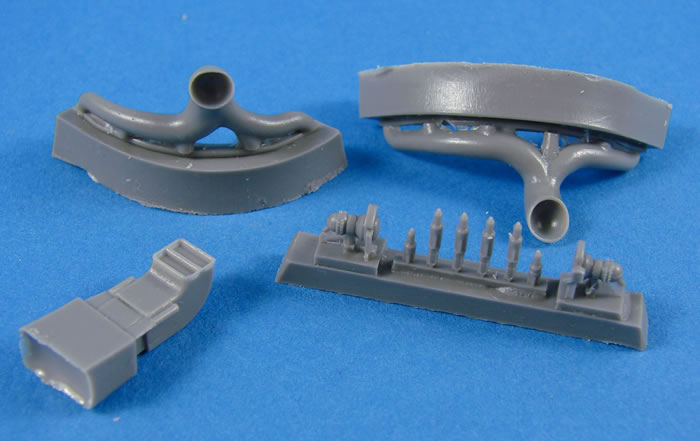
Four casting blocks are supplied here, cast from medium-grey resin. Two of these hold the parts for the exhaust manifolds with nicely hollowed out ends, the engine intake and filter, and the last block holds a series of smaller parts. These are for the gunsight (two included), and the gun barrel stubs/muzzles. Casting is excellent, as you would expect from Special Hobby/CMK.
Photo-Etch
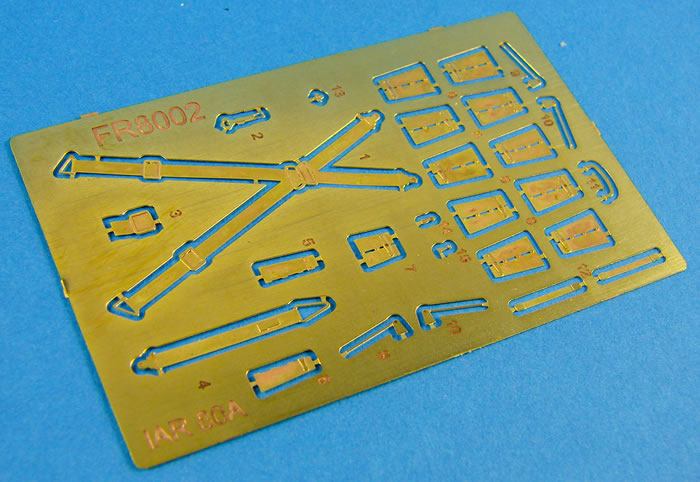
This small fret contains the engine cowl louvres, multi-part pilot harness, interior canopy handle and elevator trim tab actuators. Again, production is excellent, and the belt details will look good under a coat of paint.
Marking Options and Decals
A single sheet, printed by Aviprint, contains decals for all national markings, serials, insignia, stencils and instrument panel gauges etc. Printing quality is very good, with solid and authentic colour, minimal carrier film and perfect register. The decals also look nice and thin too. There should be no error with these whatsoever as Radu Brinzan was involved with their design. I can certainly rest easy with that as Radu is the go-to guy when it comes to this machine.
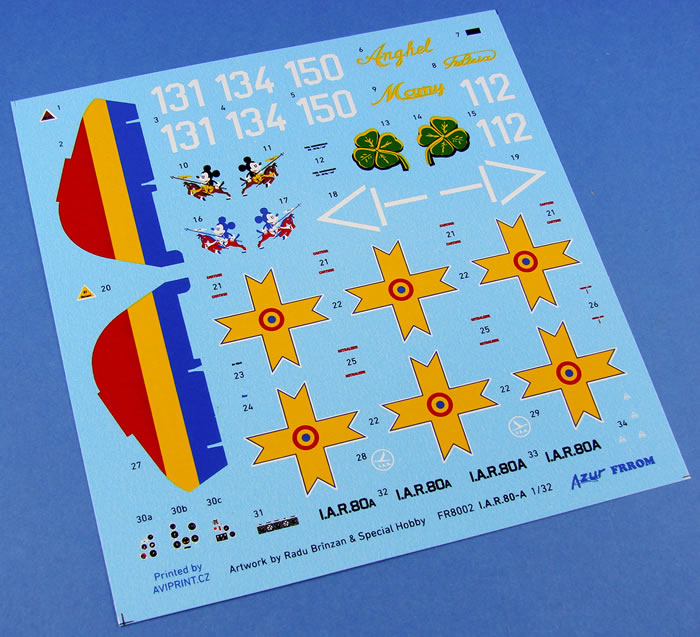
The four schemes supplied are:
-
IAR-80A – “Anghel”, Escadrila 47 Vanatoare, Grupul 9, Pipera, August 1942
-
IAR-80A – Escadrila 53 Vanatoare, Mamaïa, July 1942
-
IAR-80A – “Felicia”, Escadrila 47 Vanatoare, Grupul 9, Pipera, Summer 1942
-
IAR-80A – “Mamy”, Escadrila 47 Vanatoare, Grupul 9, Pipera, Summer 1942
Instructions
I quite like Special Hobby’s instructions format. They are clear, concise and the illustrations are easy to follow. This manual starts with a history of the type, followed by a parts map, indicating those components that aren’t to be used.
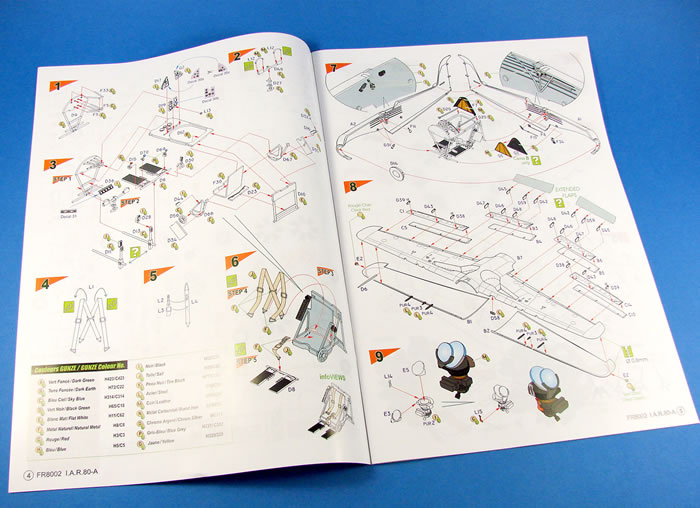
Construction is broken down into 24 stages, with clear drawings guiding the way, and the use of colour illustration to highlight painting and parts placement. The last pages of the manual contain the scheme illustrations, with good, clear scheme depiction and decal location shown.
After the IAR-81C, I was thrilled to see the earlier pure fighter version of this kit being released. It has a swarthy appearance and was, by all accounts, on par with the Fw 190A/F series in terms of performance. This is a superbly detailed kit, but perhaps one that needs just a little more attention and skill than your standard off the shelf kit, due to the main airframe components and the alignment and clean-up required. In all though, this is a superb kit of an important and oft-forgotten fighter type, and Frrom-Azue/Special Hobby (with Radu) have given it the attention it truly deserves. For the price, with both PE and resin, this is a very attractive package. All they need to do is fix the break in the sprue on F, that causes those two parts to fracture.
Thanks to Special Hobbyfor the review sample.
Review Text and Images Copyright © 2018 by James Hatch
Page Created 14 March, 2018
Last updated
15 March, 2018
Back to HyperScale Main Page
Back to Reviews Page |
 Home
| What's New |
Features |
Gallery |
Reviews |
Reference |
Forum |
Home
| What's New |
Features |
Gallery |
Reviews |
Reference |
Forum |