de Havilland DH.110
Sea Vixen FAW.2

Trumpeter, 1/48 scale
| S u m m a r y : |
Catalogue Number: |
Trumpeter Kit No.05808 – de Havilland DH.110 Sea Vixen FAW.2
|
Scale: |
1/48 |
Contents and Media: |
See details below. |
Price: |
USD$51.99 plus shipping available online from Squadron
£62.99 EU Price (£52.49 ex VAT) plus shipping available online from Hannants
and specialist hobby retailers worldwide |
Review Type: |
First Look |
Advantages: |
Nice instructions. |
Disadvantages: |
Interior is lacking; shape and size issues with various elements of the airframe; lack of option for posing the cockpit in an open position; incorrectly placed panel lines; incorrect colour callouts; white serials for lower surface white wings; incorrect serial decals; no stencil decals; tail boom and fin issues. |
Conclusion: |
We can all just pray that Airfix re-release their infinitely better kit, and this one can be relegated to the bin of curios and oddities.
|
Reviewed by
James Hatch

Trumpeter's 1/48 Sea Vixen is available on sale from Squadron.com
The de Havilland DH.110 Sea Vixen is a British twin-engine, twin boom-tailed, two-seat jet fighter flown by the Royal Navy's Fleet Air Arm during the 1950s through the early 1970s. The Sea Vixen was designed by the de Havilland Aircraft Company during the late 1940s at its aircraft factory in Hatfield, Hertfordshire. It was developed from an earlier first-generation jet fighter, and the Sea Vixen was a carrier-based fleet air-defence fighter that served into the 1970s.
Initially produced by de Havilland, it was later called the Hawker Siddeley Sea Vixen after the de Havilland Company was absorbed by the Hawker Siddeley Corporation in the year 1960. The Sea Vixen had the distinction of being the first British two-seat combat aircraft to achieve supersonic speed, albeit not in level flight. Operating from British aircraft carriers, it was used in combat over Tanganyika and over Yemen during the Aden Emergency. In 1972, the Sea Vixen was phased out in favour of the American-made McDonnell Douglas Phantom FG.1 interceptor. Only one Sea Vixen remains airworthy today in the world and is displayed regularly at air shows. The Sea Vixen also flew in an aerobatic role, performing in two Royal Navy display teams: Simon's Sircus and Fred's Five.
Of the 145 Sea Vixens constructed, 55 were lost in accidents. Two DH.110 development prototypes were also lost. The 55 Sea Vixens lost represented a loss rate of almost 38%. 30 (54%) of these were fatal incidents, 21 of which involved the death of both pilot and observer.
A small number of Sea Vixens were sent to FR Aviation at Tarrant Rushton airfield for conversion to D.3 drone standard, with some undergoing testing at RAF Llanbedr before the drone programme was abandoned. Among them was XP924, now G-CVIX, the only Sea Vixen to remain in flying condition, which has now been returned to 899 NAS colours. Formerly owned and operated by De Havilland Aviation, G-CVIX could be viewed at their hangar at Bournemouth Airport in Dorset, southern England, or at air shows around the UK.
I really can’t understand Airfix. I can only presume is that sales of their rather nice Sea Vixen didn’t merit it continuing in production, or it could simply be that it wasn’t scheduled into their production schedules with their current batch of new releases. Either way, until Trumpeter released this particular kit, you would really need to scrabble around to try to source the Airfix release, and probably get scalped in the process. But, thankfully, Trumpeter comes to the rescue with a brand-new tooling of this aircraft, and in the same version as the hard-to-find Airfix kit. All is good, yes? Well, maybe…
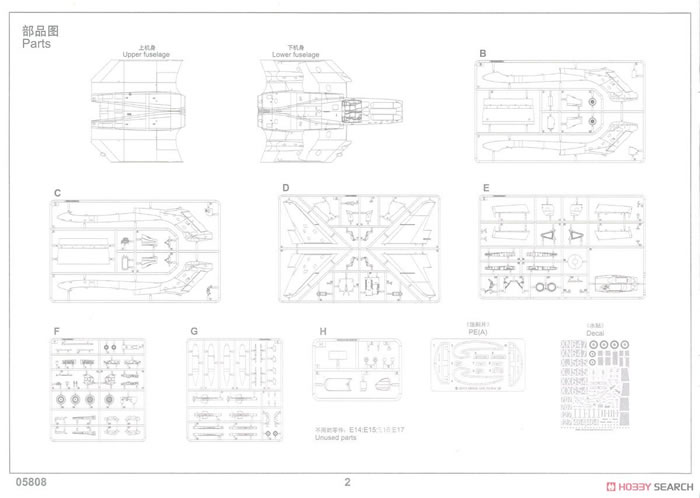
Whilst my review looks at the kit from an in-box perspective, it is pretty apparent from eyeballing the kit and also gleaning information from online sources, that Trumpeter’s B-Team have been busy once again and got dirty in the process. I’ll mention the differences and possible discrepancies with the shapes as I look at the sprues. Each sprue us individually bagged, and a number of components are placed in a separate compartment within the box. These are the nosecone and intakes, clear parts (also wrapped in foam), and a PE fret.
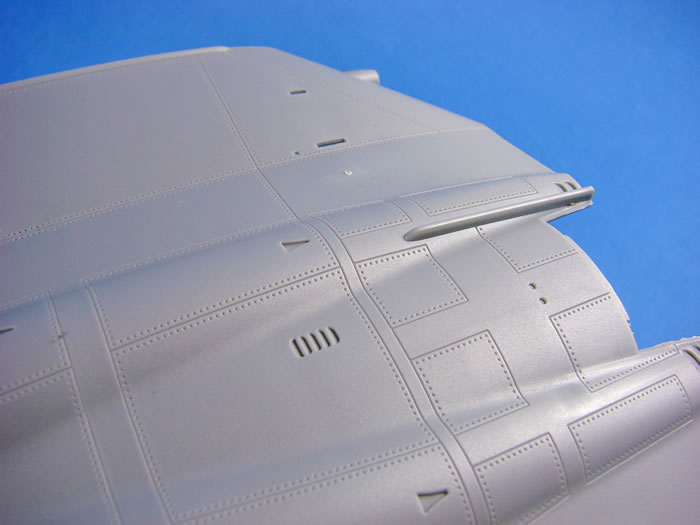
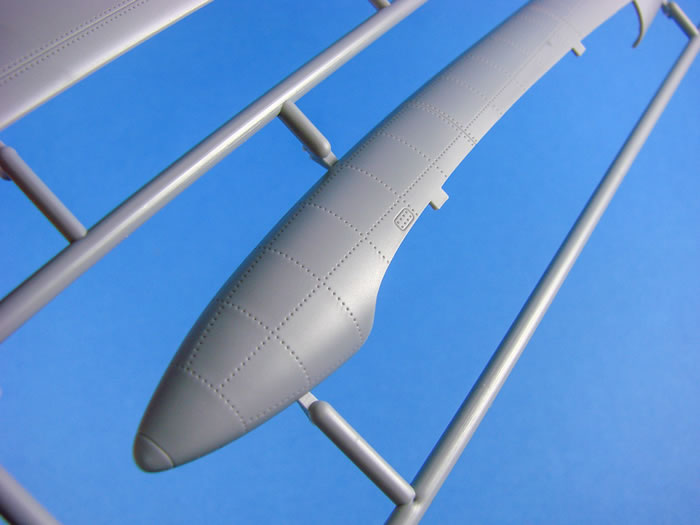
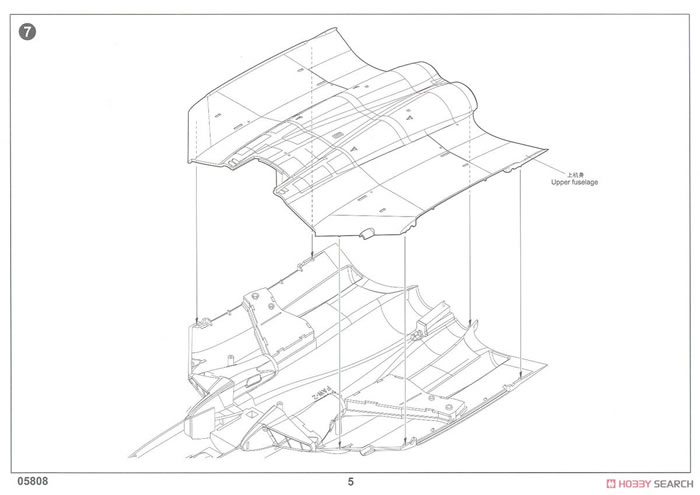
Fuselage upper half
Off to a reasonably good start here with this superbly moulded upper panel that spans the area up to where the wings would fold. This is neatly keyed to accept the tabs on the tail boom halves, and also exhibits some very nice panel line details. The only rivets are those that follow the panel lines. If anything, both panel line and rivet detail is perhaps a little too heavy, but this can easily be lessened with a coat of Mr Surfacer and rubbed down before prime/paint. Internally, some stiffening webs are moulded to lessen the compression effect that could arise during handling and construction.
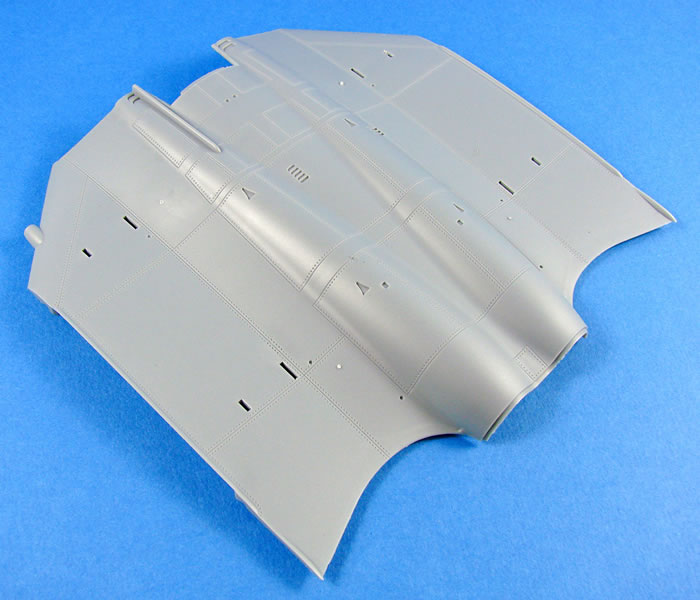
A small number of nubs exist on the upper surface, from the moulding process, and these will be very simple to eliminate. These are where the moulding sprue will have been before they removed it. With my reference, a number of panel shapes look wrong too and Trump has simply used the rivet depiction to replace the various shapes and style of fasteners that exist here.
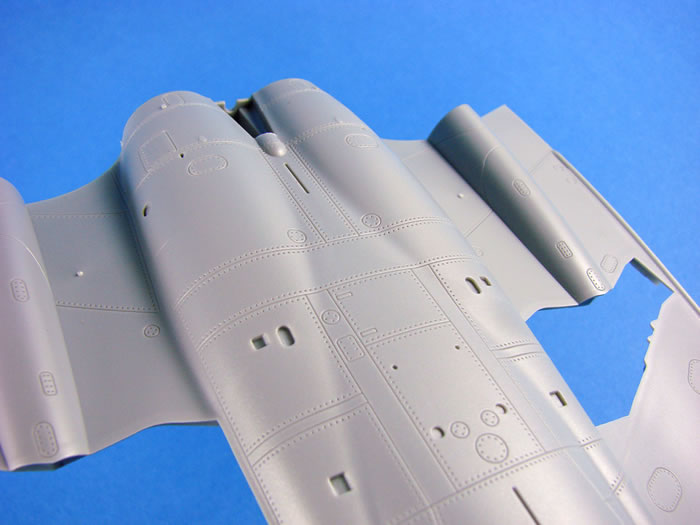
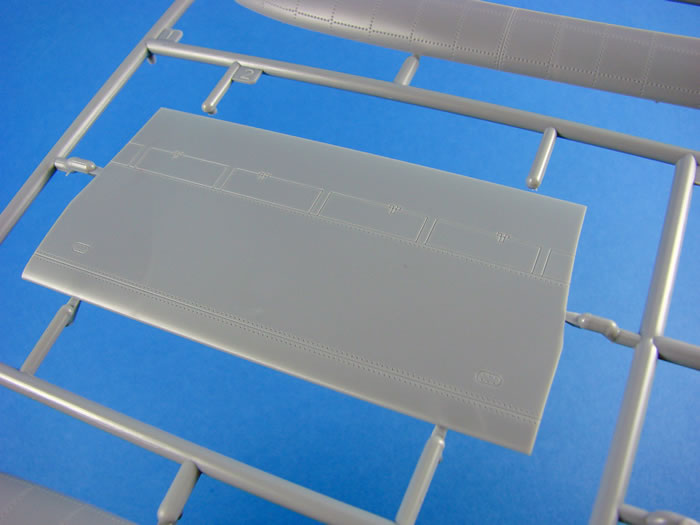
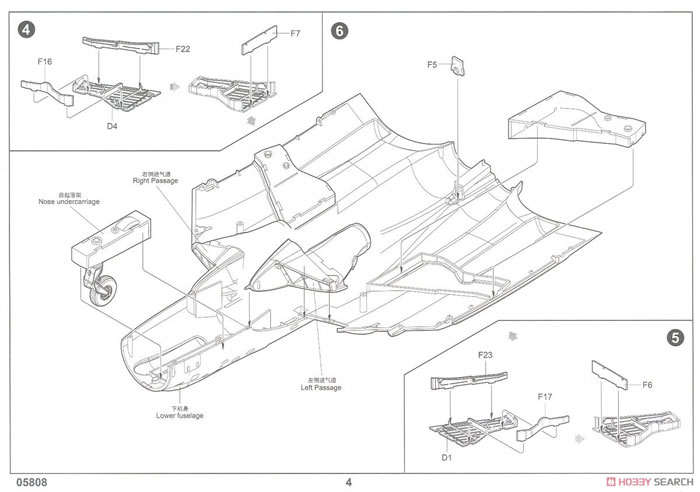
Fuselage lower half
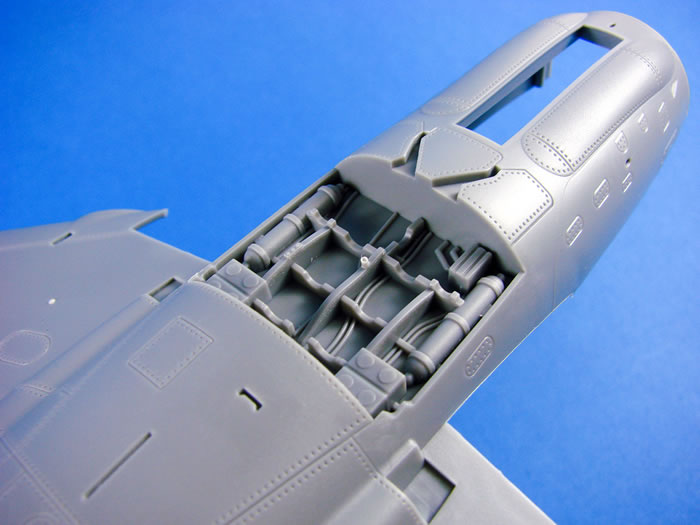
Following in the same style as the upper panel, this lower part, incorporating the lower nose and gear bay openings, has the same style of surface textures which I think need reducing a little. Openings are moulded to accept the separate wheel bay installations, and a large airbrake section is included with all internal details.
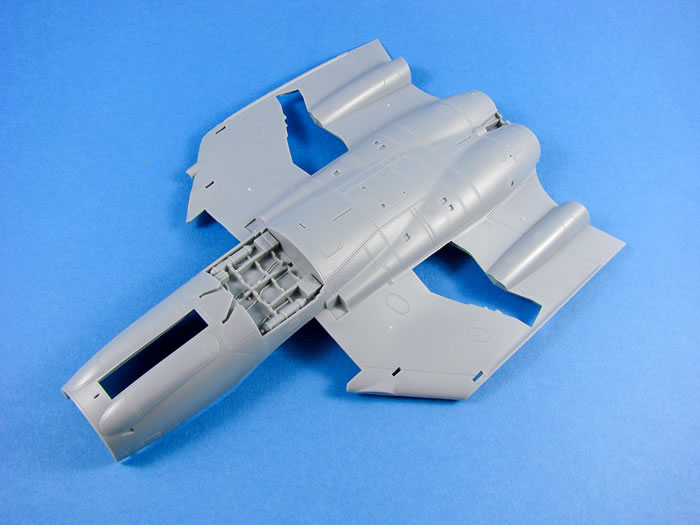
Here, and on the wing surface, you will need to remove those very minimal nubs. As for the airbrake housing detail, I would say this is pretty reasonable, complete with the various structures and pressure tanks.
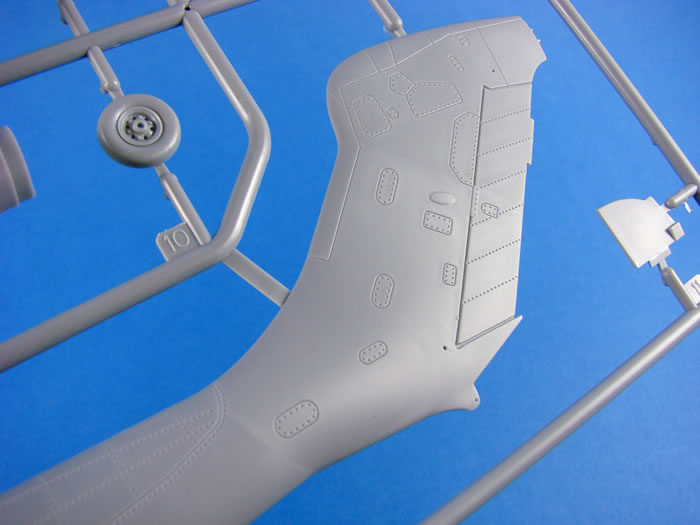
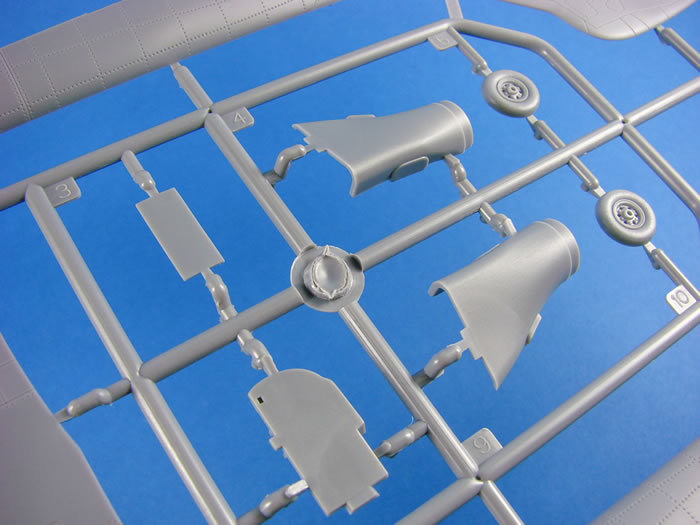
Sprue B
Here we have the external halves for the the tail booms. Here is where we see some discrepancies from both the Airfix release (which is generally taken to be pretty accurate as far as shapes go), and also from reference I have. It does appear that the booms are slightly too long aft of the wing trailing edge, but more frustratingly, the top of the fin appears to be more bulbous than it should be. I do think this can be fixed with a little sawing and putty though, but nonetheless, Trump got this wrong. The booms seem to be almost devoid of any panel line details too.
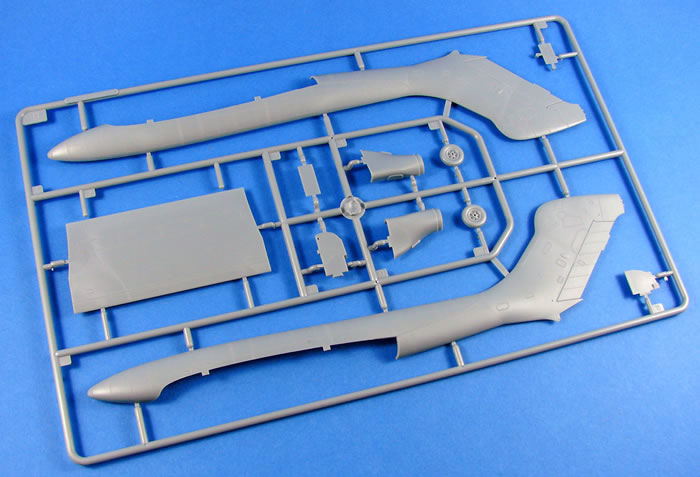
Whereas Airfix moulded their stabiliser with a separate elevator, this kit is provided with the parts combined. I have to say that it makes the Trump effort look like the whole stab and elevator is a single unit with no real differentiation in the areas. A few swiped of a scriber to deepen the panel line that separates them would be needed.
Other parts here include the two-part nose wheel with integral hubs (no weighted effect), cockpit bulkhead and upper halves of the intake channels.
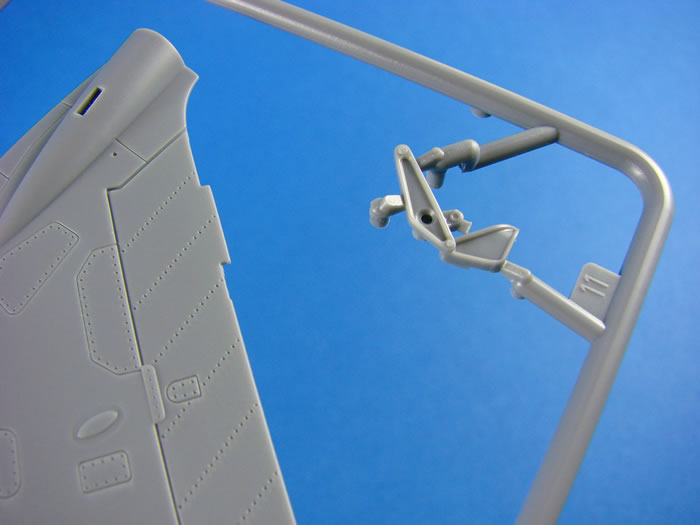
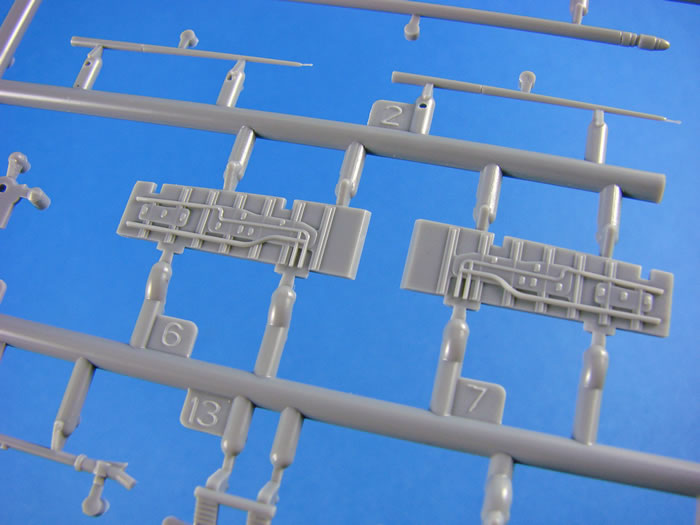
Sprue C
This sprue contains the inboard halves for the tail booms, plus the upper stabiliser section, nose wheel fork half, and intake lower halves. Trumpeter has moulded a great little instrument panel for the pilot, with blank, recessed gauges that can be supplemented by the kit decals (or better, Airascale instrument decals). Something else which looks a little anomalous, perhaps, is the navigator hatch. Compared with the Airfix kit, and with my own and online searches, the hatch appears to be narrower than it should be, and perhaps a tad longer too. The part itself is nicely detailed with rivets running around its circumference.
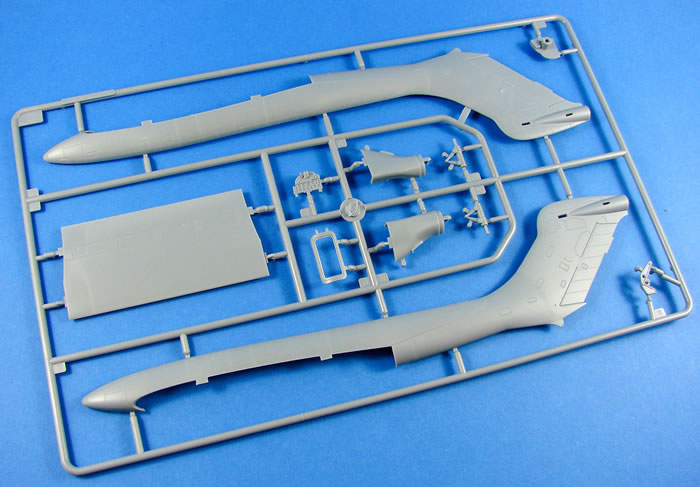
The lower portions of the main gear struts are moulded here too, and these look rather good.
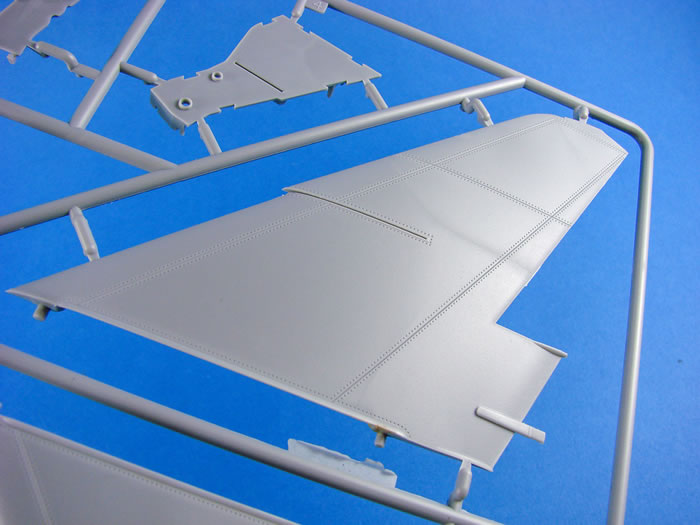
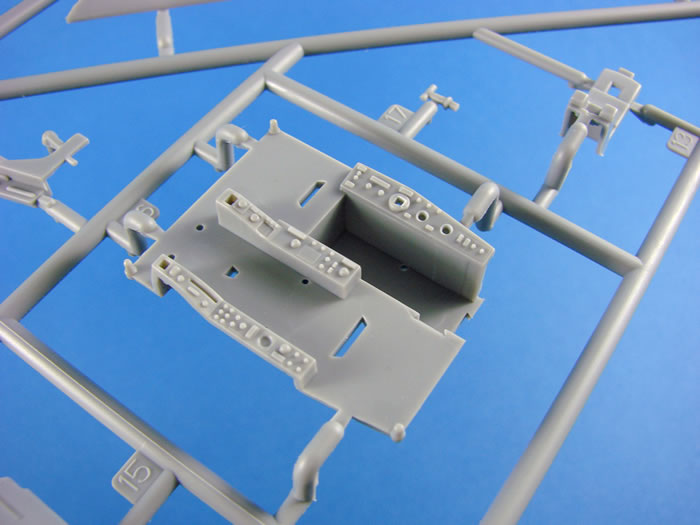
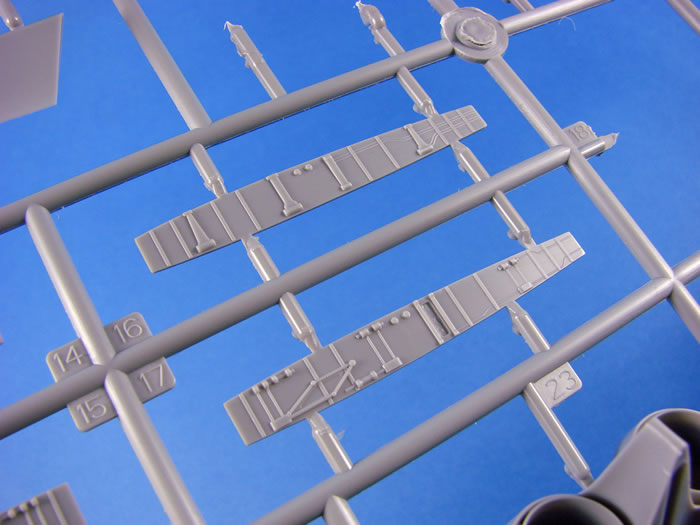
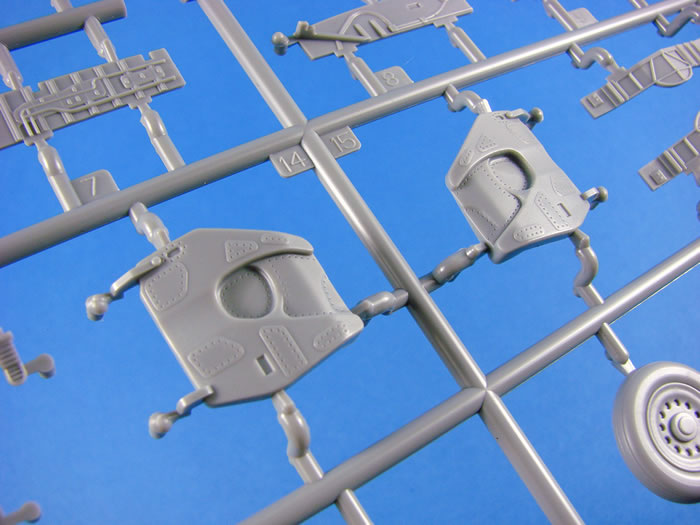
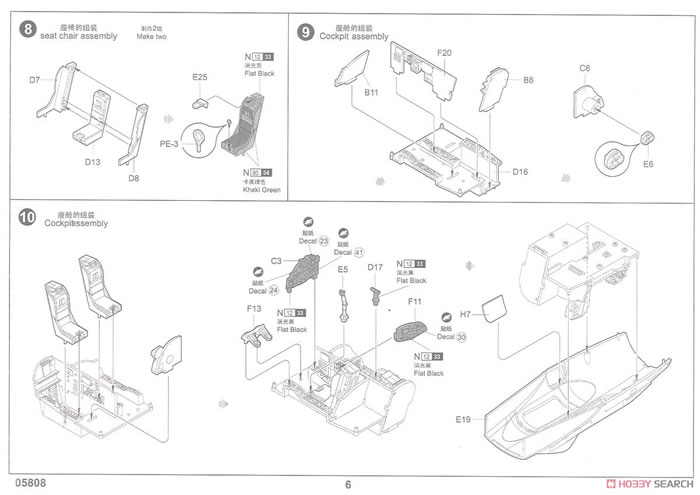
Sprue D
Both wings have their outboard panels moulded here, as traditional upper and lower halves. Ailerons are separate, as are the wing fences which are supplied as photo-etch parts. Again, the only rivet details to be seen are those outlining the various panel lines. Even the panel lines on these parts aren’t too numerous and looks pretty good.
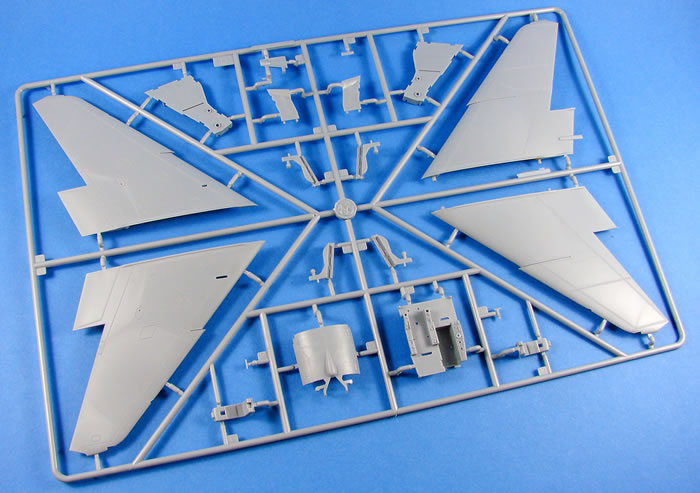
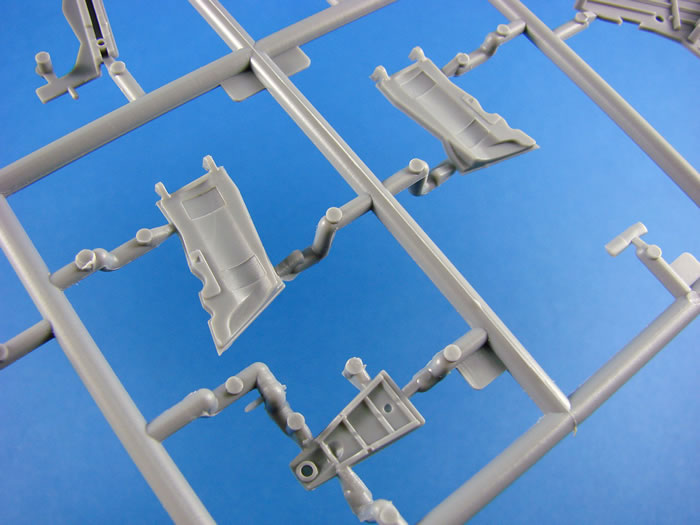
You will also find the cockpit tub here, and whilst similar in many respects to the Airfix kit, the consoles themselves look more simplified and even a different shape. The starboard pilot console appears to be narrower than it should be, so some work will be required here to fix that. Maybe Eduard will come up with something that should at least improve these rather lacking areas. Crew seats are also very disappointing in their amazingly basic details. Again, maybe look for something aftermarket to replace these entirely.
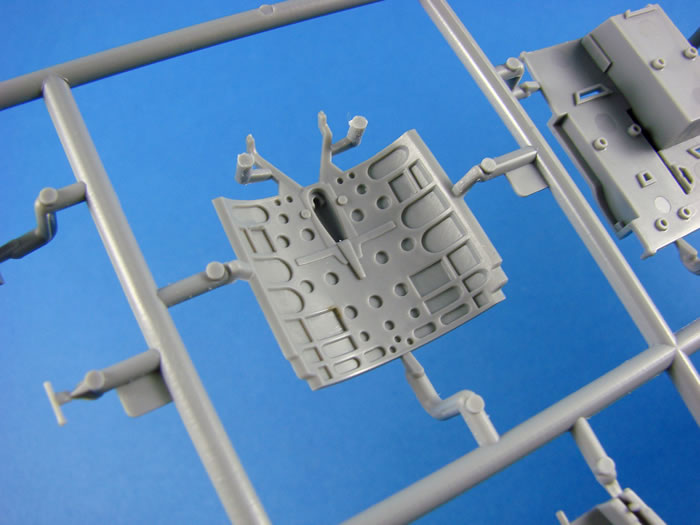
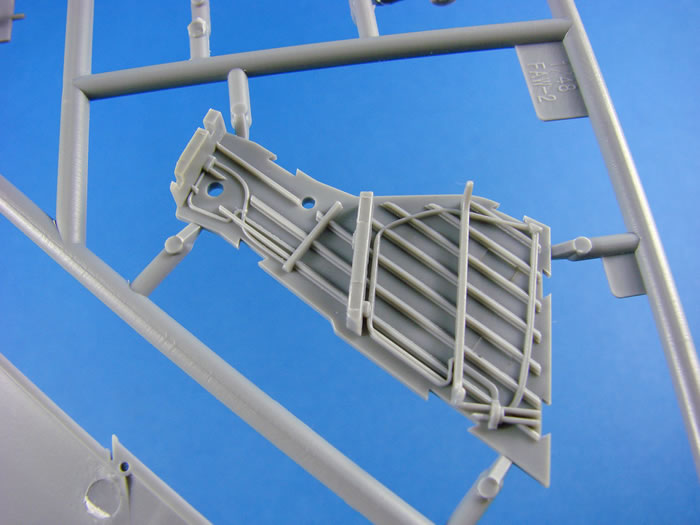
I have to say that I much prefer how Trumpeter has created the wheel bays on this model, in comparison to Airfix’s release. On the latter, these are all-in-one mouldings, but this kit has separate side ceilings with more detail, and also detailed side walls. A much nicer representation indeed. As for the speed brake itself, this is very similar to the Airfix kit, and indeed very close to the real thing.
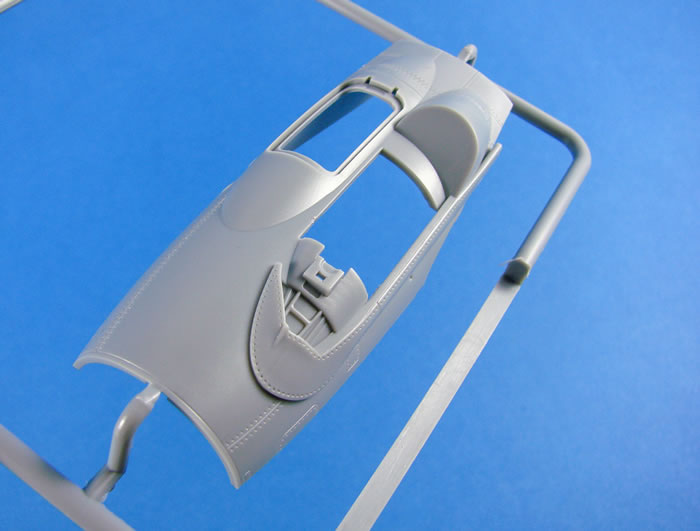
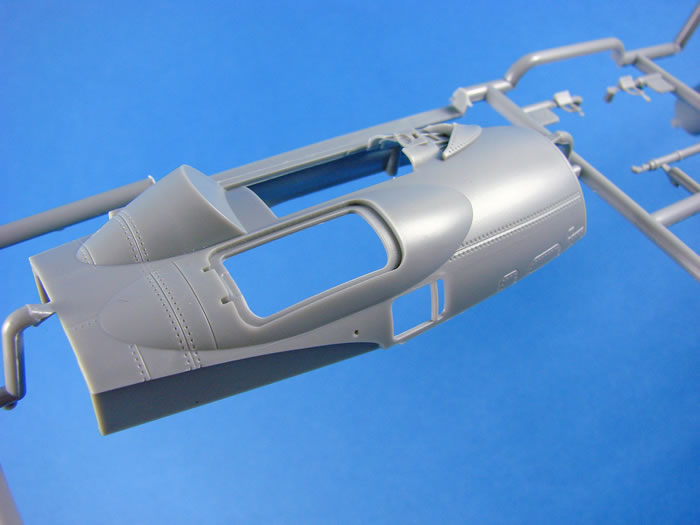
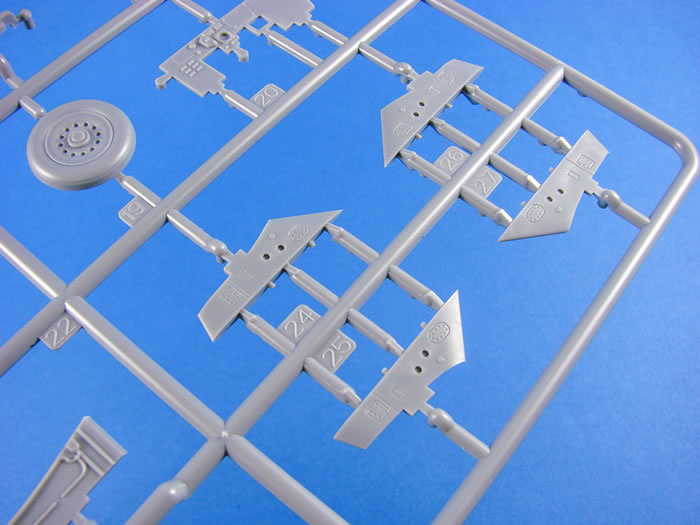
Sprue E
The key player here is the upper nose section of the Sea Vixen, with both cockpit openings. This is a very nicely executed moulding with some slide-mould tech used to create it. That heavy fairing to the front of the windscreen is beautifully recreated, but you will also note the navigator’s opening which does appear to be too narrow and long. You may notice something else that’s really frustrating too, and that’s the solid rear portion of the pilot’s canopy is moulded here too meaning you CAN’T position the hood in an open position. Just what was Trumpeter thinking about here? For many, that will be a deal-breaker.
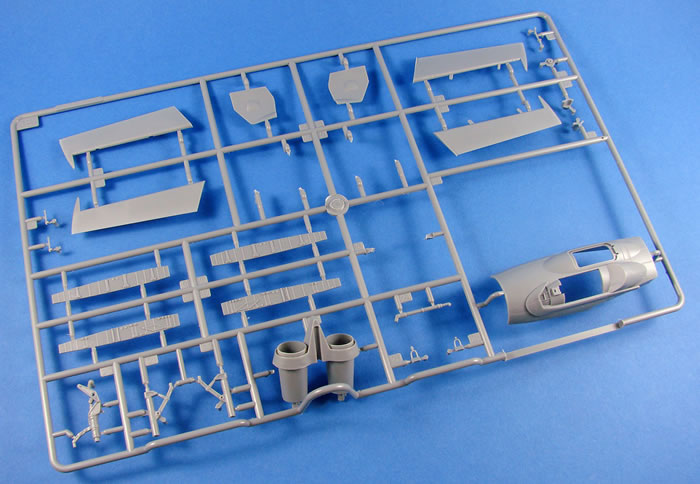
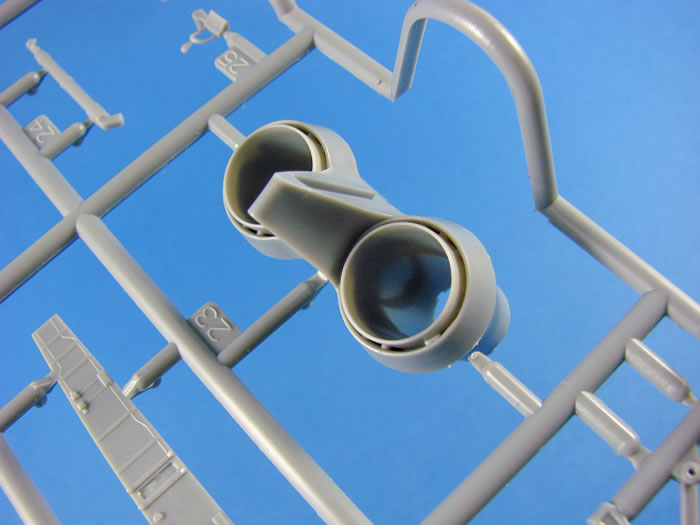
More slide moulding is employed for the tail pipes, and this part includes a portion of the exhaust tube on the interior. The edges of the external tube are nice and thin and sit recessed within the rear fuselage portion. Very nicely recreated. Parts are included for what appears to be the wing rib detail for a wing-fold build, but these aren’t shown in the kit instructions.
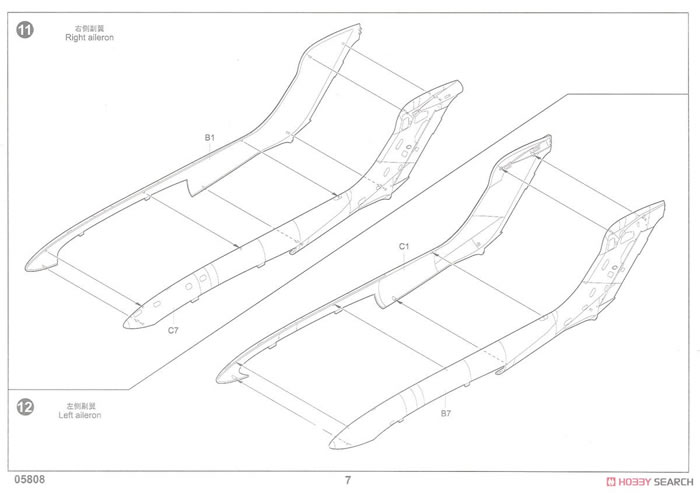
Other parts here include the upper portion of the main gear wells, main gear exterior door parts (these have separate interior parts as seen on Sprue F), nose gear strut and ailerons that are constructed from upper and lower halves. The trailing edges of these look reasonably thin too.
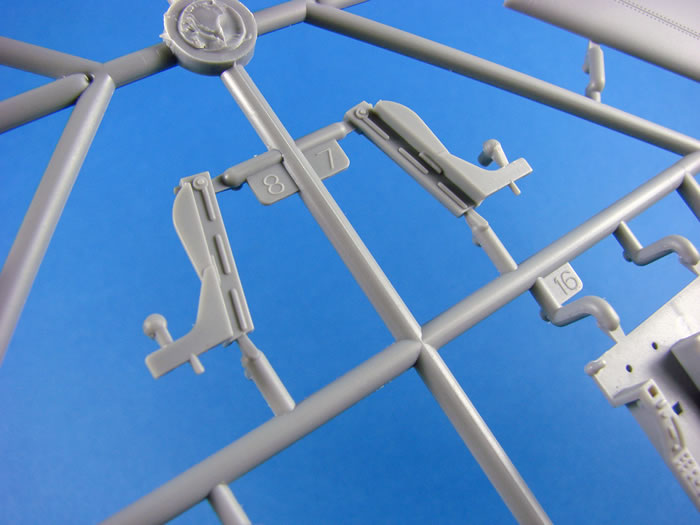
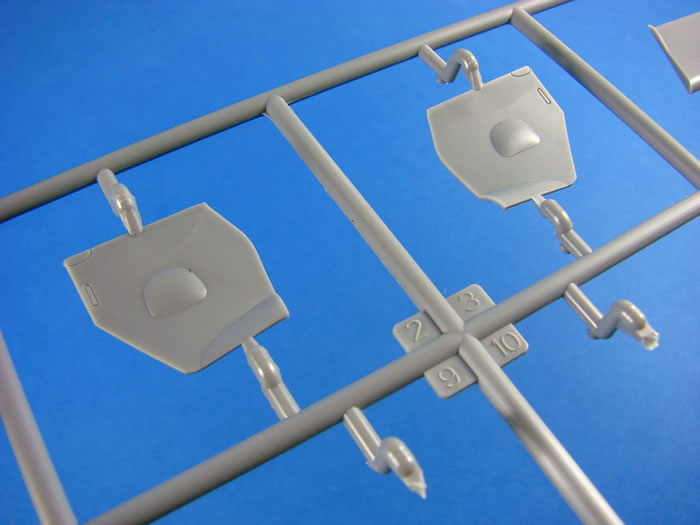
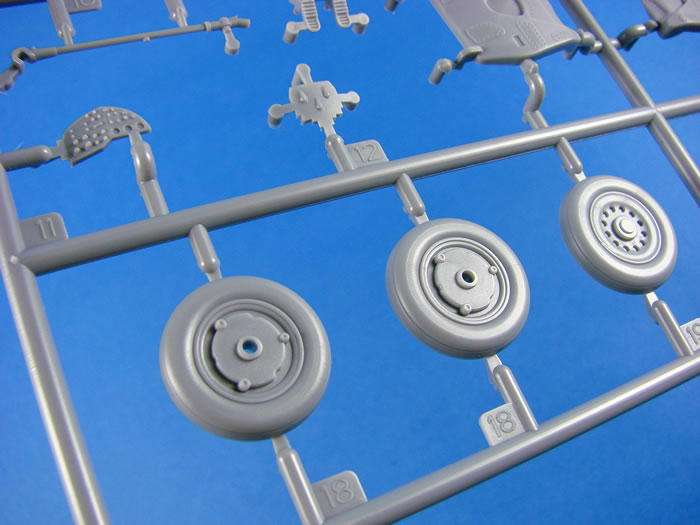
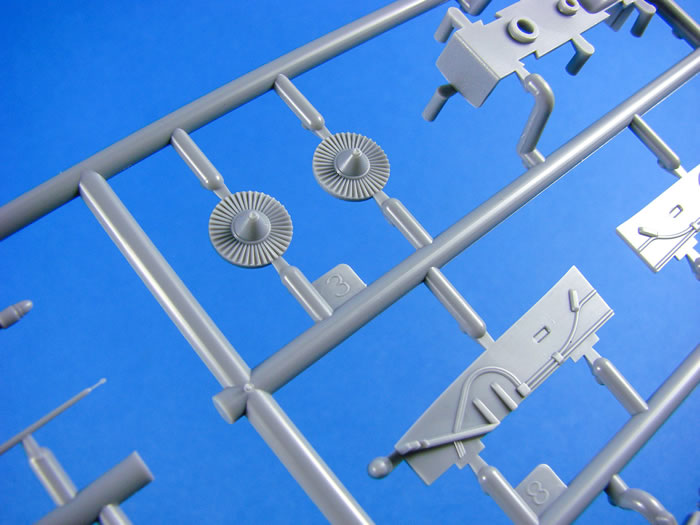
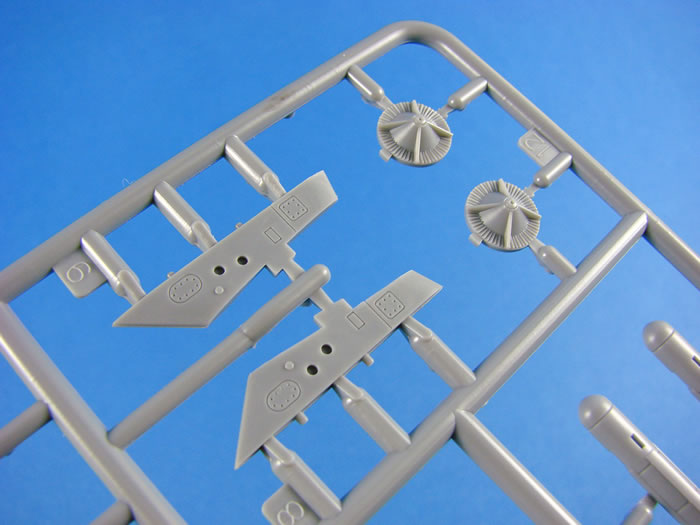
Sprue F
In this day and age, I really would like to see companies create weighted effect tires. As well as this omission, the hubs are also very simplified and missing many key details. I sense the need for more aftermarket. The main gear interior door parts are found here, and these look excellent.
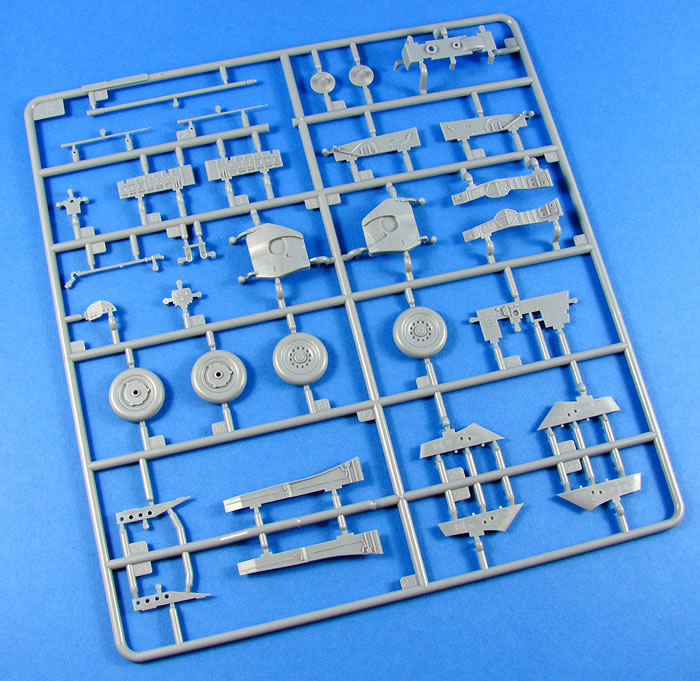
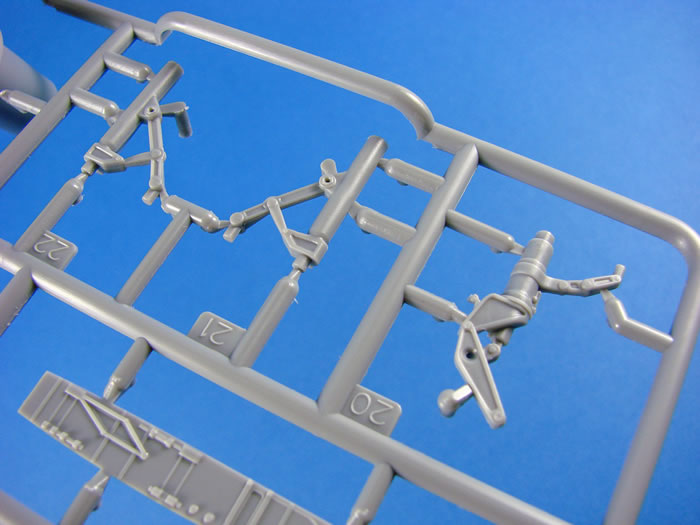
Main gear well and nose gear well components can be found on this sprue, as can the intake fan parts and weapons pylons. A number of other cockpit parts are included, such as rudder pedals and navigators panel.
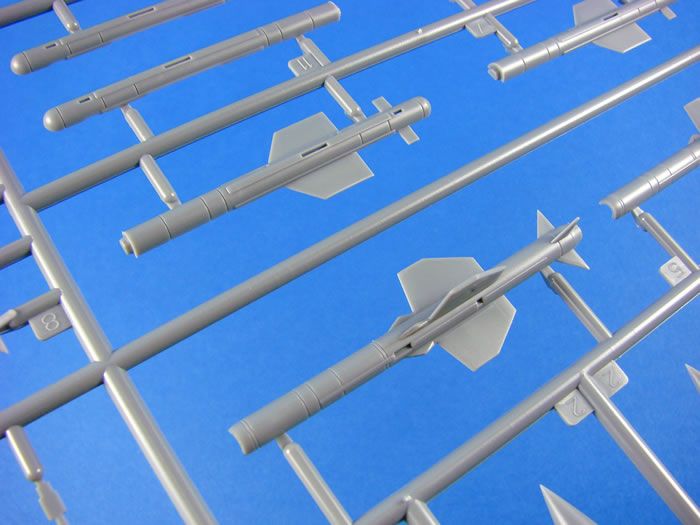
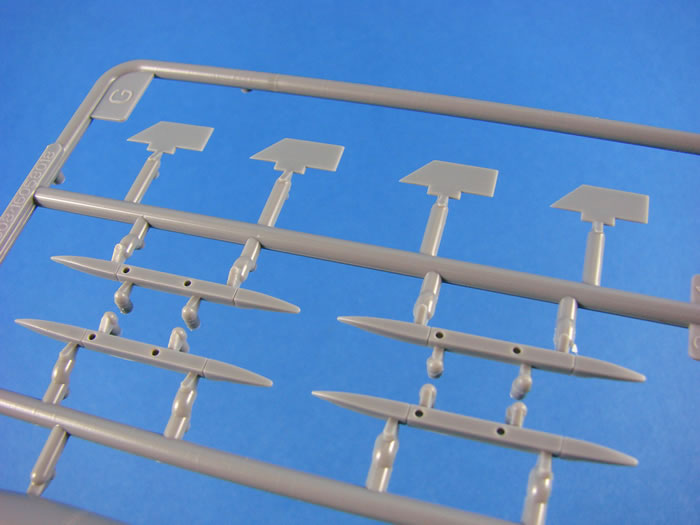
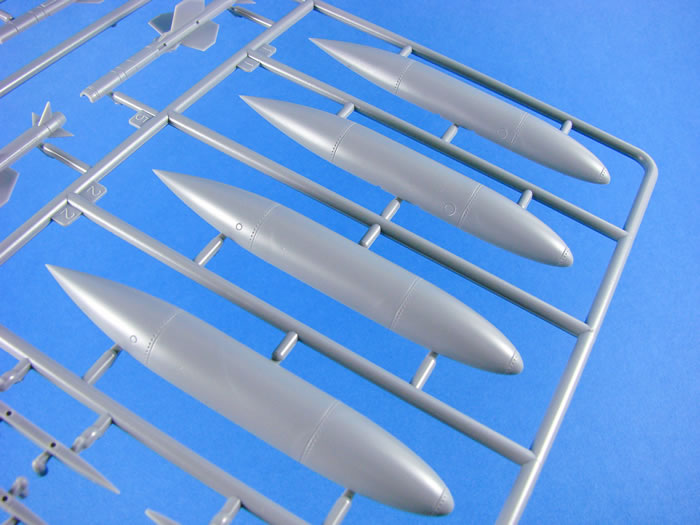
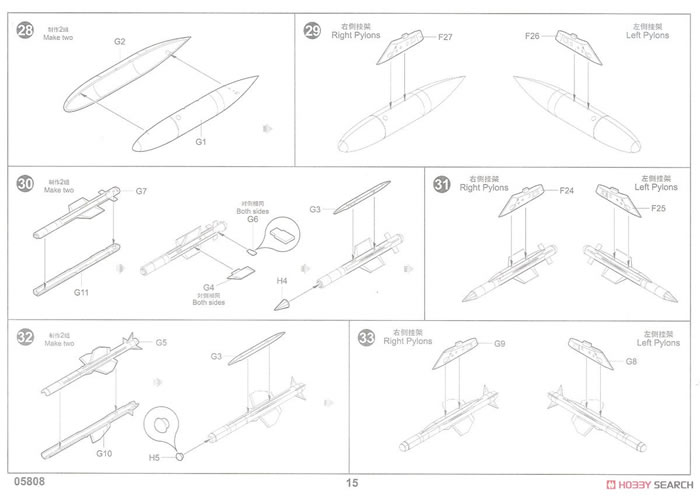
Sprue G
This is the weapons and stores sprue with provision to build two external fuel tanks, and four missiles. Missiles have clear nose parts included, and overall detail is very good.
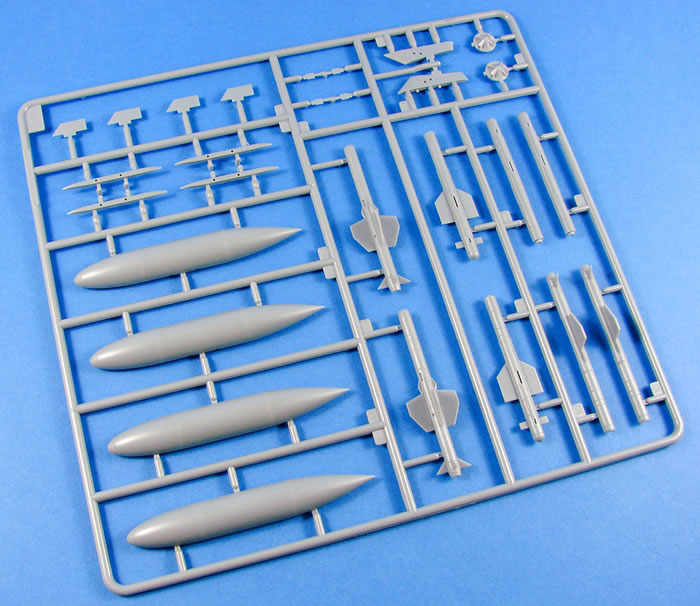
It’s a strange sprue to find the exhaust flame holders, but here they are!
Sprue H
Trumpeter’s clear parts are always superb and come wrapped in an extra sleeve of foam to protect them further. Frame lines are nicely defined, and the parts are bright, with excellent clarity.
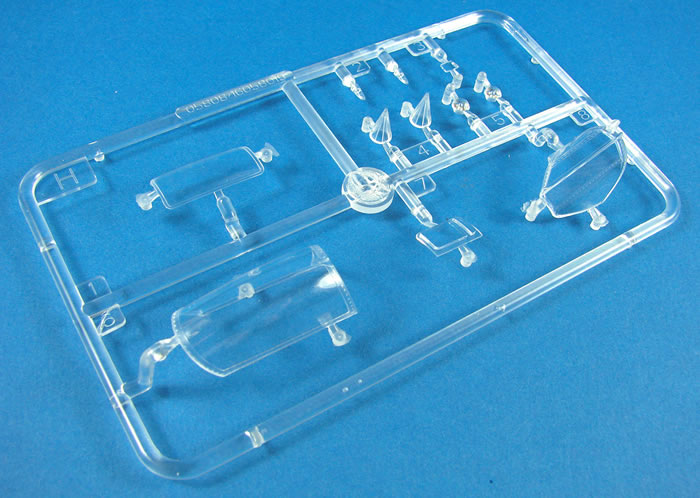
As you can see from this photo, the main hood isn’t designed to be posed open, as previously mentioned, and that is, for me, probably the killer blow amongst the various other issues.
Separate parts
Three parts are included in a separate bag. These are the nose cone and the single-piece intake fairings. More slide-moulding has been used here and the parts look very good.
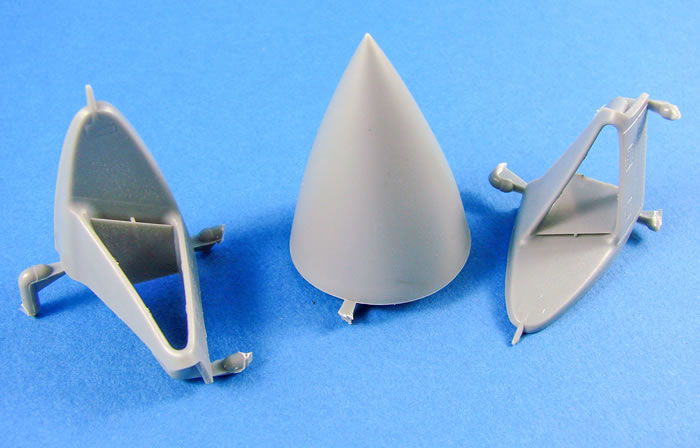
Only minimal clean-up is required to remove the sprue tabs. A sanding sponge will also be needed to remove he slightly fuzzy edges on the intake itself.
Photo Etch
A single fret includes parts for the wing gates, airbrake housing bay bulkheads and intake vanes.
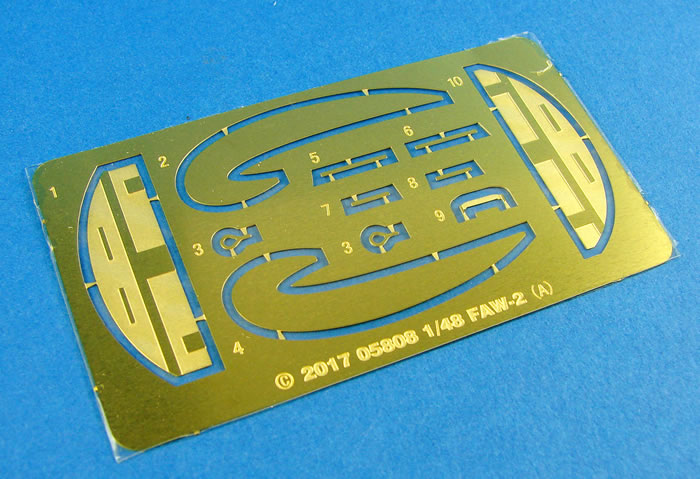
Production is excellent with small tabs holding the parts in situ.
Markings
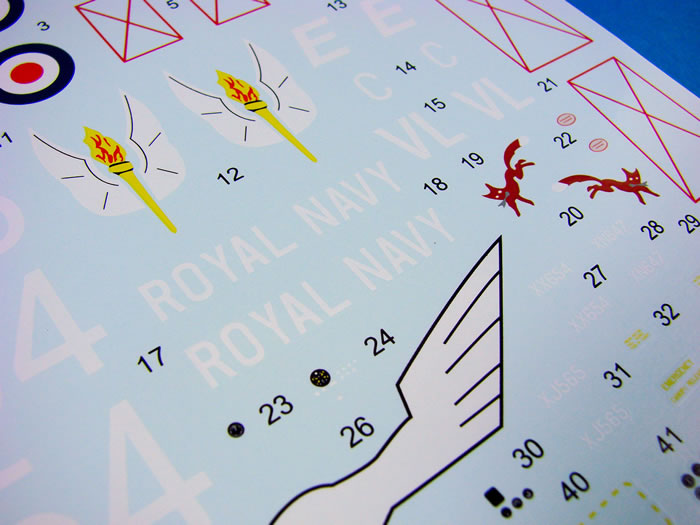
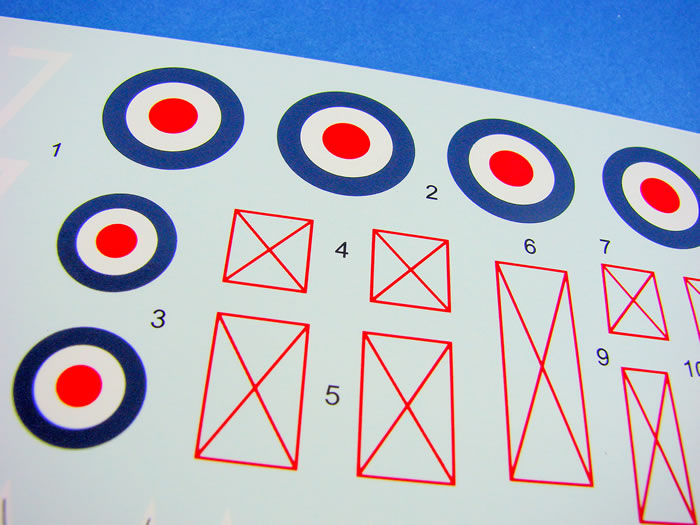
A single sheet of nicely printed decals is included. Printing is glossy, suitably thin and with minimal carrier film. Registration also appears to be correct. Instrument decals are included, but alas, no stencils.
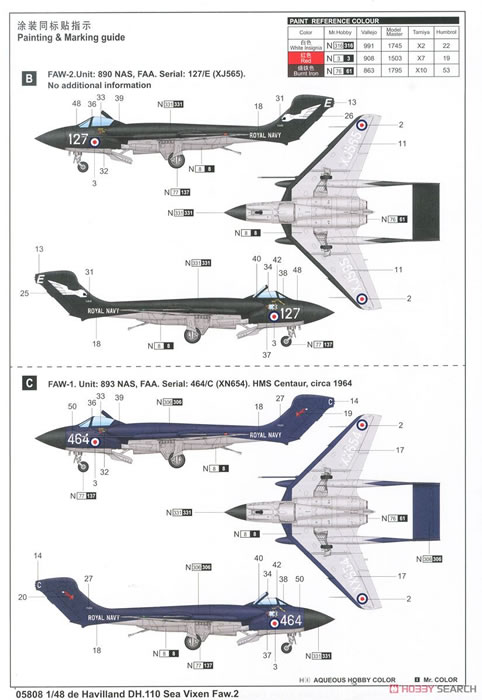
Also, the camouflage colours should be Extra Dark Sea Grey upper surfaces and White below. However, Silver is incorrectly called out below. To compound the problem, Trumpeter supplies white serial number decals for the under wings which, as discussed, should also be white. You'll need to source your own black serial number decals.
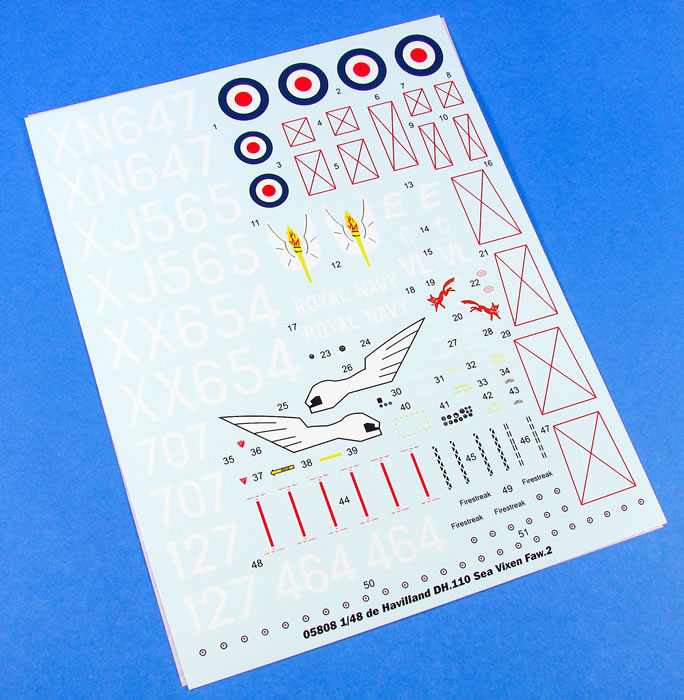
The three schemes are:
-
FAW.2. Unit: 766 NAS, FAA. Serial 707/VL (XN647), RNAS Yeovilton, 1969
-
FAW.2. Unit: 890 NAS, FAA. Serial 127/E (XJ565)
-
FAW.1. Unit: 893 NAS, FAA. Serial 464/C (XN654), HMS Centaur, 1964
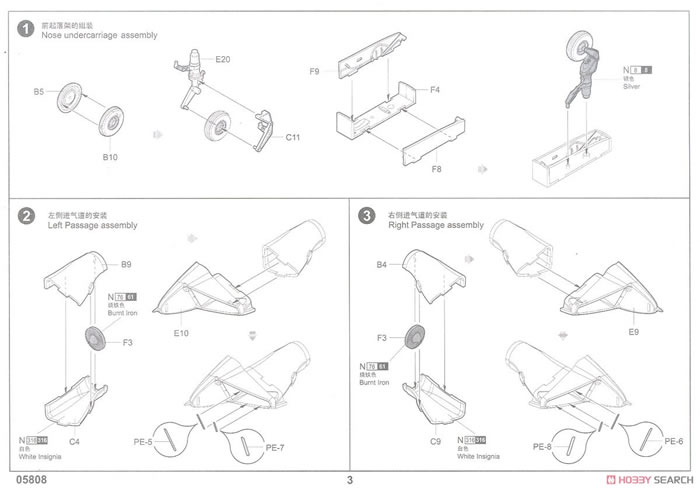
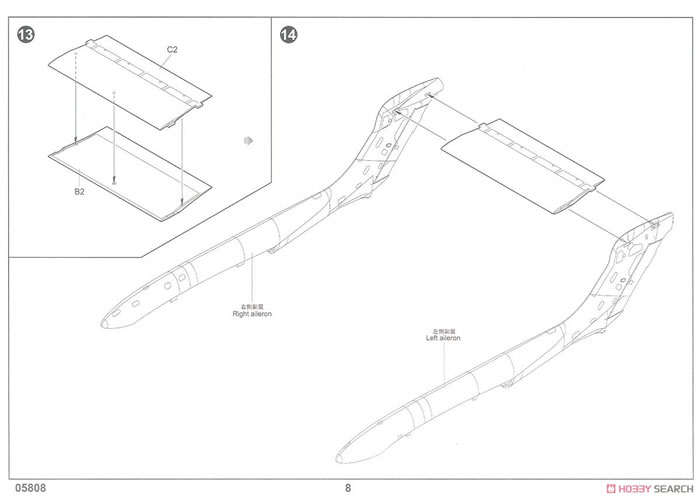
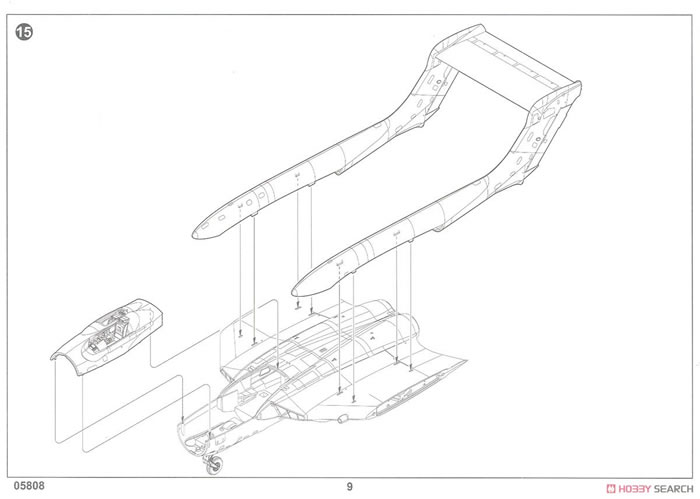
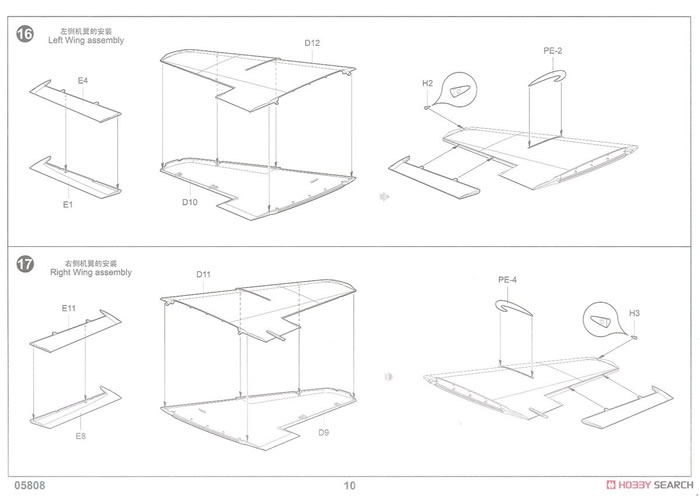
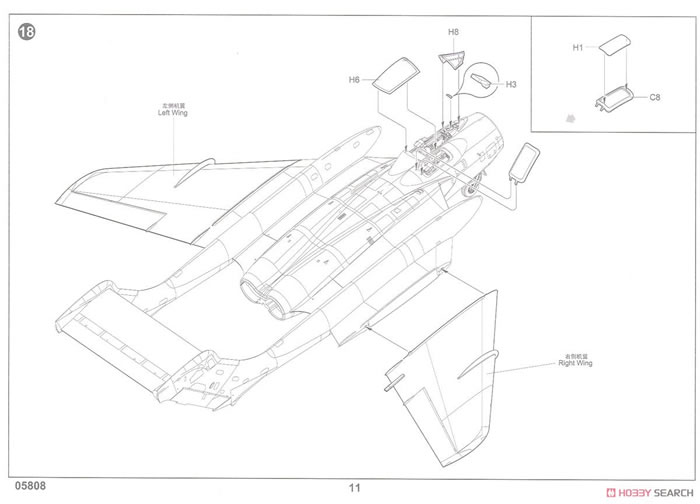
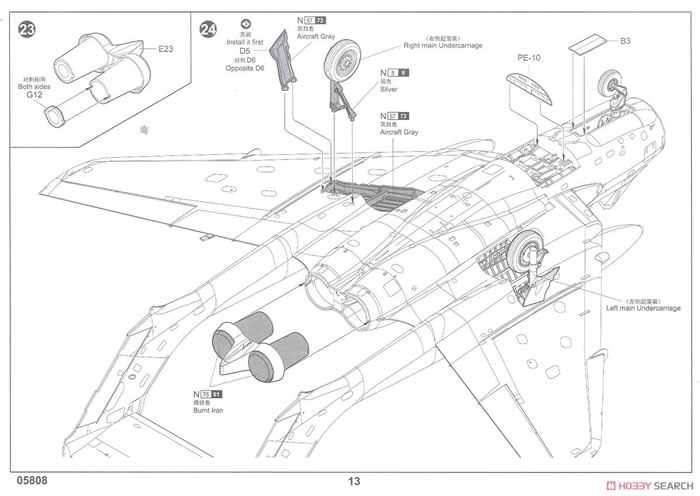
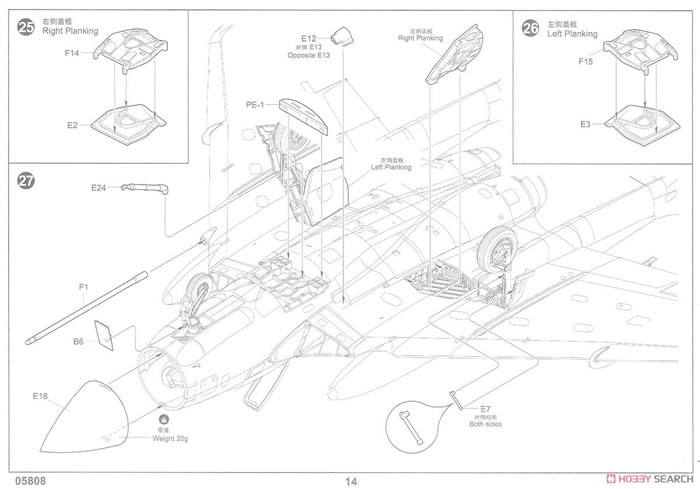
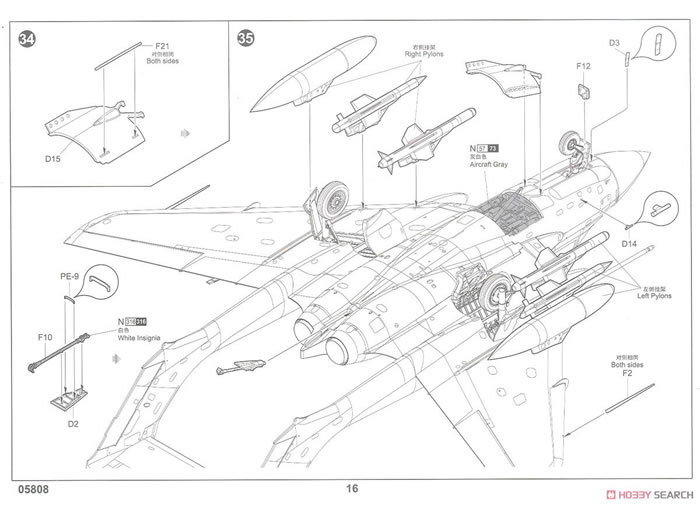
Instructions
I’ve always liked Trumpeter’s instructions. They are clear, non-ambiguous or fussy, and usually logical in approach. Construction is broken down into 35 stages in a manual that spans 18 pages. Come colour reference is supplied during the build.
A colour sheet is included, highlighting the three schemes, with good scheme depiction and paint call-outs, plus decal placement. Other paint codes are supplied for Vallejo, Model Master, Tamiya and Humbrol. I could be wrong here, but the instructions show the undersides as being in silver (specifically Gunze N8), but I am sure these aircraft were white underneath. That could be a problem as the supplied underside codes are also printed in white, so you would need to get a set of more accurate markings that were correctly provided in black.
Another mixed bag from the house of Trumpeter.
I can’t understand why they get things so wrong. There’s plenty of information out there to use as reference. We have shape and size issues with various elements of the airframe, and that lack of option for posing the cockpit in an open position. You’re going to need new cockpit elements, plus seats, wheels etc. to bring this anywhere close to the correct level of detail you’ll require. Then there’s filling the panel lines that are wrong and re-scribing them. You will need new serial decals too. Add to that the tail boom and fin issues, and your work will be cut out.
In the meantime, we can all just pray that Airfix re-release their infinitely better kit, and this one can be relegated to the bin of curios and oddities.
My sincere thanks to Pocketbond for sending this kit out for review here on Hyperscale. To buy this kit, check out your favourite local or online retailer.
Thanks to Pocketbond UK for the sample

Review Text & Images Copyright © 2018 by James Hatch
Page Created 19 June, 2018
Last updated
21 June, 2018
Back to HyperScale Main Page
Back to Reviews Page |
 Home
| What's New |
Features |
Gallery |
Reviews |
Reference |
Forum |
Home
| What's New |
Features |
Gallery |
Reviews |
Reference |
Forum |