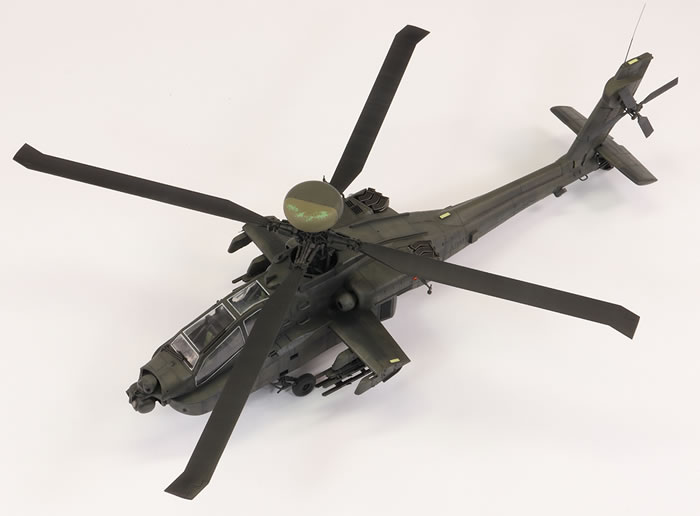
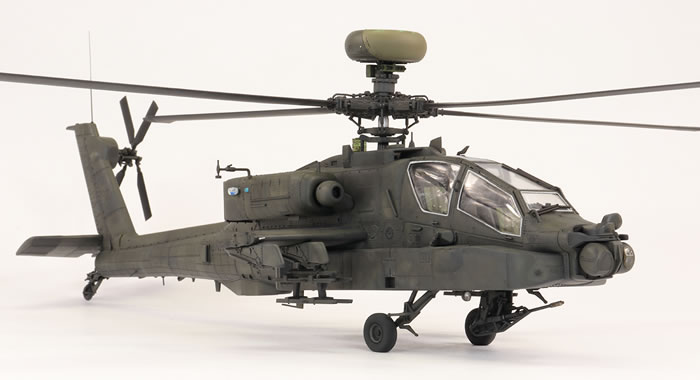
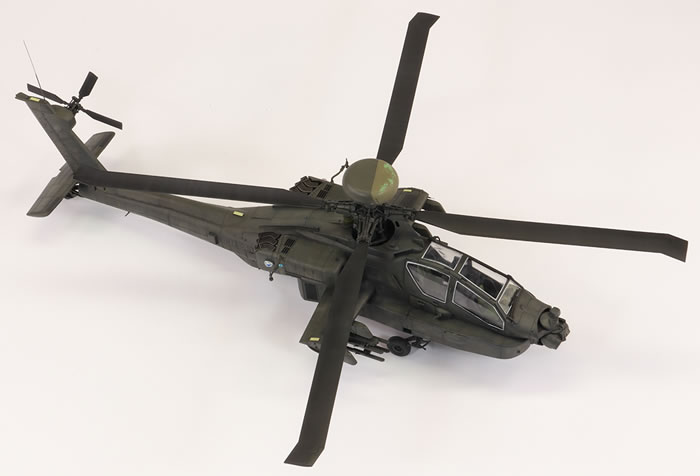
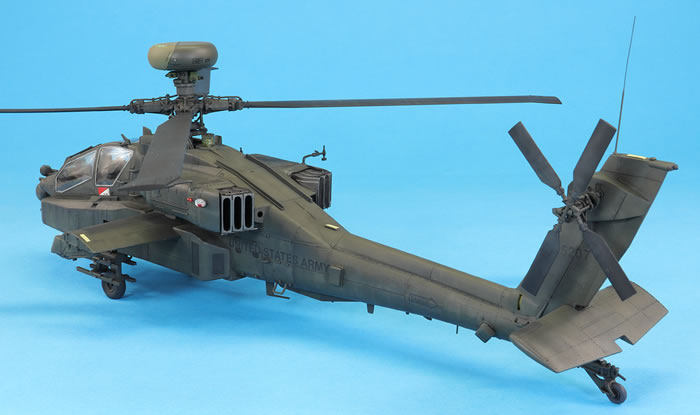
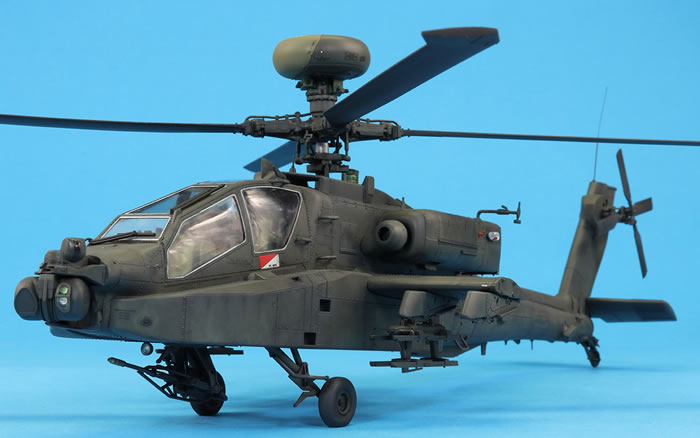
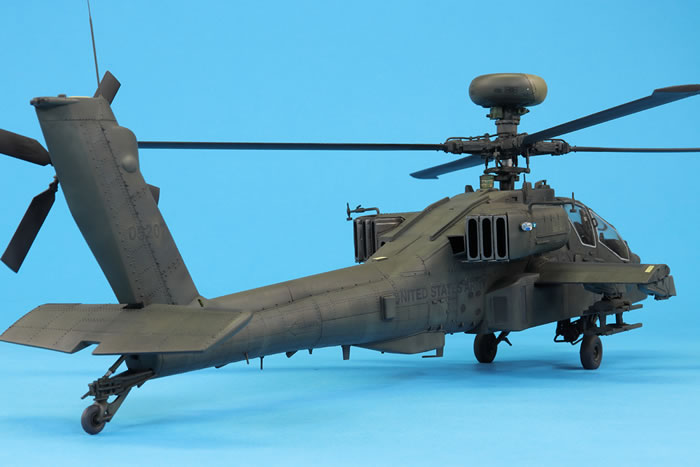
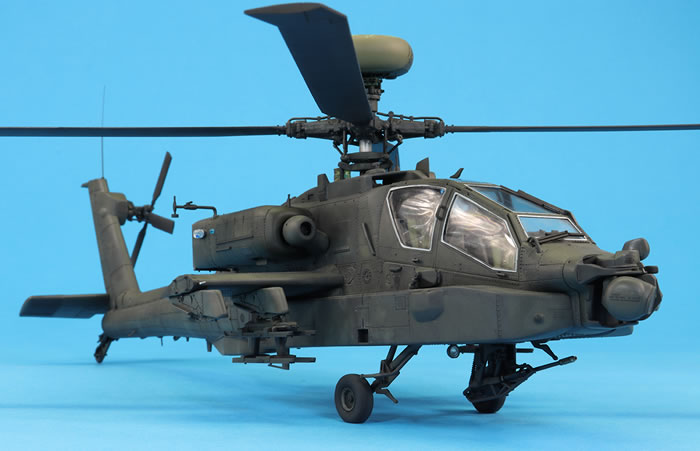
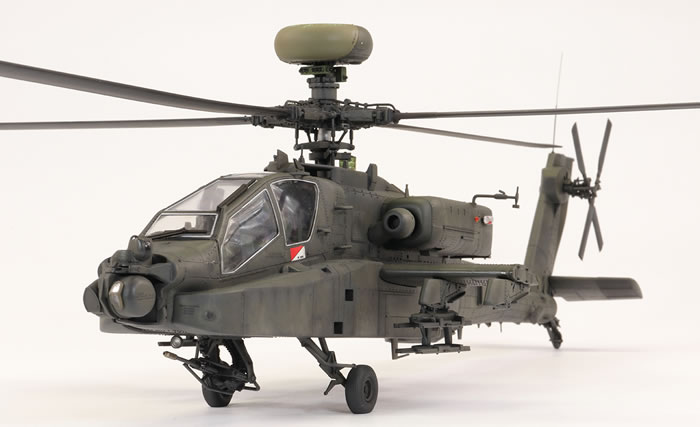
Hasegawa's 1/48 scale
Boeing AH-64D Longbow Apache
|
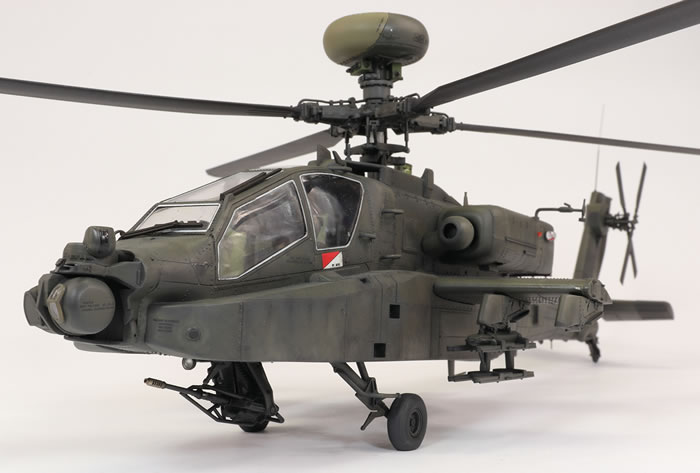
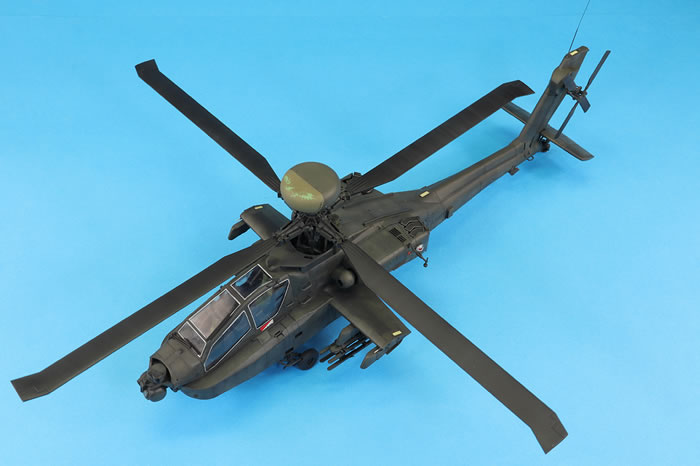
Boeing AH-64D Longbow Apache
2nd Battalion, 159th Aviation Regiment, 12th Combat Aviation Brigade, US Army, Germany 2006
|
with Master gun and ArmyCast decals
by Jon Bryon

Hobby Boss's 1/48 F4U-7 Corsair is available online from Squadron.com
This is one of the most complex kits I’ve built for a while. With nearly 300 parts, monotone green finish and US Army credentials, it was more like building a tank than an aircraft. And I compounded the challenge by making the kit twice and converting one to an Israeli Saraf.
The Hasegawa AH-64 is produced to a standard you would expect from them for a 2001 tooling. The plastic is nice to work and the moulding is pretty good. There are a few parting lines to deal with, but overall the detail is lovely and the kit seems to be considered as pretty accurate for an early block AH-64D.
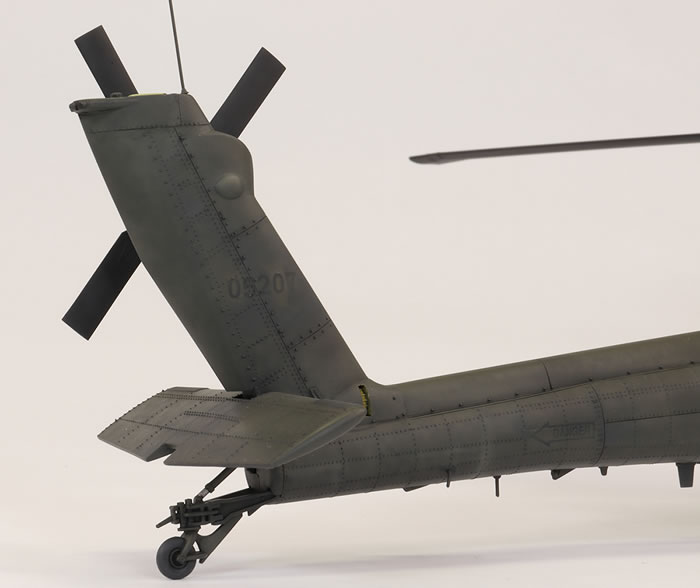
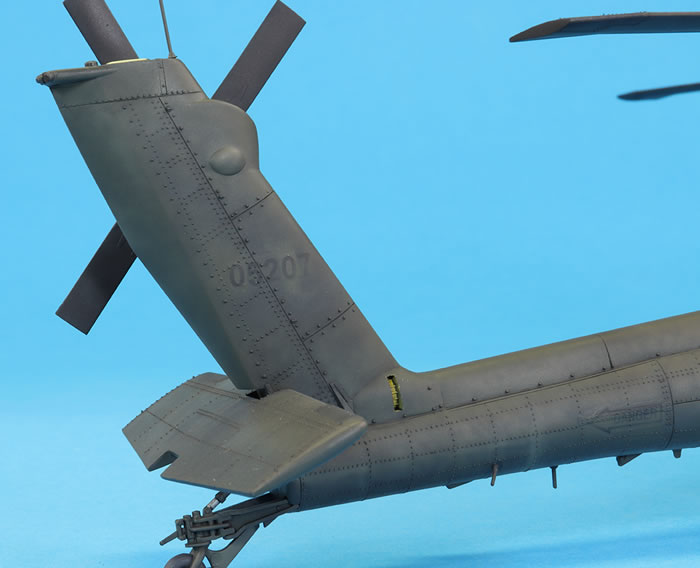
Hasegawa supply decals to model any US Army serial number with instructions for a single specific yet completely anonymous machine. My first task was to find a more concrete airframe to model. Burkhard Domke’s website came to the rescue with some nice images of an early block AH-64D Longbow Apache 05207 taken in 2006 in Germany: http://www.b-domke.de/AviationImages/Apache.html#AH-64D_US. There are a couple of photographs of this particular Apache also on the Air-Britain website, including an image of the left side. With plenty of reference material for 05207, I could get going.
Some modifications need to be made. Part J37, which is a circuit breaker panel, should be omitted as I believe it is only correct for an AH-64A. One of the oval cooling grills on the door beneath the left engine should also be filled and removed. Some further specific changes were required for this particular helicopter:
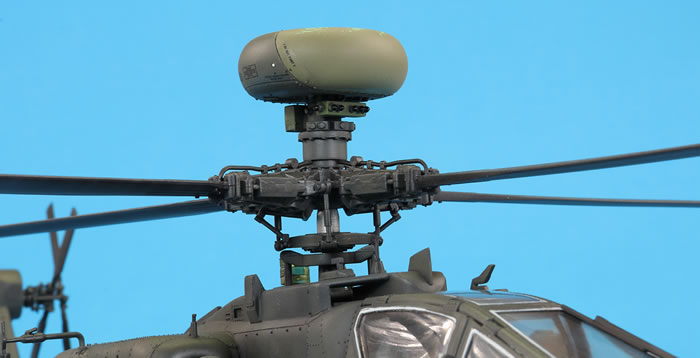
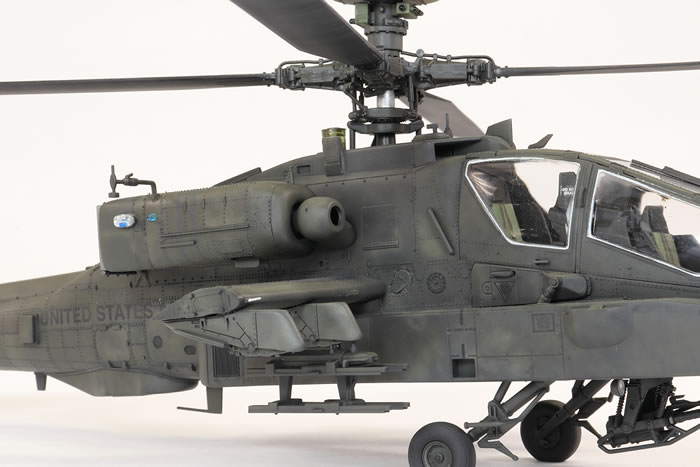
- There is some fin-like structure, which I assume is an aerial of some kind, at the front of the rotor housing on the roof behind the pilot’s canopy. I modified a spare part from an Academy 1/48 UH-60:
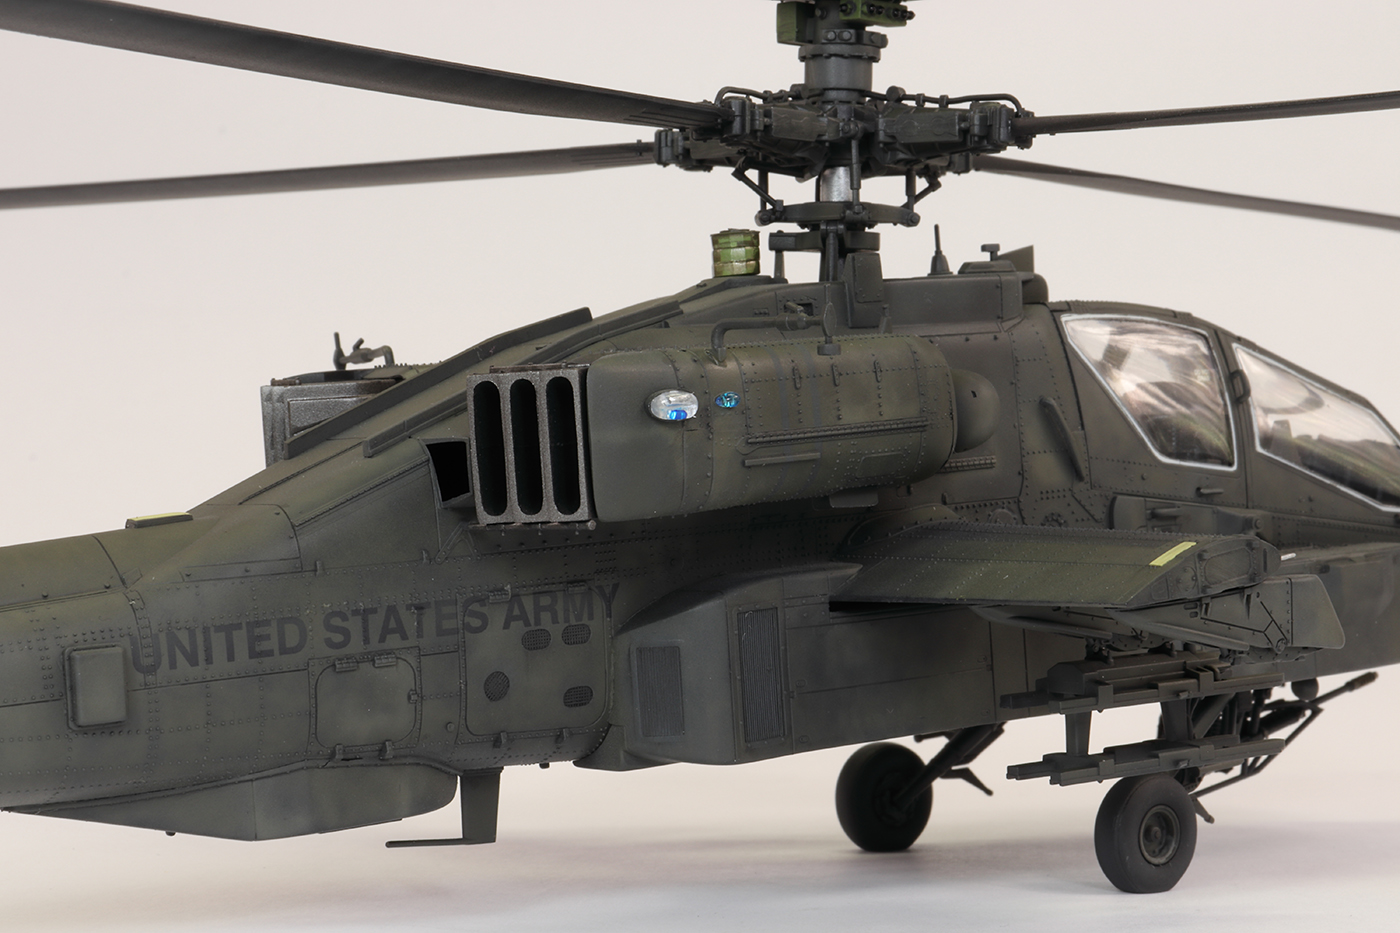
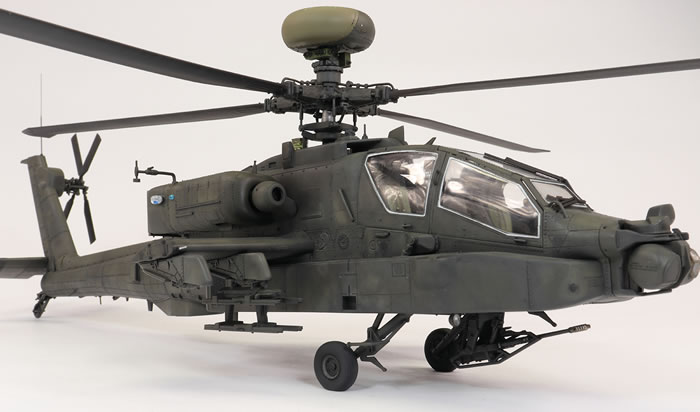
The dark green ‘fin’ is a necessary addition from a modified spare UH-60 part. The modified antennae on the sides of the rotor housing can also be seen.
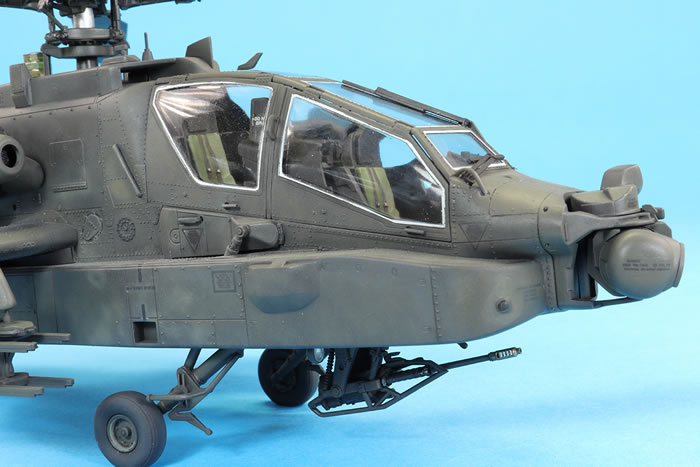
- There are two antennae, one on each side of the rotor housing. These needed modifying to a flat face, which I did with plastic sheet. Some rivet detail was added using Archer Fine Transfer resin decal rivets.
- Part J8, another aerial, was not present on this Apache, and so I left it off.
- Photos show no evidence of part G8 on the real thing, so I did not fit this.
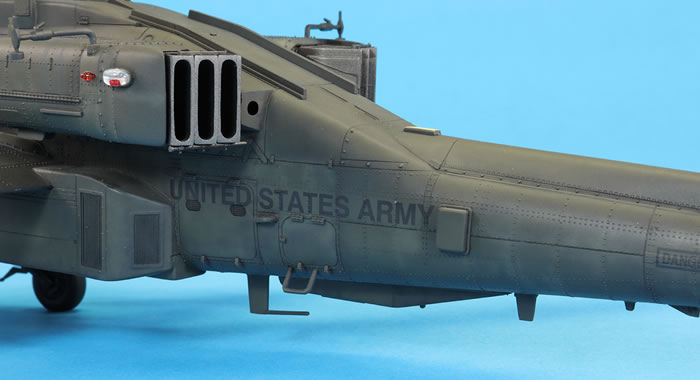
There are some cooling doors which always open under the engine pods when an AH-64 is powered down. I cut the doors out from the engine nacelles and made new open ones with thin plastic card:
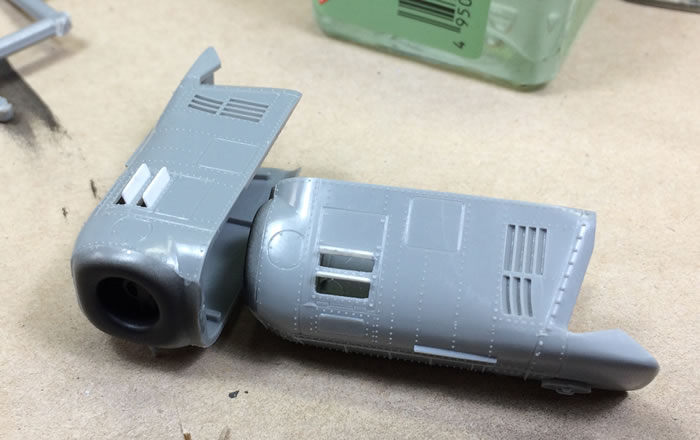
Cooling doors made from plastic card.
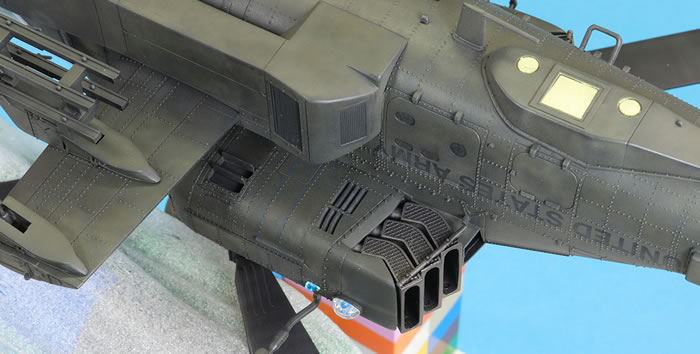
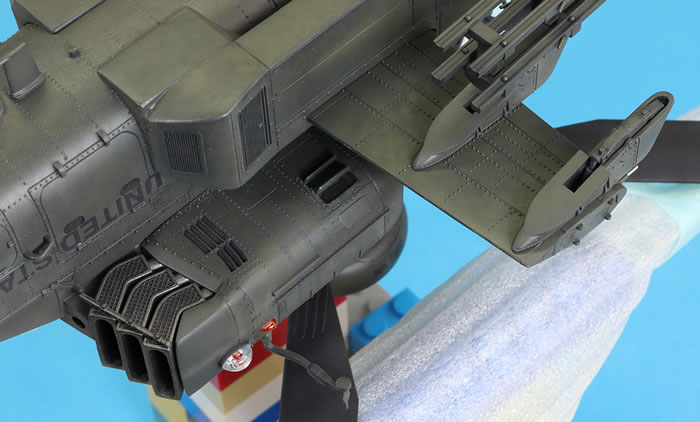
Cooling doors on the finished model.
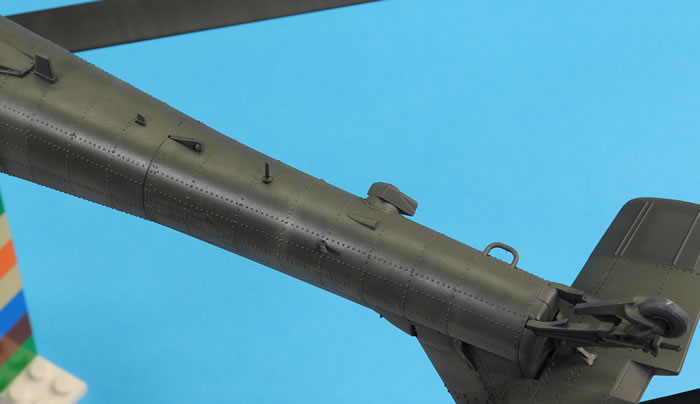
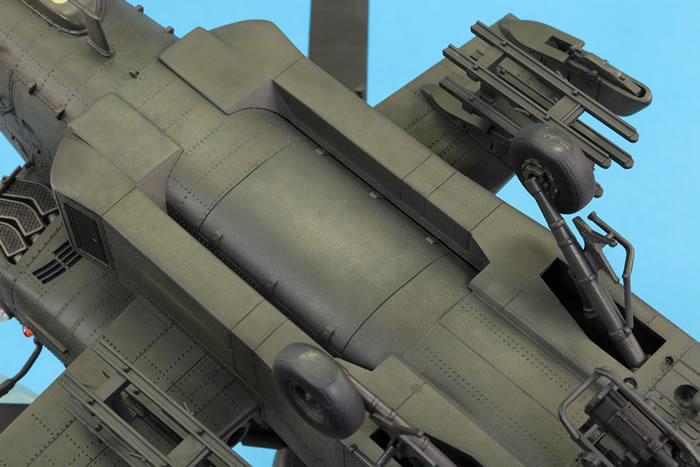
The big concern when building this model is the rivet detail: it’s going to get lost when the fuselage seams are sanded down. I had always planned to use Archer Fine Transfer resin rivets on decal film to replace the removed surface detail and my confidence in this method was boosted by my experience with this product on my Monogram AH-1S. The fuselage halves were joined using plenty of super glue and after sanding down the hardened glue, the missing rivets were replaced:
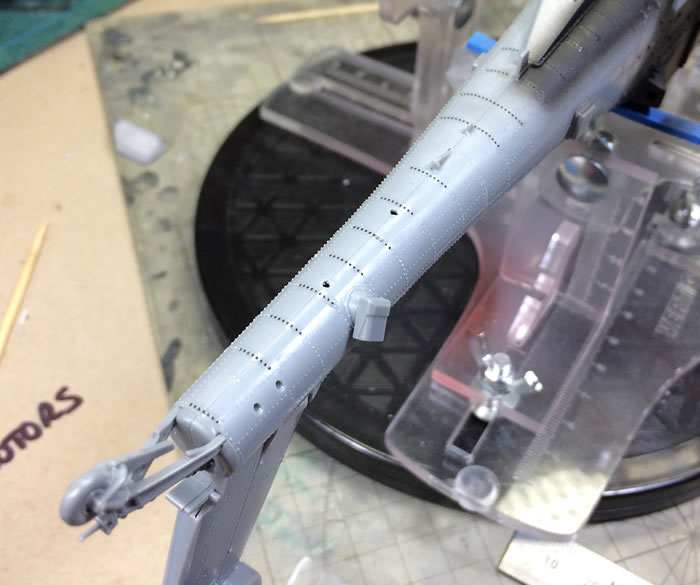
Raised rivet detail lost by sanding replaced by Archer Fine Transfers.
For these rivets I used the smallest available – 0.2mm in set AR88014.
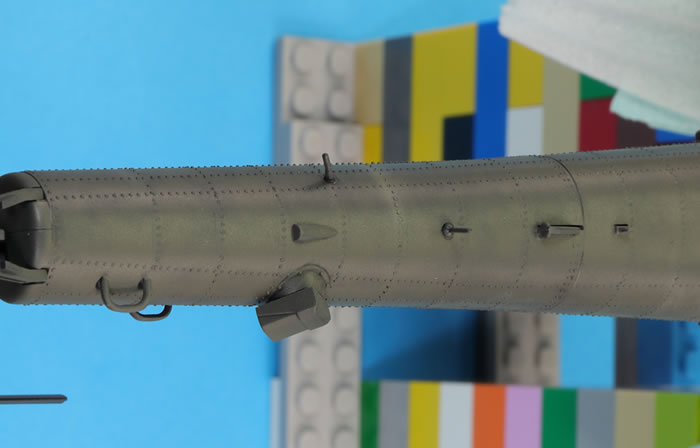
Rivets under paint.
I diligently removed the centreline seam on the upper fuselage between where the engines are mounted before realising this should be a panel line. It had to be reinstated using a Tamiya scribing saw.
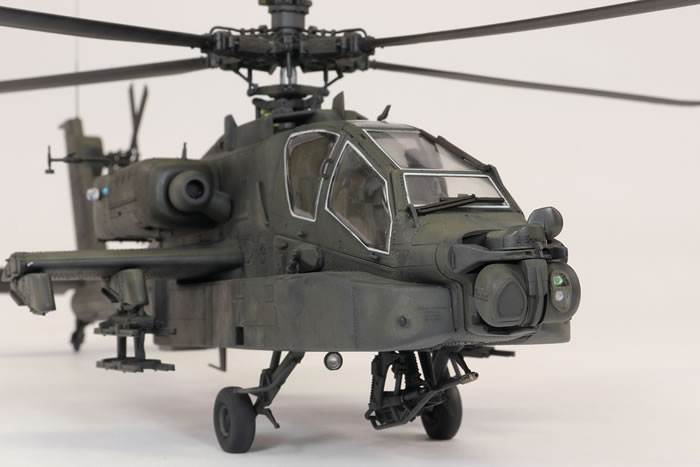
There are some circular sensors on the tip of the tail and towards the front of the nose. As moulded by Hasegawa they looked far too anaemic to me and so I enhanced them with some punched discs from my new RP Toolz punch and die set. This tool is very expensive and I rarely use it, but when it’s needed, it’s very good at what it does.
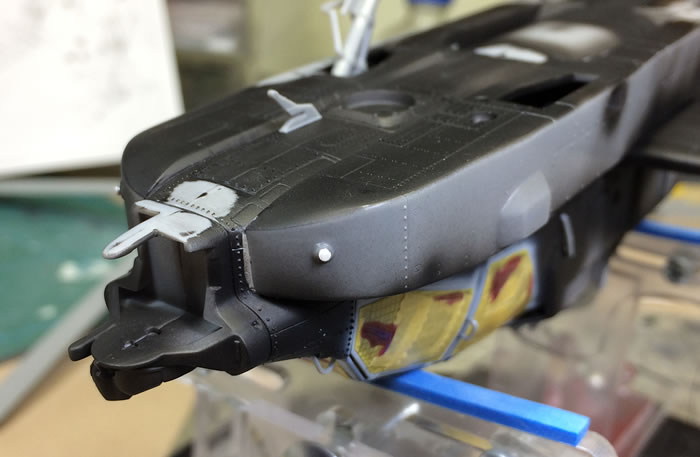
Some detail added with punched plastic discs.
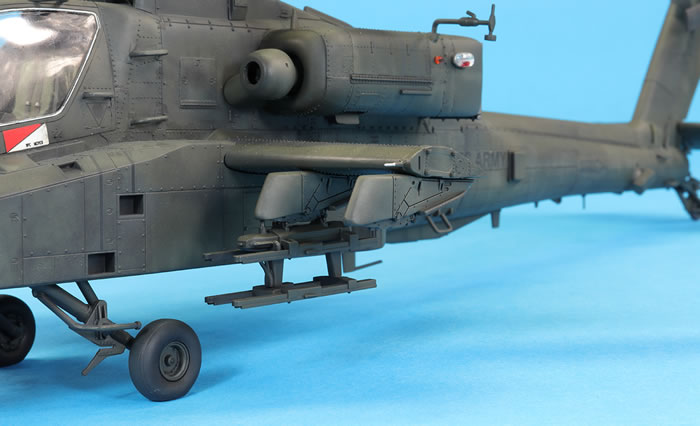
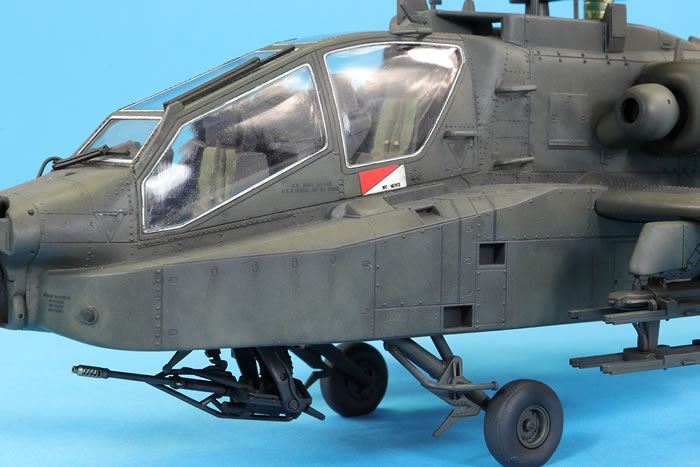
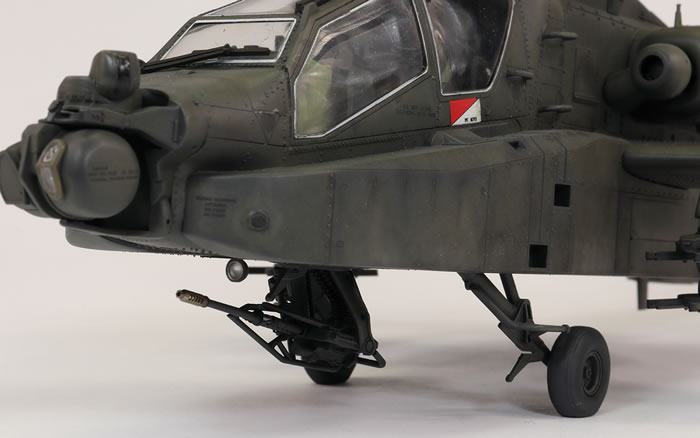
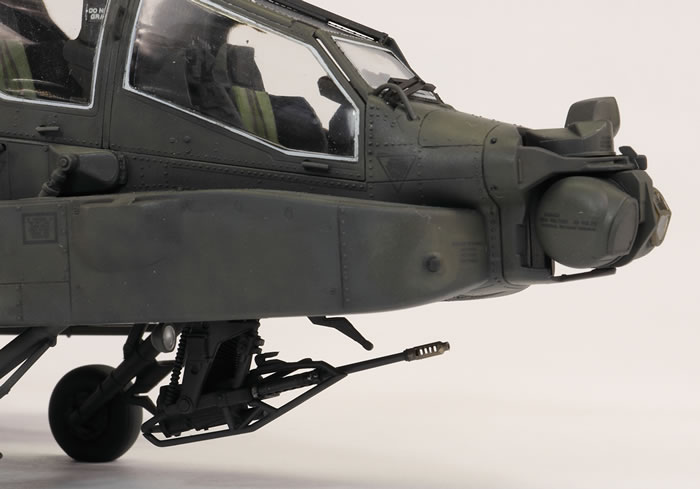
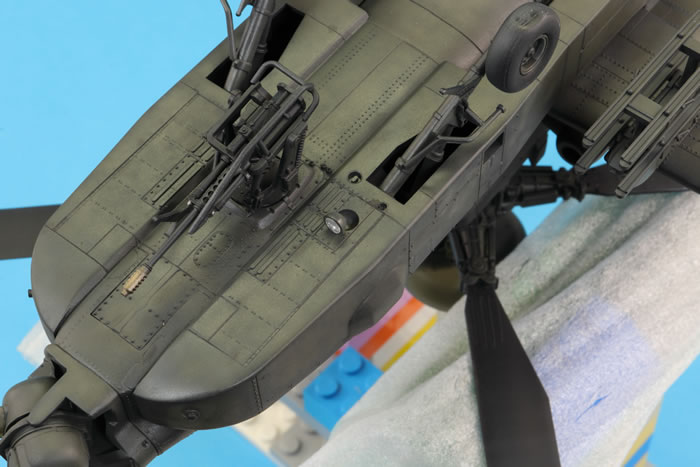
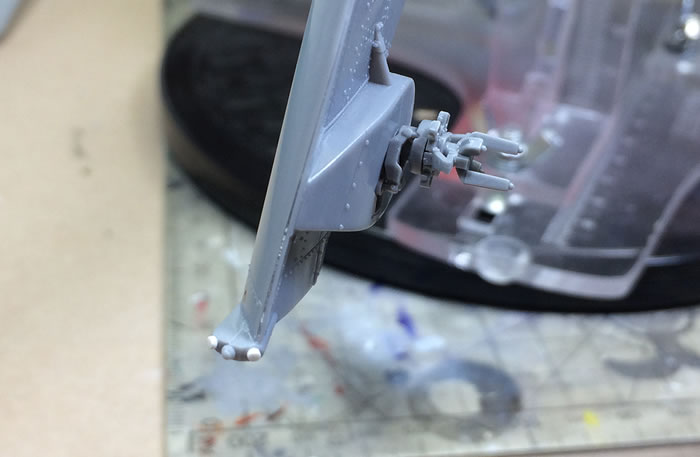
Master recently released a metal and resin set for the Apache comprising a turned metal gun barrel (made of four parts), pitots and tail whip aerial and a resin muzzle. The pictures looked great and so I bought a couple. The parts build up beautifully and are a big improvement on the plastic kit components, but I’m not sure they are visible enough for the expense and effort. The rest of the kit gun is rather simplified, as are many of the more intricate components for the main and tail rotors, the tail wheel (which is moulded integral with the strut), and the area behind the nose-mounted sensor turret. The numerous hand holds are too thick and would look better replaced with a thinner material, as would the windscreen wipers.
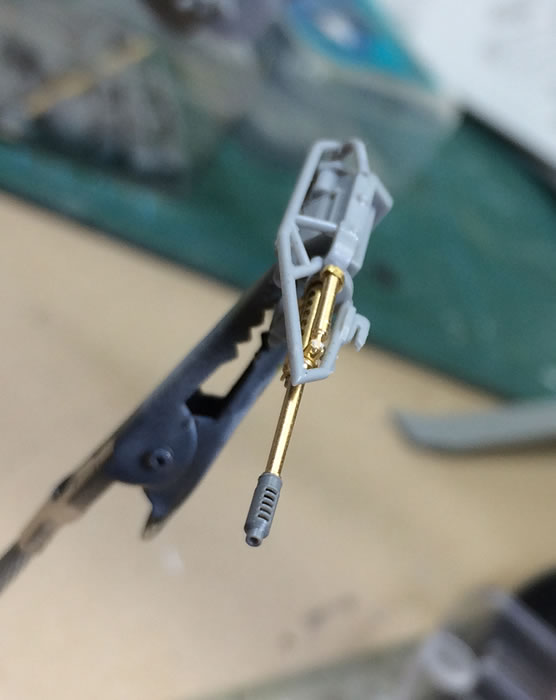
Master gun barrel (in brass and resin) added to the kit’s plastic parts.

The finished gun in place.
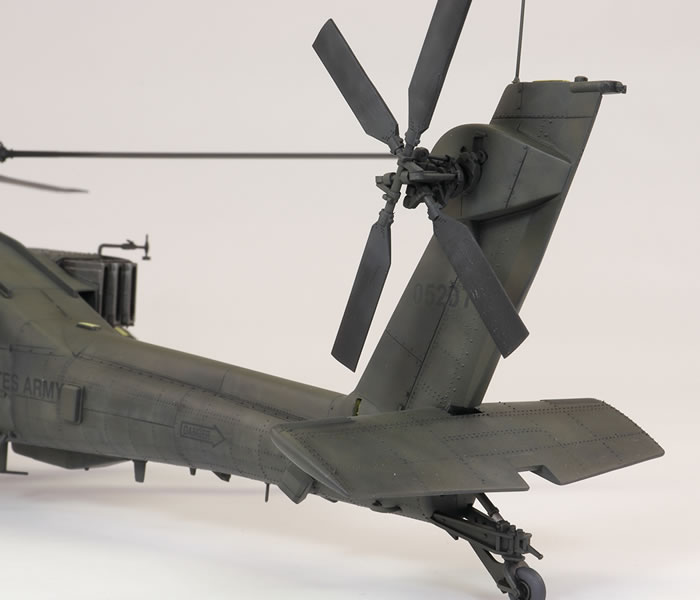
The way the tail rotor attaches to the tail is a little confusing in the instructions. I quickly worked out there is a hole missing from the tail to accept the peg from the hub; I just sliced the peg off. Another ‘gotcha’ was that the poly cap to receive the gun mount did not sit centre relative to the hole moulded in the plastic. This meant the gun would not plug into the fuselage and so that peg had to be removed too.
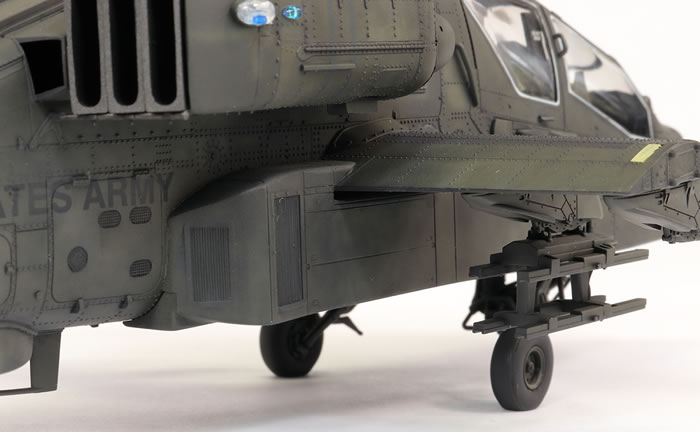
By far and away the biggest challenge for me with this kit was fitting the landing gear. Hasegawa want you to fit it prior to attaching the big fuselage side pods. I wanted to attach it all at the end, which dry fitting showed is possible. The problem is that there is a huge amount of slop in the fit of the gear to the fuselage, and that there is nothing provided by Hasegawa to help you get the correct geometry when constructing the multi-part main gear legs themselves. My method was to make up and install one side, let it set, and then try and get the other side to match. This failed, and the main landing gear are wonky. I am still trying to figure out a better method for my second Apache…
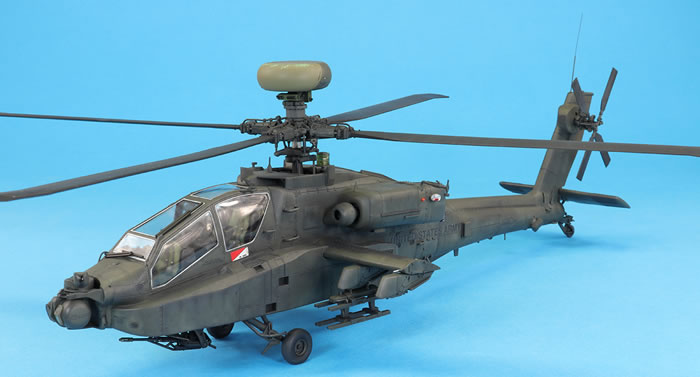
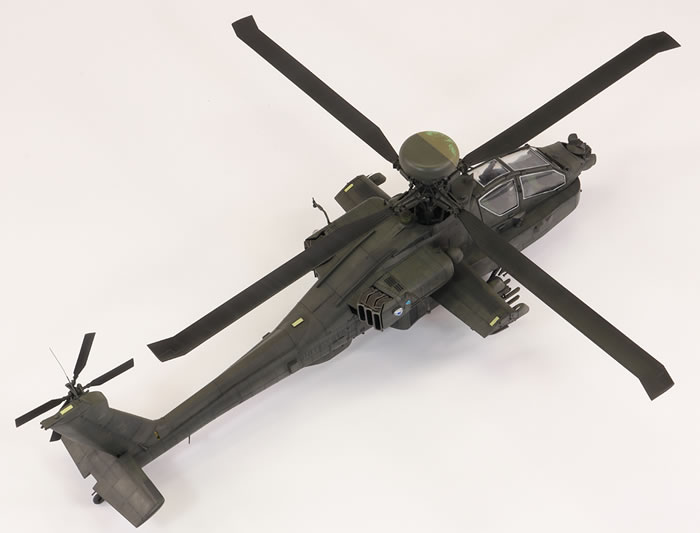
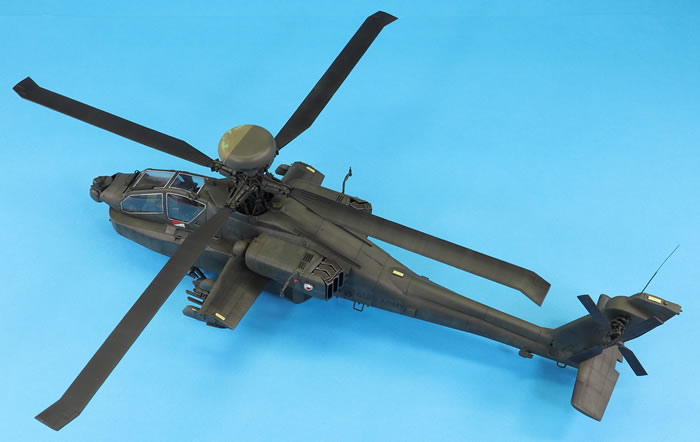
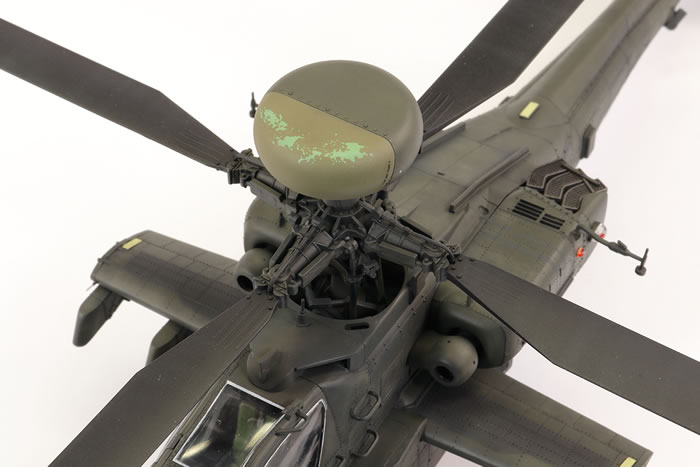
This AH-64 needed a disco IR jammer behind the main rotor mast. There is no mention of this in the instructions, but three parts from clear sprue Q make it up. I attempted to get a purplish colour by mixing clear red and blue, but that did not work. In the end I settled for a gold/green colour, which it appeared in some photos, but the end result is rather ill-defined and crude.
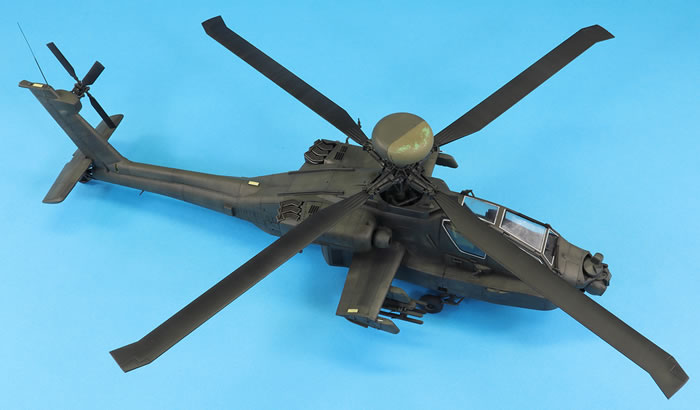
As mentioned above, the main rotor mast and hub is simplified, but goes together easily enough. Unfortunately the main rotor blades were a bit warped, and in the wrong direction, so they deflect upward slightly on the finished model.
The US Army’s Apaches are dark green, and the shade does not appear to be widely available from my usual paint manufacturers. Happily, the Hataka Israeli Air Force Paint Set (Modern Rotors) CS71 includes lacquer paints for my IDF AH-64D-I and the standard US Army Helo Green which I could use on this US Army Longbow. I duly bought the set.
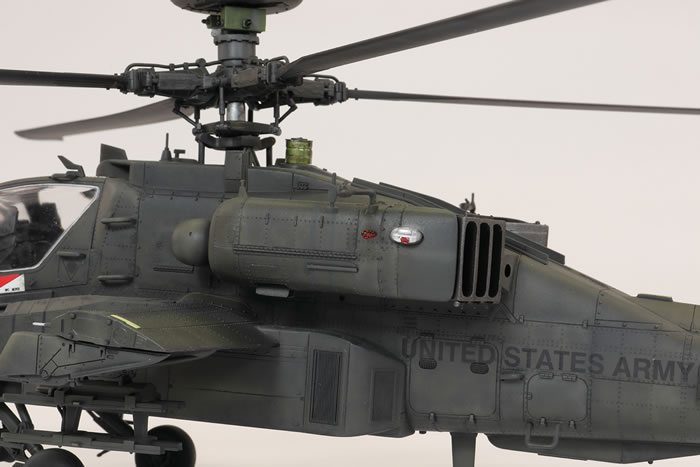
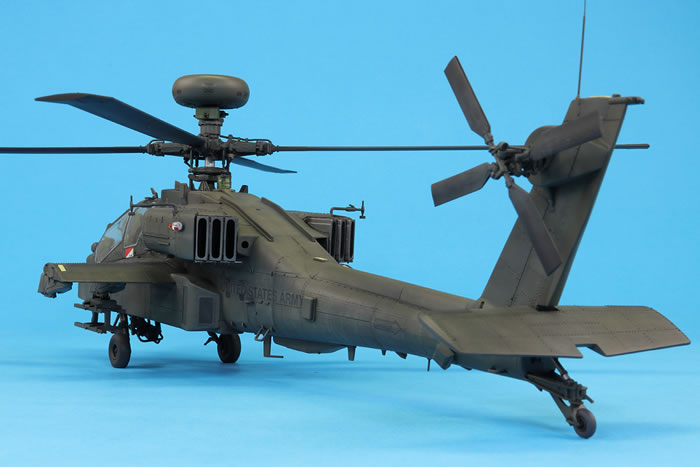
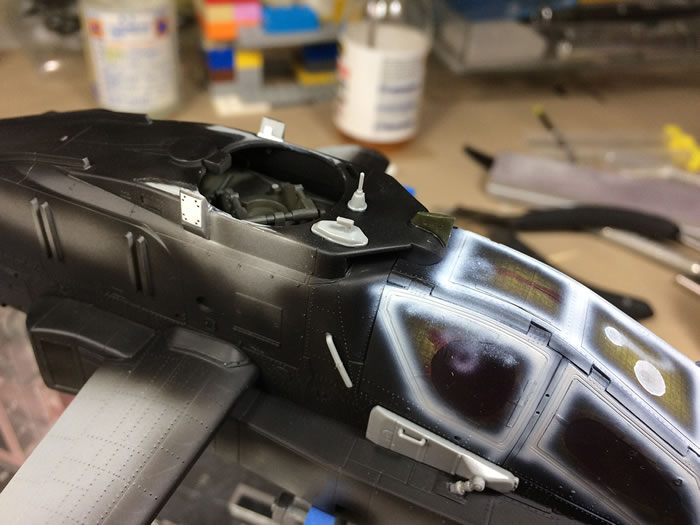
The model was primed with Mr Finishing Surfacer Black. I kept the engine pods off to make airbrushing between the engines and wings easier. Over this I then began to mottle a highly thinned coat of the Hataka green using my Iwata Custom Micron. The idea was to end up with a very dark, patchy finish; US Army Longbows have very uneven and dark finishes. Over this I then mottled further layers using the green lightened with one of the sand tones in the set. Overall I was pretty pleased with the patchiness, but the tonal variation is somewhat reduced in the photos. The black areas of the wings and horizontal stabiliser were also airbrushed on using a dark grey.
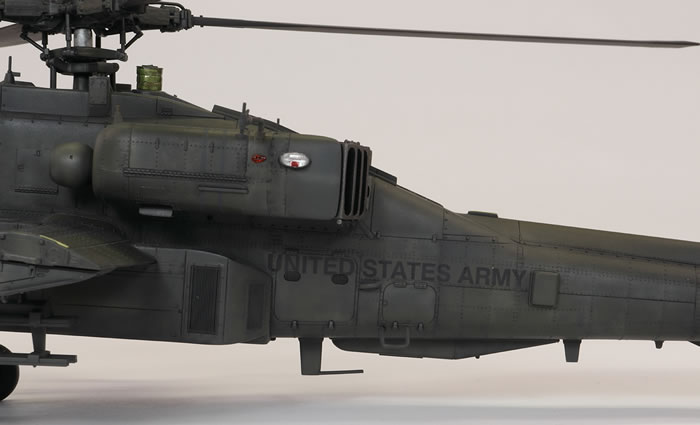
Hasegawa supply the serial numbers and UNITED STATES ARMY lettering in the wrong font. It has angular corners, whereas the actual font is rounded. This caused me some trouble. Aftermarket decals for US Apaches are very thin on the ground. Two Bobs made a set, which is long out of production and I could not find, and ArmyCast make a set for a late-block AH-64D with the upturned exhausts. The latter has the correct font. In the end, I bought the ArmyCast set just for the lettering. Sadly, there are no usable ‘0’s on the sheet to make up the tail serial (I thought there were two ‘0’s but after applying them it turned out they were edged in white!). The ‘5’, ‘2’ and ‘7’ were no problem, and I managed to get two ‘0’s from the Wingman sheet that came with my AH-64D-I conversion set, but this still left me two ‘0’s short, and they were too small to mask. I spent a happy couple of hours going through my spare decals and those in my stash. I eventually found a perfect match in a 1/48 Airfix Hawk kit, with two ideal ‘0’s amongst the RAAF markings! Ecstatically happy (it’s the little things in life), the kit could now be decalled. The numbers that make up the tail serial did not need to be applied perfectly level as photos of the real thing showed they were slightly crooked.
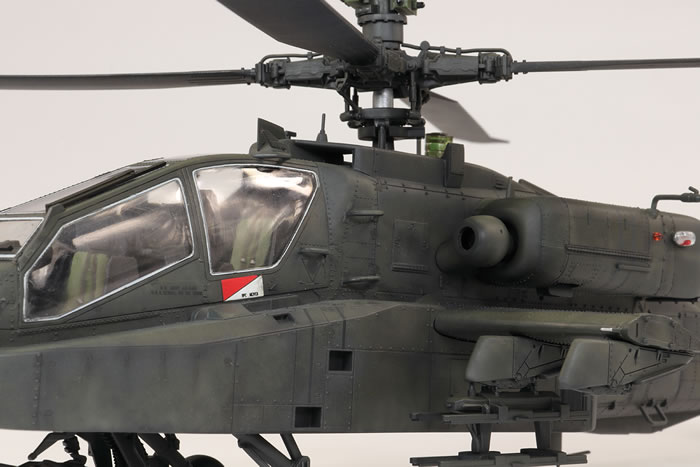
All the decals went down pretty well using a variety of setting agents. This took a while as any silvering would be highly visible against the dark surface and there was a lot of raised and recessed detail for them to conform too. I think ArmyCast got the UNITED STATES ARMY decal a little too large. Hasegawa supply some stencilling, but not enough compared to the real thing. I comforted myself with the fact that the markings in real life are extremely subdued and quite difficult to make out from the overall murky finish. The diagonally split red/white rectangle on the port side under the canopy was cobbled together from the ArmyCast sheet.
Further weathering was applied using some oil washes and overspraying the black markings with thinned US Army Helo Green. The Longbow radar was painted up using a variety of greens to match those in the photos, and I noted that the finish of the actual radar section was peeling to reveal a turquoise-coloured surface underneath. I mixed up a concoction that I thought would work (but in the event did not quite match as it wasn’t blue enough) and then added some masking fluid with a sponge. Once the olive drab for this section was sprayed and dried, the masking fluid was rubbed off to reveal the unusual colour underneath. The final finish for the whole model was Mr Color GX113 Clear Flat.
It felt like there were endless parts to add to finish the model. The engine nacelles fitted quite well, but I probably should have prepped them a bit better for a more seamless joint. I noted quite late that the light underneath the helicopter should really be in the stowed position, but my painted one wouldn’t fit in the recess. I’ve therefore modelled it deployed. Everything else fitted in place quite easily.
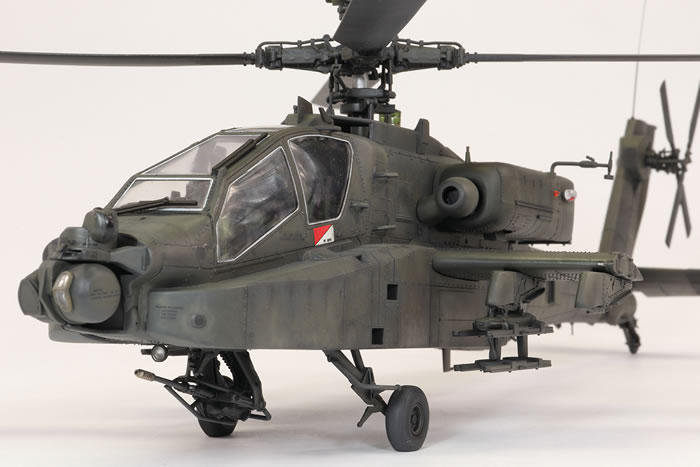
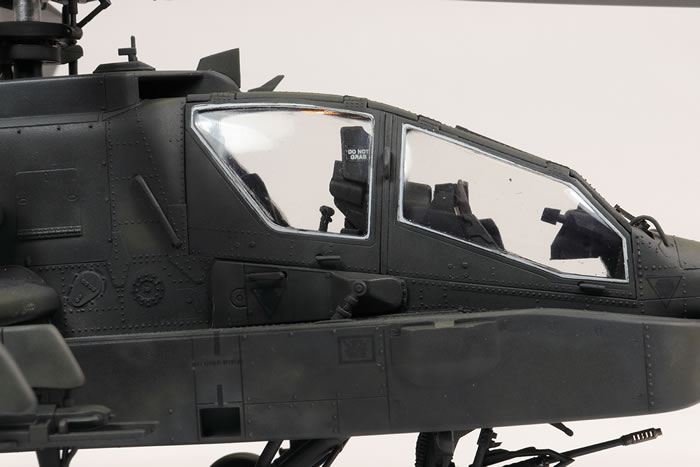
The final step was to remove the canopy masking. This was my greatest disappointment with the model as the pale coloured sealant between the glass and the frame was very uneven. It’s very visible and shows up my lack of accuracy with the masking. If I need to do the same on my Israeli Apache I will have to use a different plan to produce a neater finish.
Aside from the disappointment with the canopy and, I realised as I was taking photos, an unfortunately misaligned wing pylon, I am rather pleased with the result. In resizing the photos, a number of other construction errors become apparent: there is a gap between the front cockpit door and the main frame, and one of the stencils for the starboard step did silver a bit over the recessed detail. The kit is complex but essentially well-engineered (aside from the landing gear) and fits together quite well. I was very surprised at how much more complicated a machine it is to model compared to the AH-1Z and it’s a lot bigger than I expected, too. I’ll now be pressing on with my Israeli version, which in its much lighter colour scheme will be an interesting foil to this dark-coloured beast.
For more articles like this one, please visit my website http://www.jonbryon.com.
Text and Images Copyright ©
2019 by Jon Bryon
Page Created 18 October, 2019
Last Updated
18 October, 2019
Back to
HyperScale Main Page

|
 Home
| What's New |
Features |
Gallery |
Reviews |
Reference |
Forum |
Search
Home
| What's New |
Features |
Gallery |
Reviews |
Reference |
Forum |
Search