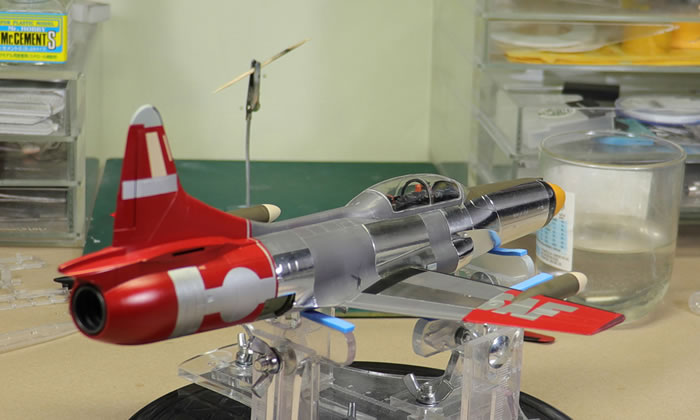
Kitty Hawk's 1/48 scale
Lockheed F-94C
Starfire
|
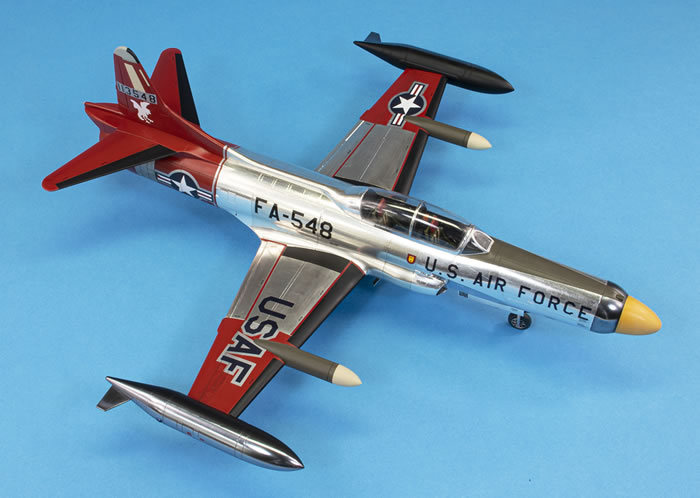
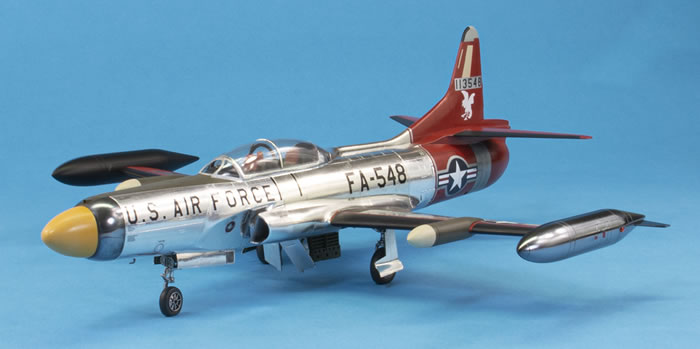
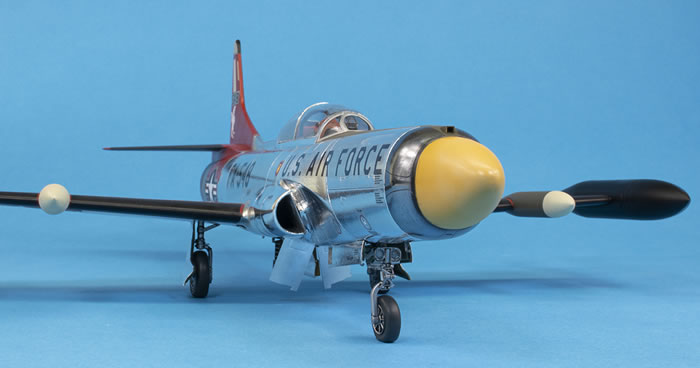
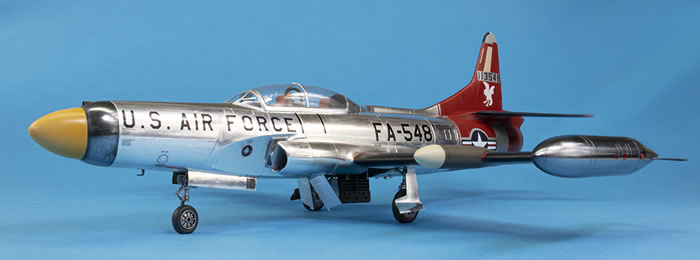
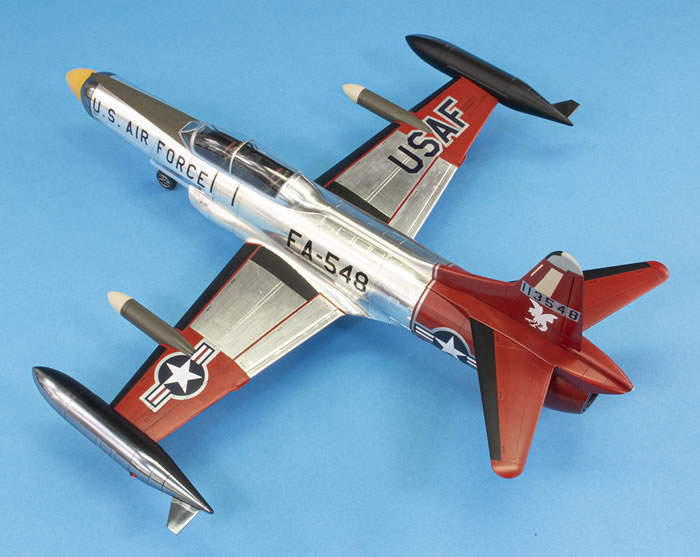
Lockheed F-94C Starfire
US Air Force, 29th FIS, USA 1956 |
with Caracal Decals
by Jon Bryon

Hobby Boss's 1/48 F4U-7 Corsair is available online from Squadron.com
I still remember the moment I read about this kit being released. I was gobsmacked. Who was Kitty Hawk? And why did they choose an aircraft as obscure as the F-94C Starfire for their first release? And was it any good? I love 1950s US jets, and they are still woefully under-represented in 1/48 (Skyknight? Cutlass? Tiger? Phantom? FJ-2/3 Fury? Banshee? F-86A/E/H? etc. etc.). I was living in China at the time and dashed around to my local model shop. I was gobsmacked again: he’d just had a delivery and the kit was in stock.
The kit looked good in the box. There’s a fair amount of detail, some photo-etched brass, decent decals and it appears well moulded. It was released back in 2012 and as the years have rolled by there have not been many issues raised regarding accuracy. I was going to look forward to this one; it was right up my street.
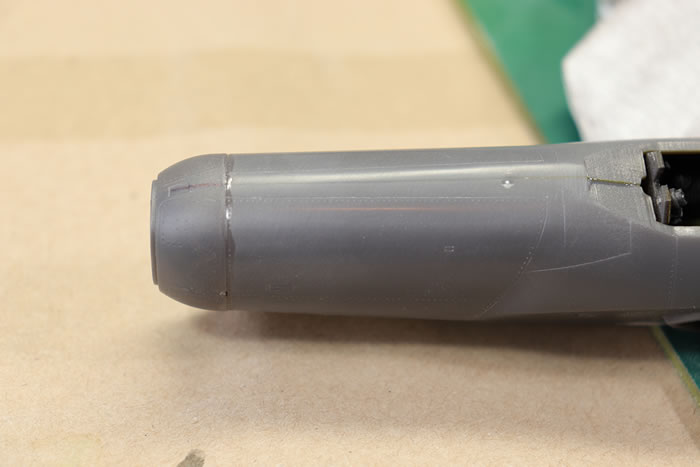
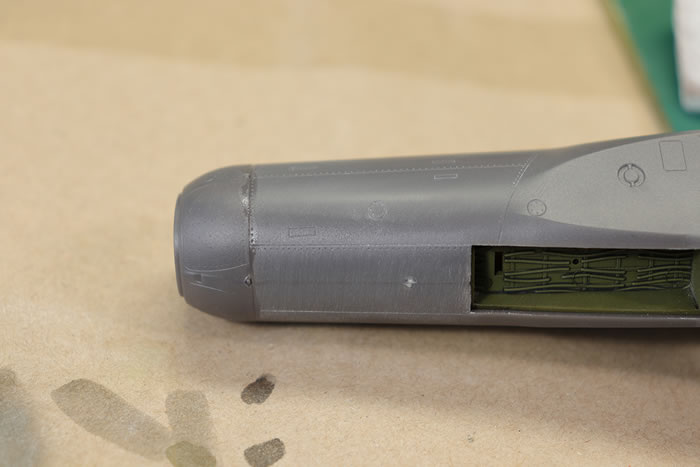
Sadly the moulds were clearly not perfect. There is a very noticeable surface texture, especially on the wings and upper fuselage. Whilst this is a problem in many modern kits (the Eduard MiG-21s, for example, also suffer from it in 1/48), this was an order of magnitude worse and it does need to be polished out for the sake of the natural metal finish this kit will invariably be finished in. Unfortunately, this is made difficult for two reasons: One, the surface detail is very nicely done and restrained, which means it easily disappears when smoothing the plastic out. This would not be so bad were it not for the second reason: the plastic is hard and nasty. Usually I would go over the recessed detail with a scriber to deepen it so it doesn’t disappear under sanding. Because the plastic is hard and rough, this was a nightmare and the scriber would jump and wander all over the place. It’s a chore. In other areas, like the rocket hatches around the nose, the surface details is indistinct and also had to be rescribed.
The moulds also exhibit another oddity, which I believe has subsequently become a Kitty Hawk trade mark: locating pegs that don’t match. The seats, for example, need their pegs cut off as there are no matching holes in the cockpit floor. Other pegs are just better cut off anyway to improve the fit, such as for the wing halves (see below), the rocket pods and the wing tip tanks.
There is a PE fret in the kit. Some of the parts are very nice, like the overlays for the air brakes. Other parts are weird, like the seatbelts. And other parts just don’t seem necessary, like the little corners for the nose rocket doors and the windscreen wiper.
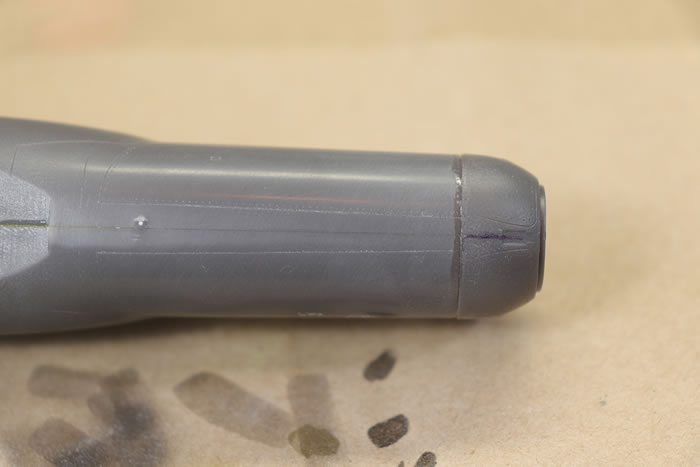
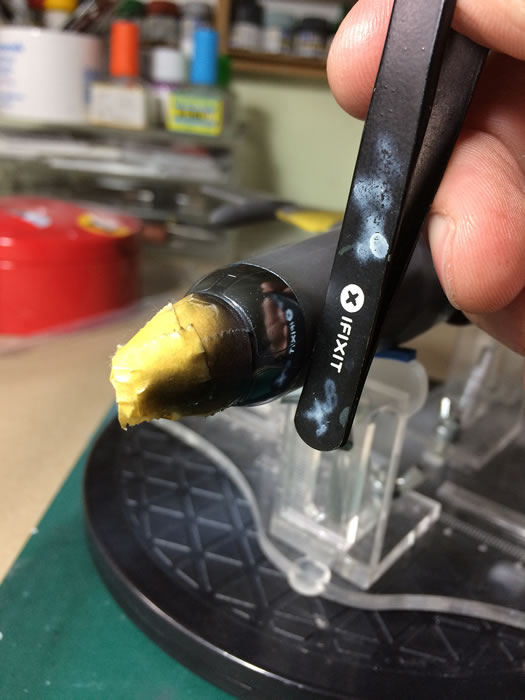
Overall I think the fit of the kit is good. Some people have complained the plastic doesn’t react well to standard glues, but I had no trouble using Tamiya Extra Thin and Gunze Mr Cement S. I used CA to join the fuselage halves to prevent ghost seams. The fit can be improved by making a few modifications. First, don’t bother with part C36. This is the inner nose section that serves no purpose whatsoever other than to distort the shape of the nose and make the outer part (with the rocket doors) not fit well. By leaving C36 out, the nose pieces fit very well. Remember to add nose weight. I used little lead balls rather than the supplied ball bearings. Be careful fitting the nose cone as it has an ‘up’ and a ‘down’.
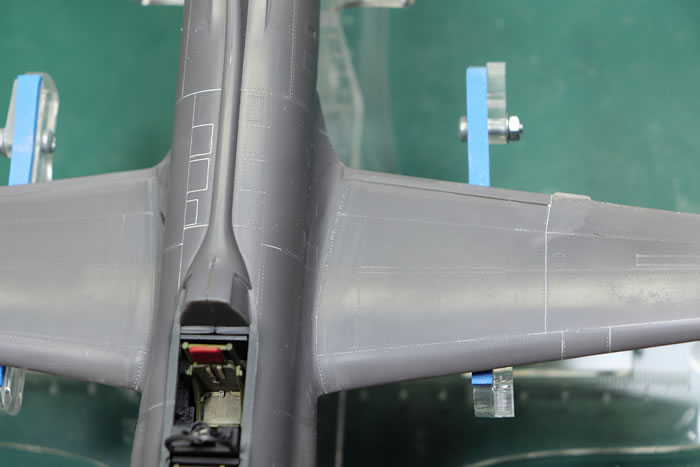
Secondly, remove the locating pegs from the wing halves. I attached the lower wing to the fuselage first and then the upper halves. This resulted in as good a joint as I could have expected. Doing this does, I believe, compromise the dihedral. I’ve read that this should be 7 degrees; mine is about 4.
The worst fitting part is the canopy. There are two problems here. The first is that the clear part joins directly on a frame made from grey plastic and the fit is good, but not that good. The second is that the frame is designed for the canopy to be open, not shut. It took a lot of thinning of the inside of the rear of the canopy frame to get the canopy to close, and even then I had to use CA to remove the rear hinge line and rescribe it in the plastic. The windscreen fits okay, but needs to faired in with some filler.
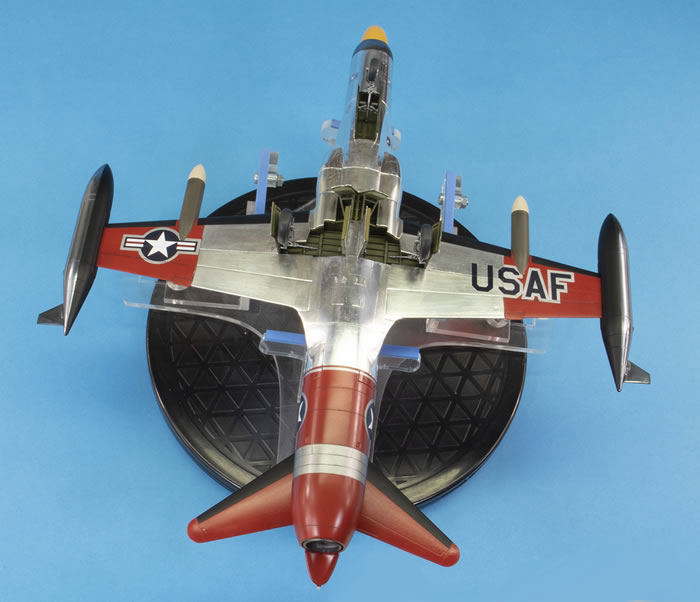
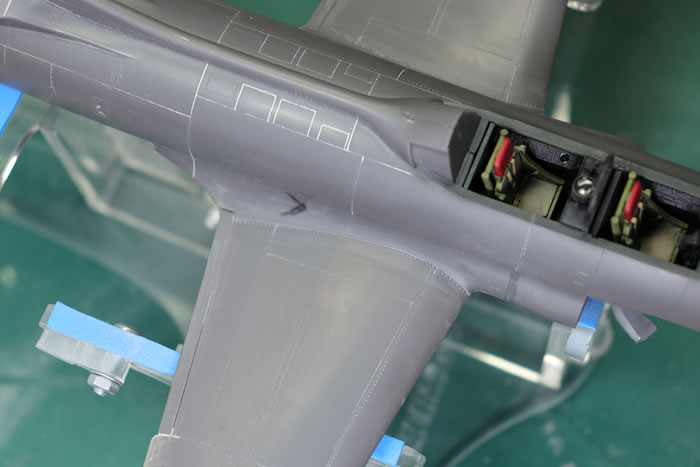
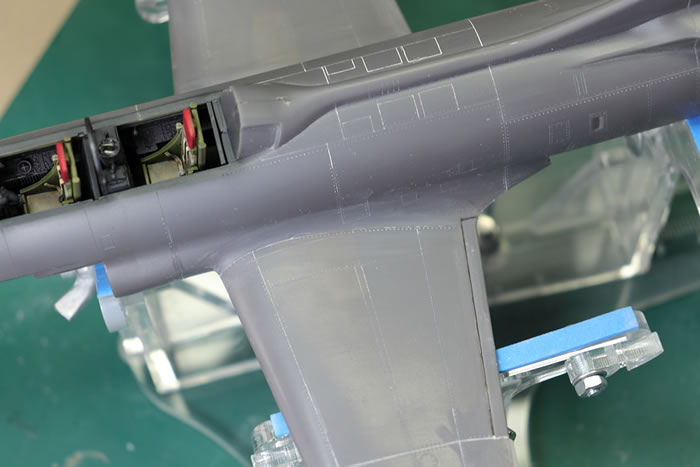
The second worst fitting parts are the intakes which just take CA and elbow grease to blend in. One design flaw is that the intakes are see-through into the fuselage. I used some blanks made from plastic card and painted black.
There are several parts missing from the kit. There needs to be a pitot tube added under the nose; I added a spare one from a Hasegawa A-4 kit. There should also be four small hooks or vanes under the rear fuselage behind the main wheel well. I could not find any good references for these and just fudged it by using some small parts from my spares box.
Other corrections are:
-
The upper wings are missing the spoilers. I scribed these in.
-
The lumps on the outsides of the wing tip tanks are fictitious and need removing.
-
The engine exhaust is fictitious. I left it off, which is fine. I actually used a razor saw to remove the inner ring and used this in the opening to provide an end to the tail pipe.
Other errors are:
I think I painted the undercarriage doors the wrong colour. They should probably be aluminium.
Against my better judgement, after my experience with the Monogram F-80C, I did decide to use foil again for most of the airframe. As much as I hate it, I knew I could not use paint to get near the highly polished and extremely shiny finish of this particular jet. And so, with much reluctance, I planned out a strategy for the finish. There were a number of factors to consider:
-
Foiling the nose tip, where the rockets are, would be a nightmare. Same for the wing tip tanks.
-
Paint does not stick to foil.
-
Foil does not stick that well to paint.
-
The national insignia need to go over a natural metal finish.
-
Foiling behind the intakes would be impossible after they were fitted.
So, the plan went something like this:
-
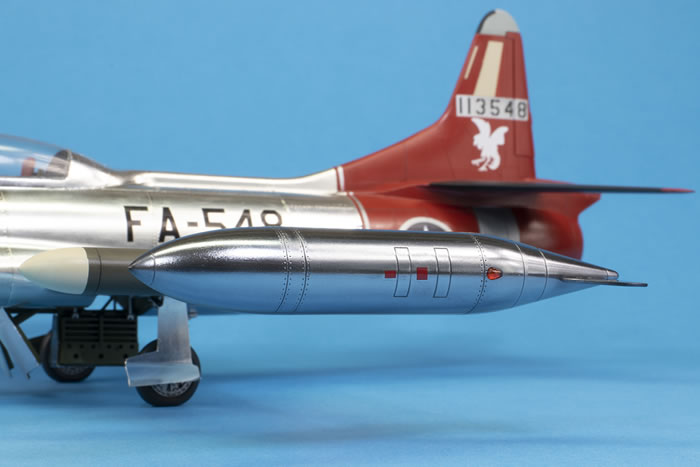
Use Uschi van der Rosten polishing powder for the nose and wing tip tanks.
-
Put all the paint on the airframe prior to foiling.
-
Mask all the areas that should be natural metal when adding said paint so the foil can stick directly to the plastic.
-
Use paint for all the aluminium areas within the Insignia Red (i.e. the national insignia, ‘USAF’ markings, tail serial number and the rear fuselage panel).
-
Foil the area behind the intakes prior to attaching them.
This essentially worked as planned, but there are a number of compromises.
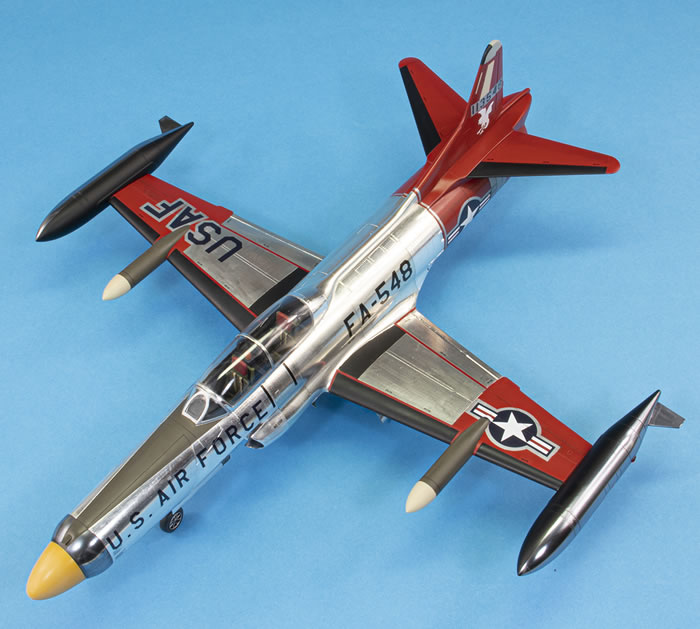
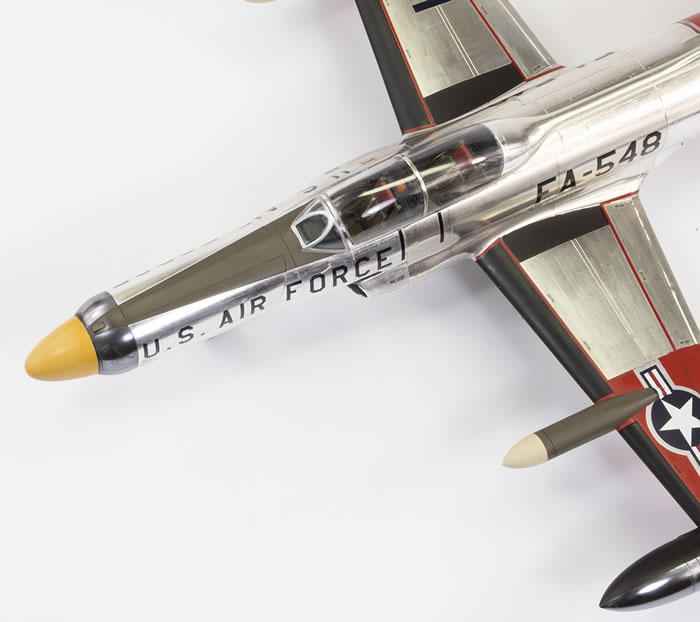
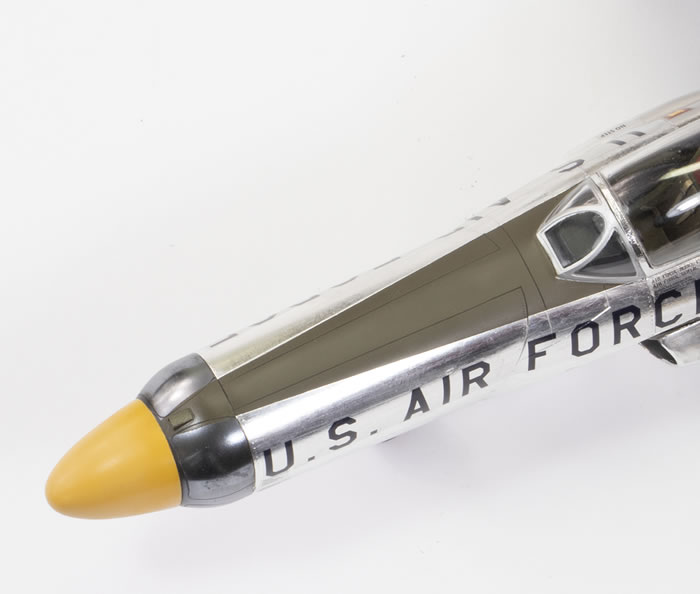
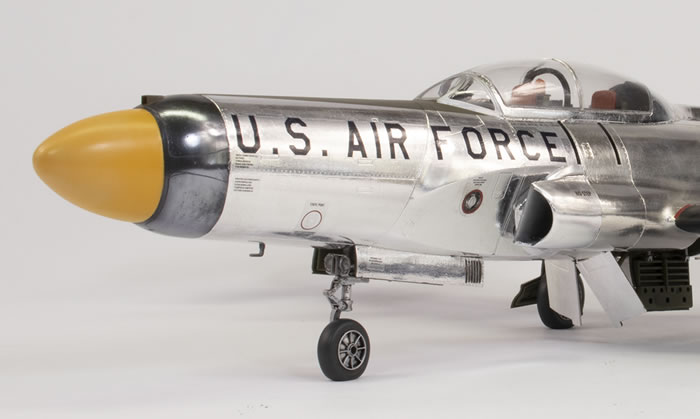
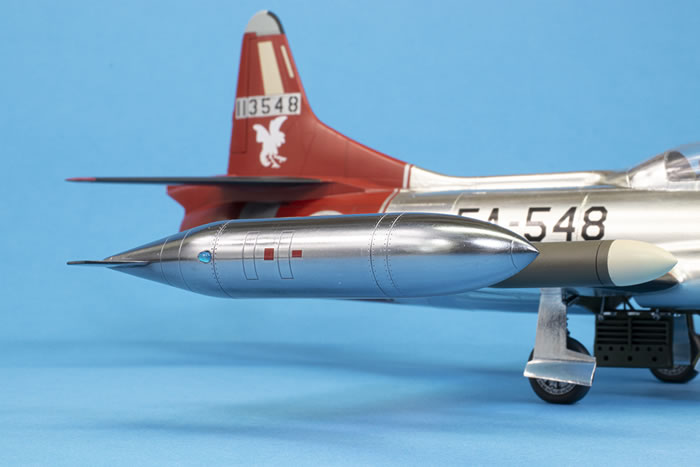
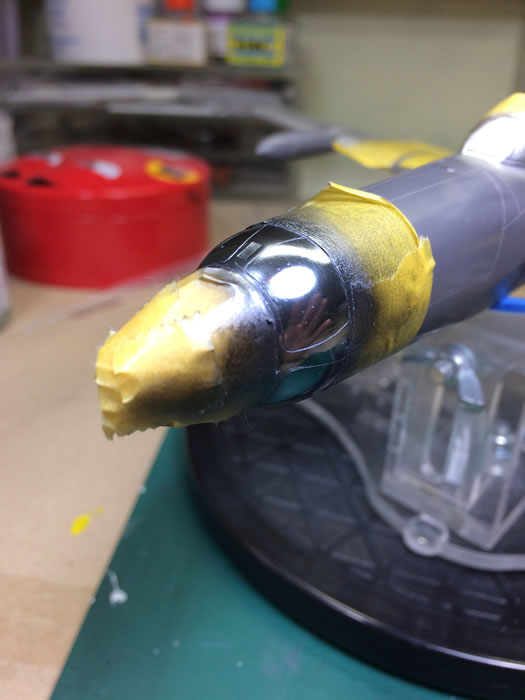
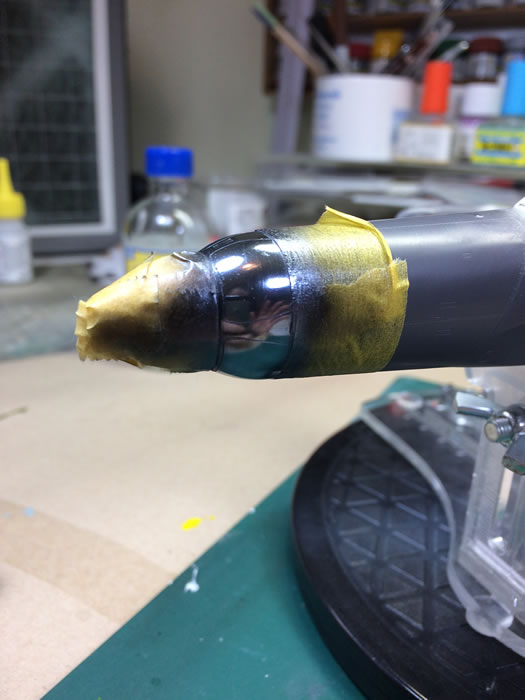
The Uschi van der Rosten polishing powder (I used Chrome) was a revelation. I used an undercoat of Mr Color 2 Black sprayed wet. I did not polish it out. After it had dried for a couple of hours I rubbed in the powder. What an amazing finish! Like a mirror, but…too dark. I’ve left it (the nose of the F-94C was often darker than the rest of the airframe, although this was usually true only of the rocket doors) but I might experiment with rubbing the powder into lighter coloured undercoats. What was even more amazing was that I masked this finish to paint the Olive Drab anti-glare panel and the black inner halves of the tip tanks with Tamiya tape and the finish was completely undamaged. I did leave the polished areas a week before masking. I think finishing a complete airframe in this powder is definitely feasible and I would like to try that one day. The main issue is to use the powder prior to any paint, as the powder does get everywhere.
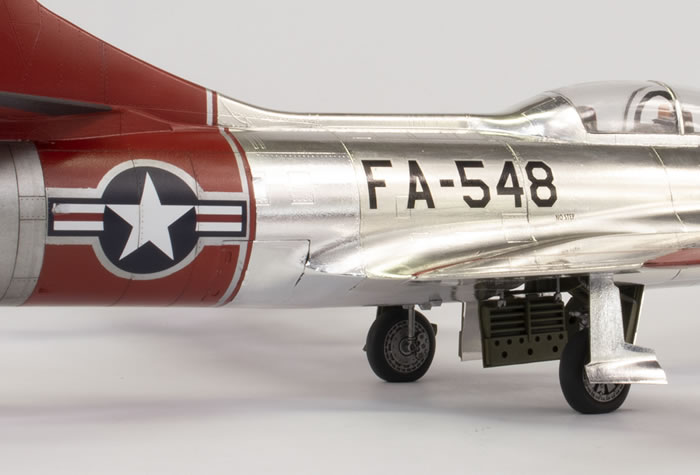
The areas to be foiled were masked and then the rest sprayed with Mr Color 8 Silver. Caracal Decals, which I was using for this kit, have a download on their website for masks for the national insignia and USAF markings on the wings. I hooked up my Silhouette cutter and cut these out on Artool vinyl, along with a rectangle for the tail number. These were duly applied and the red sprayed using Mr Color 327 and I then removed the stencils.
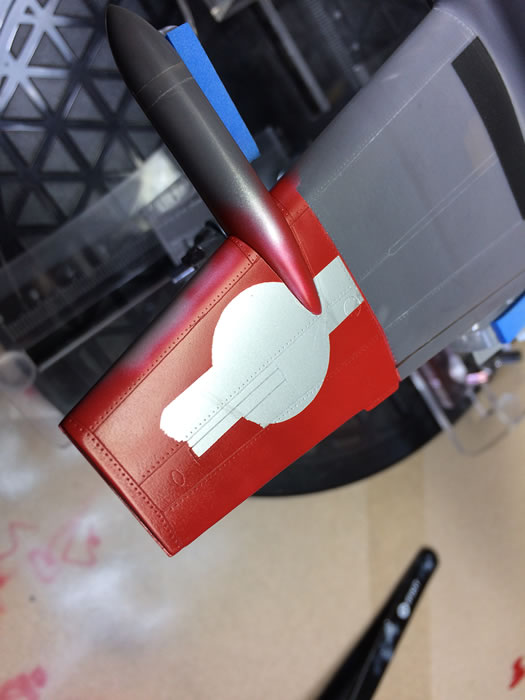
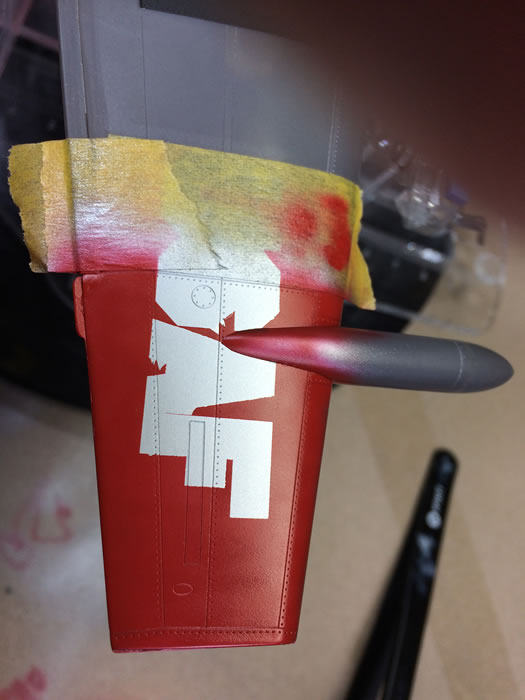
Disaster! For some reason the paint would rather stick to the stencil edge than the underlying silver. The stencils were reapplied and the red resprayed, but still the edge is far more ragged than I would like. I’ve had this happen with Mr Color 33 Matt Black too, so I wonder if Mr Color is not a good choice of paint for this sort of thing. Of course, the silver paint does jar against the foil, but this was a compromise I was willing to live with in order to make the scheme doable. I also masked and sprayed the windscreen as the framing was too indistinct for foil to be used.
The paint scheme is complex and the other parts were all filled in:
-
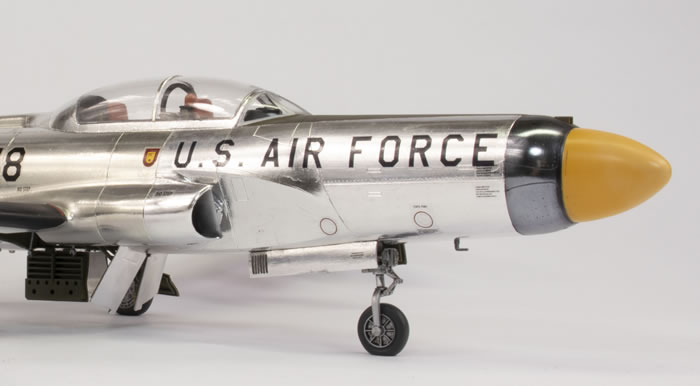
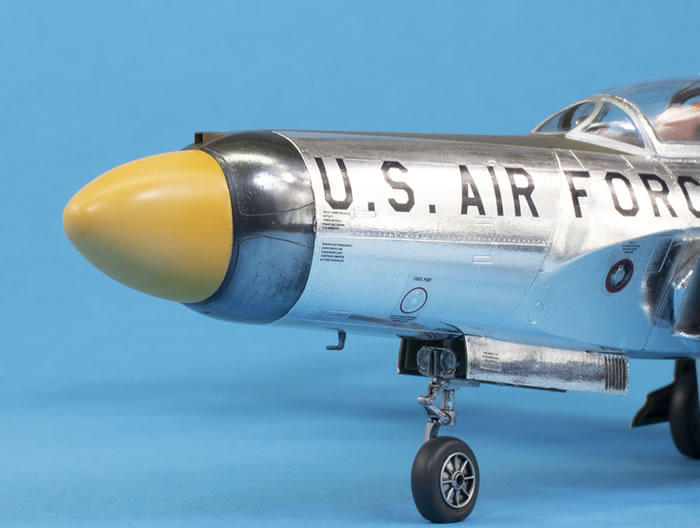
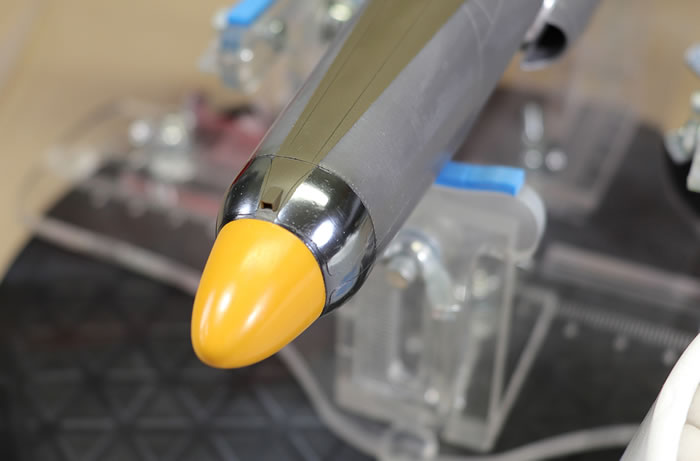
Yellow nose cone, which is a mix of Mr Color 4, 19, 59, 69 and 318. It looks very yellow, but then the only photo I’ve found of this airframe (in Lockheed F-94 Starfire: A Photo Chronicle by Isham & McLaren) showed the nose really was rather…yellow! This was actually painted before the polishing powder was used, to make masking easier.
-
Mr Color 324 for the grey panel on the tip of the tail
-
Black for the leading edges of the wings and tailplanes, the tip of the tail, the inner tip tanks and the wing walkways.
-
Mr Color 45 Sail for the rocket pod cones and the panels on the vertical tail.
-
Mr Color 38 Olive Drab for the rocket pods and anti-glare panel
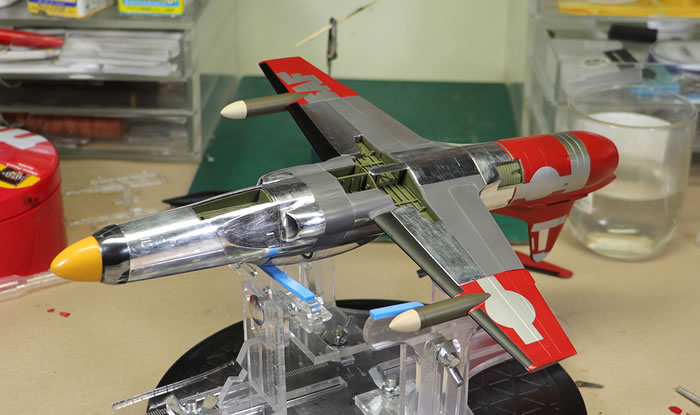
After all this was done, foiling could start.
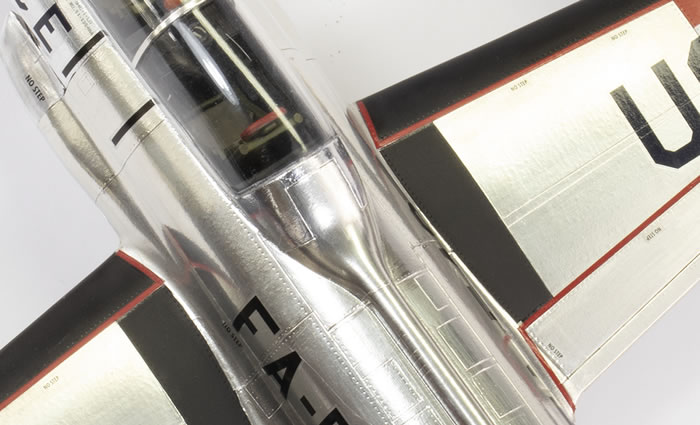
After finding DIY foil a chore on the F-80, I decided to see if Bare Metal Foil was any better. I had an old sheet and was not impressed. It was heavily wrinkled and did not seem that sticky. I used a good chunk of it anyway on various panels, including the entire nose. It functioned okay, but the wrinkles were hard to remove and are still too visible.

Midway through I purchased a new sheet of Bare Metal Foil that claimed to be ‘new improved’ on the envelope. It was certainly different, being less shiny than my old sheet, but completely wrinkle-free. This was much better to use. It’s thicker than the old sheet and much stronger, which meant it wrinkled less and was less prone to tearing. It burnished beautifully and I was very surprised as what it could stretch to. The ‘hump’ where the rear canopy meets the spine, for example, could be foiled with a single piece and no wrinkles. The only downside is that it marks under burnishing (I was using a paper stump) which I don’t like, and also it is less mirror-like than the older sheet. I’m under no illusions – there are still many visible wrinkles and rough edges, and foiling results in a model that does not stand up well to close scrutiny – but overall I was impressed. Life was made easier by the simple shape of the Starfire and lots of the hard bits being painted in red, but I would definitely use this foil again if required.
The decals are by Caracal and printed by Cartograf, who do a nice job of printing but use a thicker decal film than, say, Microscale, who are still (in my opinion) the masters of making decals. Going by the photo I have of this airframe, the U.S. AIR FORCE legend on the side has the letters spaced out slightly too wide.
The downside of using foil is that weathering is hard as very little sticks. In the end I just settled for a little oil paint to dull down the fibreglass sections and a black wash for the moving control surfaces. I was in love with the bright and busy colour scheme and so I’m kind of pleased to have an excuse to leave it looking quite pristine.
The canopy collected various bits of sanding debris on the inner surface after it was attached. I removed most by gently tapping it. Unfortunately, I tapped it too hard at one point and there’s a nice crack running along the canopy above the rear cockpit. Great.
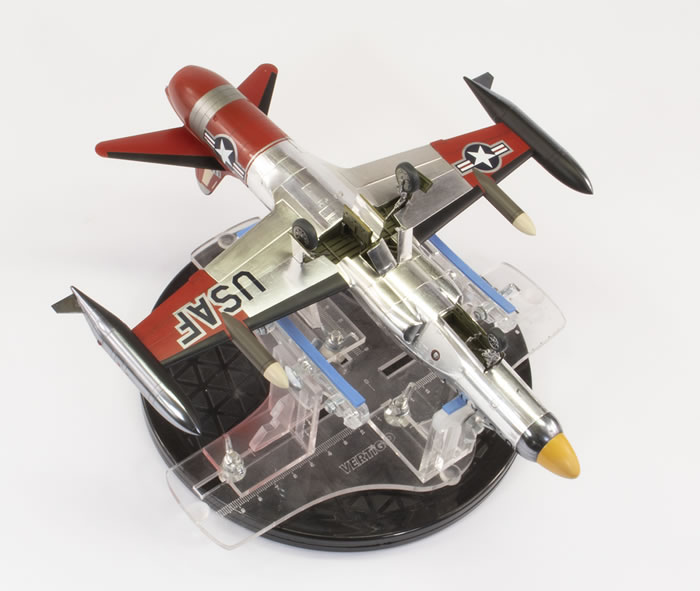
Things were going pretty well until the model was almost done. I was feeling warm thoughts towards Kitty Hawk, but then as I was adding all the pre-painted bits at the end it all went wrong. I had intended to model the F-94C as it usually was on the ramp: flaps up and all speed brakes deployed. The flaps and front speed brakes were fine, but the air brakes at the rear just would not fit in the deployed position. The actuators are too long and there is nowhere for the open brake to butt against the fuselage. It was a nightmare as I was trying to hold everything together and avoid the foil peeling away from the air brake. In the end I gave up and fitted them closed. They fit rather well, but the markings don’t line up with those on the fuselage proper. This is my greatest disappointment with the finished article.
The anomalies continued. The retraction strut for the nose leg is way too short. I used a piece of Albion Alloys brass tubing slipped over the strut to lengthen it. The light at the rear tip of the fuselage doesn’t fit and I could not find any decent photos of what this area should look like. I replaced the kit part with a small clear piece from my spares box. The main gear legs are too short and I think have been designed from a real Starfire with collapsed landing gear oleos. It’s little engineering issues like these which have somewhat tarnished Kitty Hawk’s reputation.
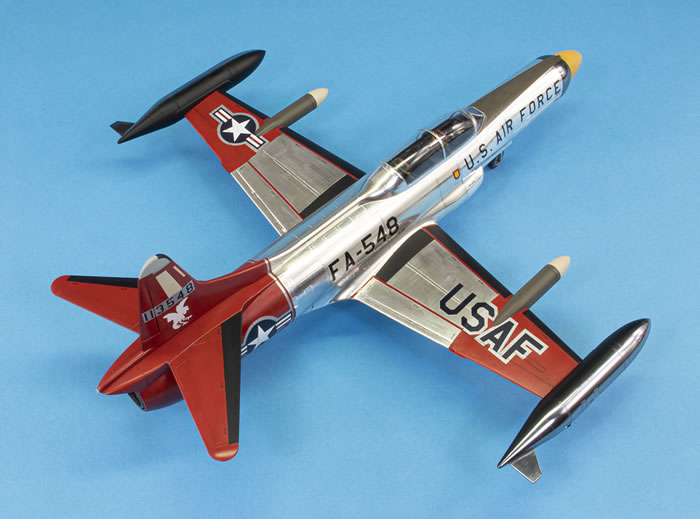
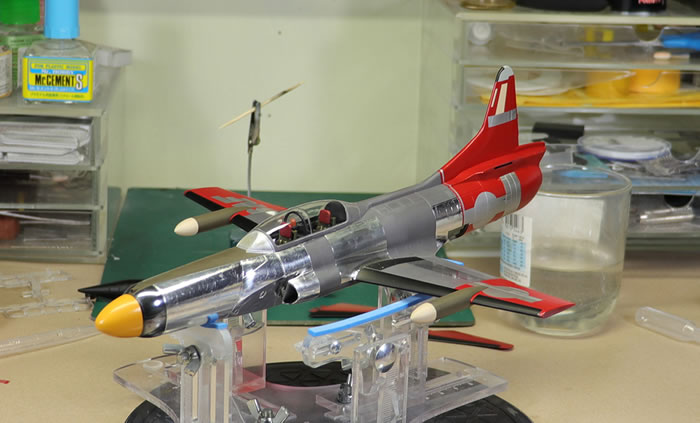
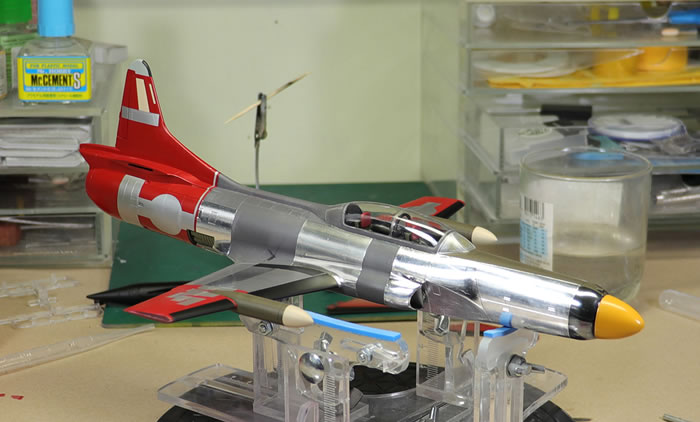
So this is the F-94C. Because of the foil, mine will always look better from a distance. Close up the wrinkles, gaps and patches just stand out too much, and the lack of a panel line wash and any other weathering looks incongruent, but from three feet this is one of my favourite models. It looks fantastic, especially in the arctic scheme, and more like the product of a comic book artist’s imagination than something that existed in reality. I think that sense could only be rivalled by a natural metal Cutlass.
The final product will always annoy me because of how unnecessarily difficult final assembly was. I wish the airbrakes were open and I wish the paintwork matched across their shutlines. But having said that, I’m very grateful to have this model in my collection. What we really need now is an up-to-date (i.e. non-Hobbycraft) F-94A/B. I’ve no idea why 1950s aviation continues to be so neglected in 1/48 (add to my list in the opening paragraph aircraft like the Twin Mustang, Ouragan, Mystere, Super Mystere, Venom, two seat Skyraider, Gannet, Swift, Scimitar, Savage) but some of the gaps are slowly being filled in, like the F-51H due this year. Let’s hope some of these fantastic designs from one of the most interesting decades in aviation history finally make it into accurate injection-moulded plastic.
For more articles like this, please visit my website .
Text and Images Copyright ©
2019 by Jon Bryon
Page Created 24 July, 2019
Last Updated
24 July, 2019
Back to
HyperScale Main Page

|
 Home
| What's New |
Features |
Gallery |
Reviews |
Reference |
Forum |
Search
Home
| What's New |
Features |
Gallery |
Reviews |
Reference |
Forum |
Search