Hasegawa's 1/48 scale
McDonnell Douglas RF-4B Phantom II
by Jon Bryon
|
McDonnell Douglas F-4E Phantom II
307th TFS, 31st TFW US Air Force Thailand 1972
|

Hobby Boss's 1/48 F4U-7 Corsair is available online from Squadron.com
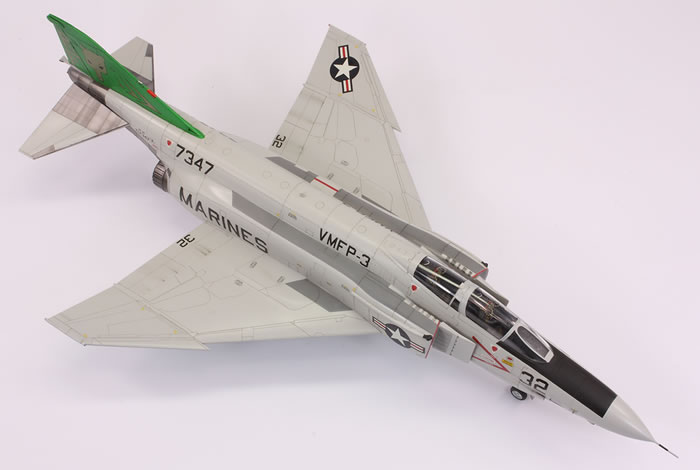
Hasegawa 1/48 McDonnell Douglas RF-4B Phantom II
with True Details resin seats
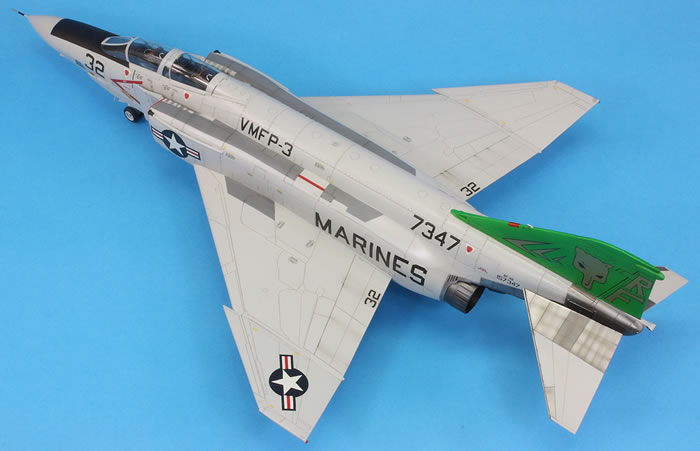
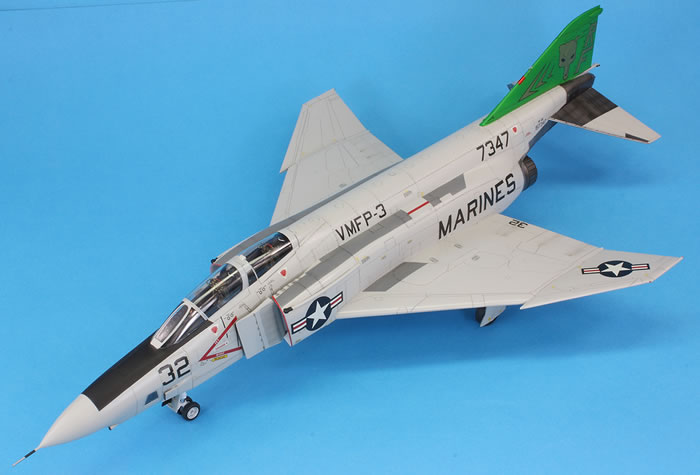
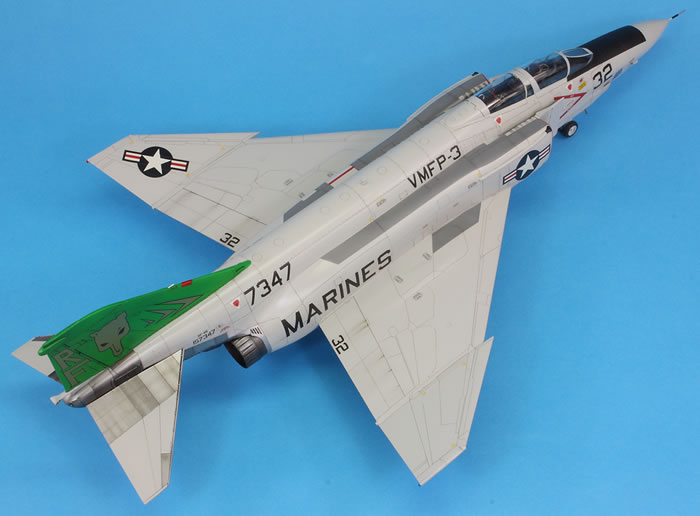
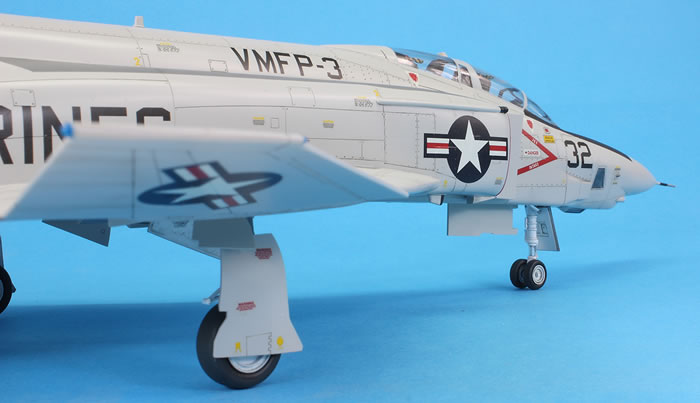
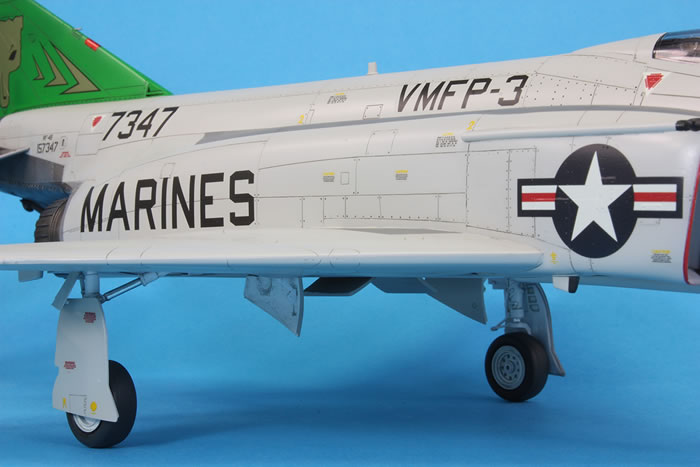
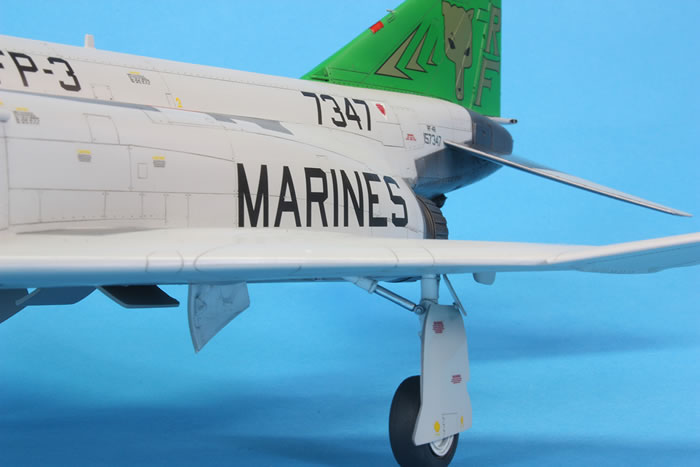
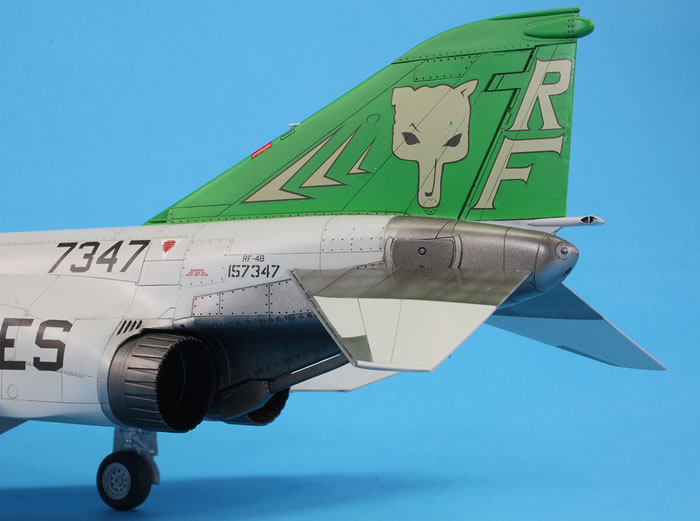
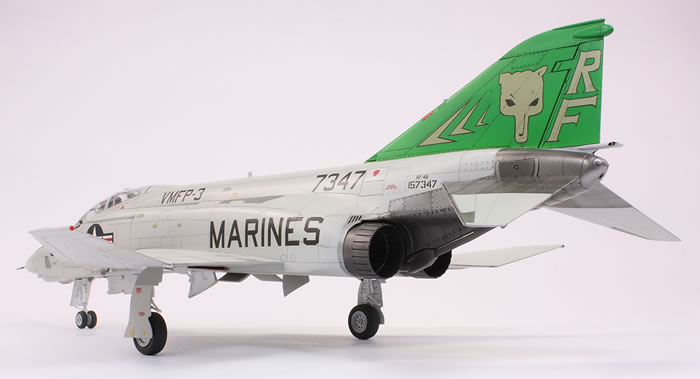
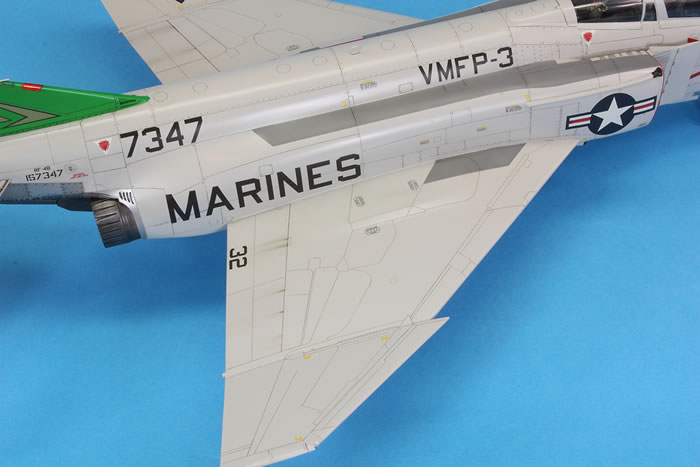
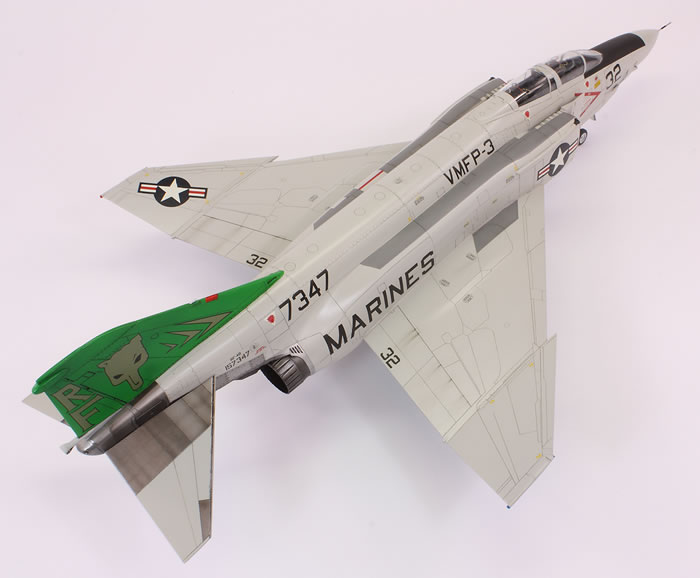
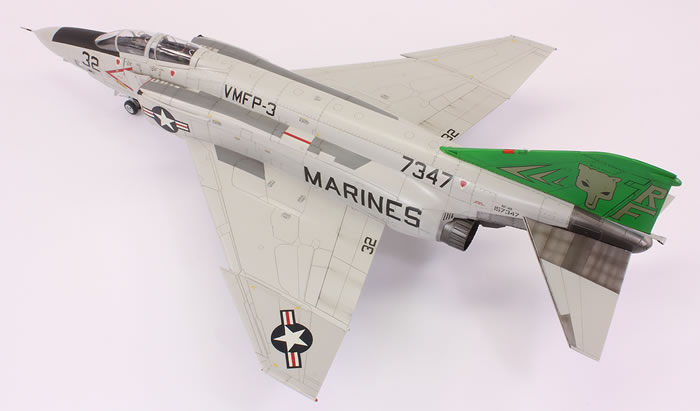
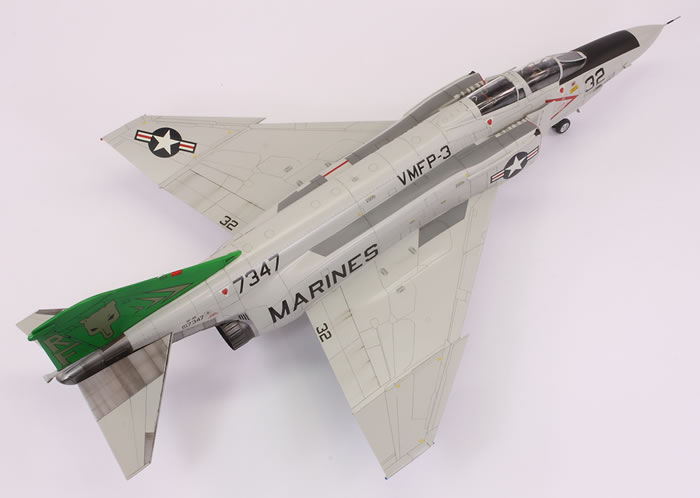
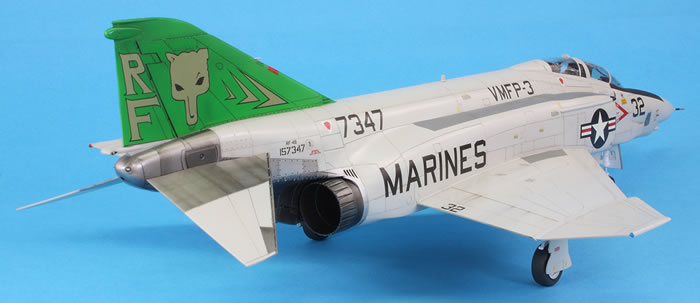
VMPF-3 US Marines Corps USA 1979
It took Hasegawa ages and ages to finally release the recon versions of the F-4 in 1/48 (nearly 25 years!) and this was their first release of this moulding.
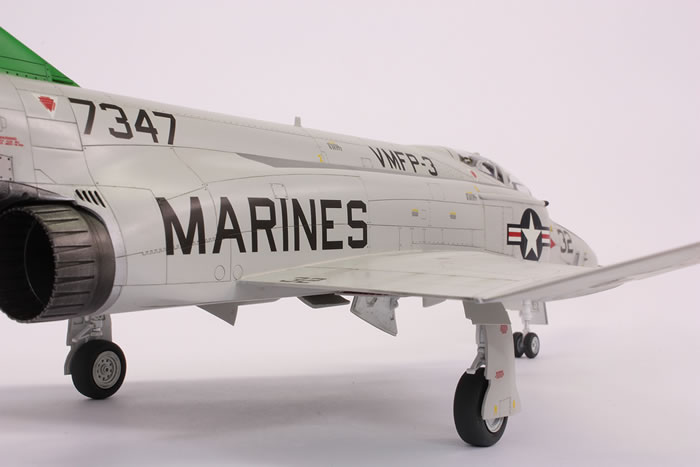
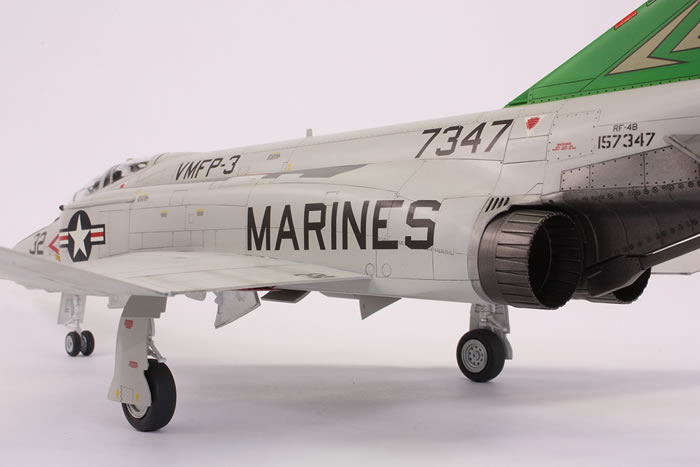
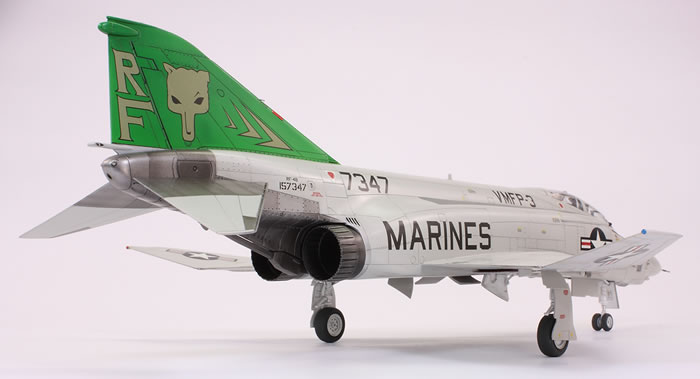
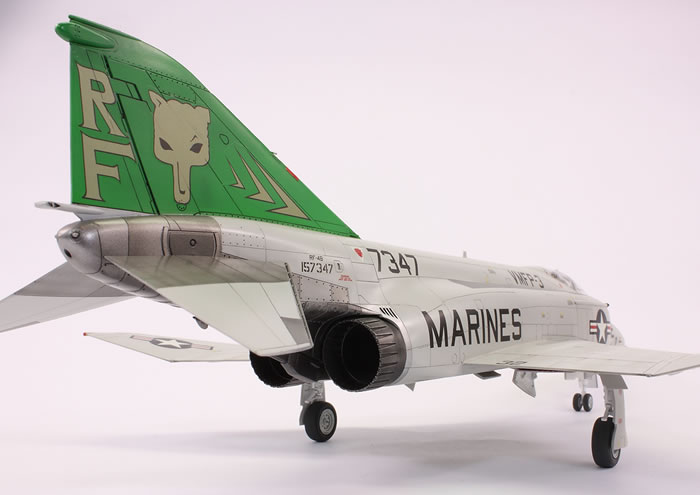
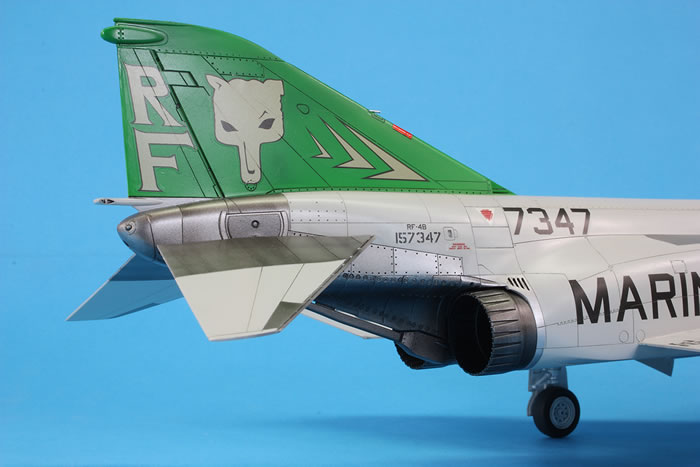
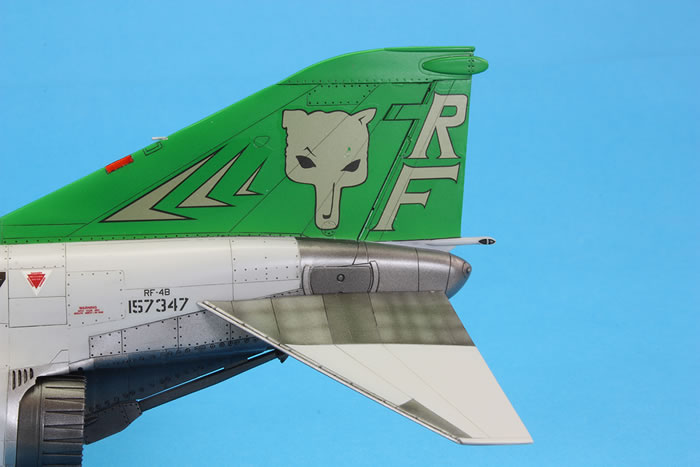
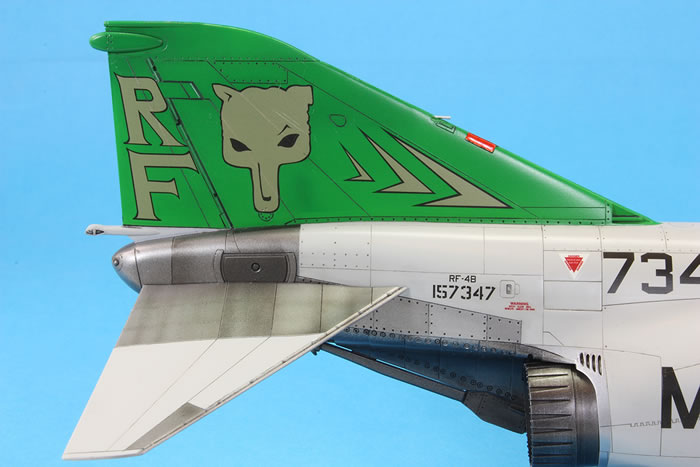
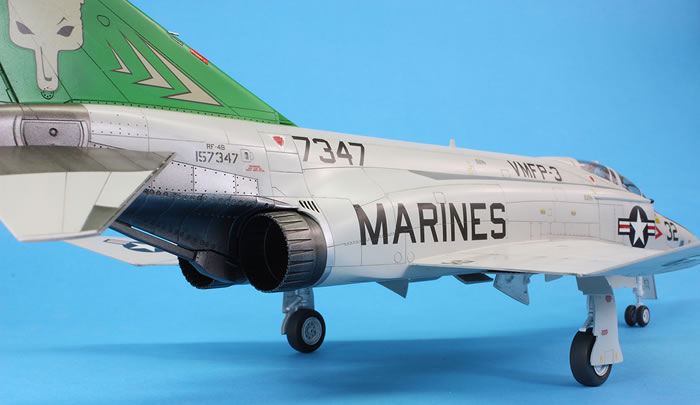
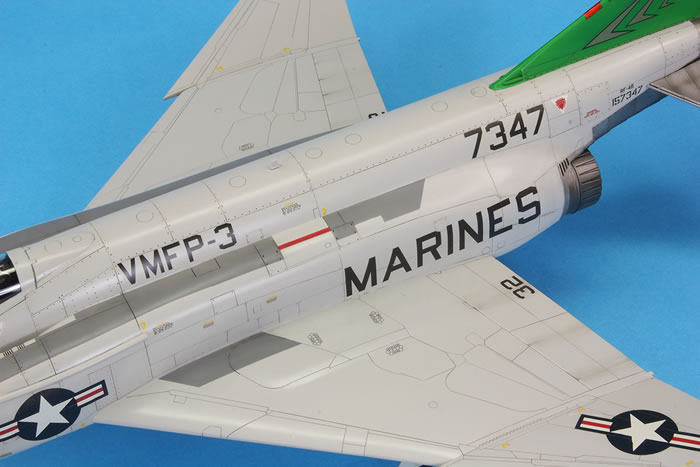
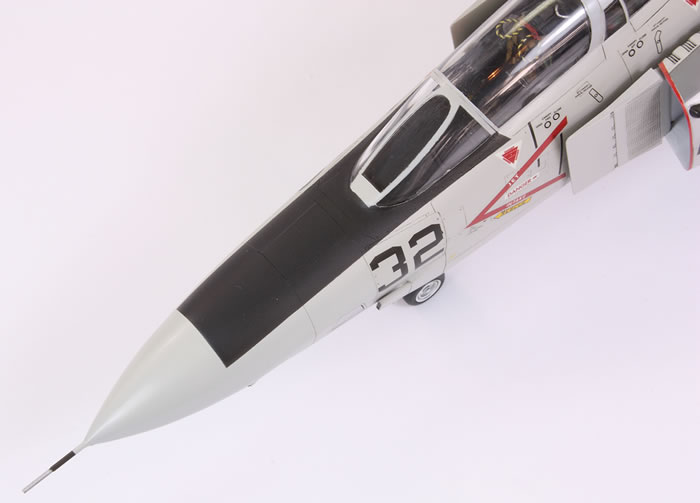
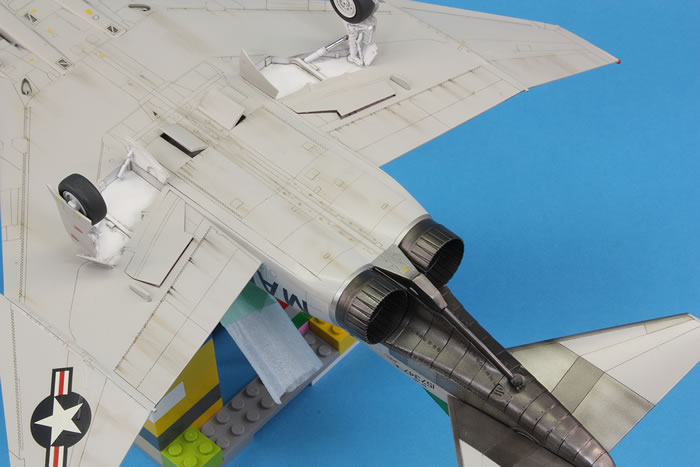
Hasegawa took the opportunity to improve on their previous Phantoms, but it’s not all good. They tooled some much nicer J79-8 engines, but promptly tell you not to use them and use the old, simple J79-10 exhausts instead. If you’re making the VMPF-3 option with the green tail provided in the kit DON’T DO THIS! There are quite a few photos of 7347 around on the web and they clearly show that this RF-4B retained the -8 engines until at least 1984 when it was in a low-viz grey scheme.
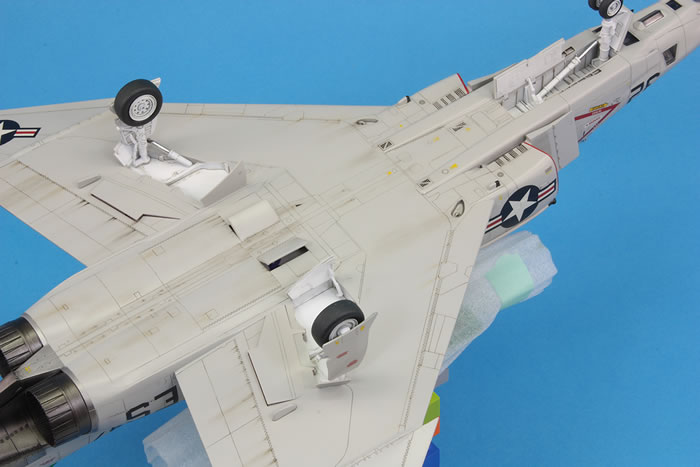
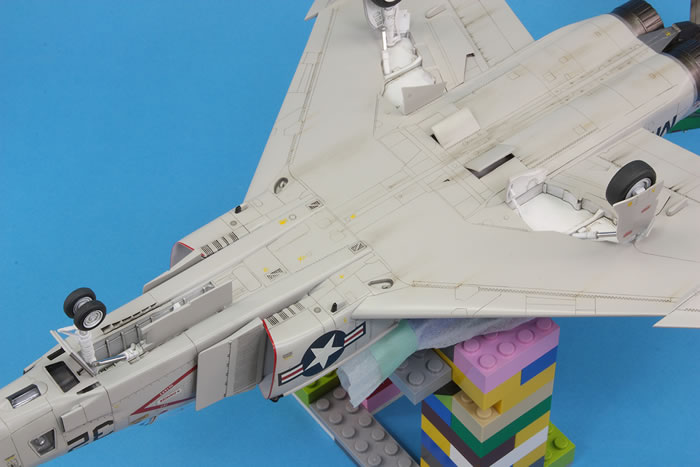
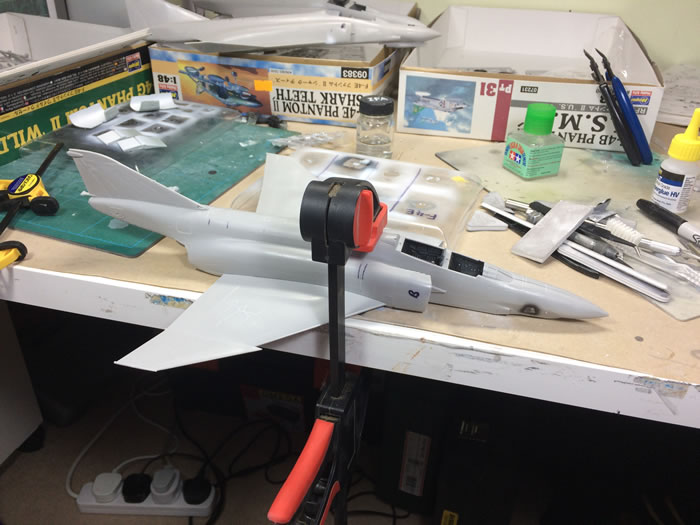
Hasegawa also tooled a new fuselage and canopy for this kit, and having now built nine of their Phantoms, I think I can say the fit and moulding of the RF-4 is not quite as good as the non-recon moulds. The surface detail does not line up properly across the fuselage centre seam and I had to remove it all and reinstate it. The fit around the front cockpit coaming was horrendous. A further example is the wing, which does not mate nearly as well to the lower fuselage and required some clamping followed by Milliput to get rid of the gap.
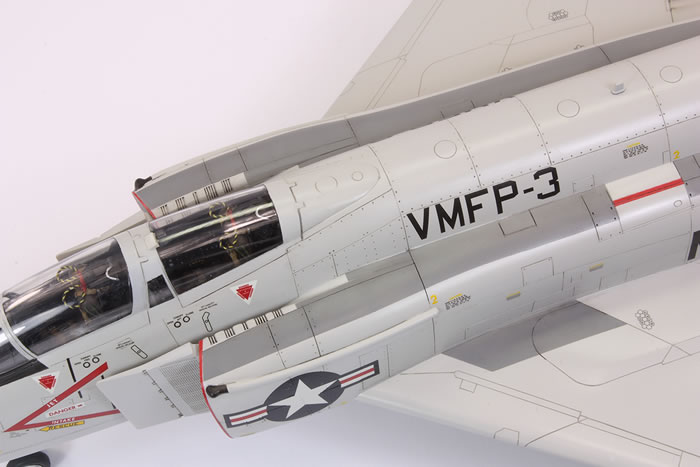
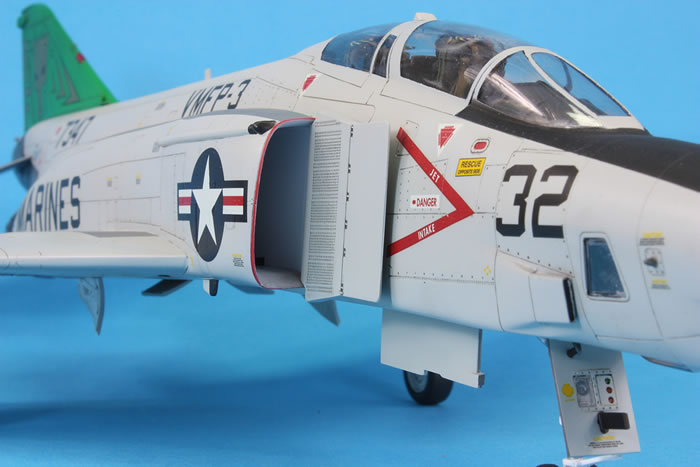
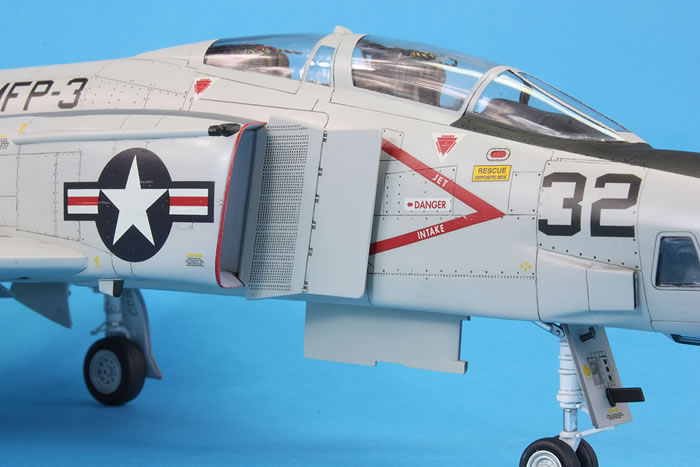
The canopy is *not* the same as previous Hasegawa F-4 kits, which is important if you want to use an Eduard masking set: make sure you get one dedicated for the RF-4. Sadly, Eduard also let the modeller down as they only provide masking for one style of camera nose, not the other; there are two in the kit and Eduard give masks for the rarer one. It also has to be said that the Eduard masks do not fit particularly well.
I think the photo cartridge doors in the rear fuselage are transposed in the instructions and I got a better fit by swapping them over.
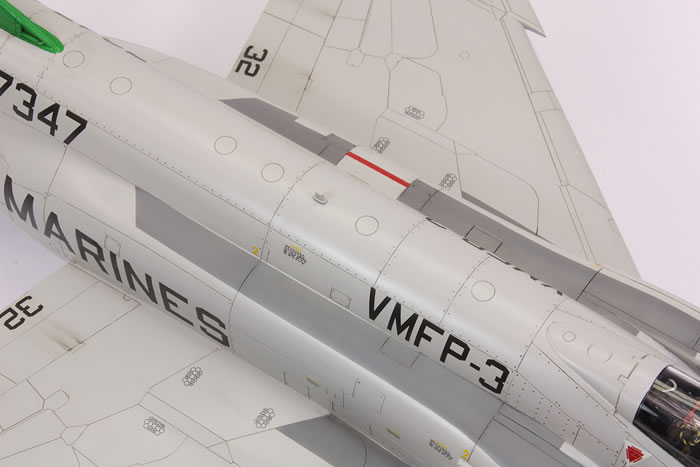
Hasegawa did not deem it worthwhile to retool the tailplanes, which is a pain as they have raised panel lines. I rescribed them.
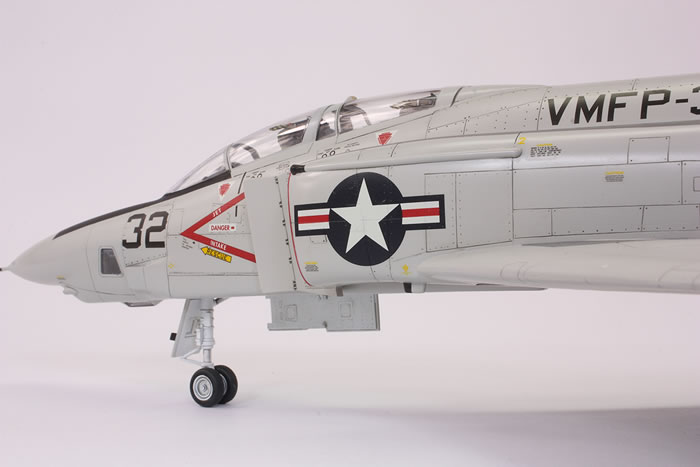
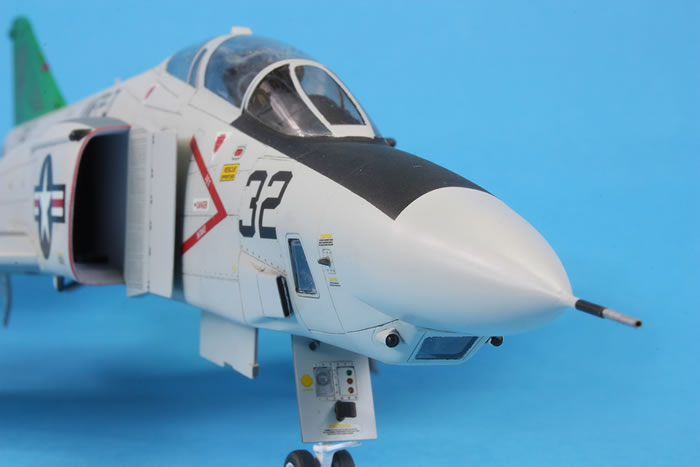
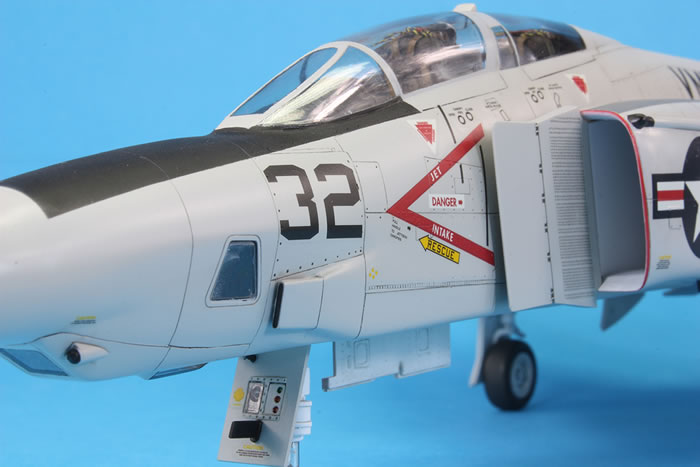
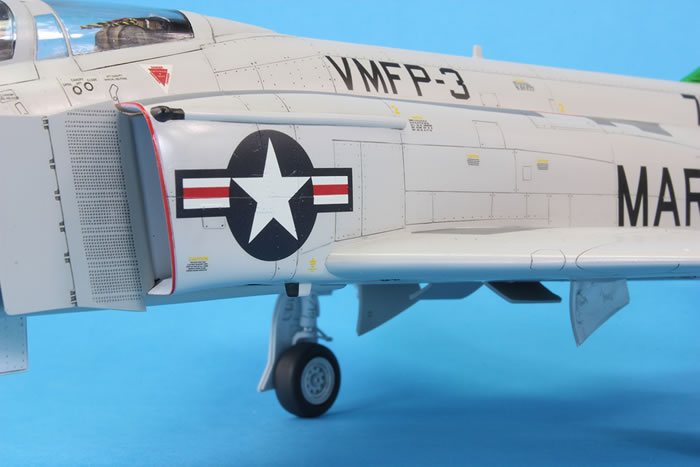
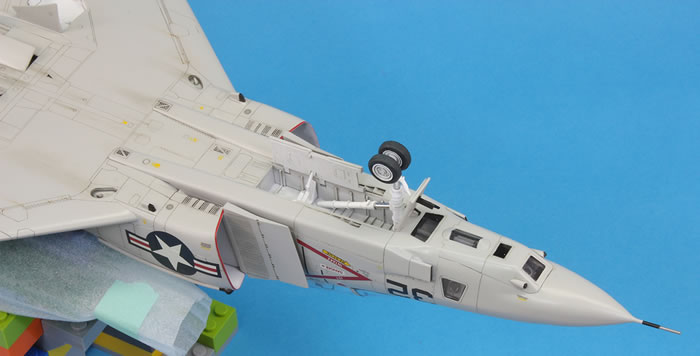
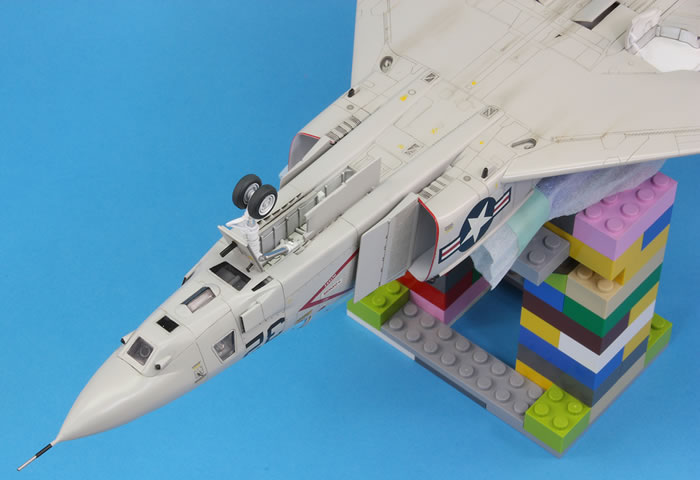
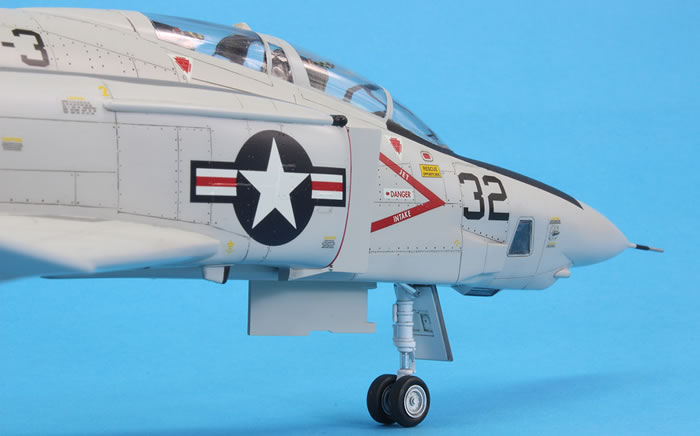
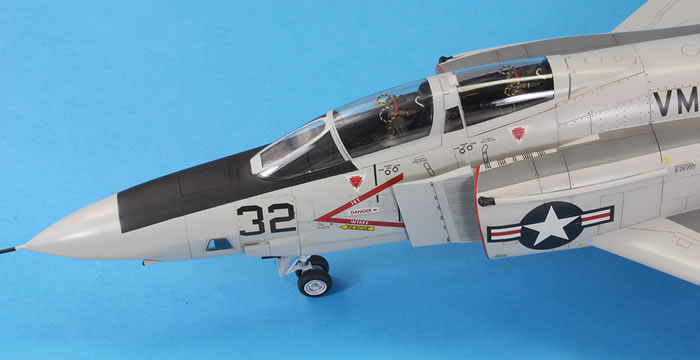
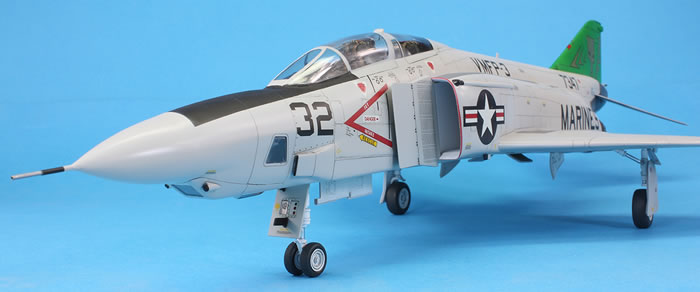
There are some cameras provided to fit in the nose, but these fit rather poorly and have very vague and weak mounting points. I consider myself fortunate that none came adrift during subsequent assembly and finishing. It is worthwhile noting that the outside of the nose gear bay needs to be painted as it is visible through the camera windows; I neglected to do this. The camera transparencies generally fit quite well, except for those on the sides of the nose which are undersized and leave a very difficult to fill gap.
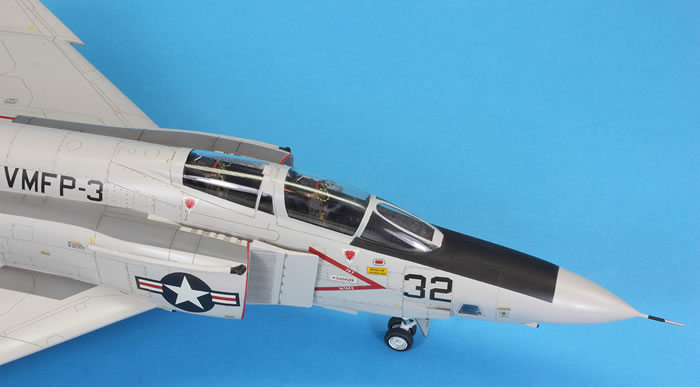
The only aftermarket I utilised was a pair of True Details resin seats with pull handles made from yellow and black thread.
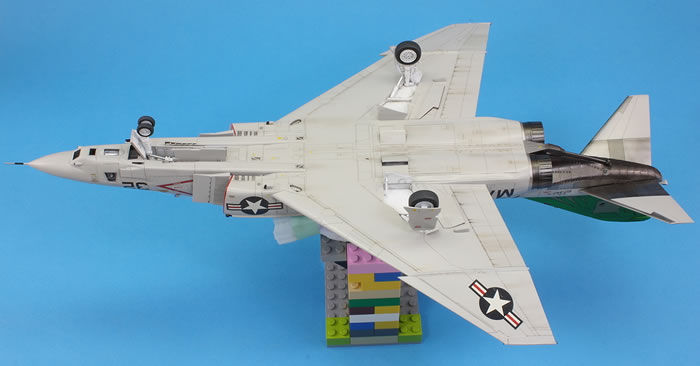
As usual for many of the Hasegawa Phantoms, there are some moulded lumps on the upper wing that need to be removed. Doing so is a pain, as is removing the moulded sway braces for the inner pylons that are not fitted to RF-4Bs. Hasegawa would have you remove the sensors under the wings, but I believe that they should be retained.
I replaced the nose pitot with one assembled from Albion Alloys tubing. It lasted all the way to final finishing when I snagged it in the filter of my spray booth. There’s now a hairline fracture around its base that I decided not to mess with.
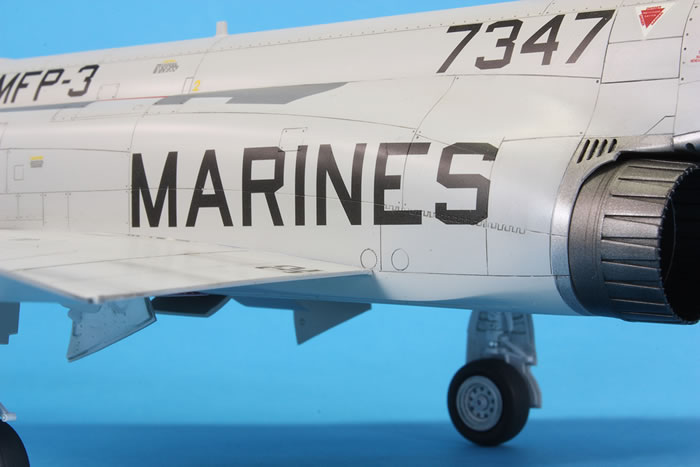
As with all Hasegawa Phantoms that use the J79-8 engines, the bare metal area around the engines is too narrow. This is difficult to describe, but Tommy Thomason has a good article on it by following this link.
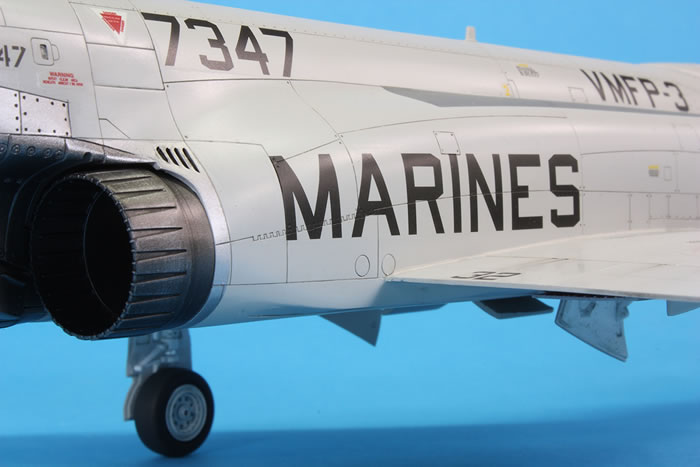
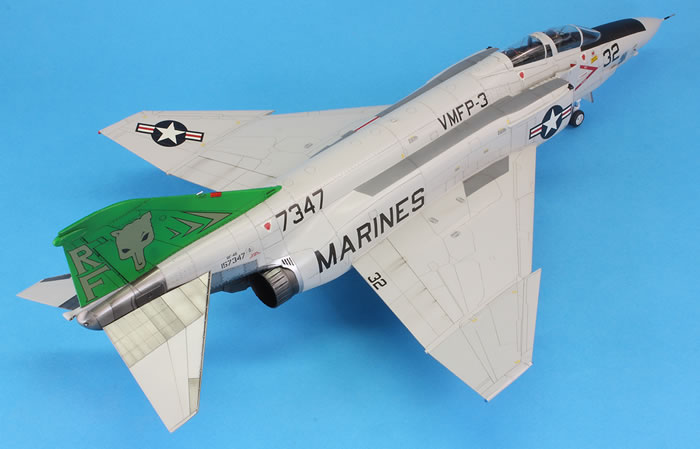
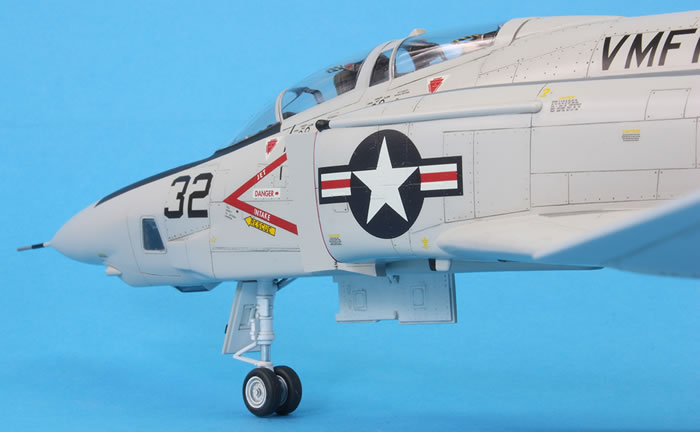
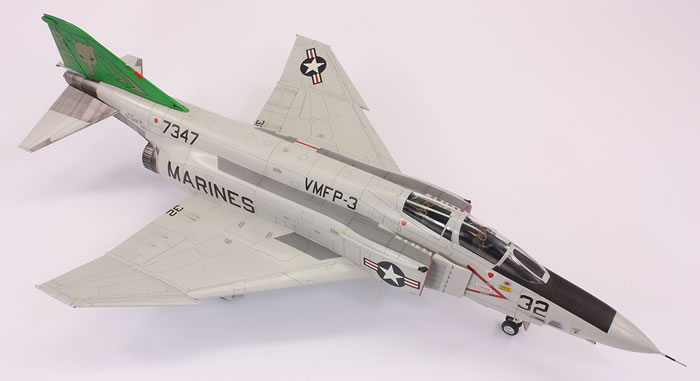
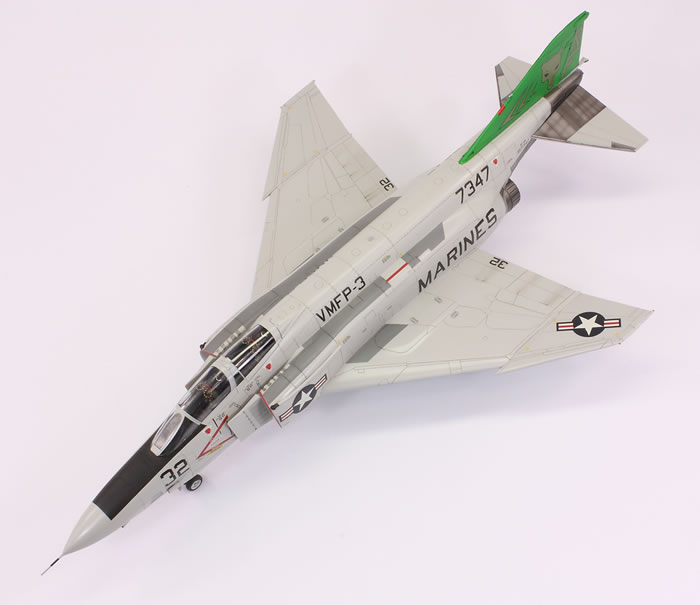
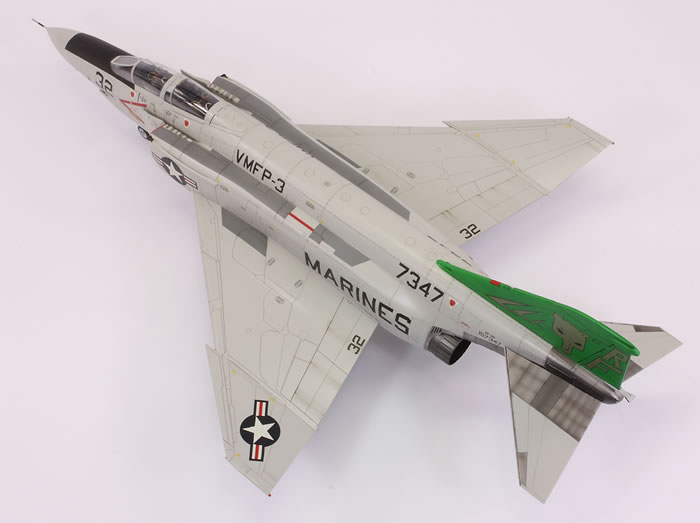
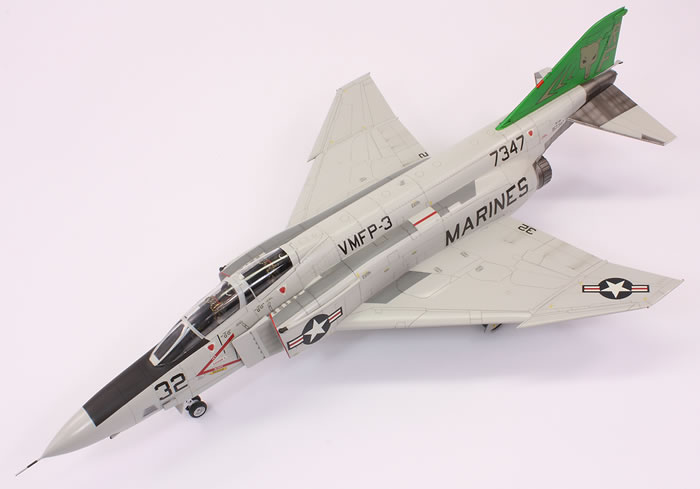
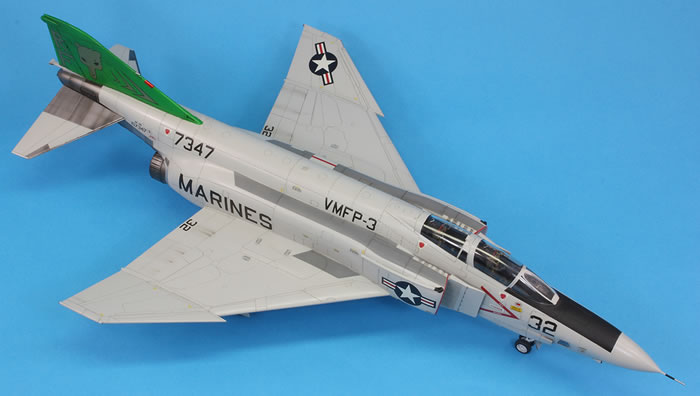
I liked the colour scheme for VMPF-3 with the green tail that Hasegawa provided. This is correct for thick wing and wide wheels. Unfortunately, the actual paint scheme is incorrect – at least as far as I could tell from photos of 7347 with the green tail that you can find on the internet. The scheme should be overall gull grey (I used Mr Color 315) rather than gull grey and white. Many aircraft did have the red intake lips although it certainly wasn’t clear from the photo I was using as a reference that this aircraft had them. I went with the red lips anyway as I like the colour. The tail is Mr Color 66, as recommended by Hasegawa, which is wonderfully garish.
The decals were, to be frank, awful. Thick, stubborn to come off the backing paper and liable to wrinkling, they do not stand up to any kind of scrutiny. Given their thickness, the gold printed portions were extremely fragile and translucent. If I weren’t so bloody-minded, I would have looked for suitable aftermarket decals, although having said that there don’t appear to be any for this scheme that would work with the Hasegawa kit. The rubbish decals prompted me to paint the walkway markings, which I did with Mr Color 317, and then 327 for the red stripe.
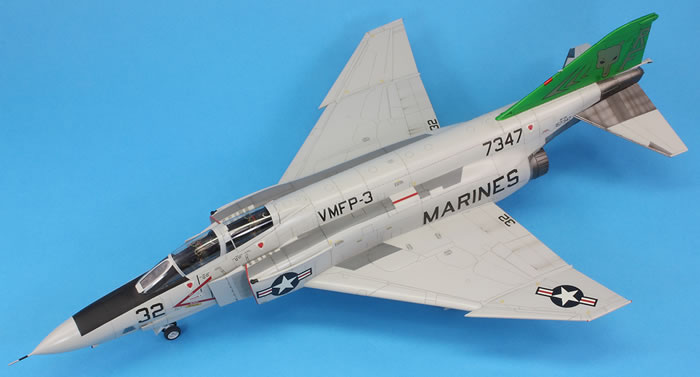
My reference photo showed really quite a clean airframe, and so I decided to do very little weathering, just some streaking with oil paints. The final finish is Tamiya XF-23 Semi-Gloss Clear, which I feel gives a good sheen for a relatively clean overall gull grey airframe.
This kit suffers from the usual Hasegawa F-4 engineering weaknesses: non-existent attachment tab for the tailplanes, the main undercarriage cants inwards because the retraction struts are slightly too short (I fixed this by removing the locating nubs from the main gear legs), and the lack of intake trunking.
The finished article is a fairly so-so representation of RF-4B 7347 that’s not going to win any prizes but will look good enough in the display cabinet. I’ve now built nine Hasegawa F-4s, with one remaining in the stash (and FG.1), and whilst I’ve found them fun to build I’ve no intention of buying any more. I’m sure quite a few errors have crept into my build and I note that Double Ugly have a very comprehensive book on USMC RF-4s that might have shed further light on this airframe and colour scheme, but it was far too expensive for me to justify purchasing it.
For more modelling articles like this, please visit my website www.jonbryon.com
Text and Images Copyright ©
2019 by Jon Bryon
Page Created 3 January, 2019
Last Updated
3 January, 2019
Back to
HyperScale Main Page

|
 Home
| What's New |
Features |
Gallery |
Reviews |
Reference |
Forum |
Search
Home
| What's New |
Features |
Gallery |
Reviews |
Reference |
Forum |
Search