Hasegawa 1/48 scale
Douglas A-4E Skyhawk
with Fights On decals
|
Douglas A-4E Skyhawk
with Fights On decals
VF-45, US Navy, USA 1986
|
by Jon Bryon

Hobby Boss's 1/48 F4U-7 Corsair is available online from Squadron.com
Hasegawa's 1/48 scale Skyhawks are generally well-regarded kits and still the best available out there, despite being released 19 years ago. It feels like yesterday. Having made nine of them though, they do have some shortcomings.
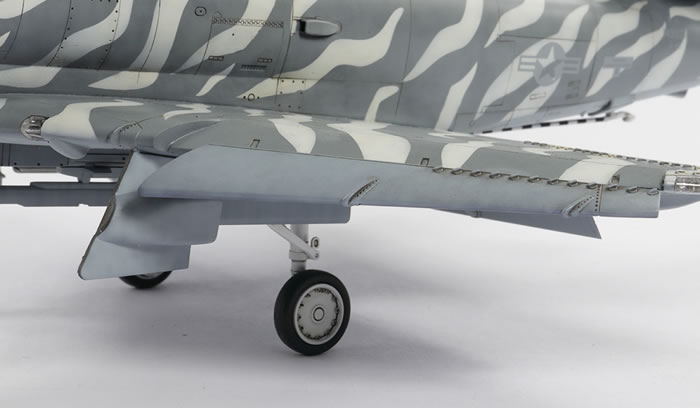
First are the leading slat wells. Hasegawa have moulded these as a recessed bay, with a lip separating where the slat retracts into the top of the wing. This is incorrect and there should be a smooth transition. I was going to ignore this error, as I have done on the previous five versions of this kit I built, but then decided to see if I could have a go at correcting it.
My basic strategy was to superglue some strips of Evergreen 0.4mm x 1.5mm sytrene up against the lip, fill the gaps with CA and just sand it all smooth. This worked surprisingly well and was not much effort.

Strip superglued in place.
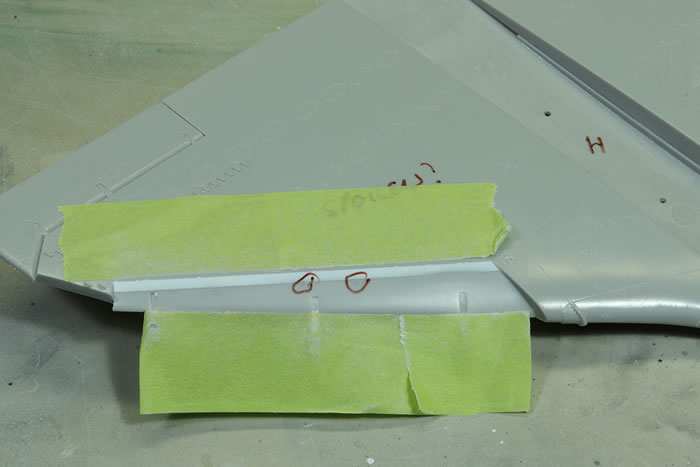
Masking tape used to protect the detail and CA and strip sanded down using rigid sanding sticks. The brown circles indicate where more filling is needed.

All cleaned up and polished.
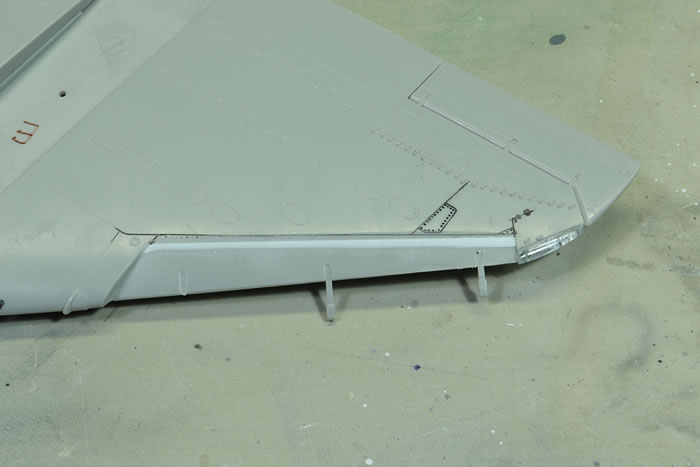
The recessed detail is rescribed in and checked with a wash.
My second major complaint is the nose wheel being moulded integral with the nose leg. This irritates me, but not enough to do anything about it.
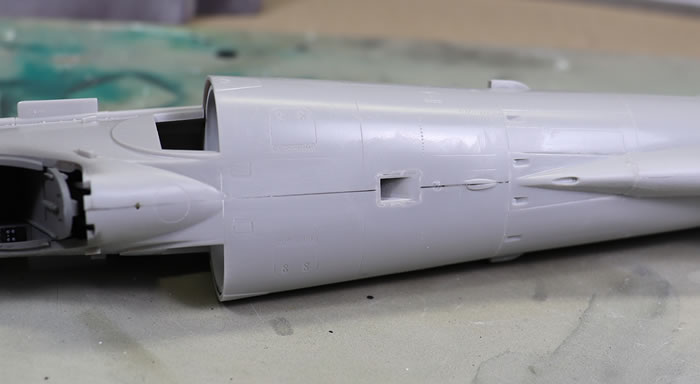
Third, most A-4s do not have the reinforcement plates that Hasegawa have moulded on the intakes. These were sanded off.
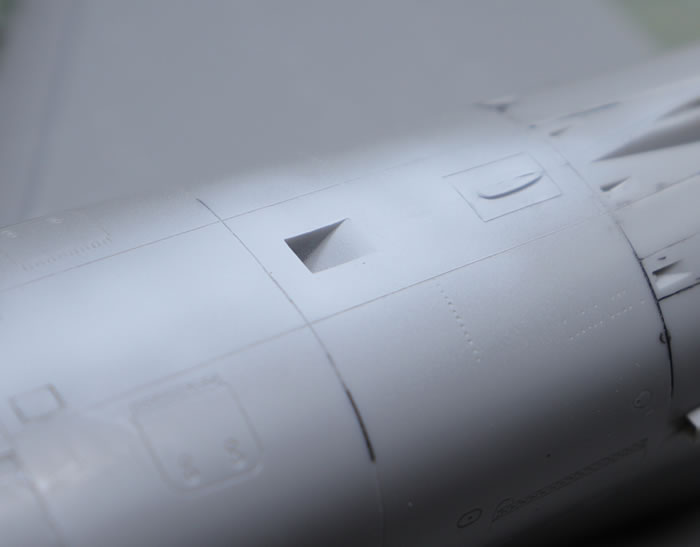
There were some other little modifications that needed to be made as well: a small recessed intake on the left side of the fuselage ahead of the air brake had to be filled and removed, and the rearmost of the triangular static points moulded on the right side of the nose needed to be sliced off.
That’s all on the accuracy side of things. On the fit side of things it is a similarly mixed bag. The general standard of moulding and detail is excellent and standard for Hasegawa around the turn of the millennium. Also standard are the large number of inserts to cater for many, many different variants, and the fact they don’t fit very well. So, whilst the major components, like the fuselage halves, wings, intakes and horizontal tail planes all have excellent fit, the front of the wing roots, base of the vertical stabiliser and, most annoying of all, a semi-circular insert under the rear fuselage, don’t. Much CA is needed followed by sanding and rescribing.
Sorting out the vent insert on top of the fuselage.
Checking the insert with some primer.
Aside from some complex recessed detail under the tail hook, the most difficult details to reinstate are several ‘nubs’ ahead of the tail hook hinge. Fortunately, there are several of these rear fuselage inserts in each kit and I have a large stash of spares. The nubs could therefore be sliced off, the seams addressed, and then the nubs reattached, with plenty of spares to allow for mistakes.
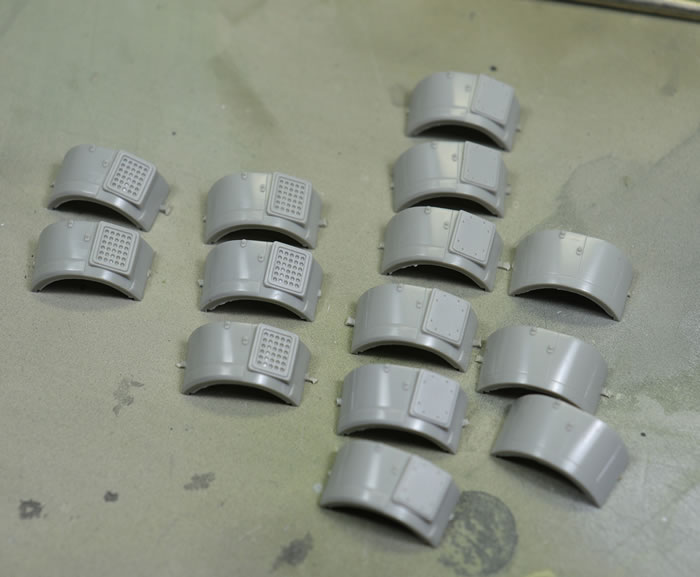
My stash of spare inserts from which the ‘nubs’ can be harvested.
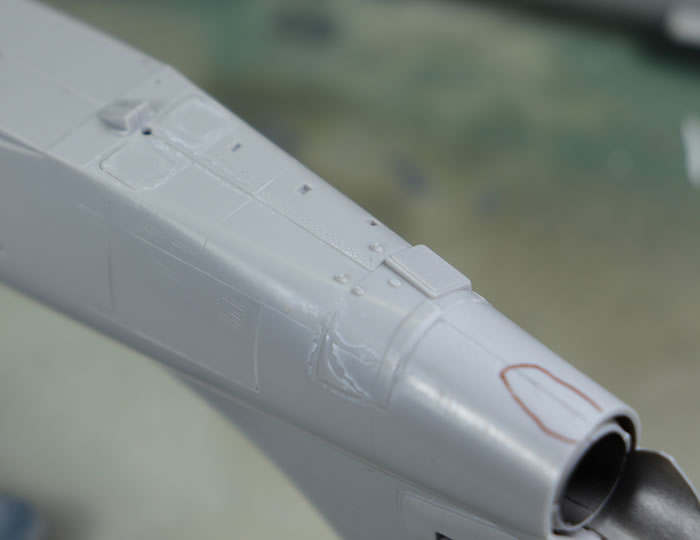
CA applied and awaiting clean up. The ‘nubs’ will be removed to facilitate sanding the seam around the insert.
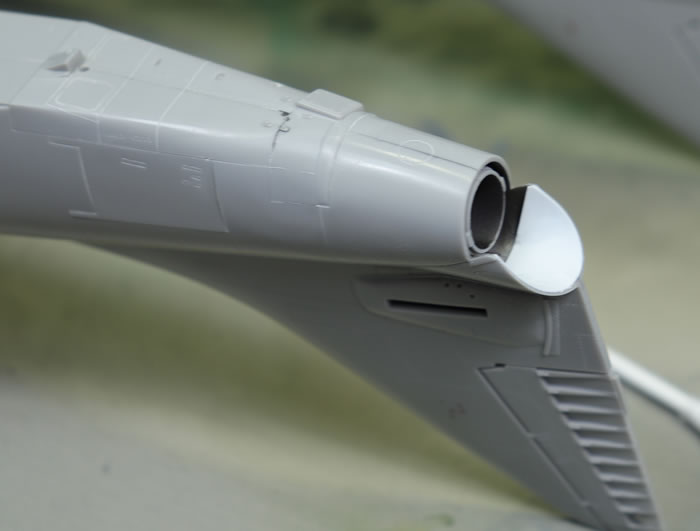
Thin plastic card used to cover the seam behind the exhaust.
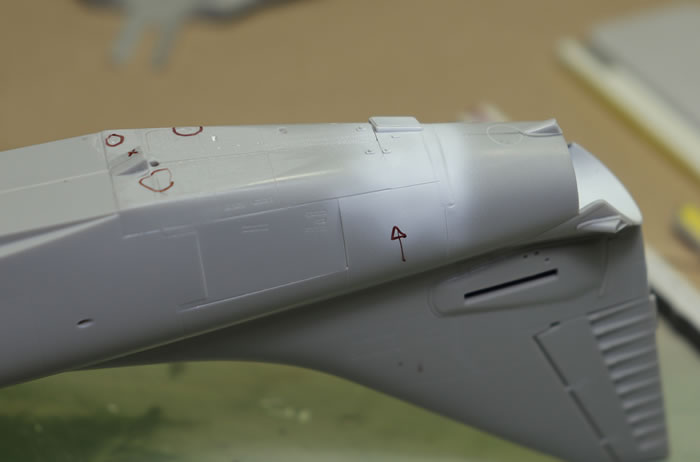
Checking the seams under priming. There is still work to do, as indicated by the brown marks.
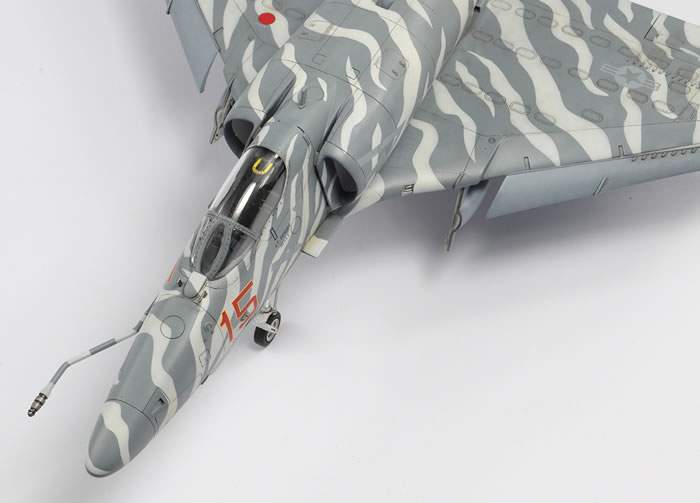
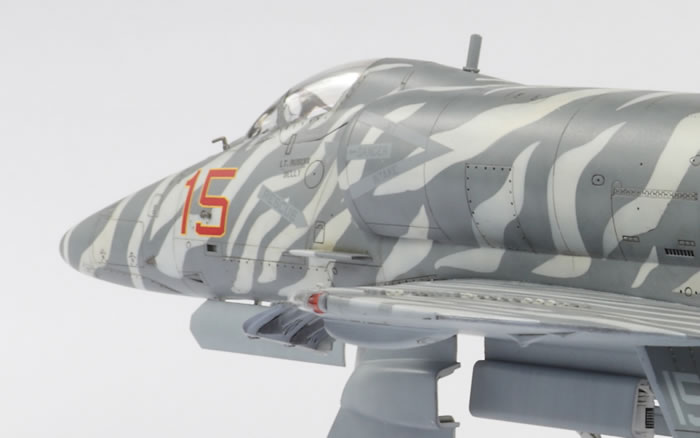
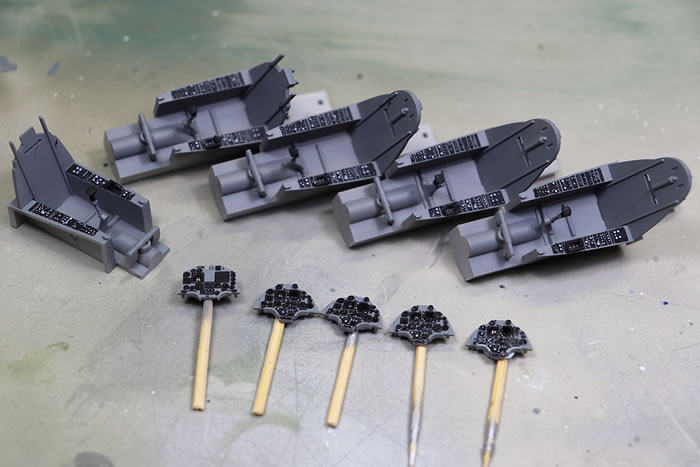
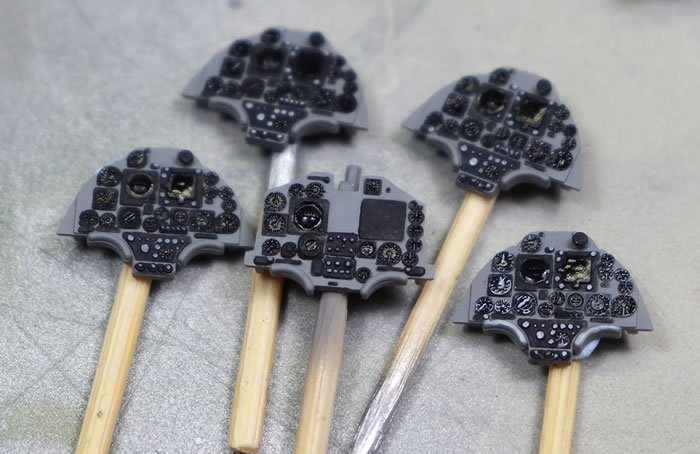
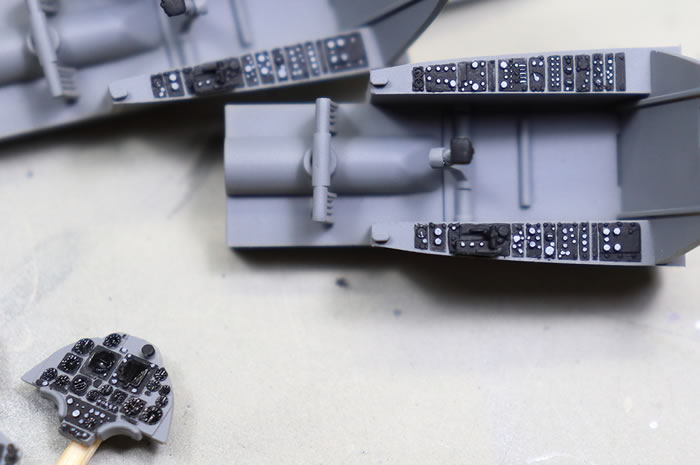
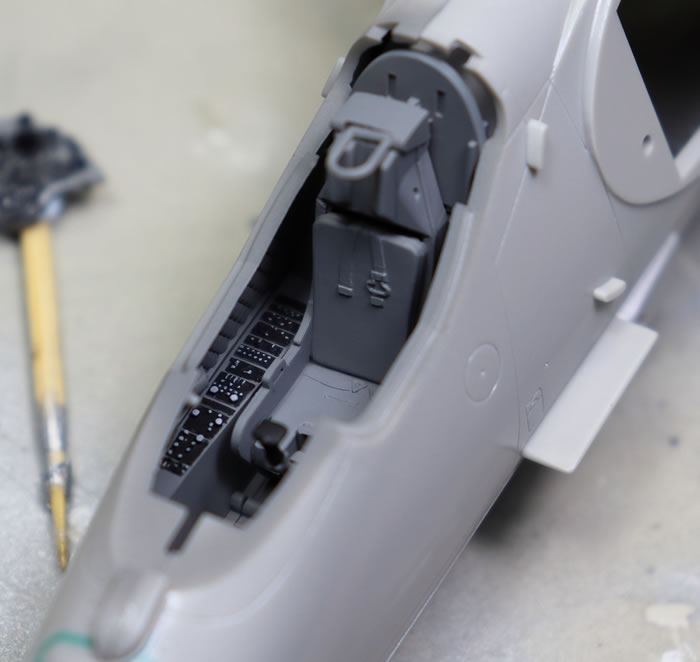
The cockpit detail is more than adequate if closing the canopy, as I planned to do. The seat could definitely be improved, but is not that visible. I do, however, wish I had done a better job of creating a new ejection handle as I rushed painting the moulded one and it looks terrible.
Although the instrument panel is invisible on a finished A-4 (with the canopy closed) I decided to experiment with magnification to paint it and the consoles. This was a revelation. I used a x10 hand lens from my geologising days and was amazed at how much more accurate I could be with the paintbrush. I always thought my detail painting was limited by a shaky hand, but it turns out visibility was always the problem. I highly recommend doing this sort of thing under magnification.
As is my SOP, the main components are all assembled using CA, as this is the most reliable way of avoiding ghost seams. Ghost seams have recently become a ‘thing’ in magazine articles and on the web. I first became aware of them in 2005 when making Skyhawks #3-5 in my collection and have spent the last 15 years trying to get rid of them. Using CA to join major components is the only reliable method I have found. This was reinforced again on this build when I made the mistake of using Tamiya Extra Thin to glue in some of the inserts and…had ghost seams to deal with. I should have used CA even for the small parts! I’ve never used a liquid cement that doesn’t cause me issues with ghost seams somewhere on the model.
Many people have problems using CA as a filler because it sets pretty hard. I don’t know what I do differently, but for me it remains fairly soft even when I leave it for 2-3 days (which I do quite frequently). I use a very thick superglue and rarely use accelerator, which may make a difference. Anyway, I often use quite a lot of CA applied rather thick. Once dry, I start on it with 400 grit sanding sticks (I like Wave and Infini; other manufacturers may have different grit standards) and then work through 600, 800, 1000, 1500, 2500 and then 4000 to polish. I then check the seam under grazing light, which picks up most of any imperfections there may be. If I am not sure, I can drag a needle in a pin vise under its own weight across the area I’m concerned about. If the needle sticks or catches, I know there is still work to do. This is a pretty discriminating method and as a result I rarely have to fix seams after priming.
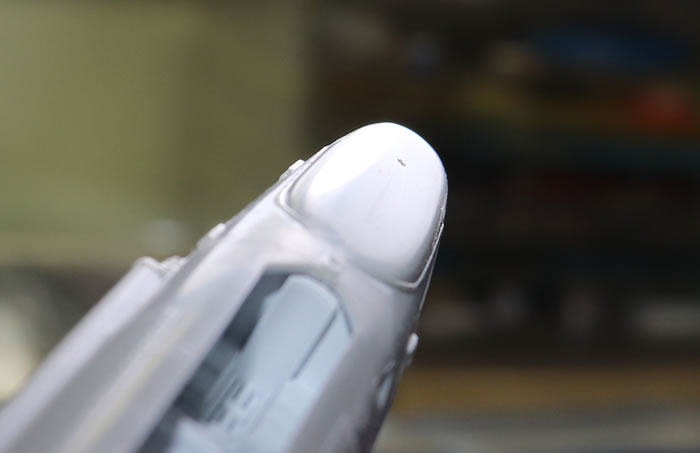
Nose seam under grazing light. You can see a line, which is the superglue in the join. However, by examining the reflection and dragging a needle perpendicular across the joint, it can be determined that the seam has been eliminated. The hole was unnecessarily opened up for this model, and so was later filled.
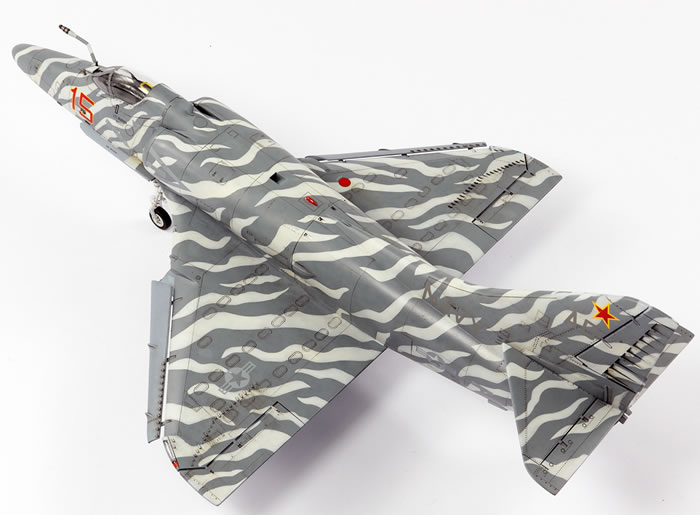
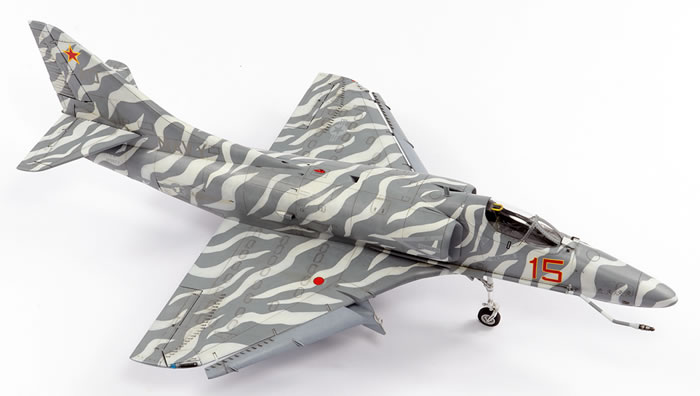
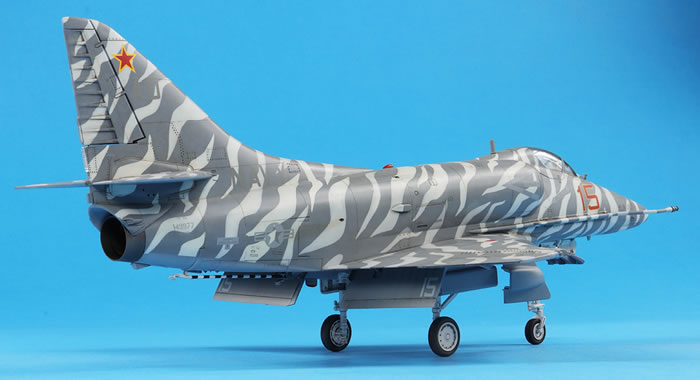
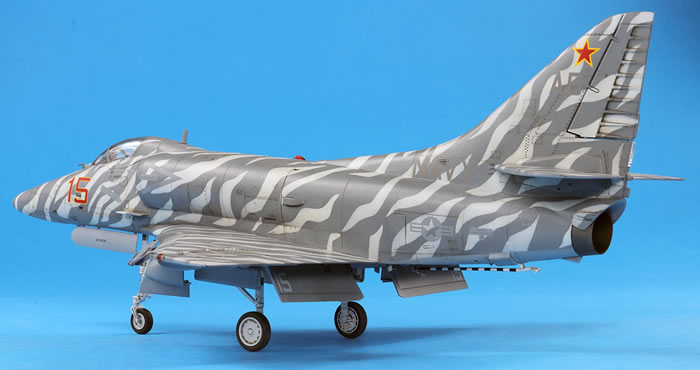
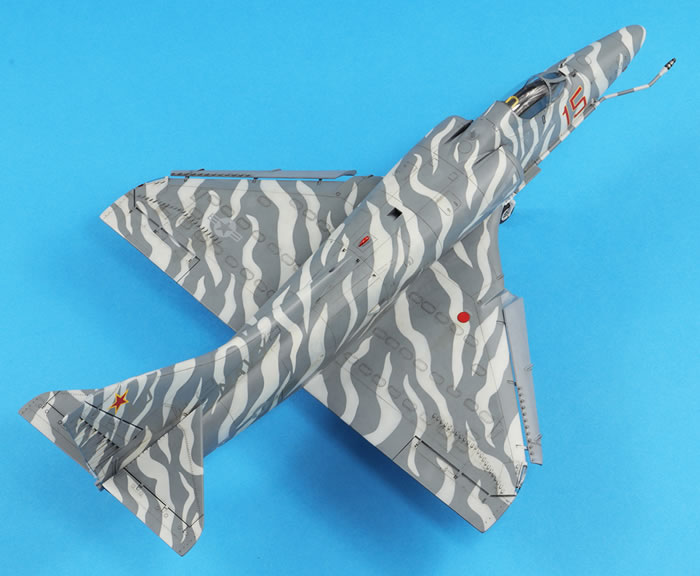
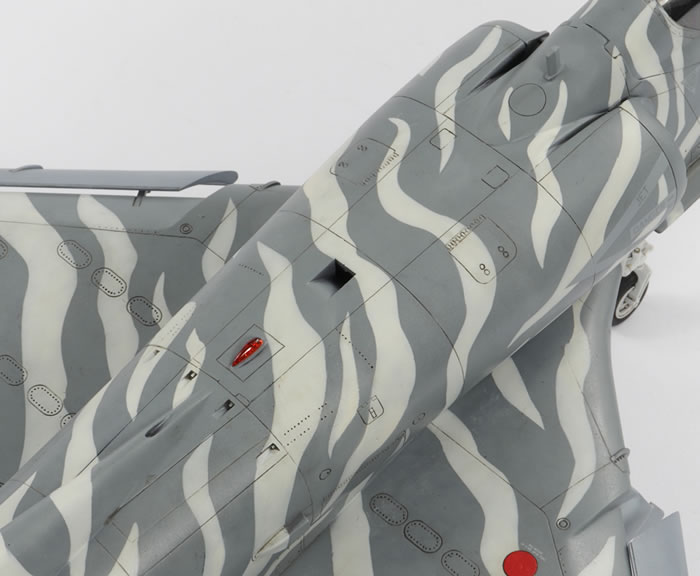
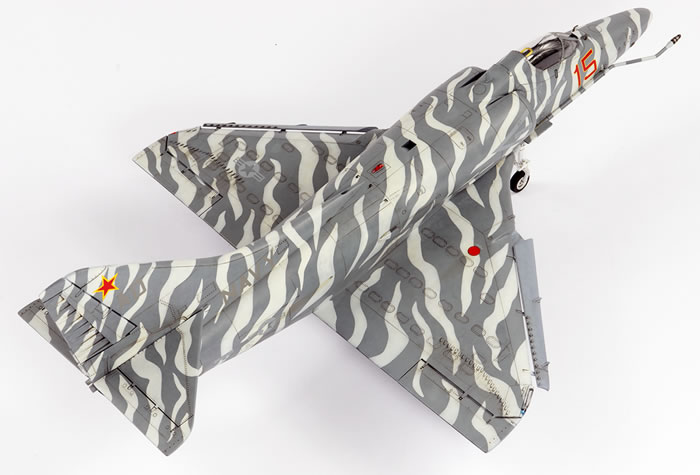
I had always intended to build this model in the kit-supplied standard US Navy markings of gull grey and white. I love this scheme and it’s very colourful. However, of the nine Skyhawks in my cabinet, five will already be in grey and white and so I decided it was time for an aggressor A-4. I bought the Fights [sic] On decals for aggressor Skyhawks and was immediately attracted to the most complex scheme on the sheet: the two-tone grey tiger-striped AD15. This would be a challenge.
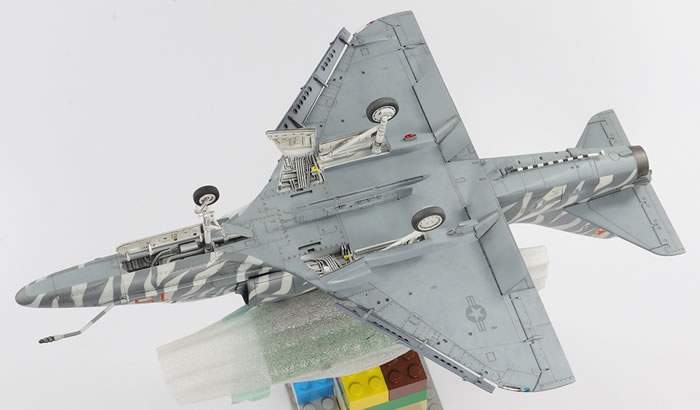
Some Googling produced images of both the left and right sides of this particular airframe, which helped greatly in figuring out the correct antennae configuration. It also showed that a missile pylon was carried on the centreline and I used these parts in the kit. Now the problem was going to be how on earth to paint this very involved scheme.
The first stage was standard: clean the model with 100% IPA and then prime it with Mr Finishing Surfacer 1500 Black. So far so good. Next came the straightforwards bits: airbrushing the underside in Mr Color 308 and the leading edge slats in Mr Color 307. I favour the black-basing method and use card stencils from Artool and PE stencils from Uschi van der Rosten to get a dense mottled effect which is blended in with a highly thinned coat paint.
For all of this I use an Iwata Custom Micron B with a 0.18mm needle and thin the paint very heavily with Mr Leveling Thinner and an additional drop or two of Mr Retarder mild.
I masked off the lower surfaces and then applied a mottle and blend coat of Mr Color 337. My strategy was to paint the dark grey and then mask areas off to spray the light grey stripes with Mr Color 311. My reasoning behind this was I prefer to put light paint over dark to build in some natural tone variation. It would definitely have been easier to do it the other way round in terms of masking, and apply the light grey first, but then I would have struggled to get the tonal variation in the dark grey.
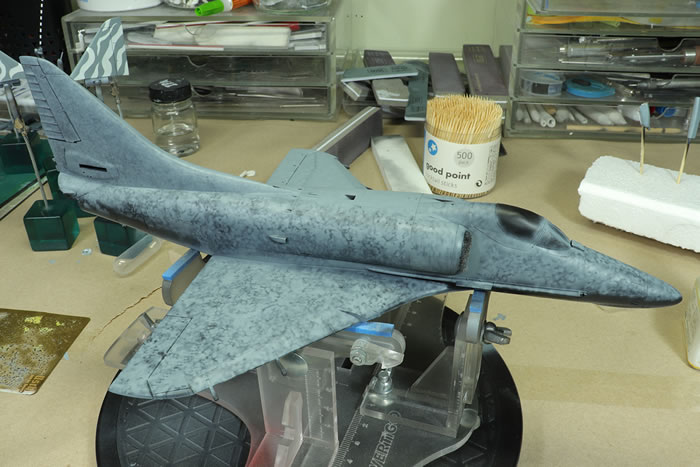
Marbling (using Artool and Uschi van der Rosten stencils) with Mr Color 337 over Mr Finishing Surfacer 1500 Black.
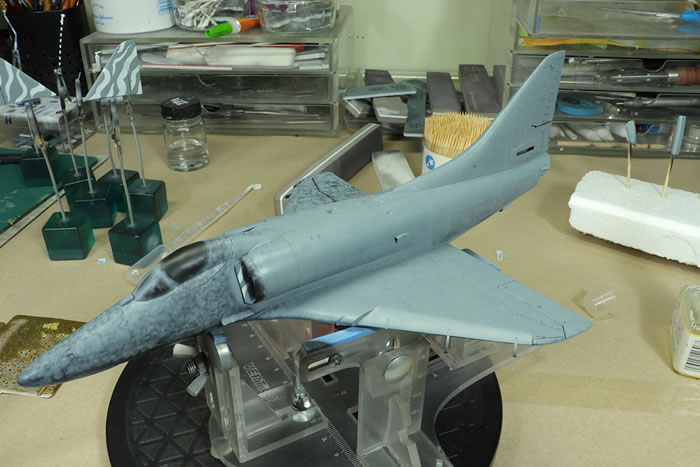
Blend coat of thinned Mr Color 337 has been added to most of the left side.
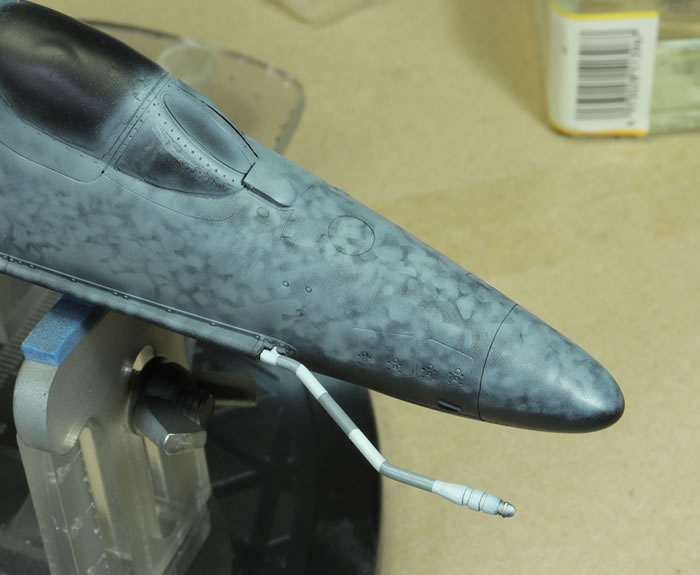
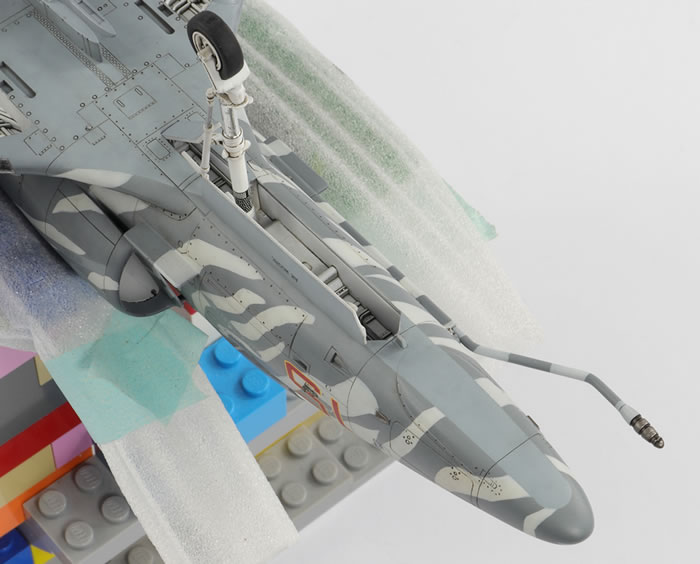
Test fitting the refuelling probe, which has already been finished in Mr Color 337 and 311.
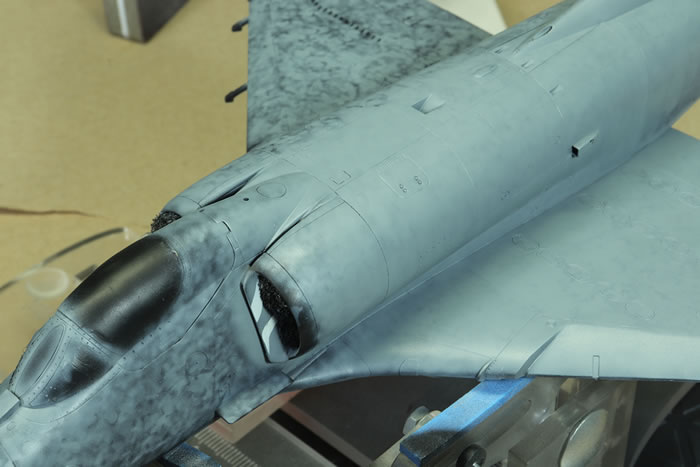
Adding the intakes and getting them painted before the rest of the airframe.
I decided that I would draw the stripes in Inkscape and then transfer the images to be cut on a Silhouette plotter. This seemed like a good idea. It wasn’t.
I had to scan in the instructions and then trace the stripes in Inkscape. This is semi-automated but needs a lot of cleaning up and it took a very, very long time to produce a mask that could be cut. It could then be sent to the plotter. My plan was to use Tamiya masking sheet, but the plotter really did not like this for such large masks with tight turn radii. The pointy ends of the stripe lifted during cutting and gummed the blade up resulting in an enormous mess. I am sure I could have fixed this with experimentation, but Tamiya masking sheets are very expensive and I did not have the resources to churn through them. I therefore fell back on Artool Ultramask. This cut a lot better, but vinyl has its own drawbacks: the mask is stiff, thick and the adhesive is quite aggressive
I tested all this on the horizontal tail planes, which I had kept separate. As these surfaces are very flat, the results were encouraging.
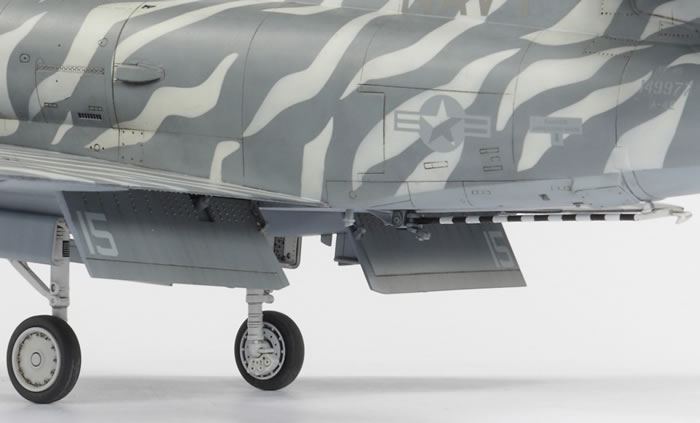
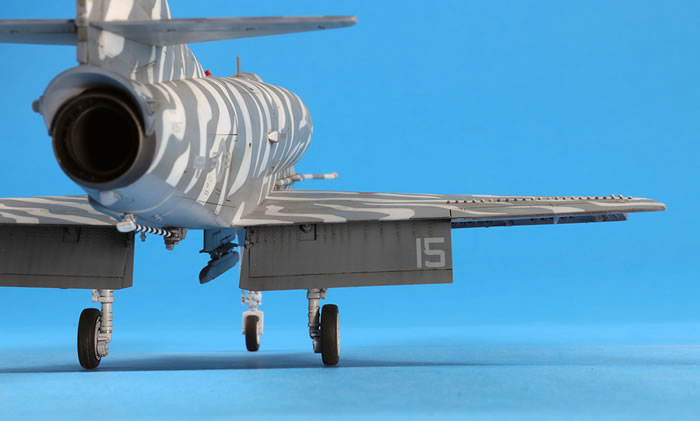
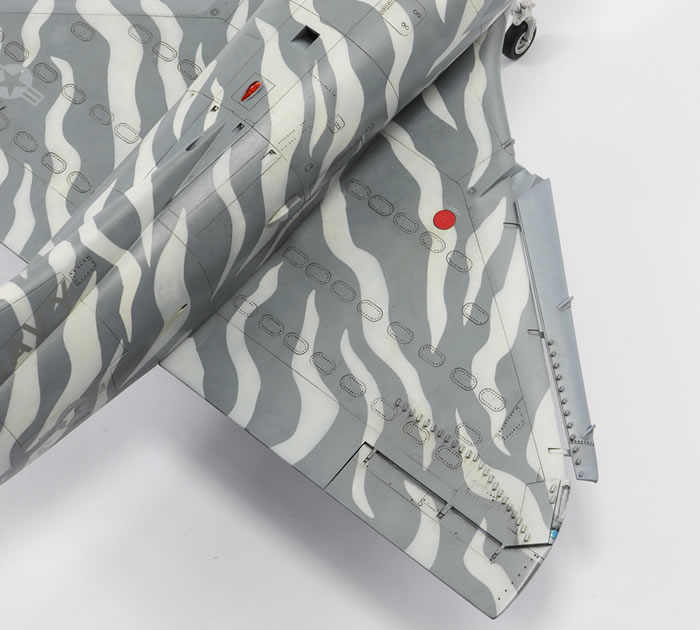
Next I tried the starboard wing. This also went pretty well, but the vortex generators were a challenge to mask around. I used Blu-Tack to plug gaps and filled in exposed areas with a liquid mask. I had not resized the mask perfectly to the wing, so it was cut into sections to get the spacing correct.

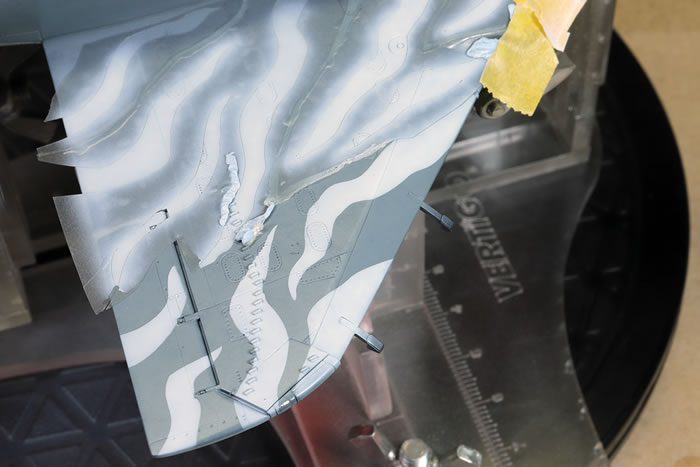
Masking up and painting the right wing.
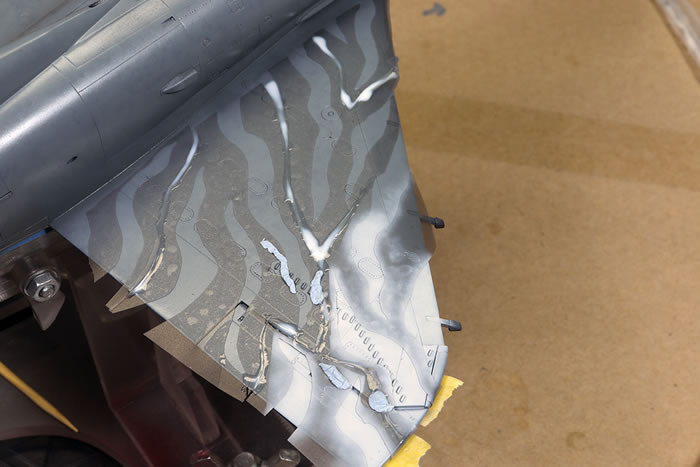
This was all going quite well until I hit the fuselage. I always knew the transition from the wing to the fuselage was going to be difficult, especially over the aerial refuelling pipe and because the masks were taken from a 2D image of what is a very curved surface. Masking really slowed down at this point, doing a stripe or two at a time from the butchered vinyl mask and using bits of the failed cut from the Tamiya sheet. That also was fine – I could cope with things going slow – but what was not fine was what happened when the masks were removed:
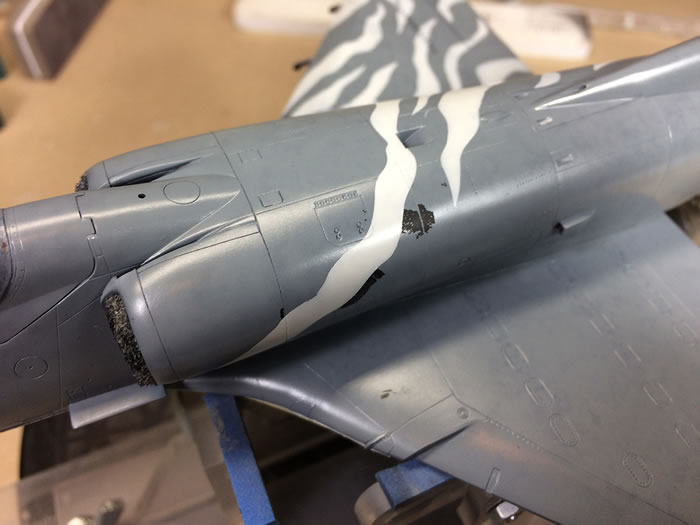
All those black patches are the Mr Color paint failing and being peeled up. Not only is it bad to have the paint lift, but it lifted adjacent to what had just been masked. This was going to be a nightmare to fix later on.
The position of the failed paint (it was confined to the central fuselage) and the fact it only failed down to the primer indicated to me this was because I had handled the model with bare hands after priming. I have found in the past Mr Color is *very* sensitive to my skin oils. Lesson learned: once the model has been cleaned with alcohol for priming, it should only be handled whilst wearing gloves.
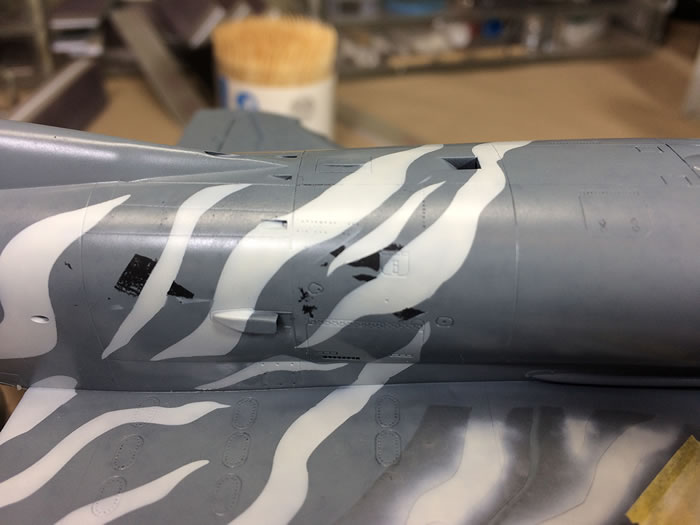
I knew I’d have more paint issues so pressed ahead with finishing the light grey stripes intending to do all the touch ups at the end.
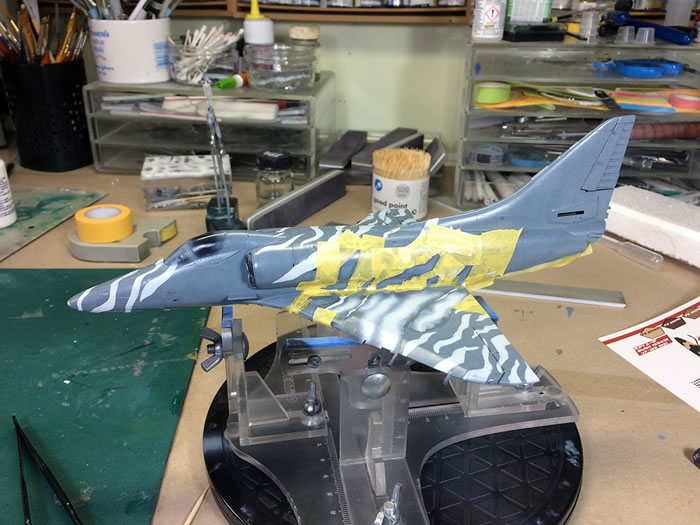
This picture illustrates why the masking took so long. This is for six stripes to be painted.
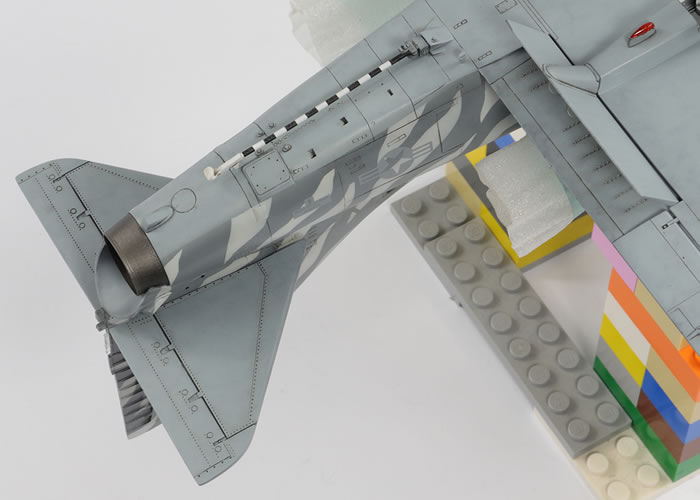
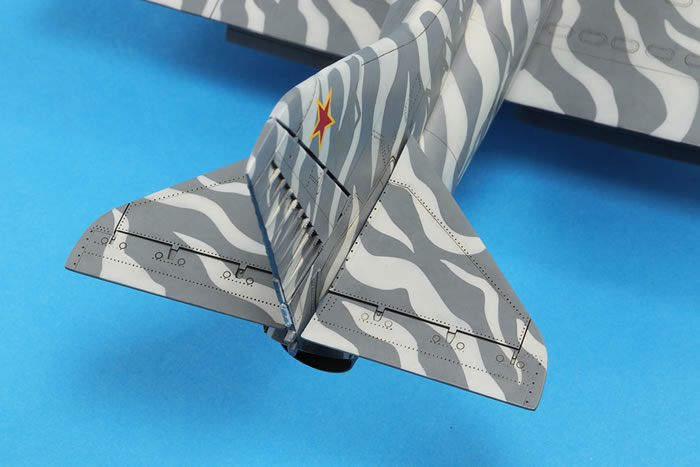
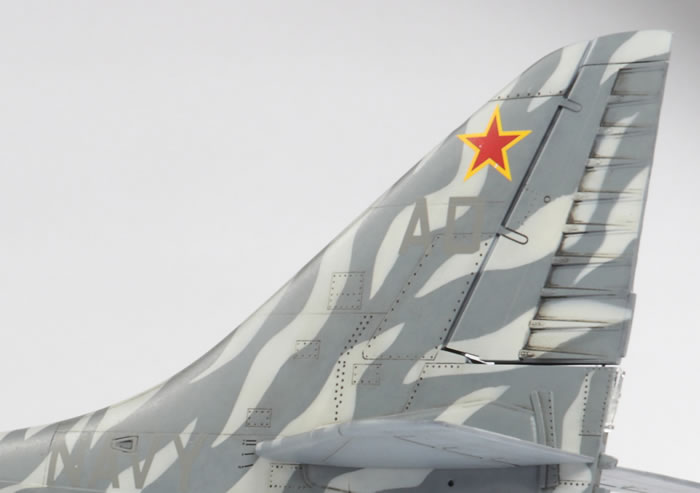
All in all, this was a painful model to paint. The Skyhawk is a deceptively complicated airframe with all kinds of protrusions that made the vinyl masking difficult, not least those vortex generators and the ribs on the rudder (which do not withstand close inspection well). For my next tiger-stripe camouflage finish, which will be a US Navy F-5E (currently scheduled for 2022, but we shall see…), I will probably paint the stripes first, mask them off using Tamiya tape cut by hand from the marking instructions, and then paint the background colour.
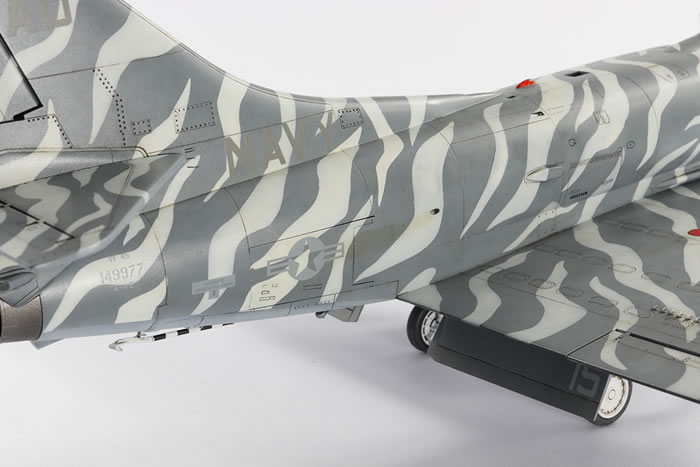
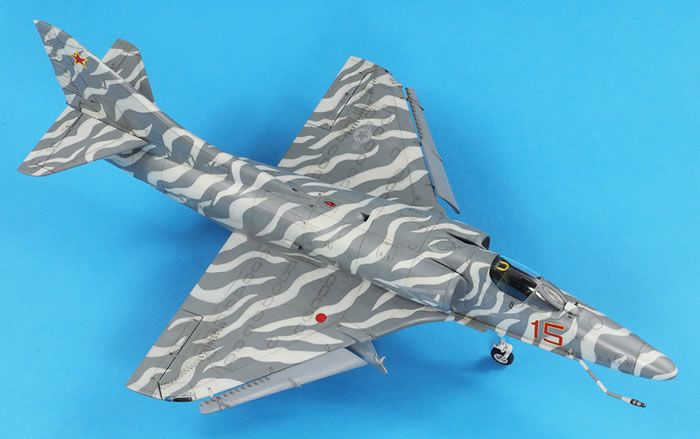
I did aim to get the final pattern reasonably accurate, but focused on using the drawing supplied by Fights On, rather than the photos I had. Consequently, if you compare this to the real thing, you will see that every stripe is there, but the shapes and spacing are not perfect. It took about two weeks to paint the stripes, each stripe taking an average of around 15 minutes to mask. There are a lot of stripes.
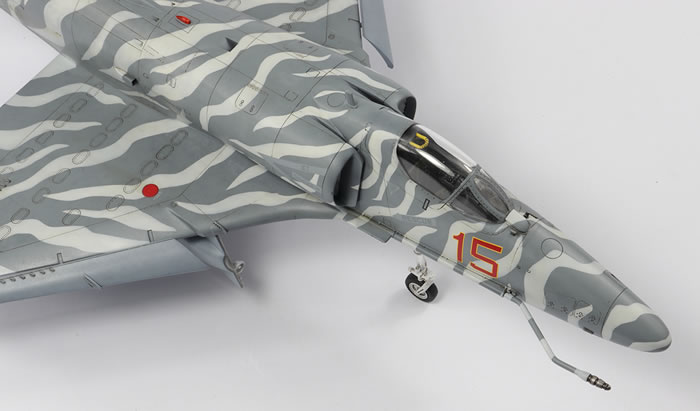
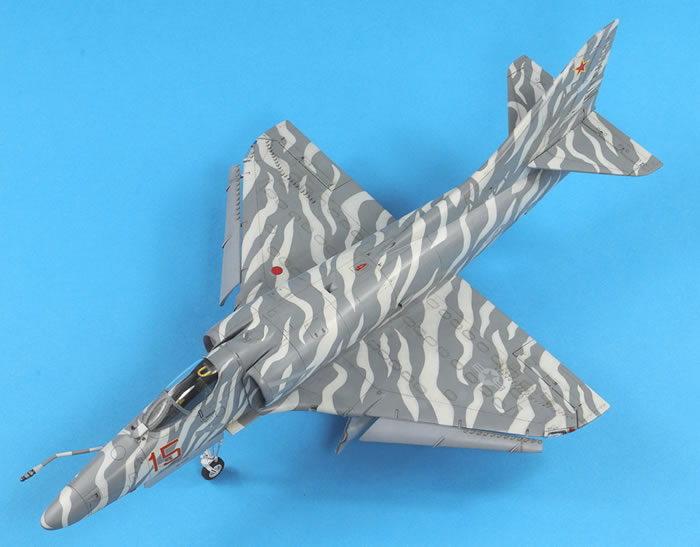
The decals are nicely printed by Cartograf. They settled down adequately well over a puddle of Mr Setter and under a light coat of Daco Red Strong setting solution. My previous bottle of this never did anything to any decal I tried it on, but I must have had one from a bad batch. This time I used a new bottle and it smashed some of the small decals down over some pretty major surface detail on the insides of the undercarriage doors. I think the red stars on the tail might be a bit too big – they’re certainly bigger than those shown on the markings guide.
A pin wash of Abteilung 502 oil paints mixed to a very warm grey shade was applied to the recessed detail. I used Zippo lighter fluid as the thinner, which gives a nice working time and doesn’t damage the underlying Tamiya X-22 gloss coat.
The overall finish is a roughly 50/50 mix of Gunze GX100 gloss with GX113 matt, thinned with Mr Rapid Thinner. It’s slightly matter than it should be, but I prefer my models looking that way. It was during the application of this semi-gloss coat that my main frustration with the finish became apparent: this model was a microfibre magnet. I have no choice but to model in a room with a carpet in a house with young kids jumping on the furniture, where washing is always drying somewhere and there’s just a lot of dust fibres in the air; you can see it when the sun shines. I’ve tried everything I can think of to cut down on dust fibres in my modelling room – vacuuming, spritzing with water, running an air filtration machine, and so on – but I just can’t get rid of the little fibres and they suck themselves to the model. I try and get rid of as many as possible using a tack rag and a blob of Blu-Tack, but as soon as I start airbrushing some always manage to find themselves in the paint. This one looks okay with the naked eye, but get up close with the camera and it’s not nearly as flawless as I would like it to be. If only I could get a sterile airbrushing environment
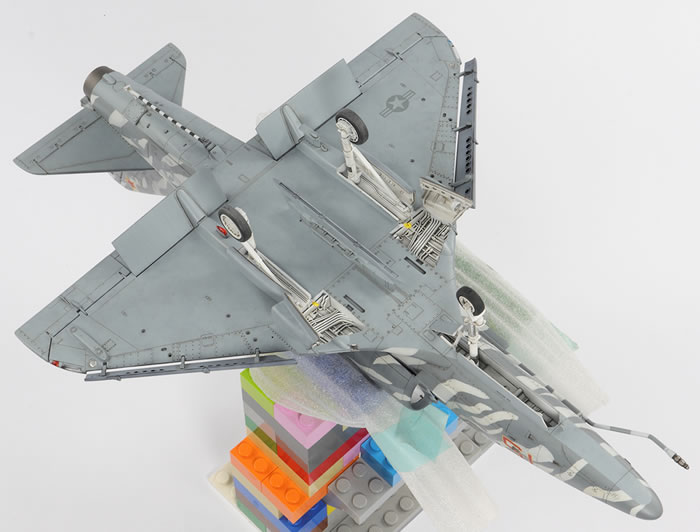
The final parts – undercarriage, pylons, leading edge slats, refuelling probe, etc. – were all attached at the end. Hasegawa’s engineering is generally excellent here, and neither main gear leg is glued in place, simply being held by friction. I wish all undercarriages were as simple to install. The only drama was the prominent aerial behind the canopy, which I mucked up. The area had to be sanded down and resprayed, and even now the way it’s attached is not perfect. I should have installed it prior to painting.
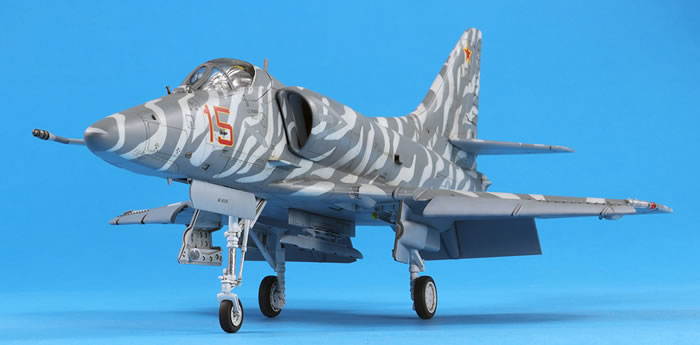
The overall effect is quite striking. It would have been a better model had I not had the paint lifting nightmare, but it’s such a busy paint scheme that the imperfections are not noticeable at first.
My main criticism would be the ejection seat handle, which I did not finish well and stands out a bit like a sore thumb.
I’m certainly glad I decided to correct the leading edge slat bays and think it makes a surprisingly big difference.
Next up should be the A-4L.
For more articles like this, please visit my website at www.jonbryon.com
Text and Images Copyright ©
2020 by Jon Bryon
Page Created 19 May, 2020
Last Updated
19 May, 2020
Back to
HyperScale Main Page

|
 Home
| What's New |
Features |
Gallery |
Reviews |
Reference |
Forum |
Search
Home
| What's New |
Features |
Gallery |
Reviews |
Reference |
Forum |
Search