Eduard's 1/48 scale
Messerschmitt
Bf 110 G-2/R3
by Brian Bourdon
|

|
Messerschmitt Bf 110 G-2/R3 |

Here is my Eduard 1/48 scale Bf 110 G-2 that I converted to a G-2/R3.
Cockpit
The cockpit consists of slightly more than a hundred pieces and it is a pretty fair representation of the real thing. Nevertheless, there are a few niggles, all of which I was prepared to ignore with the exception of the gunner/radio operator’s seat.
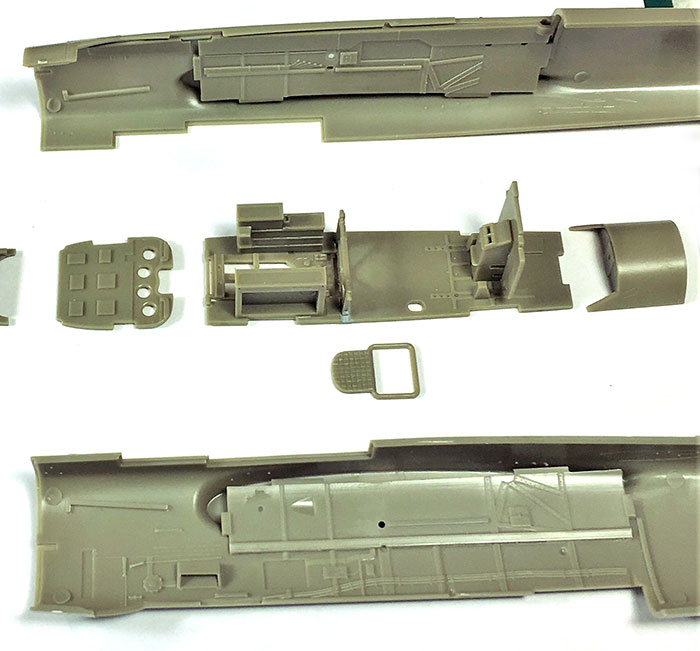
Photos of the cockpit confirmed that it should be positioned closer to the floor by approximately 3.5 mm. To do so, I rebuilt the supporting structure and drilled out new locating holes.

The overall appearance of the MG81Z was a bit underwhelming so I replaced the pistol grip with one amputated from a spare MG42. I will add that even though I feel somewhat better for having made the effort, it was a complete waste of time.
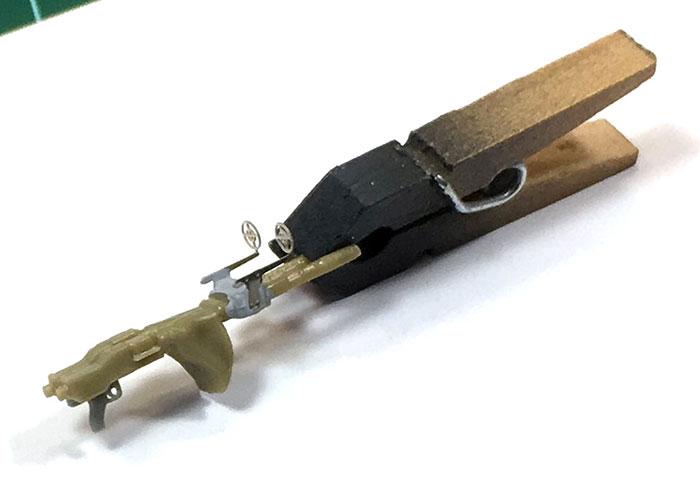
I challenge anyone to admire the much improved pistol grip now that it is more or less hidden by the glazing.
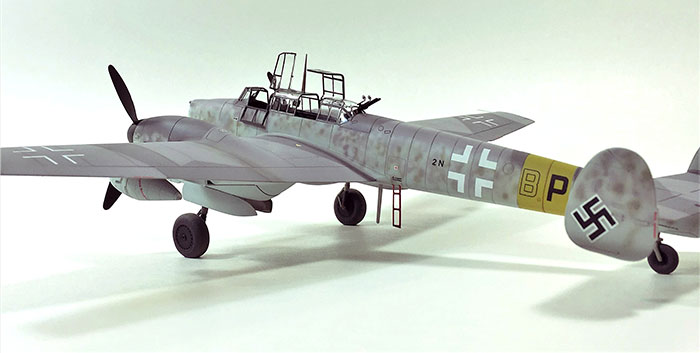
Exterior
Since I wanted a cannon armed G-2/R3, I grafted Revell’s nicely detailed nose cap onto my model. It had to be lengthened by about 60 thou which, in this case, amounted to two 30 thou sheet styrene shims glued together. At what point does a shim become a plug? I leave that question to better men. Despite the work required to blend everything in place, I found it was still easier than dealing with the kit supplied pieces.
Eduard supplies a generic, one-size-fits-all tire which I’m pretty sure is incorrect for all versions save the ‘E’ and possibly the ‘D’ models. It is a small point and not particularly noticeable, but I chose to correct the width of the tire by adding a styrene shim and by re-scribing the tread pattern. It’s an easy fix.
The gondola cannons, as supplied, were a bit anemic and were replaced with beefier lengths of styrene rod. And yes, I drilled out the ends.
As I’d previously experienced the joy of assembling Eduard’s multi-piece exhausts – there’s a weekend I’ll never get back – I gladly opted for a Quick Boost resin replacement set. These are finely cast with hollowed stacks, reasonably priced and very easy to install.
Finally, I scratch built a boarding ladder, a curious omission where Eduard is concerned.
Painting and Markings
The RLM 76/74/75/02 camo was produced with a combination of Aeromaster, Model Master, Tamiya and Gunze acrylic paints.
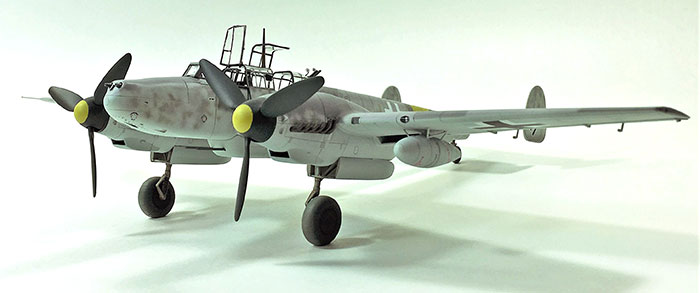
The markings came from both Eduard and Revell decal sheets.
Model and Text Copyright ©
2020 by Brian Bourdon
Page Created 30 November, 2020
Last Updated
4 February, 2021
Back to
HyperScale Main Page

|
 Home
| What's New |
Features |
Gallery |
Reviews |
Reference |
Forum |
Search
Home
| What's New |
Features |
Gallery |
Reviews |
Reference |
Forum |
Search