Moebius 1/8 scale
Grim Reaper
by Jonathan Hartman

|
Grim Reaper |

Having enjoyed mis-spending her mid-teens to early 20s as an enthusiastically morbid Goth, and with her birthday coming up, I thought among her other gifts My Dear Wife should have a small memento of the many happy, pleasurable years she spent before meeting me.
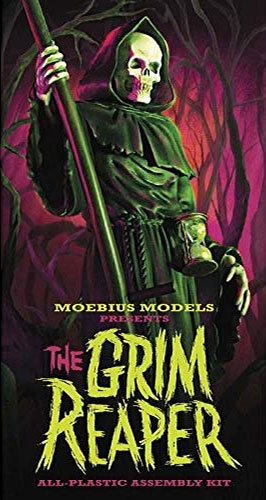
Accordingly, online I went, and purchased Moebius’s Grim Reaper for a surreptitious Surprise Build.
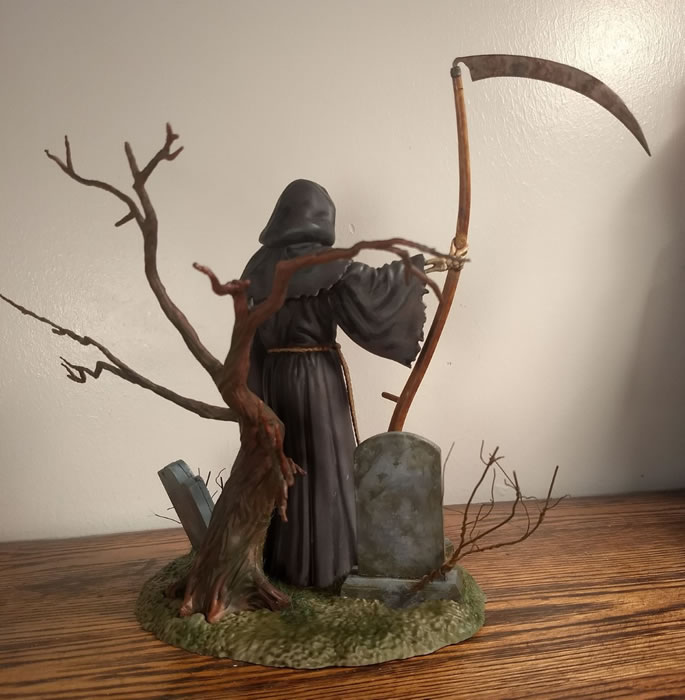
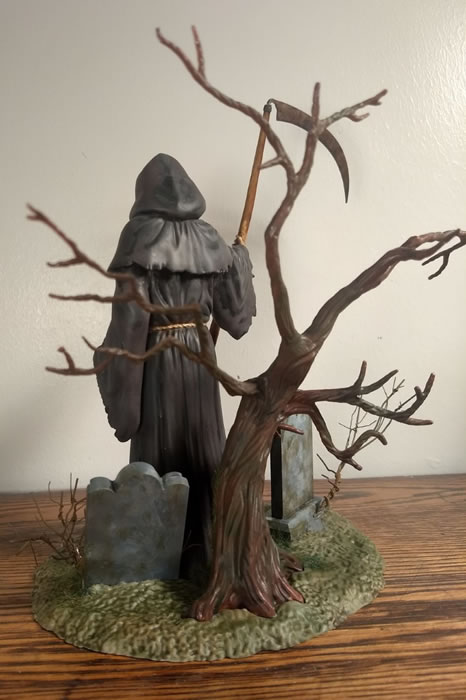
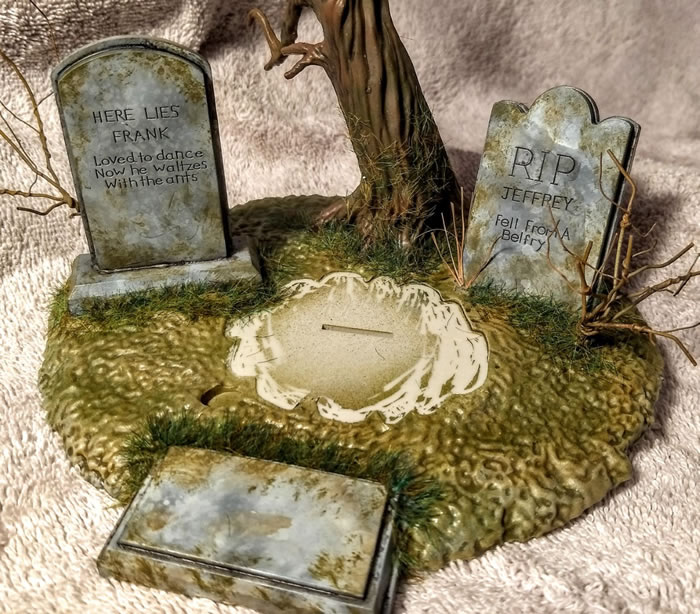
The model itself is a simple assembly, the parts building into the Reaper, his scythe, clear plastic hourglass, base, a leafless, gnarled background tree and two humorously inscribed tombstones. I decided to go for subassemblies to make the painting easier, so separately glued together tree, base and stones, scythe, and lastly the composite parts of the figure (arms, robe, short cape and hood) without yet sticking them together into ‘Mr. Agrarian Death’ himself
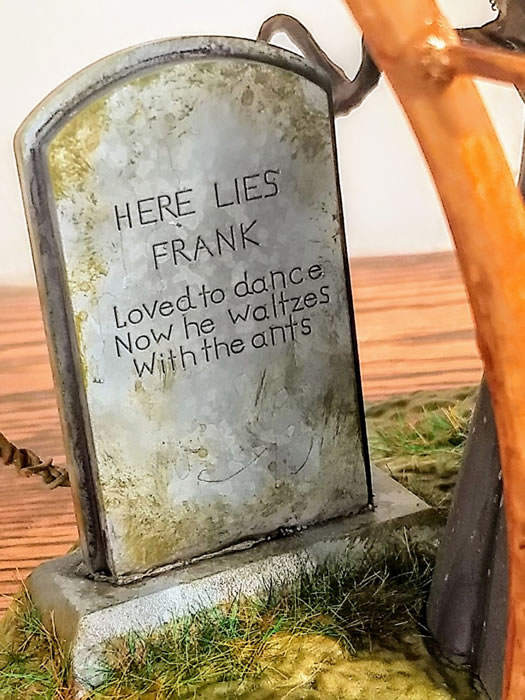
Assembling and filling the tree trunk, I painted it various shades of brown and grey, then washed black into the crevasses and folds of the bark for contrast. The base was coloured with various autumnal shades of browns and dark greens with a bit of drybrushing for contrast, the tombstones airbrushed and marbled in shades of light and medium grey, and their surfaces lightly textured further with a heavily-thinned darker grey shot through RB Productions’ photoetch Spatter Stencil. Various shades of Vallejo greens and browns were stippled onto specific areas of the tombstones to simulate patches of moss and outcroppings of lichen, and all of the inner right angles emphasized by lining them with a black fine-tipped Sharpie marker. I shot alcohol-diluted Future onto the epitaphs, then emphasized the words with a black pinwash before dullcoating everything.
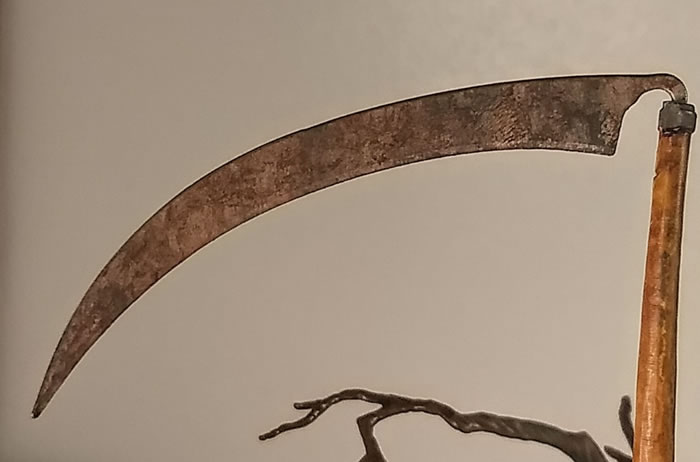
The haft of the Reaper’s scythe was woodgrained by drybrushing appropriate colours over a base of brown, all found in Vallejo’s Wood and Leather set. But the handles as supplied looked wrong somehow, so after a bit of research watching scything videos on YouTube (as one does…) I extended the upper one with a bit of scrap plastic dowel from a Q-tip! The blade was painted Tamiya Steel, then ‘rusted’ with the three oxide shades found in the excellent AK-Interactive Weathering Pencils set, which were applied dry then blended/integrated with a water-dampened brush. A bit of AK-Interactive Dark Steel pigment was worked into the blade with a stiff cut-down stub-brush, then everything was sealed with the ubiquitous Dullcoat.
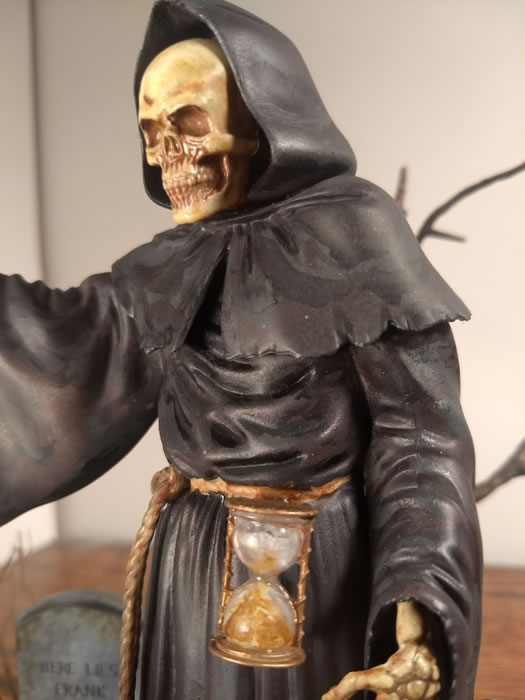
Skull and one skeletal hand left on the sprue for ease of handling (other hand is moulded onto the scythe) I painted the three plus the Reaper’s rope belt a shade of AK-Doped Linen (from the WW1 set) then used a (heavily-thinned with mineral spirits) blob of Burnt Sienna oil paint from a tube to texture everything by emphasizing cracks and hollows, then drybrushed with the lighter linen shades from the same WW1 set- old bones aren’t white!
Then it was time to paint the robes with the Andrea Miniatures excellent Black Set. This is actually five shades of gray with one of black for the deepest shadows. No mixing of shades is absolutely necessary unless you want to be a complete obsessive- the dark medium gray as instructed works nicely as a base, and the lighter and darker shades in the hollows, creases and on folds modulate and texture everything for realistic effect
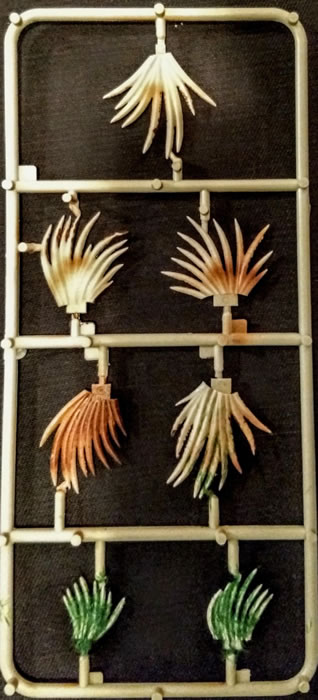
Before the final assembly I used my new (made-in-and- Net-purchased-from-China and thus affordable...) ‘Handheld Static Grass Flock Applicator’ filled with Peco 6mm Autumn Grass to set a little greenery/brownery into thinned white glue painted around the tombstones and the base of the tree. And that looked pretty good, but it also meant I really couldn’t bring myself to use the truly awful two-dimensional little kit-suppled bushes as an option. So some paperclips twisted together for the stalks and branches, accented by the fine wire those paper-wrapped ‘twist ties’ have for a core repurposed to simulate twigs then airbrushed in the usual various shades of brown and gray really helped. And a quiet restorative stroll through a nearby park yielded a few bits of useful dried vegetation.
Final assembly. Belt added, clear hourglass assembled and painted gold with simulated sand in the bottom half only, Reaper fixed to base, scythe added- and because of the faulty hole placement what you’ll need to fix his skeletal right arm solidly into his voluminous sleeve is a fairly big blob of grey or black Milliput epoxy putty which will allow a bit of alignment/wiggle room before everything hardens.
I am delighted to say that V. liked him very much, and he’s in the living room as I write, displayed on top of a speaker as per her photo with him.

One of these days I’ll finish my Wingnut Wings Harry Tate and post it on Hyperscale if Brett indulges me, but meanwhile here’s the Grim Reaper, and may he ignore us all for many debauched years to come.
Model and Text Copyright ©
2020 by Jonathan Hartmann
Page Created 19 February, 2020
Last Updated
2 March, 2020
Back to
HyperScale Main Page

|
 Home
| What's New |
Features |
Gallery |
Reviews |
Reference |
Forum |
Search
Home
| What's New |
Features |
Gallery |
Reviews |
Reference |
Forum |
Search