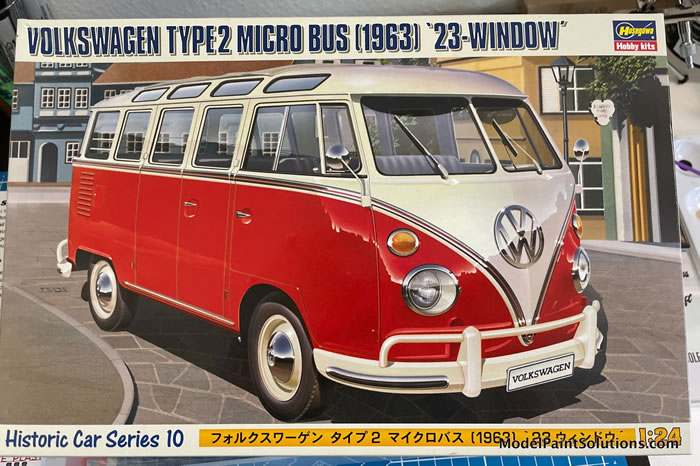
Hasegawa 1/24 scale
1963 VW Type 2 Micro Bus
"23 Window"
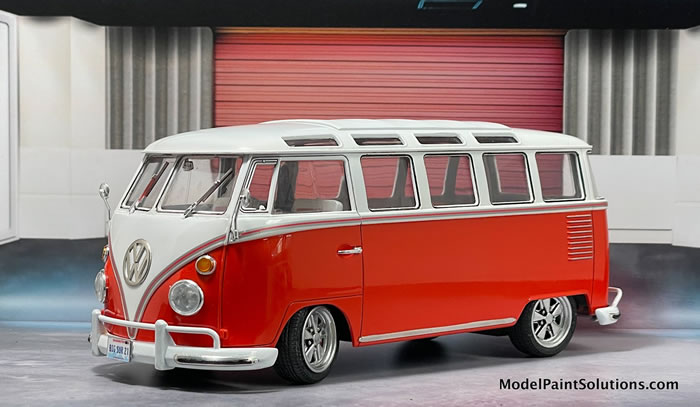
by Brad Huskinson

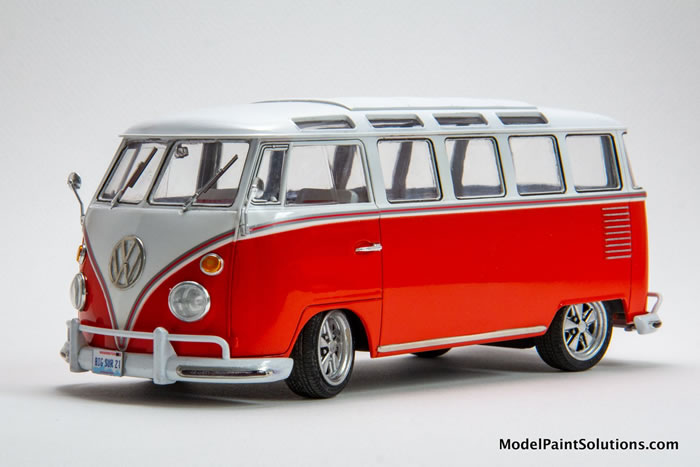
This has always been the coolest looking of the VW buses. I saw one at the vintage races at the Pacific Raceway (Kent, Washington) many years ago. Fortunately I took a picture of it. In hindsight, though, I should have bought it.
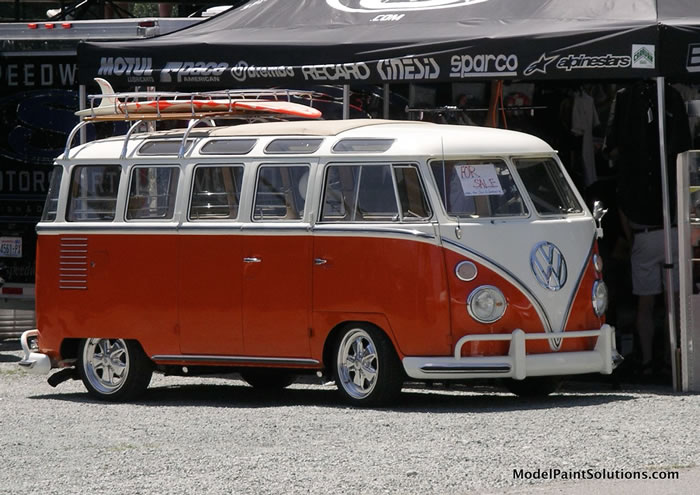
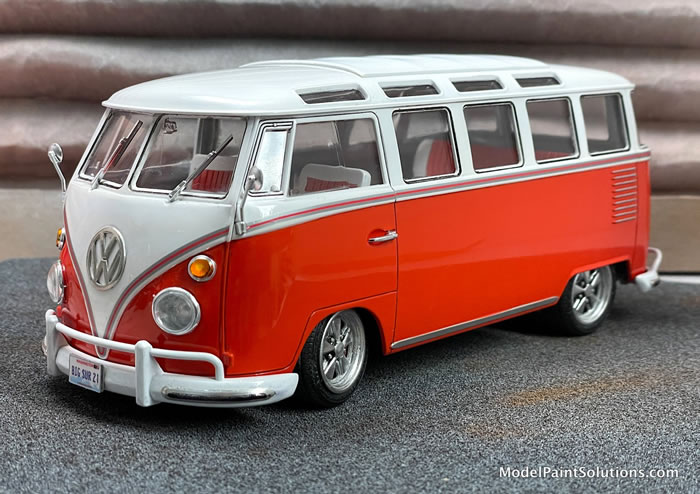
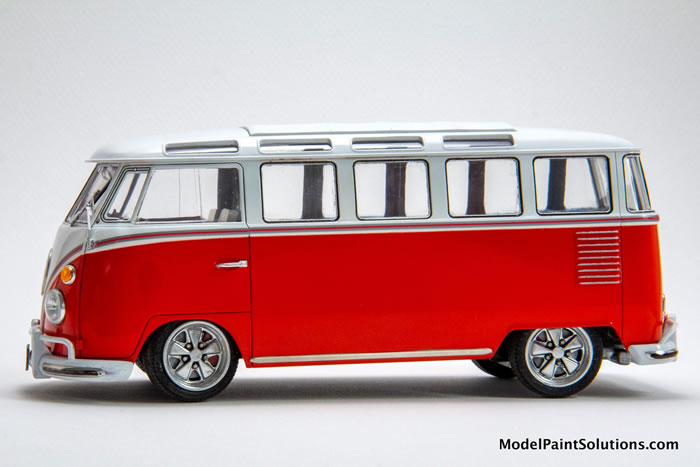
They have skyrocketed in value, plus I would have owned a very cool van. The Porsche Fuchs wheels and the lowered stance really made it stand out.
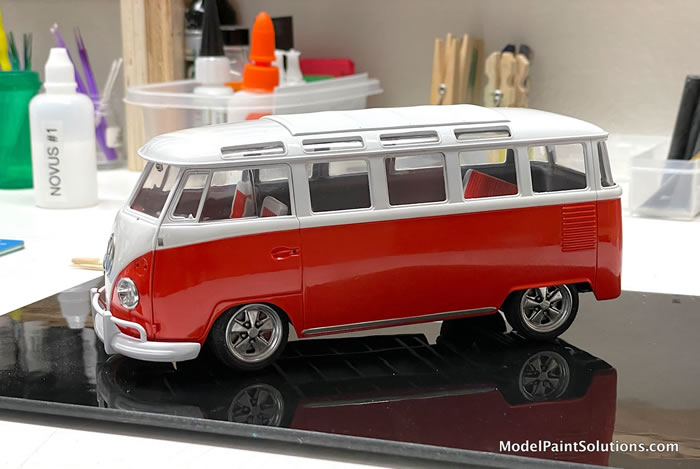
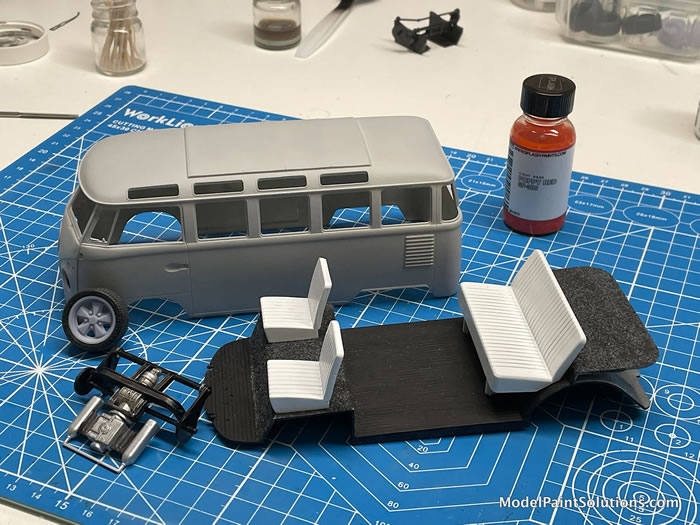
All parts were removed from the sprues with cutters and cleaned up with sandpaper and sanding sticks. Both Tamiya Thin and CA glues were used depending on whether or not the parts had been painted.

The kit was built OOB with the exception of the side doors and rear hatch, which were molded to be posed open and had very wide, open panel lines.
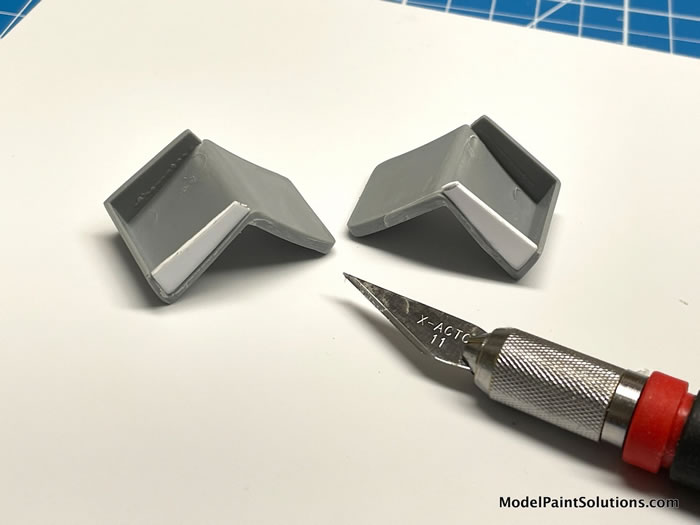
I didn’t want opened doors, so the panel lines were filled. Narrow strips of Evergreen plastic sheet were cut and inserted in all of the spaces. These were glued in place with Tamiya Extra Thin Cement. I made sure to have the strips stick out a fraction of an inch so I could sand them smooth (flush) to the body.
I then placed 3mm scribing tape tape right on the old door edge as a guide to scribe new panel lines of the proper width. This turned out to be way more difficult than I imagined, but with very good results after much sanding and filling.
The front seat was a bench and I wanted buckets so I cut the center out of both seats and made new seat ends from Evergreen sheet. Since they weren’t perfect, I swapped seat locations so the funky side was tight against the interior door panels.
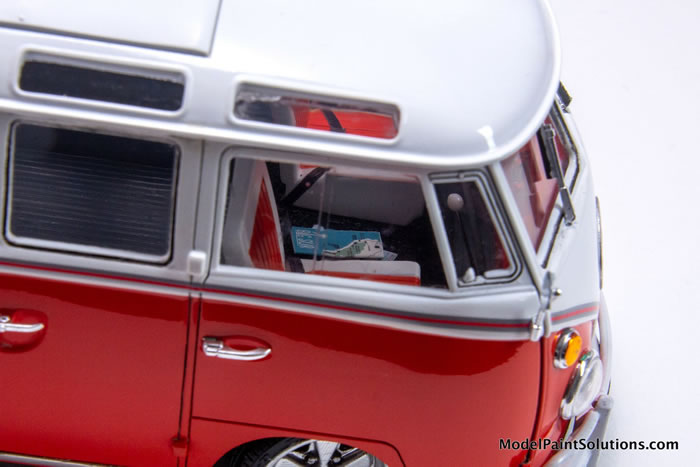
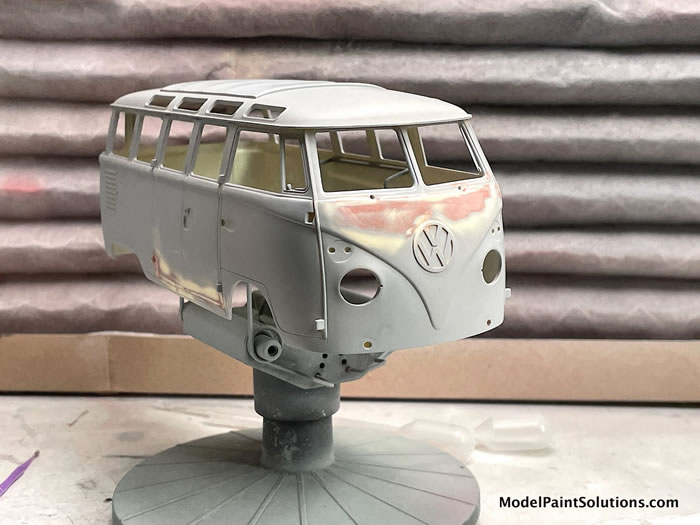
The build was mostly trouble-free except for some cavities in the front, under the windshields that were filled the Bondo Glazing and Spot Putty.
In addition, lowering the van required pieces to be removed from both the front suspension and chassis.
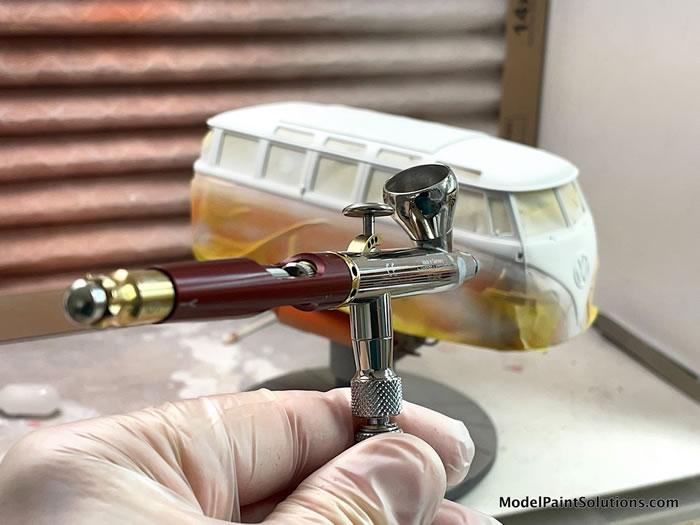
I used both a Harder & Steenbeck Infinity and Evolution for this build. Based on amount of surface area/size of part, I would switch between a .2 needle (Infinity)and .4 needle (Evolution). Virtually every part was airbrushed, as I really don’t like brush painting.
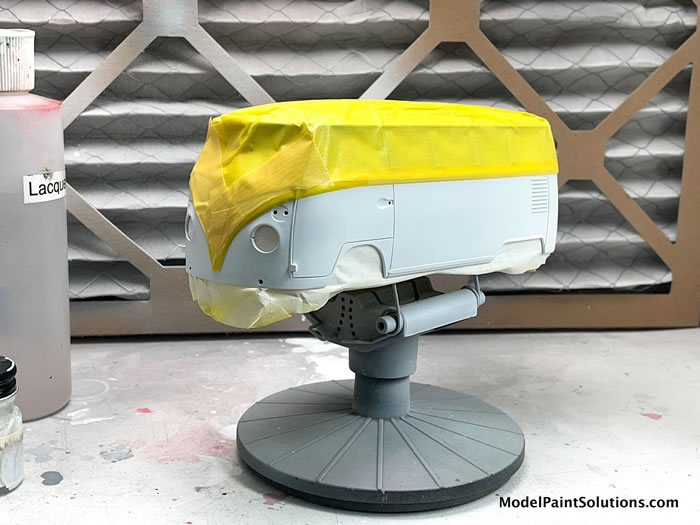
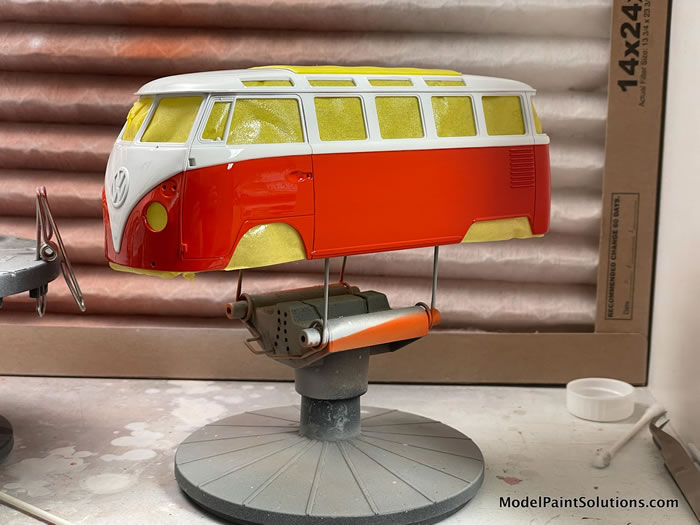
All parts were sprayed with various primers prior to painting. The body was sprayed with decanted Tamiya White Surfacer/Primer and virtually all of the remaining parts were sprayed with either Mission Primer or Mr. Hobby 1500.

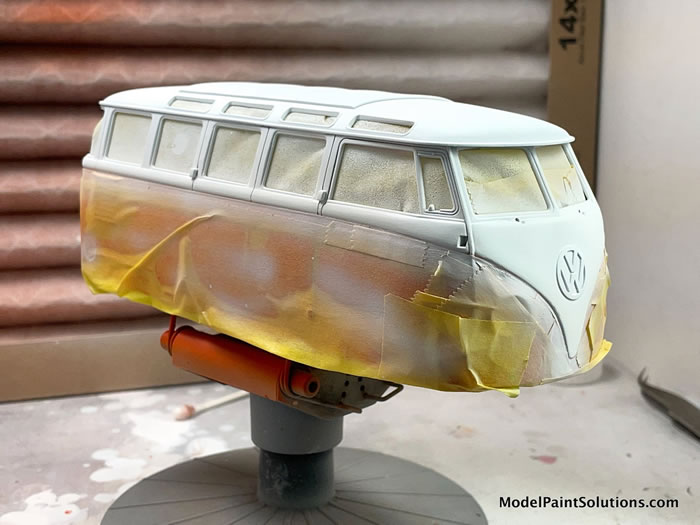
I dilute most paints from 50/50 to 30/70 (Paint/Thinner) and spray at 15-18 psi. The white body/roof is decanted Tamiya white surface primer and the red portion of the body was painted with Splash Paints Poppy lacquer. Then the entire body, except the fabric sunroof, was gloss coated with 3 coats (one misty, two wet) of Splash 2K Urethane. I left the sunroof in the flat primer texture.
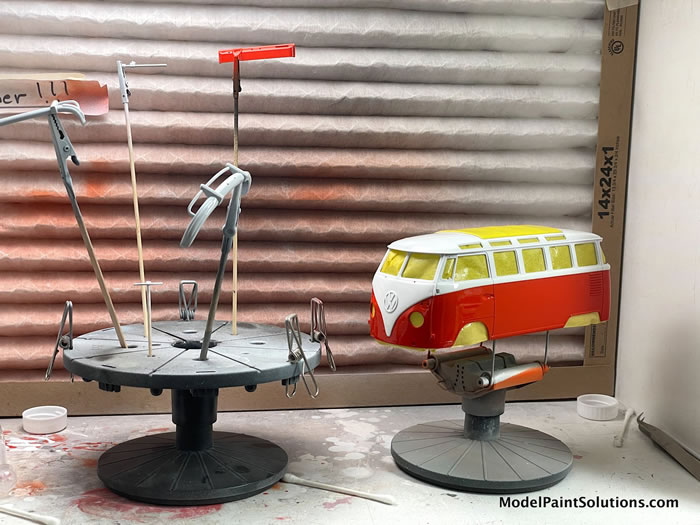
All other parts, except the chassis, were painted with a combo of Mission, Tamiya, and Model Master Metalizer paints. The chassis was painted with Rustoleum flat black primer from the spray can. I shake the hell out of the can, put it in a bowl of very warm to hot water for a few minutes, shake again, and spray multiple light coats from about 2 feet away.

The interior side panels were painted two-tone grey using Splash white surfacer and Splash grey surfacer. Splash’s white surfacer is actually a light grey tone. These are both lacquers. The seats were painted white and poppy to match the body. The floor was a grey I made with Tamiya acrylics and brush painted to represent a rubber/vinyl material.
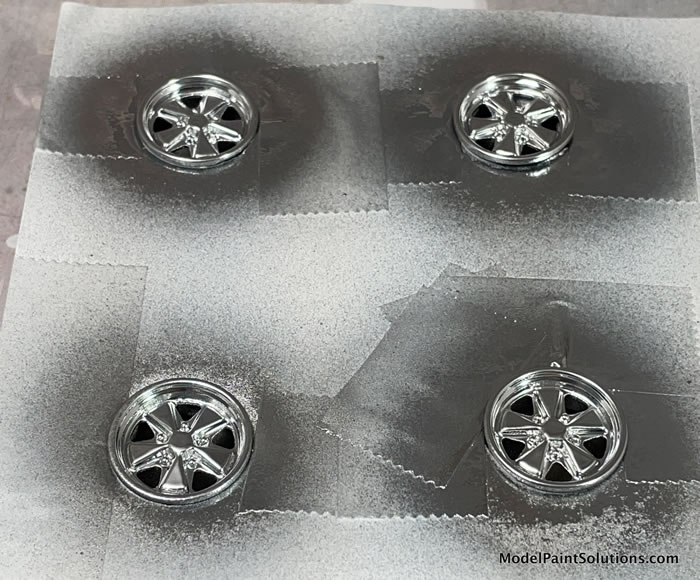
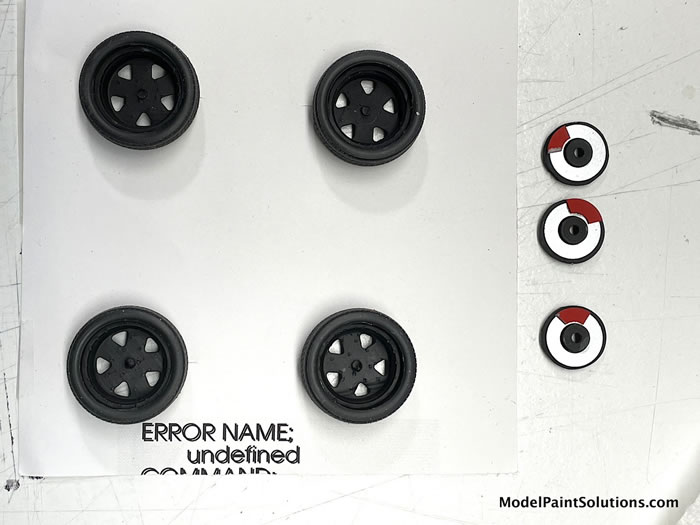
I airbrushed the Fuchs wheels with Molotow chrome.
The kit decals were used for the body stripes below the windows and applied with Micro-Set and -Sol. On the sheet they didn’t look very good at all, but once applied on the model they looked great. I used the supplied gauge decals for the dashboard with a drop of clear epoxy glue over the gauge face. It dries to make a perfect glass/plastic gauge cover.
Final Touches
The raised interior section between the seats was covered with dark grey Ken’s Fuzzy Fur to represent carpet. I printed some scale size maps of the Big Sur California coast and put them between the seats to add visual interest. I also made my own license plates in Photoshop.
Seatbelts were made with masking tape cut into narrow strips, blackened with a fat Sharpie and photo-etch buckles.
The Porsche Fuchs wheels were 3-D printed for me by Chris Bell at Bolide Plastic Motorworks. The low profile tires came from an unbuilt Plymouth Prowler kit and fit perfectly. I used thin nylon washers, sprayed with decanted Krylon Chrome, as disks and made calipers from sheet styrene painted AK Signal Red.

The kit is basically a curbside, with only the bottom half of the engine showing in the chassis. I wanted to make it appear that there was some form of a performance engine, so I made my own dual exhaust with pieces of aluminum tubing.
The side vents at the rear of the van were dry-brushed Tamiya flat aluminum.
The chrome parts were sprayed with Vallejo Gloss Metal Varnish which knocked down the toy-like chrome kit finish. I used a combination of Tamiya Black Panel Liner and super-fine tip black pens around the windows and all panel body panel lines. The chrome accents on the lower body and bumpers are covered with Bare Metal Foil.
Lastly, instead of the decal for the big VW on the front, I sanded the raised logo much thinner and used Bare Metal Foil on it.
I’m very happy with how this kit went together and how close it came to the 1:1 that I wish I owned!
For more on this article, go to ModelPaintSolutions.com
https://modelpaintsol.com/builds/hasegawa-1963-vw-23-window-bus-21210
Text & Images Copyright © 2022 by Brad Huskinson
Page Created 22 July, 2022
Last updated
22 July, 2022
Back to HyperScale Main Page
Back to Reviews Page

|
 Home
| What's New |
Features |
Gallery |
Reviews |
Reference |
Forum |
Search
Home
| What's New |
Features |
Gallery |
Reviews |
Reference |
Forum |
Search