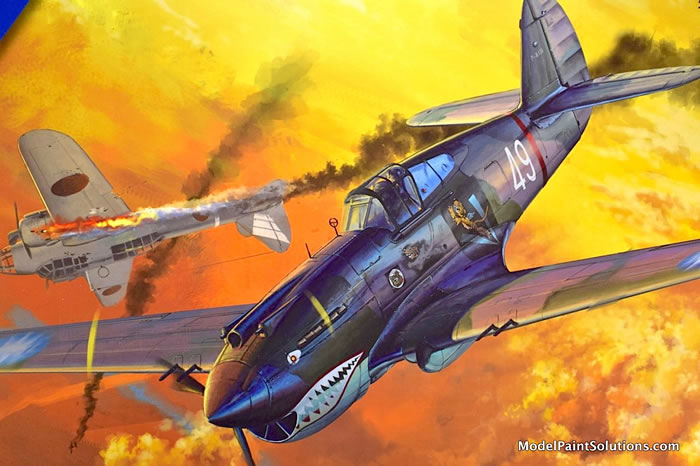
Curtiss Hawk 81-A2
“Flying Tigers”
Great Wall Hobby, 1/32 scale
S
u m m a r y : |
Description and Item No.: |
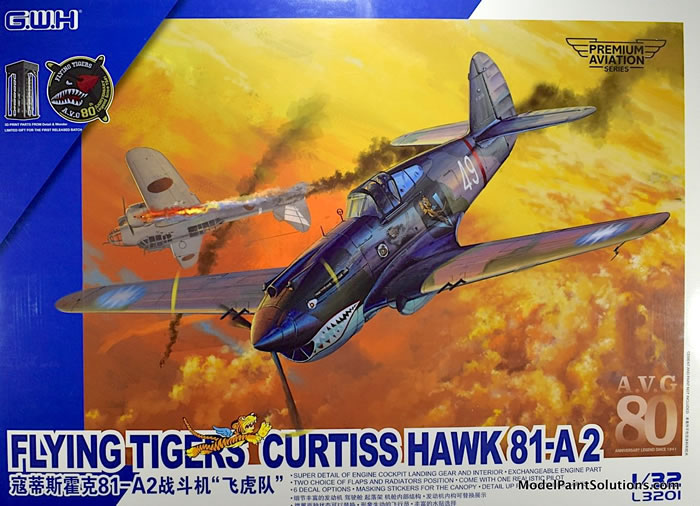
Great Wall Hobby Kit No. L3201 - Curtiss Hawk 81-A2 “Flying Tigers” First Issue |
Contents and Media: |
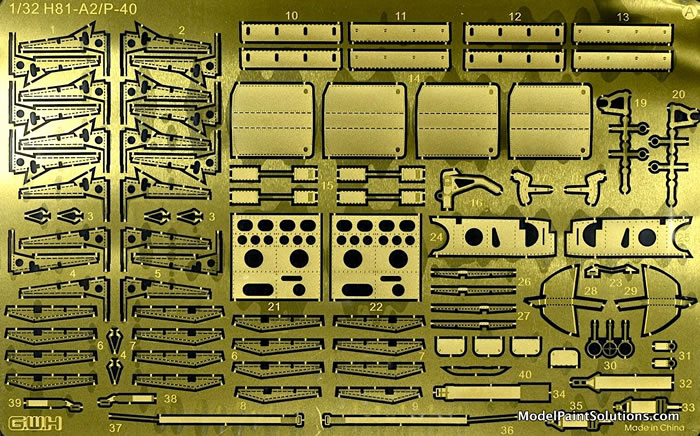
298 parts in grey styrene, 10 clear parts, 2 PE frets (large and small), 3 magnets, three decal sheets with markings for 6 airframes, 24 page assembly booklet, and small instructions addendum sheet. Additional items included in this “First Issue” boxing are 6 x 3D printed gun barrels, an embroidered 80th AVG anniversary patch, and a collectors card. |
Price: |
TBA |
Scale: |
1/32 |
Review Type: |
First Look |
Advantages: |
The overall level of detail achieved by the kit is spectacular. The surface details are state-of-the-art and the ingenious use of magnets permits the completed model to be displayed with interchangeable nose assemblies. |
Disadvantages: |
Main gear and tail wheel tires and provided in black vinyl. |
Recommendation: |
Great Googly Moogly! What a Kit! This model is a real gobsmacker. I managed to be a bit more eloquent in the review but it was difficult. Highly recommended! |
Reviewed by John Miller

Great Wall Hobby (GWH) is a name that has become synonymous with quality and attention to detail. I’m fortunate to have an assortment of GWH kits in my stash and all are absolute gems just screaming to be built. And so, with some anticipation, I started this review on what may be their most audacious undertaking yet; this super-detailed 1/32 Curtis Hawk 81-A 2. The words “beautiful kit” don’t even begin to do this model justice. This is easily the best of the P-40 family in this scale, bar none. Beyond that, I personally think it my be one of the best if not “the best 1/32 scale aircraft kits” this reviewer has ever seen.
As I try to do with all the kit reviews on MPS, descriptive text is kept to a minimum. The emphasis is on large-format pictures showing all the kits sprues with zoomed pics of important parts including canopies and decals. The beauty of this kit speaks for itself.
Thanks (again) to Mike “The Weatherman” Millette for the loan of the review kit.
The Kit
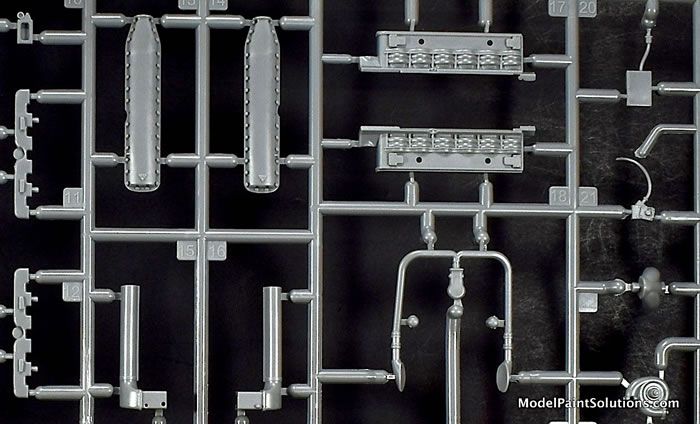
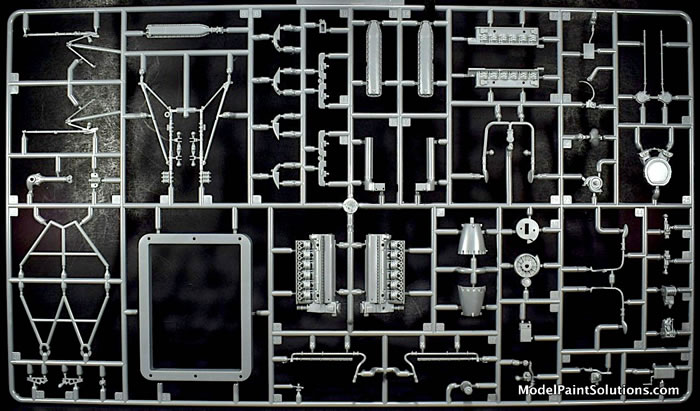
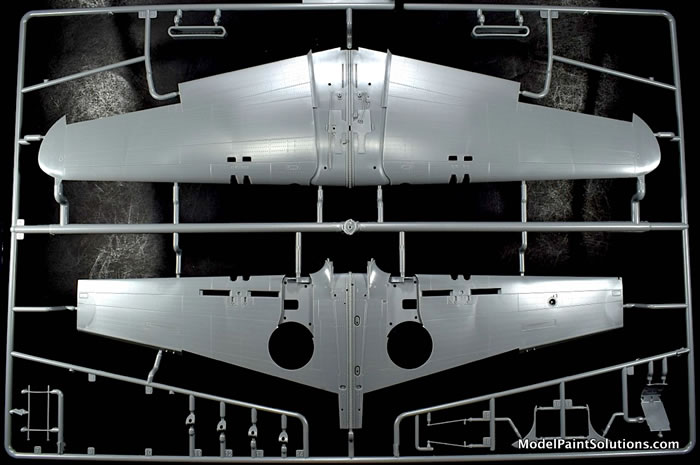
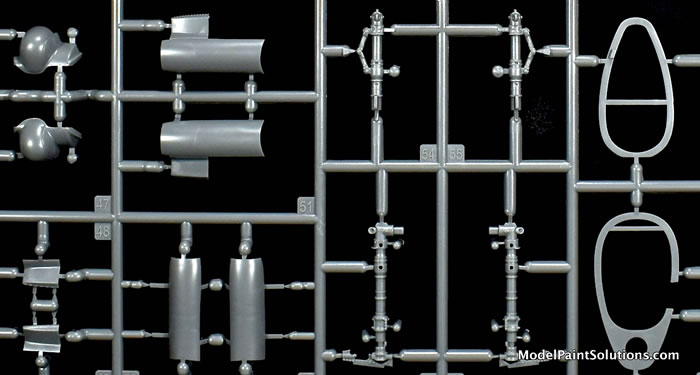
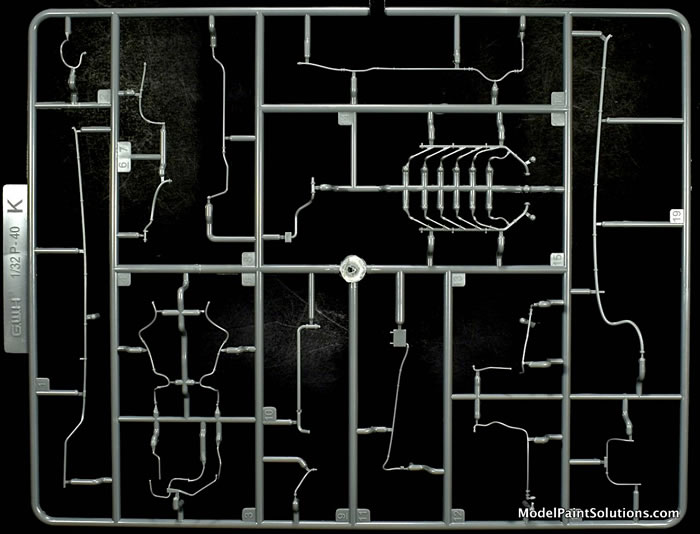
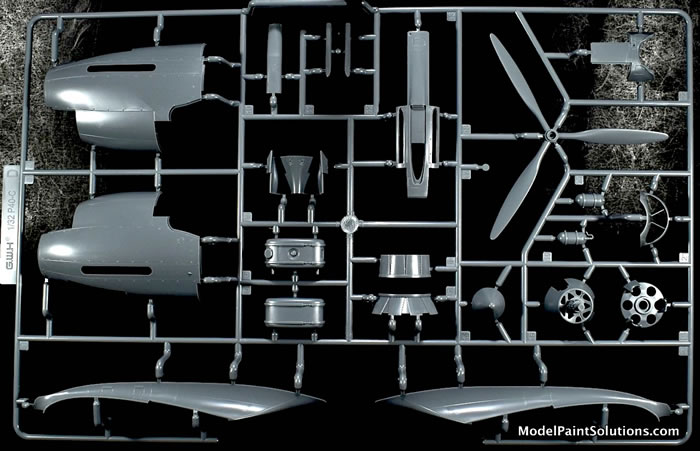
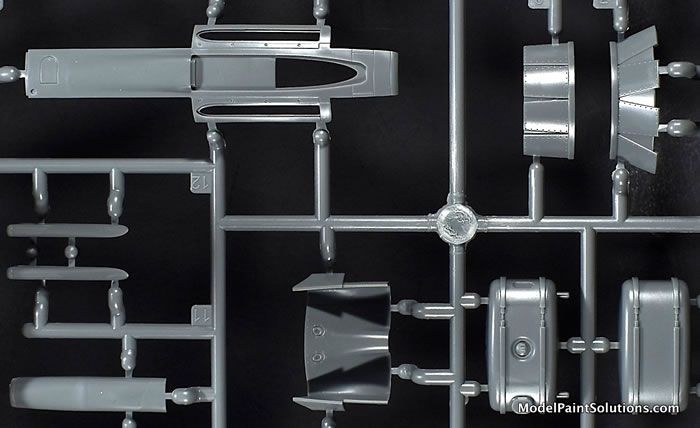
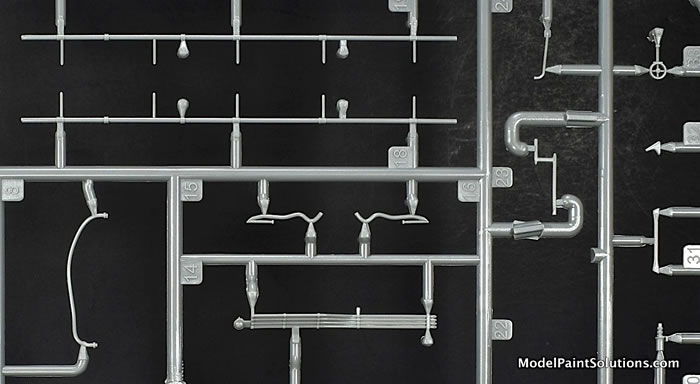
The kit comes in a stout, lidded, cardboard box adorned with artwork of a Hawk 81 wearing the colors of the American Volunteer Group (AVG). The kits parts are conveyed on 13 grey styrene sprues and what’s amazing is that Flash is simply nowhere to be found.
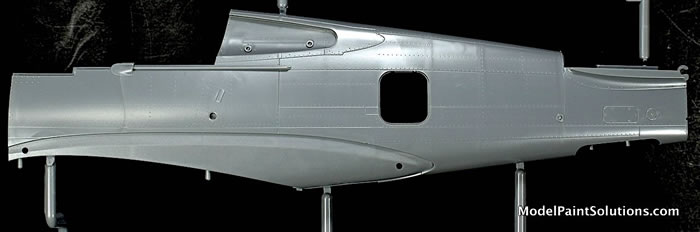
Surface details (both recessed and in relief) are crisp, scale-appropriate, and beautifully rendered. And, the details abound. Panel fasteners, rivets, and screw-heads are crisply executed and will look awesome under paint and washes. I spent half an hour marveling at the fidelity of just the surface details; amazing.
The Build
Notice to all Super-Detailers: Put your spare parts boxes and scratch building supplies away. Most of your work has already been done. That said, for the remainder of this review, assume that most (all) major parts are the result of combining smaller assemblies. This is one super-detailed model right out of the box. As such, abundant use is made of sub-assemblies during construction. Moreover, some sub-assemblies have such a high level of detail, they are a models in and of themselves. This is most evident in the amazing cockpit, rear internal fuselage, and engine sub-assemblies (more below).
As per the norm, construction begins with the seat (composed of 6 parts) complete with PE harness and moves on to the left and right cockpit side panels, which are separate pieces. These receive additional details in the form of switches, handles, levers, etc making for very detailed assemblies.
The main, single-piece instrument panel is augmented with single, crisply printed decals for each instrument face. A decal placement guide is provided. A detailed rudder pedal assembly and forward bulkhead with cowl gun breeches is added to the main panel completing the sub-assembly.
The previously completed cockpit side panels are now trapped between the instrument panel/rudder pedal assembly and the rear cockpit bulkhead, complete with molded in headrest. The result in one amazingly detailed cockpit tub.
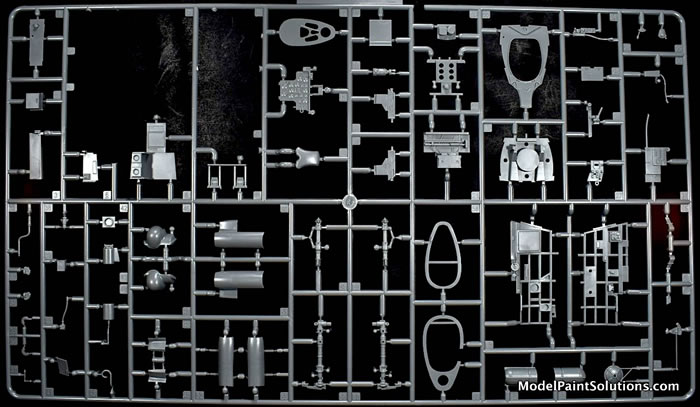
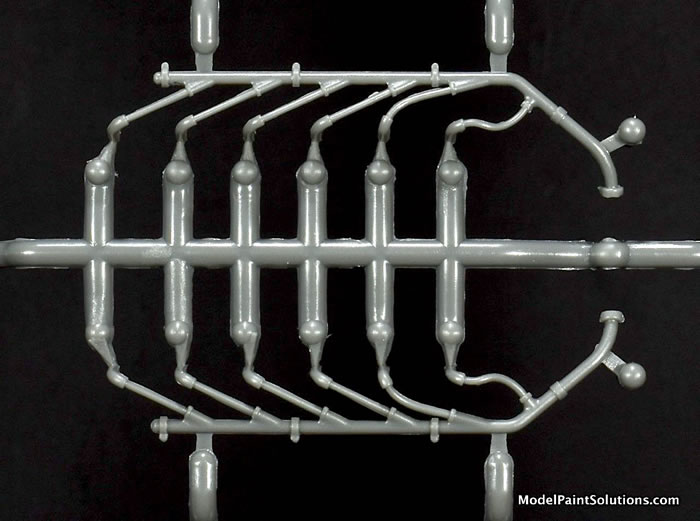
According to the instructions, the tub is now set aside to be admired while your attention is brought to bear on preparing the fuselage halves for assembly. There’s a lot of “stuff” that gets packed into the left, rear fuselage halve prior to joining the fuselage halves together. Some of this detail will be visible should the access hatch be posed open. Now, I don’t profess to know what each of the various tanks and boxes are but the extensive “plumbing” that connects it all is pretty impressive and will look amazing when assembled. Be sure to take pictures because a lot of it will be lost to view when the fuselage is closed up, which happens next in sequence.
With the cockpit tub and rear, internal fuselage details trapped in between the fuselage halves, a small decking in front of the cockpit and breech covers are added completing the fuselage assembly up to the firewall.
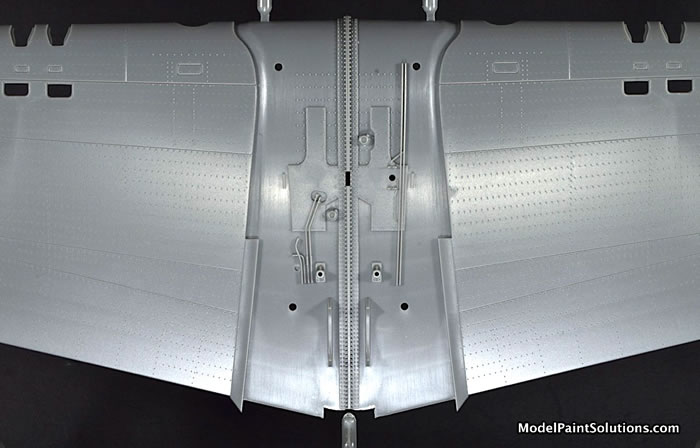
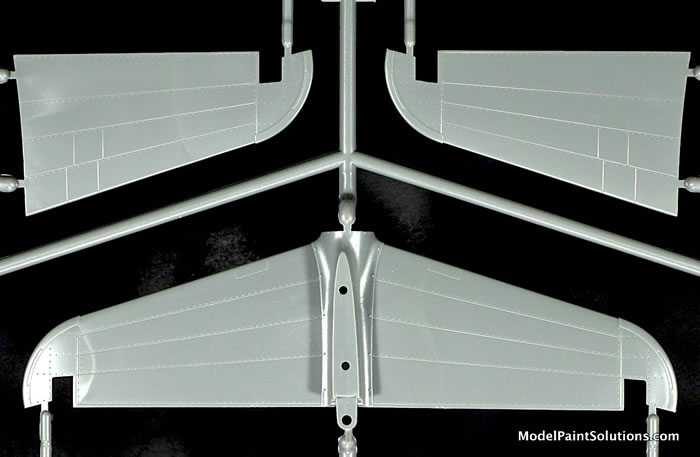
The horizontal stabilizor and elevator (both from halves) are assembled next and then added to the fuselage. Even the elevator hinge points (usually simple, straightforward assemblies) are augmented with PE details. Similarly, both the elevator and rudder trim tab have PE push-rods.
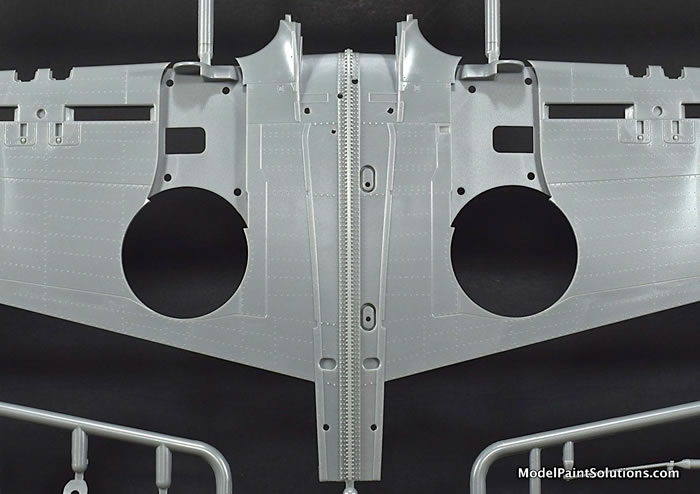
The wing is up next starting with the nicely detailed wheel well assembly, which glues into the full-span, lower wing halve. The single-piece, full-span, upper wing halve is added to the lower completing the wing; sweet and simple.
Of note is the level of detail incorporated into both of the wing halves; simply spectacular. In particular, the details of the juncture between the left and right wing halves, which on the 1/1 Hawk were bolted together. Each, individual, crisply-molded fastener has been replicated on both the top and bottom join. Likewise, the top of the wing served as the cockpit floorboard as evidenced by the presence of crisply molded foot panels, as well as mounts for various levers and the control stick. Wowza!
Next up are the flaps, which like so many other parts of the model stand out with the level of detail provided, especially if the builder decide to pose them lowered. Extensive use has been made of PE in the form of internal stringers and supports within the flap well so prior experience with photo-etch is not a requirement but certainly a good idea.
At this juncture the assembled wing is offered up to the fuselage followed by the addition of the two sizable left and right wing fillets. With the airframe now largely assembled, plumbing in the form of multiple piped lines, complete with elbows and fasteners is added to the belly centerline. Much of this beautiful detail is covered by the fuselage keel piece but, should someone want to pose their Hawk as if it were undergoing maintenance, all the required details are there.
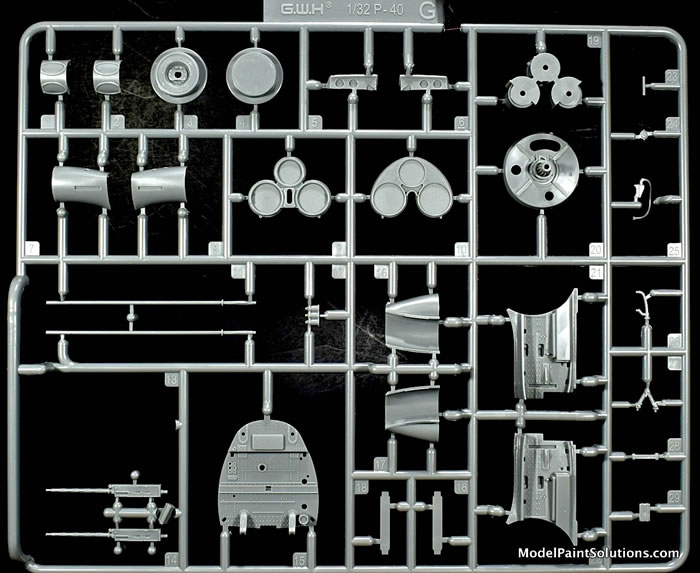
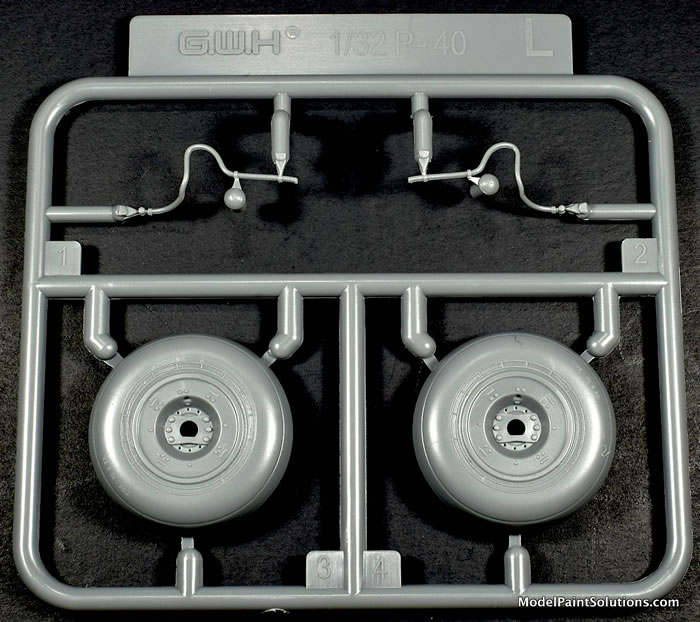
The main gear is next and here too, the details abound. The nicely molded main gear legs, which can be posed down or retracted, are augmented with both PE and styrene details that include brake lines; very nice. Unfortunately, the only criticism of the kit from this reviewer is the inclusion of black vinyl tires for the main gear and tail wheel.
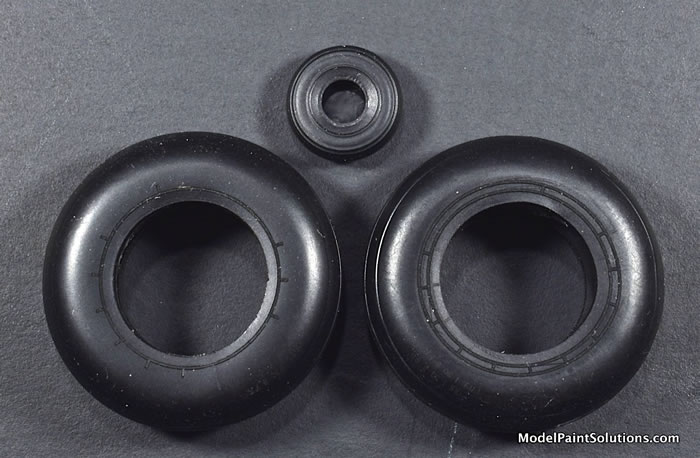
A lot of guys can make these type tires look quite convincing but I don’t count myself in that group preferring to work with styrene or resin. A set of styrene main tires are provided but can only be used if the gear is posed in the retracted position. A very nice resin replacement set of wheels is already available from Barracudacast and I have no doubt additional replacement sets will be available from other manufacturers in the near future.
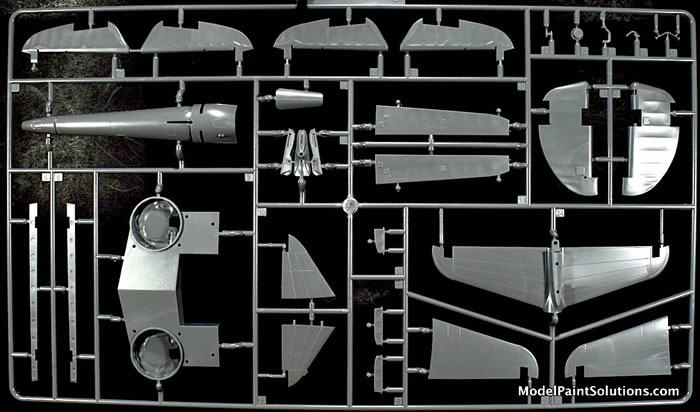
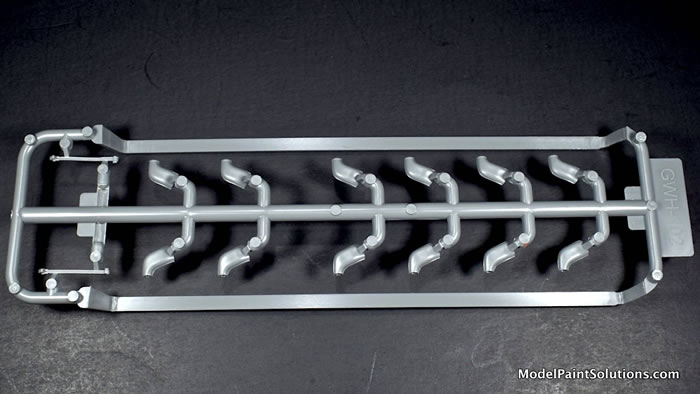
With the gear affixed to the model, the nose cowl is next in sequence and like the rest of the model, the surface details in the form of various fasteners on the upper and lower cowl pieces are beautifully done. The oil coolers have PE faces that will look very convincing under paint, the cowl flap assemblies have crisply molded styrene push rods, and the exhausts are composed of individually molded exhaust stacks; simply awesome.
Now, if you’re faint-hearted you may want to sit down, grab a stiff cup of joe or an adult libation, and brace yourself solidly before reading this next section. Using strong magnets (supplied with the kit) the assembled nose cowl ban be affixed to the fuselage OR the cowl can be replaced with an amazingly detailed engine also held in place magnetically. This takes the cake; what an awesome piece of engineering. This design permits the completed model to be posed with either an intact cowl or an entirely exposed engine. The propeller is simply switched to whatever assembly is posed on the model. Beautiful!
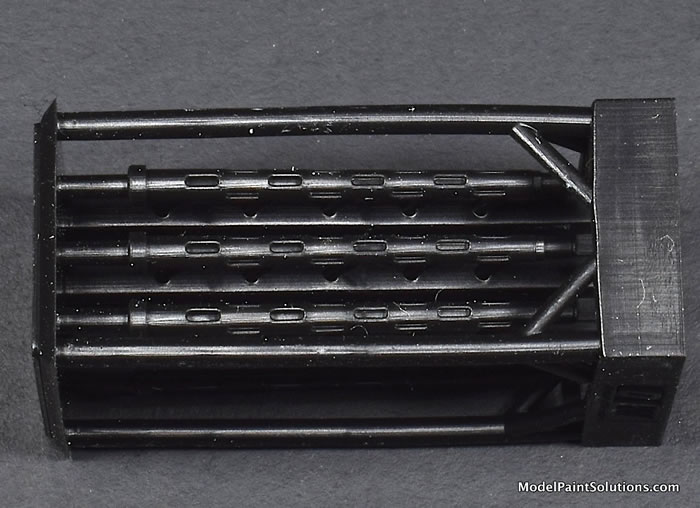
And, what an engine it is…. As mentioned earlier, some sub-assemblies of this kit are so detailed they’re models in and of themselves. This certainly applies to the exquisitely detailed engine, which requires a 6 page assembly sequence. For perspective, the entire booklet has 24 pages. Cylinder banks, plugs, ignition harness, and more plumbing that I though possible for an injection-molded kit is provided that will build into a truly stunning 1/32 Allison V12. This is some stunning work from the folks at Great Wall Hobby; well done, guys!
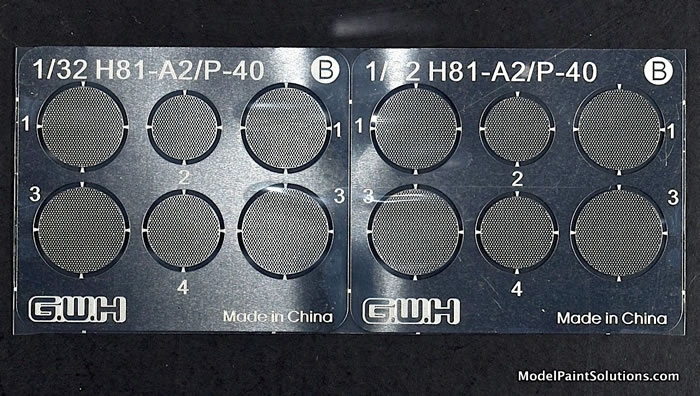
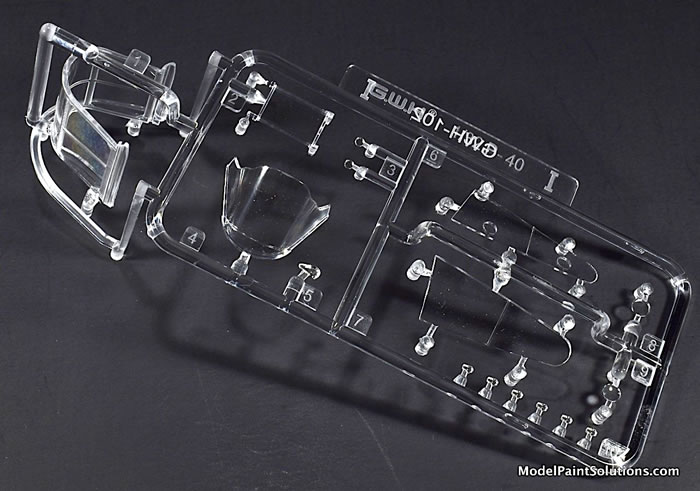
As could be expected, the clear parts are crystal-clear and crisply molded. The fasteners on the rear, sliding canopy are amazing and will look awesome under paint. And to facilitate the painting process, die-cut masks (from Tamiya-tape-like material) are provided for both the canopy and wheels.
In this “First Issue” of the kit, beautiful 3D printed gun barrels are included that will look awesome after a little paint and detailing.

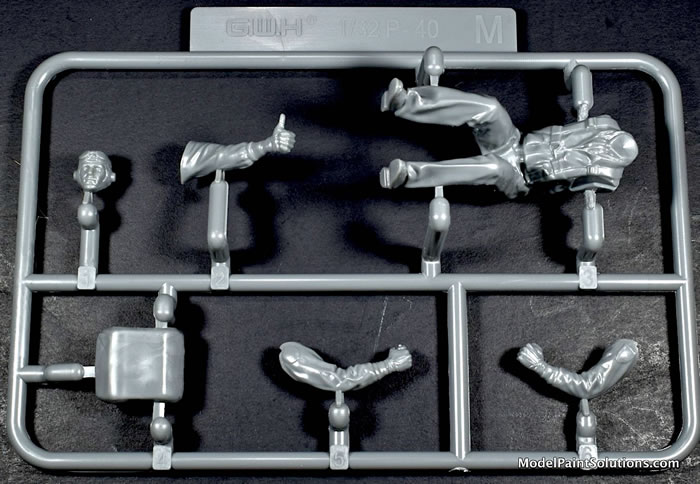
In addition, a very well done pilot figure is provided with two left arm options; one giving a “thumbs up” and one configured for holding the throttle; very nice.
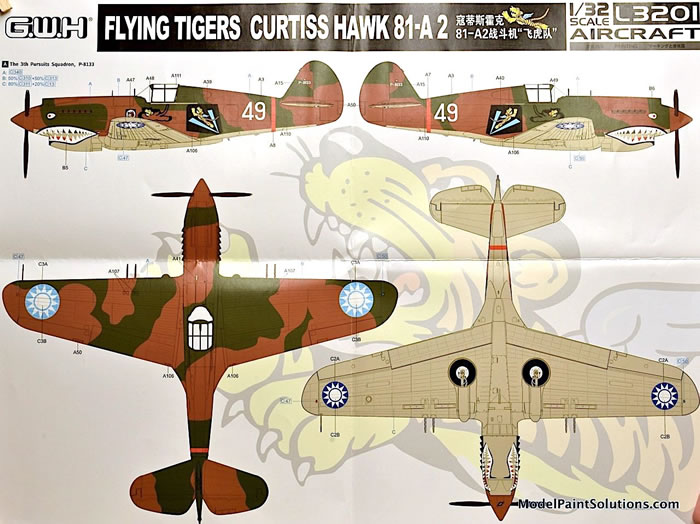
Markings
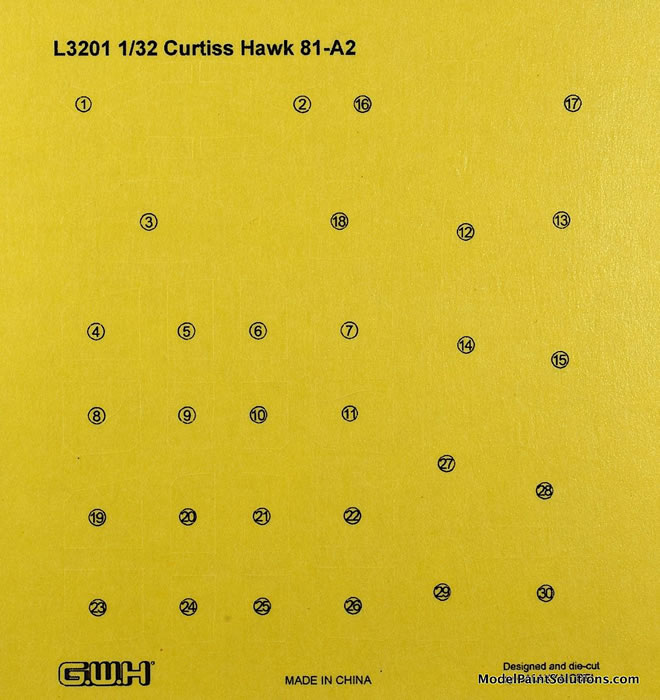
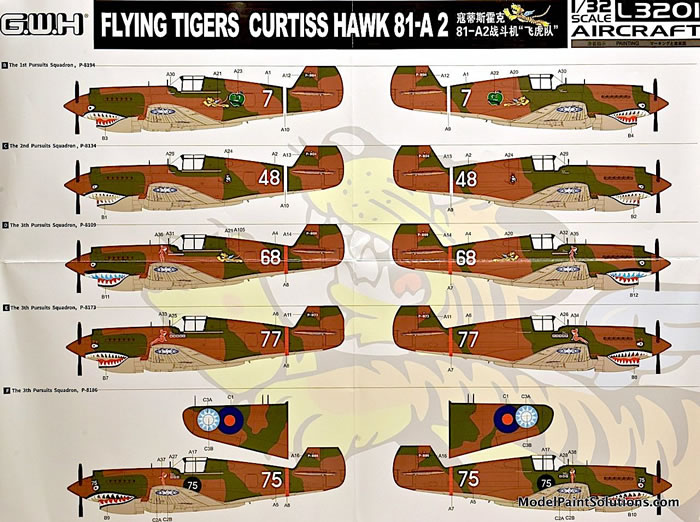
The decal sheets (3) are printed by Great Wall Hobby and exhibit good register and color density.
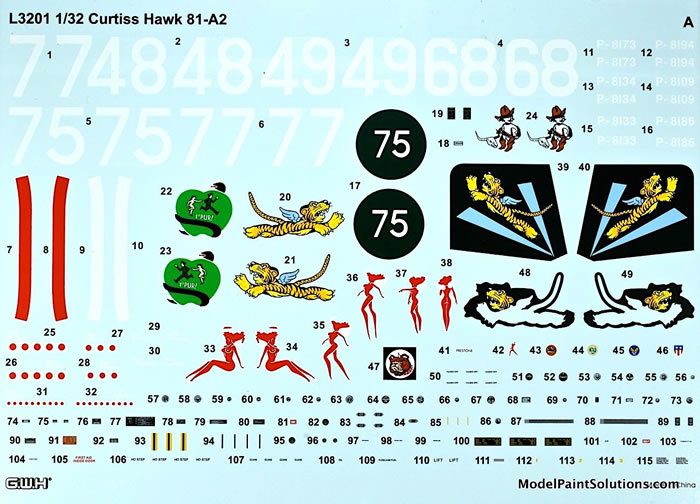
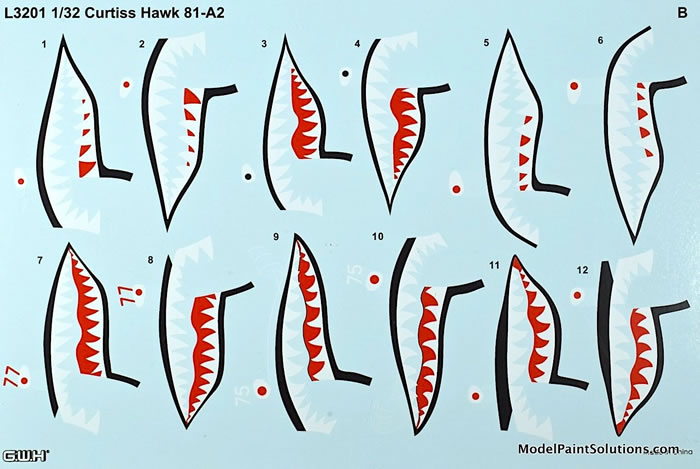
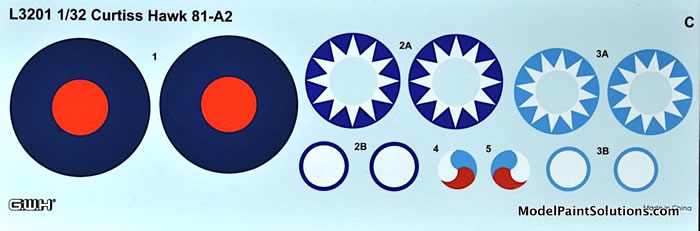
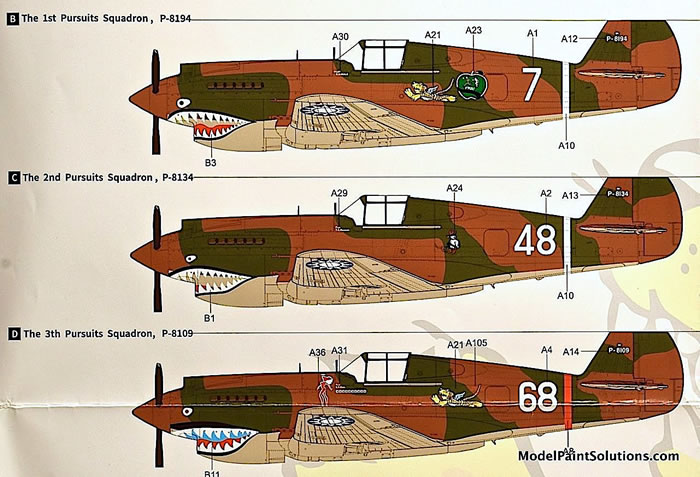
Markings and stencil data for 6 snarling, toothy airframes used by the American Volunteer Group are provided as follows:
-
Third Pursuit Squadron, P-8133
-
First Pursuit Squadron, P-8194
-
Second Pursuit Squadron, P-8134
-
Third Pursuit Squadron, P-8109
-
Third Pursuit Squadron, P-8173
-
Third Pursuit Squadron, P-8186
Great Googly Moogly—sell my clothes I’ve gone to modeling heaven :) This is the most beautiful kit this review has ever laid his 60 y/o eyes on; Wowza! The surface details are crisp, scale-appropriate and second to none. The engineering is simple, straightforward, and ingenious. The use of strong magnets to affix the interchangeable nose assemblies (normal cowl or fully detailed engine) is a trick I hope other manufactures adopt. Add to that beautifully printed decals all featuring the snarling markings of the AVG and you have a real winner. My congratulations to the crew at Great Wall for producing what is the most impressive injected-molded aircraft model I’ve seen to date.
Highly Recommended!
Now go paint something!
John
For more on this review visit Modelpaintsolutions.com
Review Text and Images Copyright © 2022 by John Miller/Model Paint Solutions
Page Created 29 July, 2022
Last updated
29 July, 2022
Back to HyperScale Main Page
Back to Reviews Page

|
 Home
| What's New |
Features |
Gallery |
Reviews |
Reference |
Forum |
Search
Home
| What's New |
Features |
Gallery |
Reviews |
Reference |
Forum |
Search_fs.jpg)