Dragon / DML 1/72 scale
Heinkel He 219 A
by Steven Hustad

The Beginning
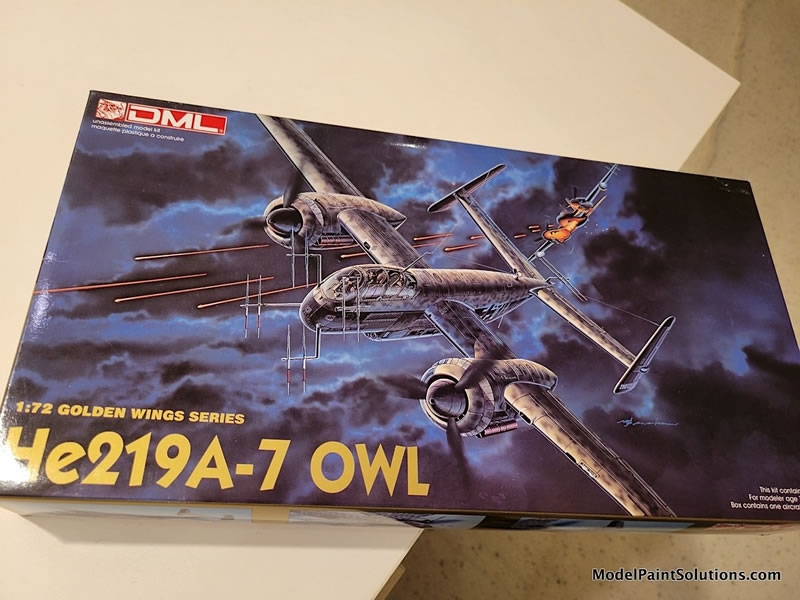
The old (now) DML/Dragon 1/72nd scale Heinkel He 219 (kit #5006) was a revelation when it hit the modeling market back in 1992. It had decent detail, an accurate outline, and showed a lot of potential for several iterations of other sub-types. More importantly, it replaced the other truly dreadful 1/72nd He 219 kits that we’d been suffering with up to that time - namely those truly ancient relics from Frog, Lindberg and Revell. I’d built all of those, (multiples of the Revell kit), and sure, you could build a respectable model kit-bashing the best elements from all three and adding a ton of scratchbuilding - proving my point that “if you throw enough hours at even the worst kit, you can…”, well, you get the point!
This Project
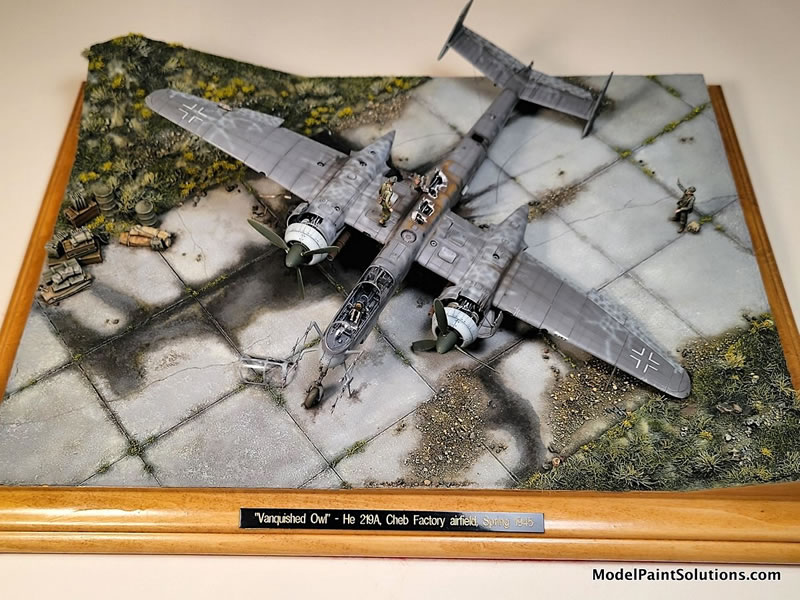
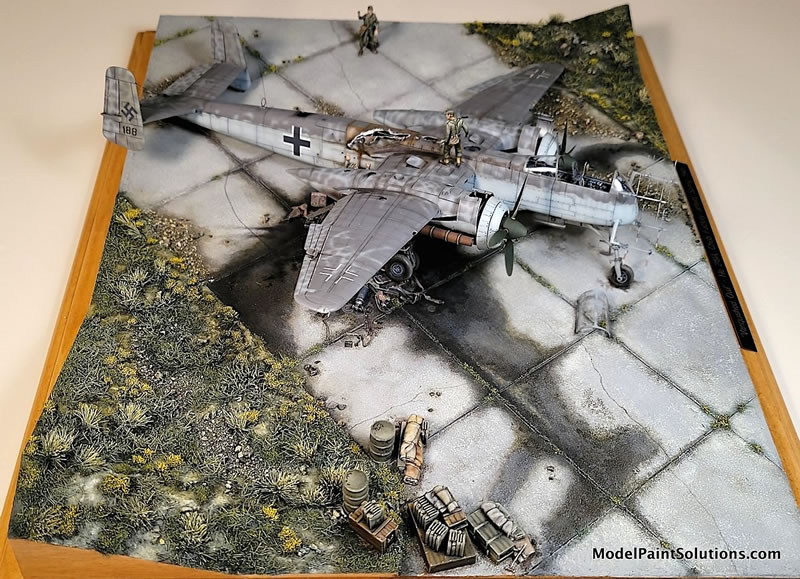
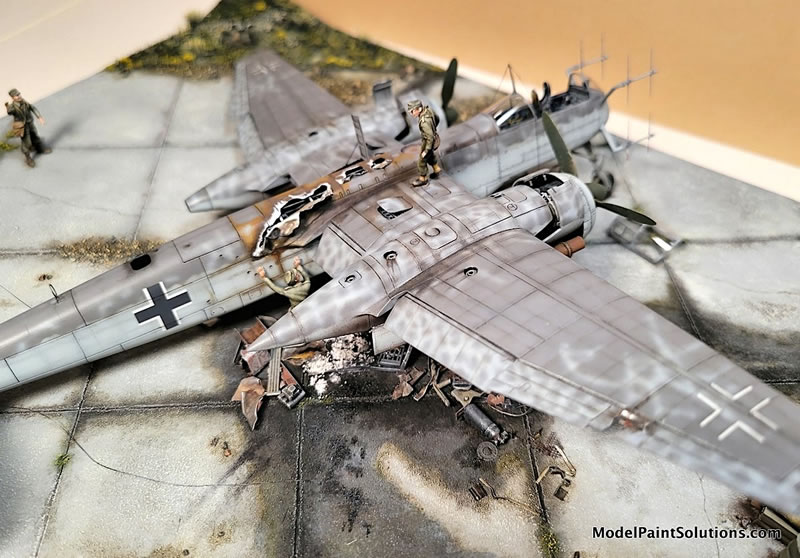
This model will form the nucleus of a diorama which will explain many of the alteration choices I made along the way. But this article will focus only (mostly?) on the aircraft itself - and not on the base, groundwork, or accompanying figures just to keep things simpler. Just so you know…
Heritage
DML’s He 219 was welcomed along with their same scale and 1992 vintage kits of the Focke Wulf Ta 152, Dornier Do 335, Arado Ar 234, Heinkel He 162, and Messerschmitt Me P.1101. To date, only the He 162 has been replaced by the nice recent kit from Special Hobby.
The rest still scream out for replacement after 33 years! (Okay, maybe not the Me P.1101). Are you listening Eduard, Arma, IBG, ICM?
Aftermarket
This 1/72nd DML He 219A kit was nicely catered to with some still truly superb aftermarket sets. Starting with the Cooper Details resin cockpit/nose wheel set (#CD7210). Falcon (via Squadron in this case) provides an excellent vacformed replacement canopy, (#9152). And True Details provides (among several others now) a nice set of replacement resin wheels (#45020), – even though they needed some attention to de-accentuate the ‘bulged flat bottomed” feature so popular at their time of release.
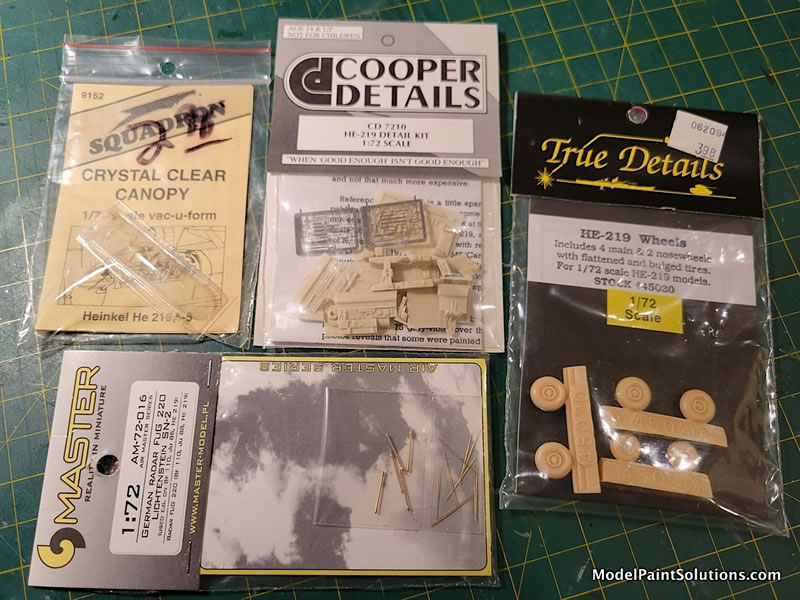
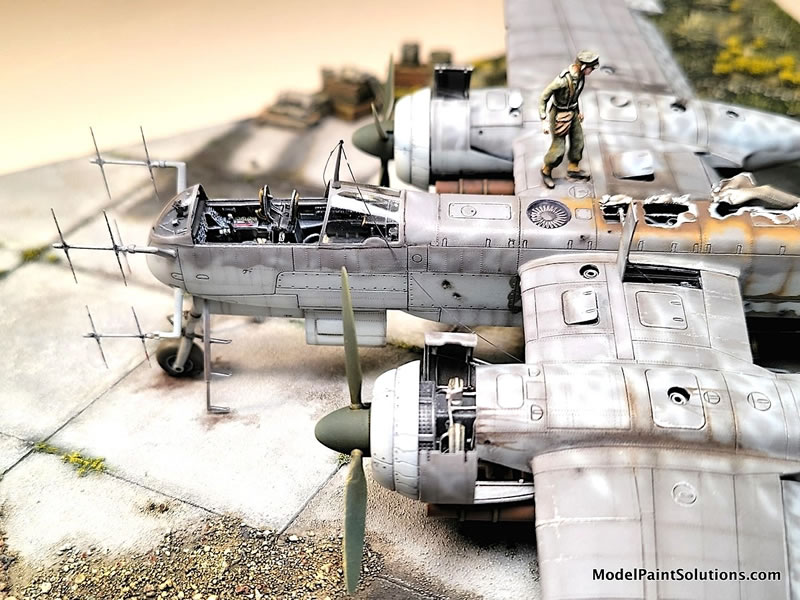
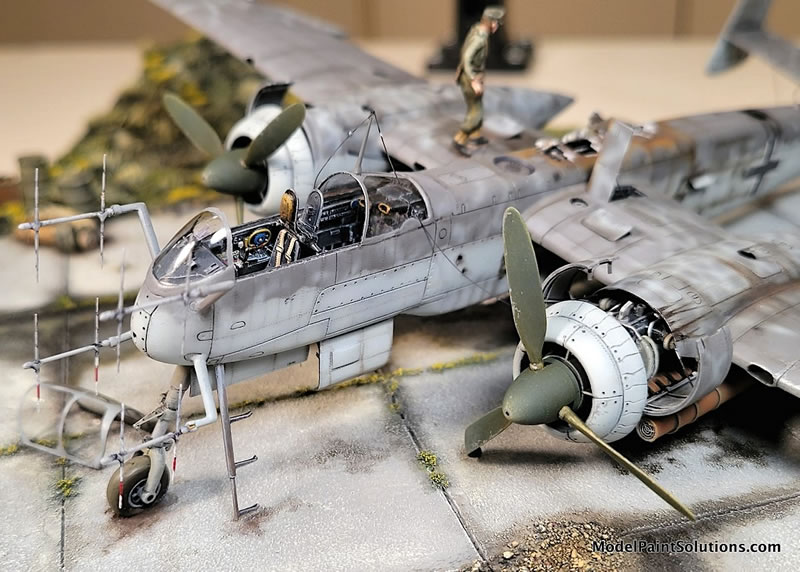
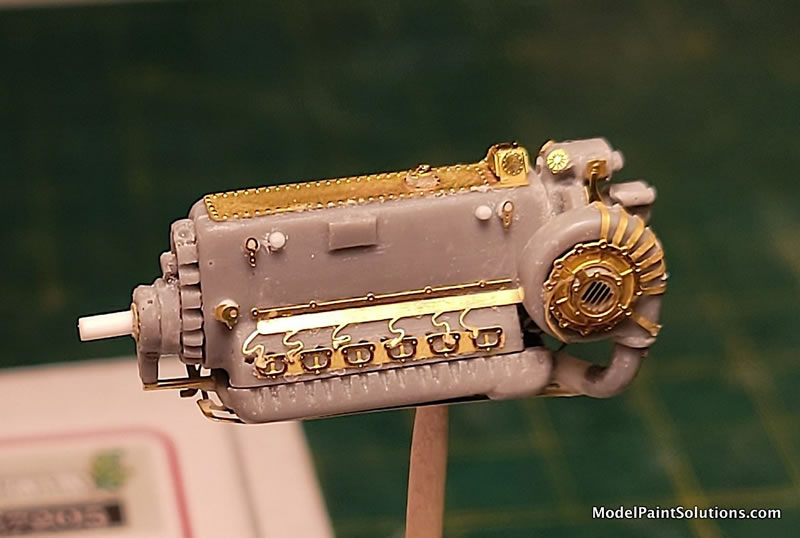
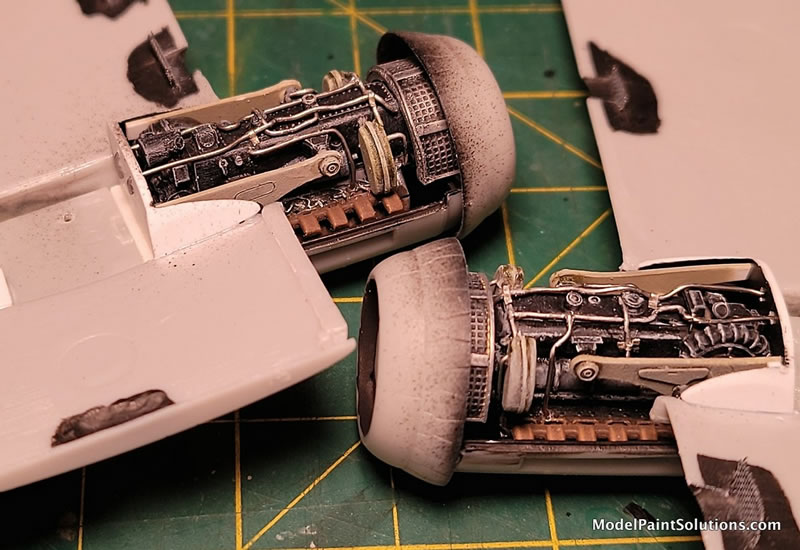
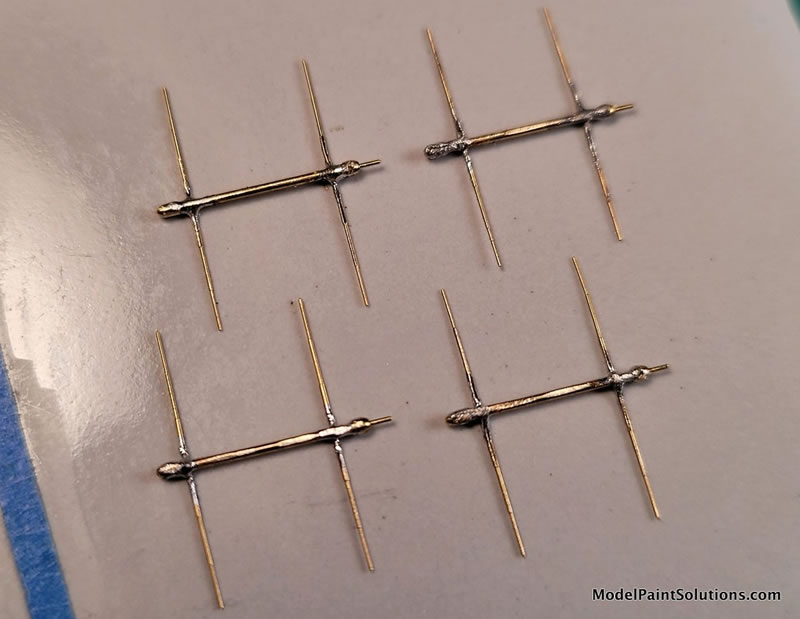
Two engines (Daimler Benz DB 603L’s) were added – one, a nicely detailed resin + photo-etched (PE) item by Karaya (#E7205) was used for what would be the more exposed engine, while the other is an old “Engines & Things” item (#72041; thanks DK!), for the much less exposed engine. This choice was made because that’s the way the photograph showed them. More on these engines later…and finally, the Master turned brass FuG 220/SN-2 nose radar array (#72-016).
The Kit
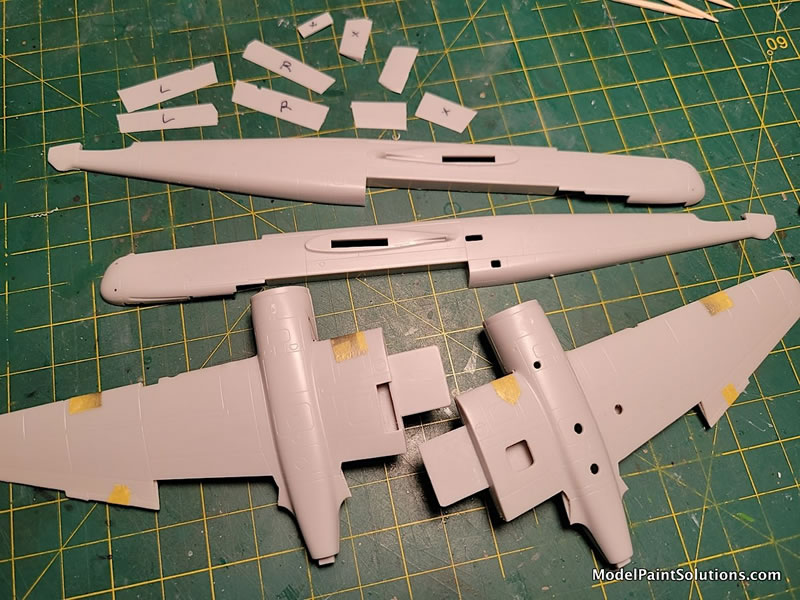
As excited as we all were back in 1992 over the release of this kit (and those others mentioned above), it quickly became apparent that there were some serious faults to deal with. Yes, the detail, shapes, and outline were all better and far more accurate - but those details, panel lines, etc. were all rather ‘soft’ and indistinct in places. In addition, the fit was horrendous in many places, especially the horizontal stab to fuselage and main wings to fuselage.
Wing halves were no great shakes as well! So many plastic shims, putty filler, outright replacement of details (surface and otherwise), and clamps were required in this build!
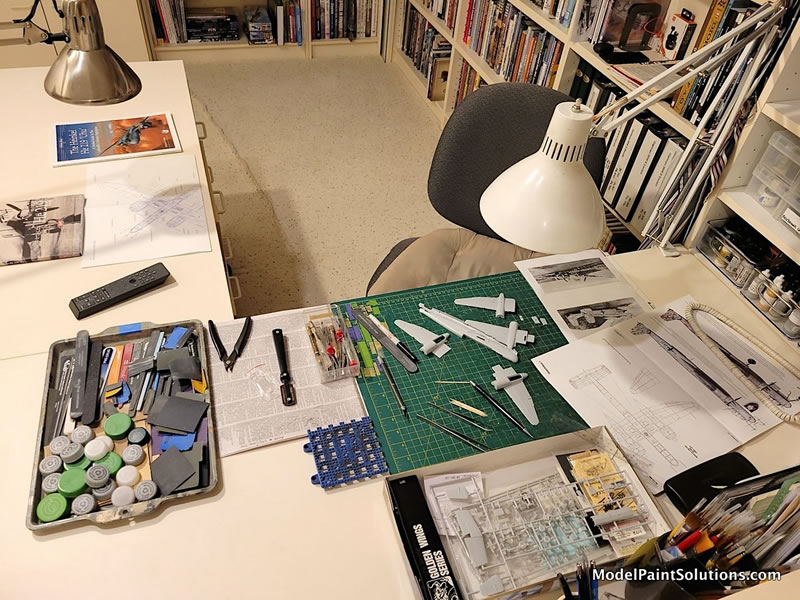
I began as I always do by getting the “grunt work” out of the way first. This involves getting pieces off the sprues, cleaning up mold lines, filling sink marks and ejector pin marks, and essentially getting everything that will end up in the final model ready for further detailing and assembly. I use a lot of small ‘zip-lock’ bags to hold parts – separating them between landing gear/nacelle, or cockpit, or flying surfaces, etc. Kit parts being replaced via aftermarket sets are relegated to the proverbial ‘spares box’ at this point as well. Some serious fit issues raised their ugly heads during this phase!
Customizing
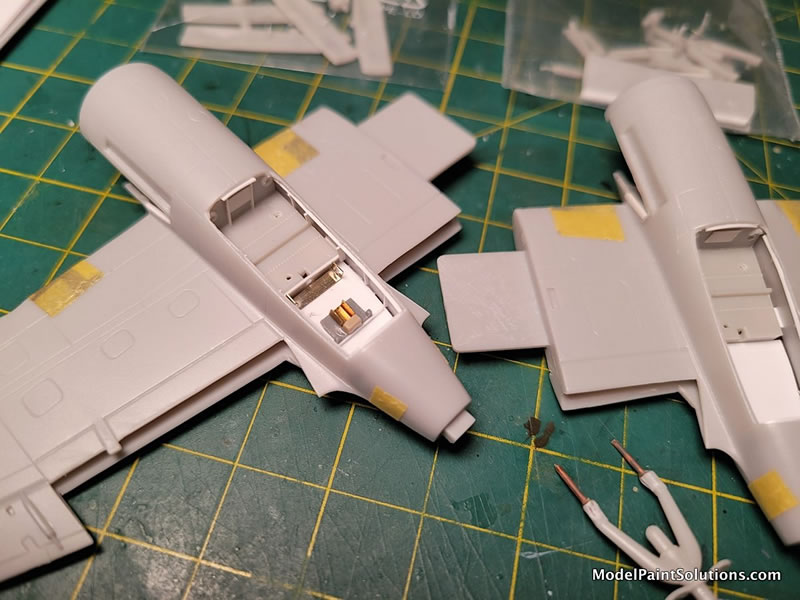
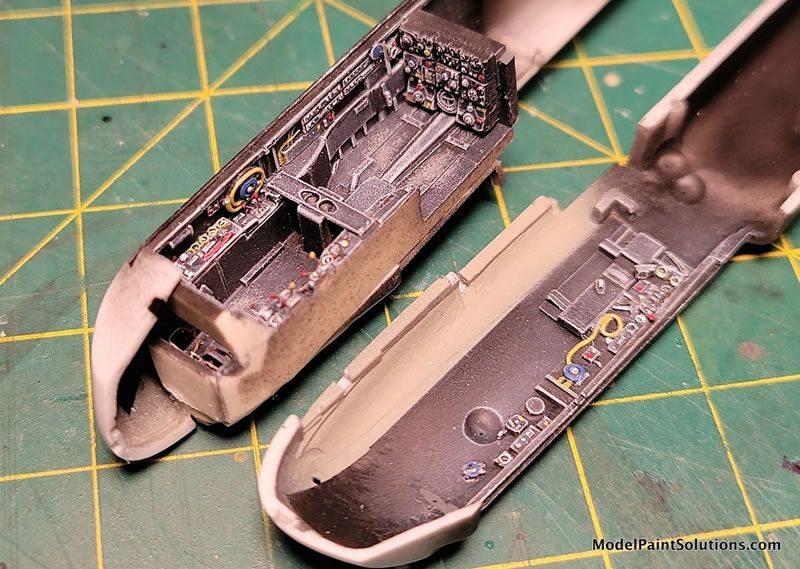
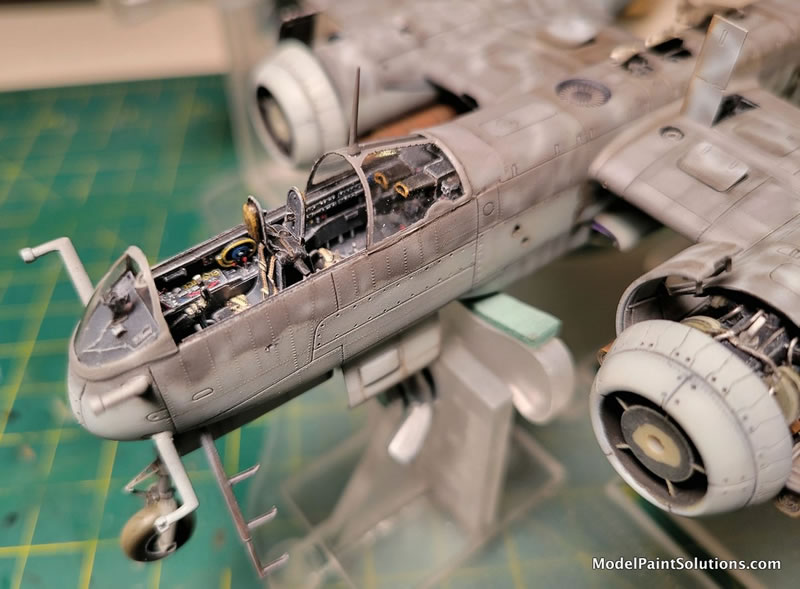
To accommodate the aftermarket sets chosen, major components are modified at this point. Starting with the (still wonderful!) Cooper Details cockpit & nose wheel resin detail set. The fuselage halves at the cockpit sidewall areas needed some significant thinning via the ol’ Dremel grinding tool. Not too difficult, and the parts fit surprisingly well. Those parts were all prepped, fitted, and bagged. I didn’t need to plan for any nose weights at least because this dio called for this poor Owl to be ‘down for the count’ on two of its three legs.
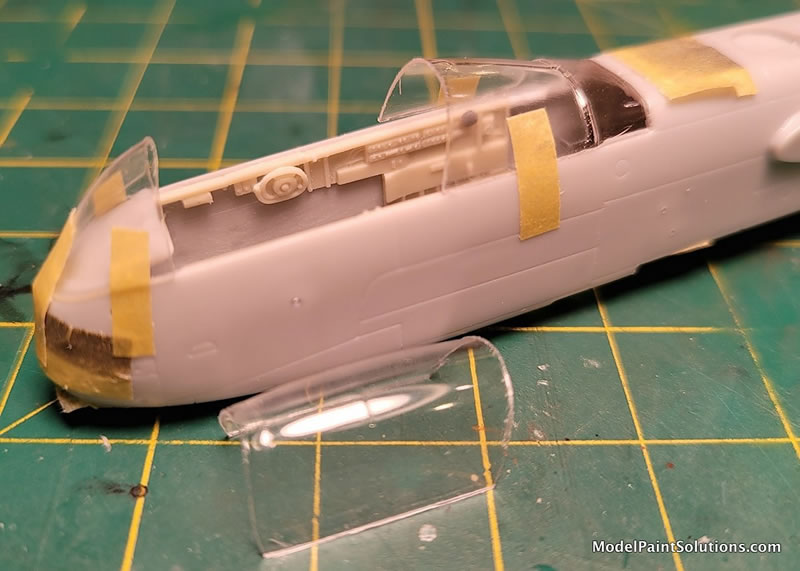
I also chose this point to cut out and fit the Squadron (Falcon) vac canopy. Taping the fuselage halves together, and some Tamiya tape to hold parts in position while they are test fit. I carved away and sanded until I got a respectable fit. The windscreen was the trickiest and took a long time, but the end result is worth it.
Because this crate will be the subject of a wreaked aircraft diorama, the affected major parts are also modified at this point. This includes the True Details wheels which were flattened and had big sections carved away to match the photo’s shapes (flat, sloped, and wreaked!).
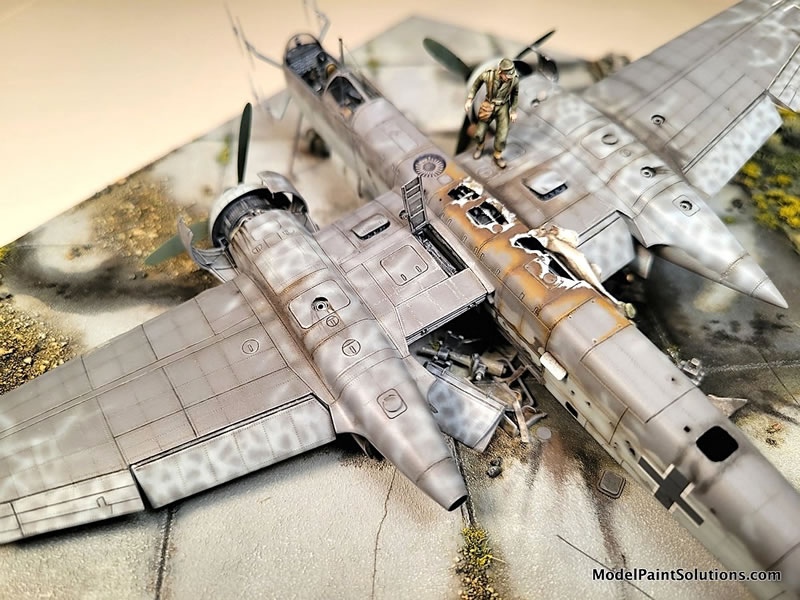
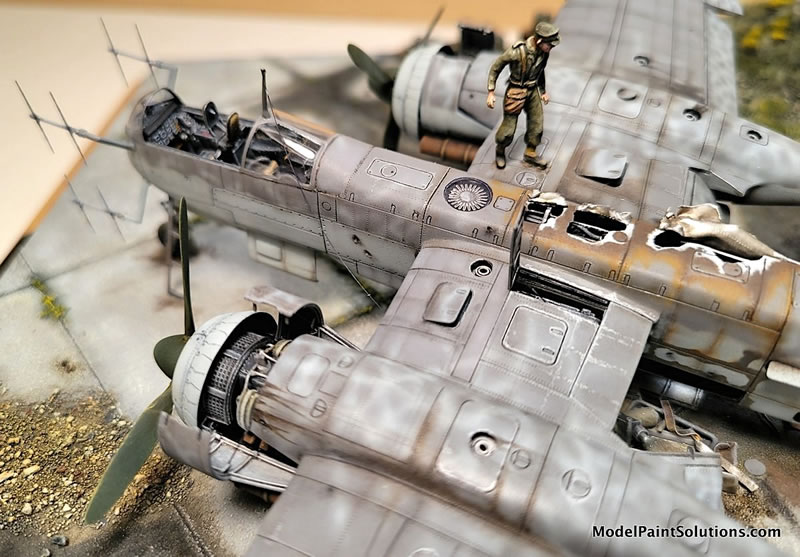
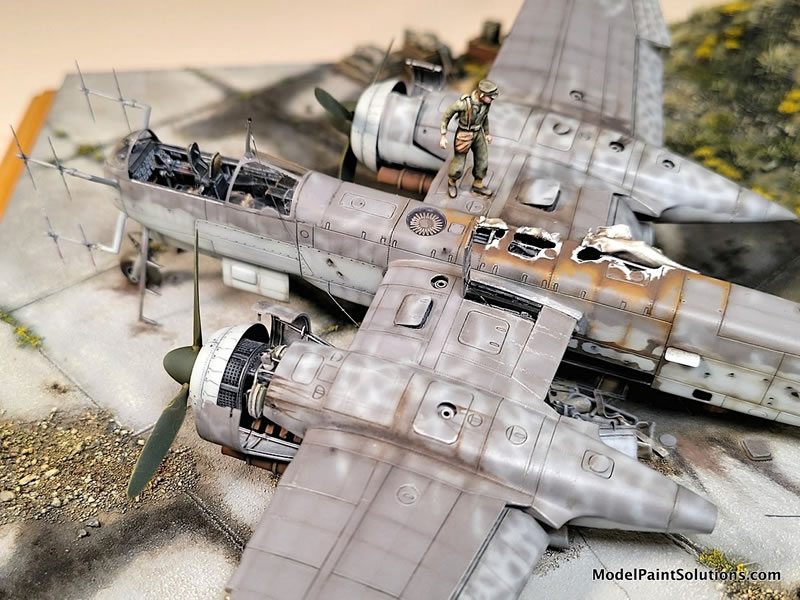
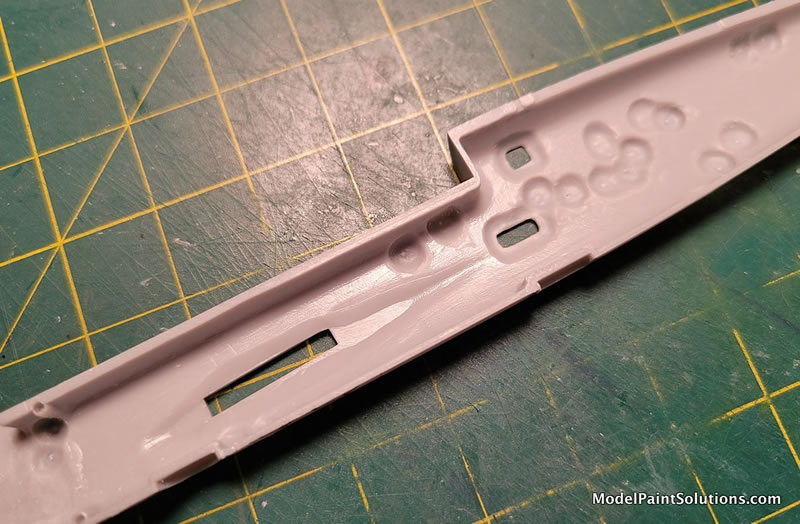
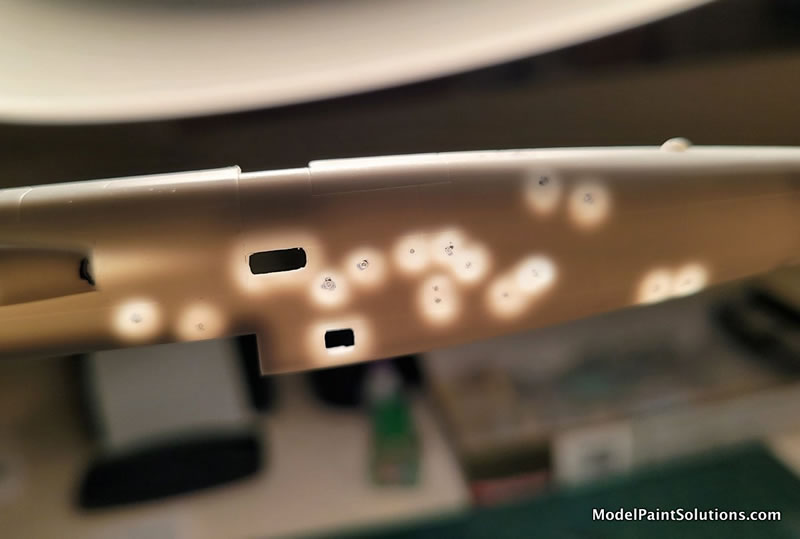
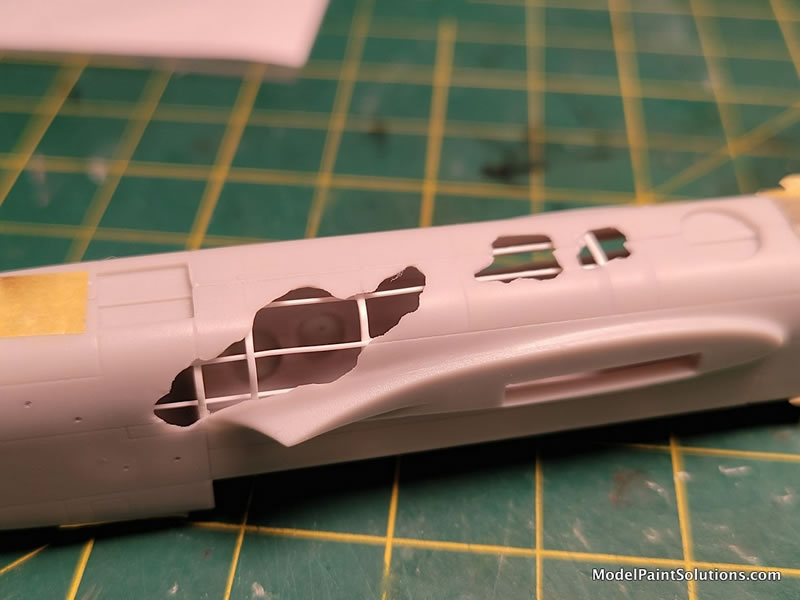
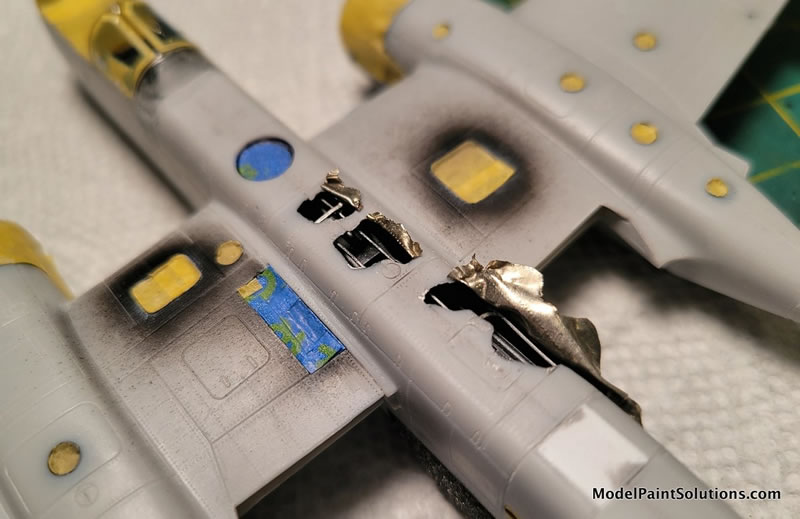
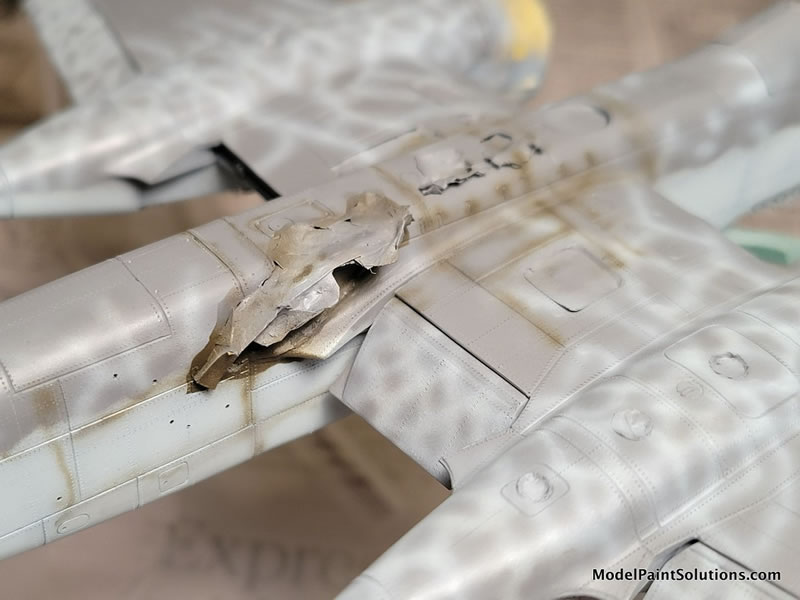
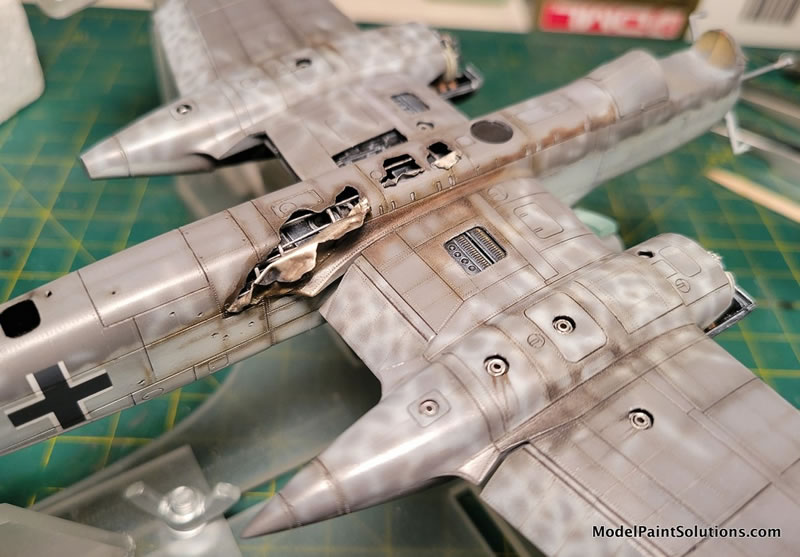
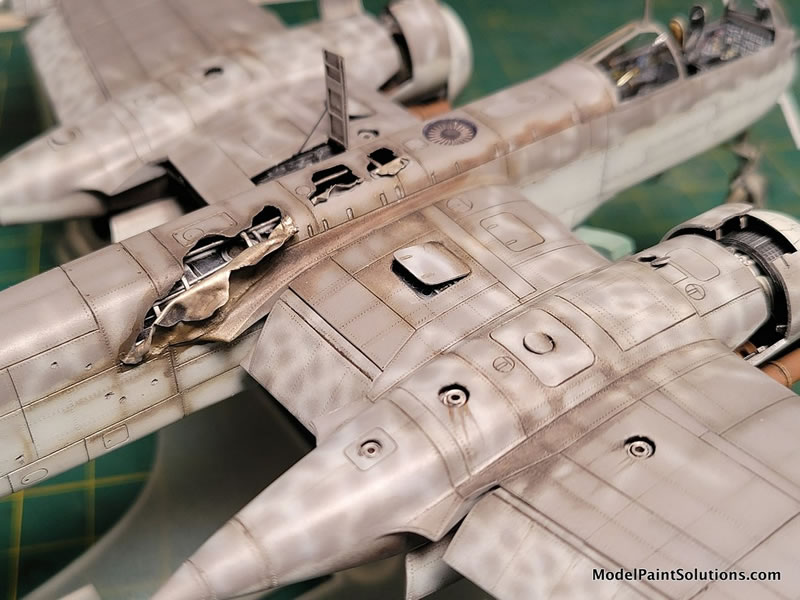
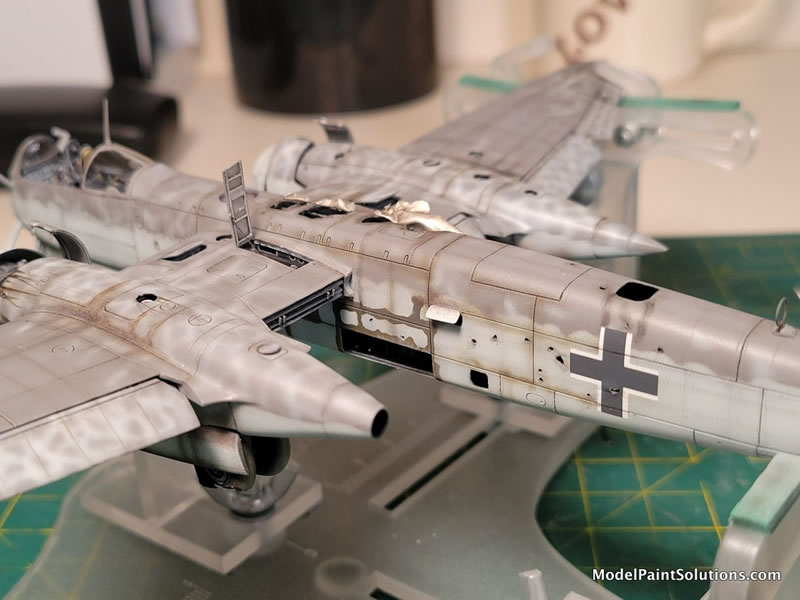
Next, the fuselage needed to have a couple large sections carved out where explosions occurred (top/middle/right portions of the fuselage). Also, since this aircraft appears to have been “fragged” while in its protective revetment, the photo shows numerous small holes in the fuselage. So those were all marked with a fine Sharpie on the outside of the fuselage and ground thin at those points from the inside at each tiny hole so those could be poked and pulled out and show up looking more like thin aluminum skin.
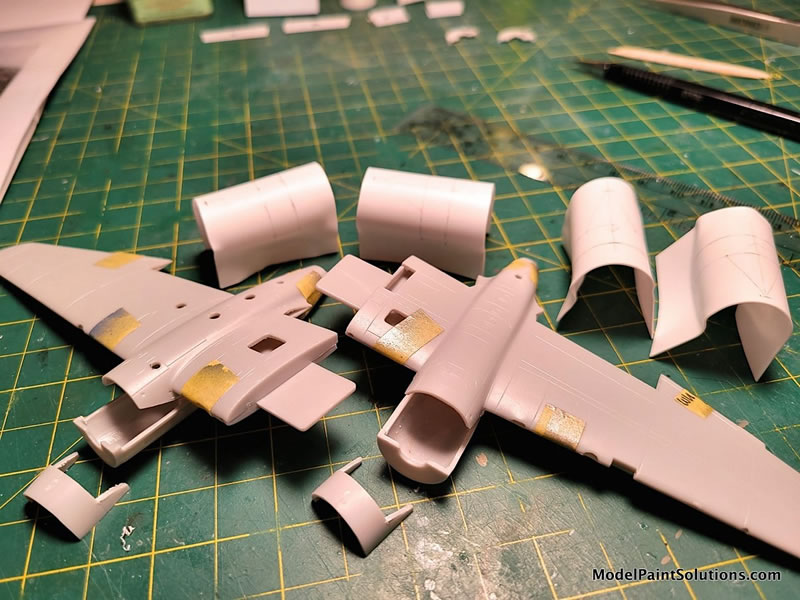
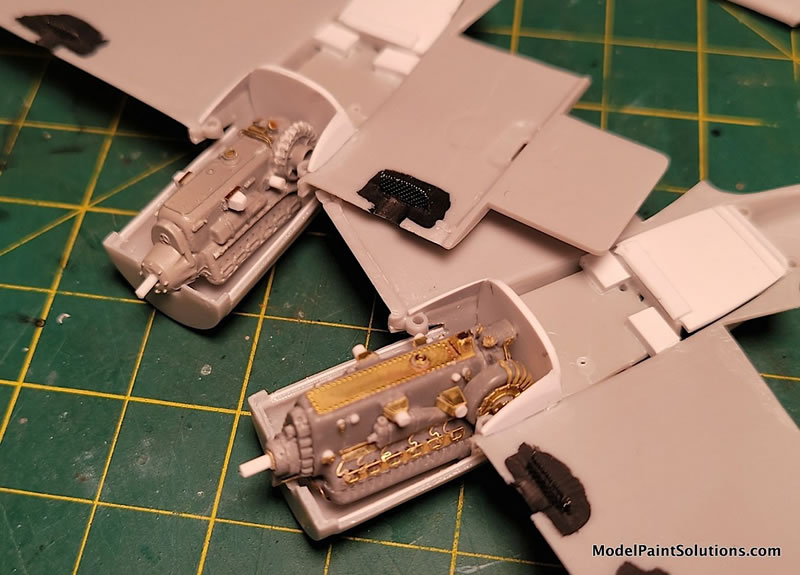
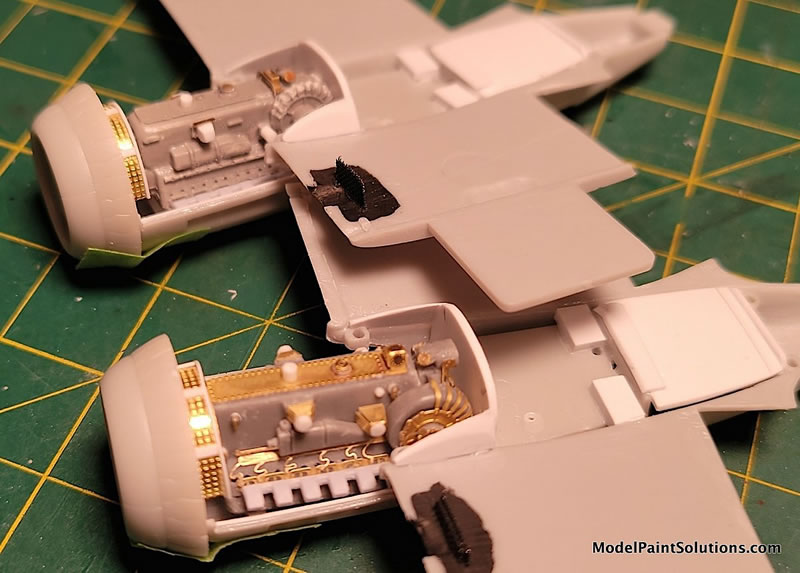
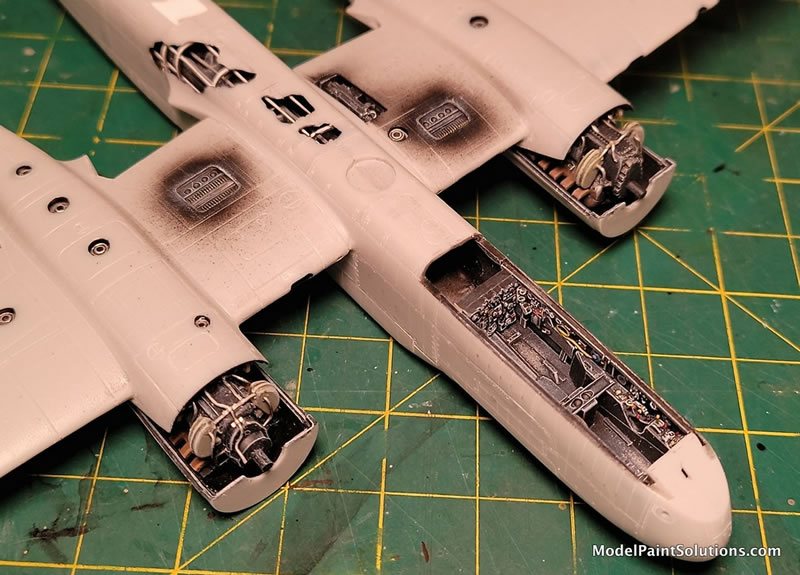
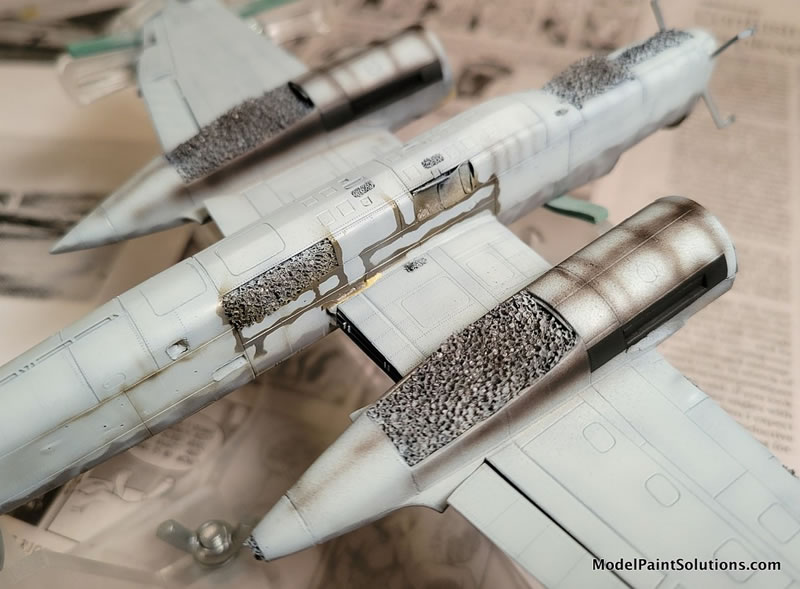
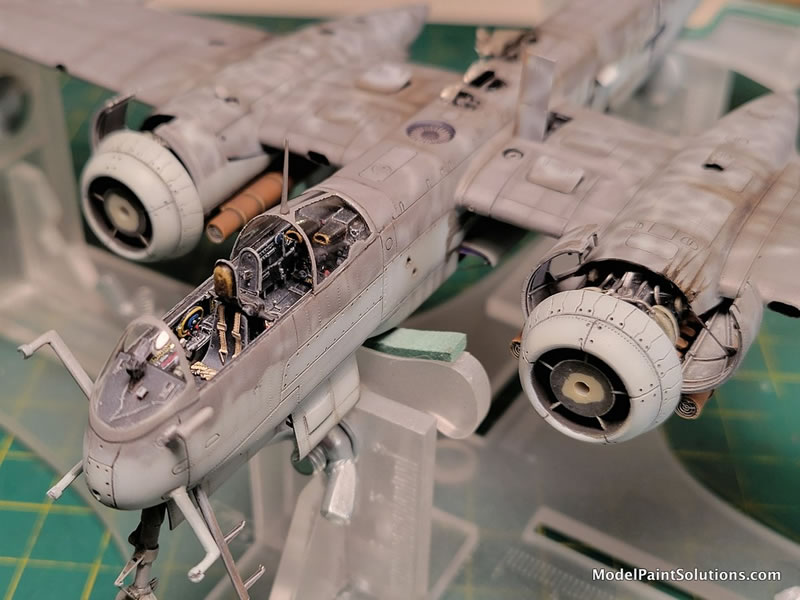
The photos also show the wing and fuselage cannon access panels were open, so those locations were also marked and drilled/sawed out. Replacement panels were made from 0.10 styrene sheet via the “heat & smash” homemade method. Both engines were also exposed (more on one than the other), so (oddly unlike the ancient Revell kit!) the engine access panels had to be cut out, nacelles thinned/cleaned up and new panels “heat & smashed”, again using 0.10 styrene sheet. The engine ‘compartments’ were then boxed in and structural detail (only that would be visible later) was added to those nacelles and the insides of the engine access panels.
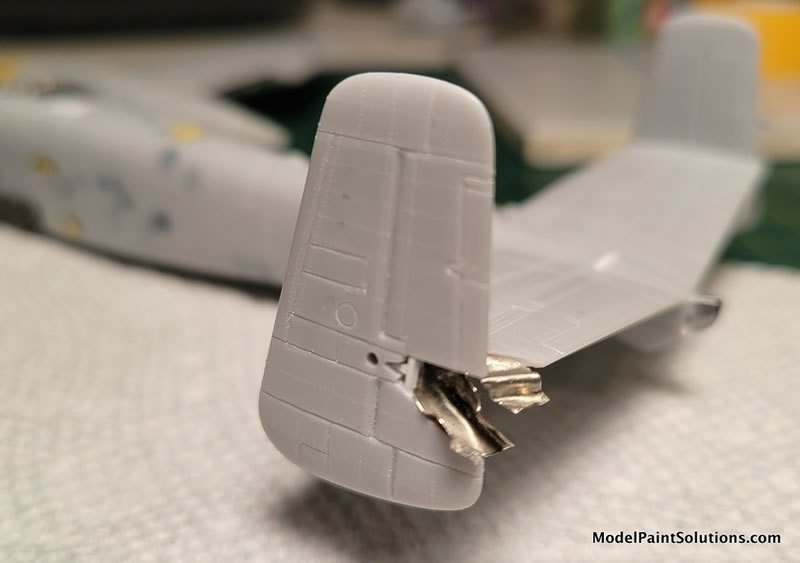
The ‘explosion holes’ in the upper/mid/right fuselage side (and at the left vertical stab to rudder, and upper starboard wing to aileron damaged) areas had some torn sheet metal exposed from those explosions or other inflicted damage. This was replicated using the foil from wine bottle necks, cut to shape and super-glued in place. The transition points were filled/tapered using Apoxie Sculpt sanded to shape when dry.
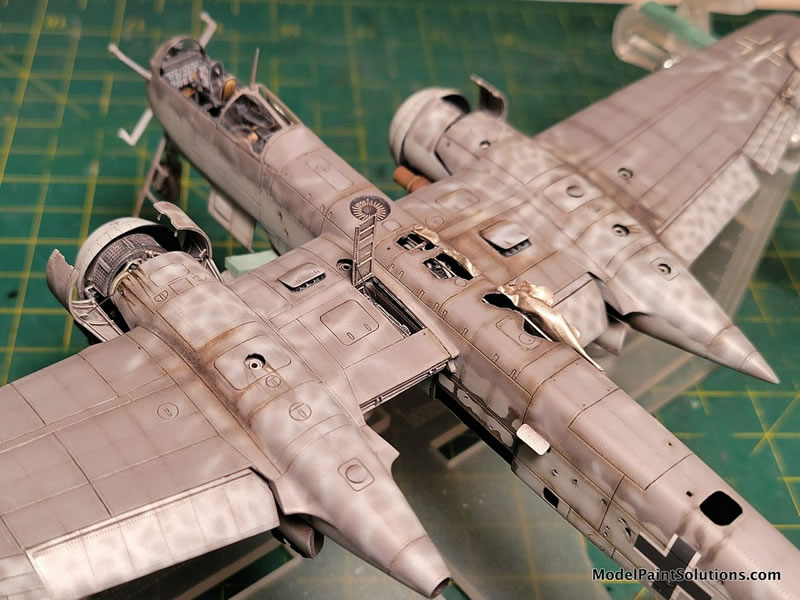
Next up was cutting out the flaps to match the photos. This required some careful razor saw work and some styrene ‘half-round’ strip stock to replace some of the flap’s plastic lost via sawing, and to provide a good continuous mating surface of the flaps to the main wing joint.
Fuselage & Wing Interiors
The interior surface of the numerous fuselage ‘frag holes’ were painted black, and the resin cockpit parts, exposed sidewalls and separate seats, etc. were airbrushed with a darkened RLM 66 Black Gray using AK’s Real Colors which oddly is a bit ‘brown’, so I needed to adjust that color a bit… The nose and main wheel well areas were airbrushed with AK’s Real Color RLM 02 (a light greenish gray). Open gun bay areas received silver and black going for contrast in what would end up being visible.
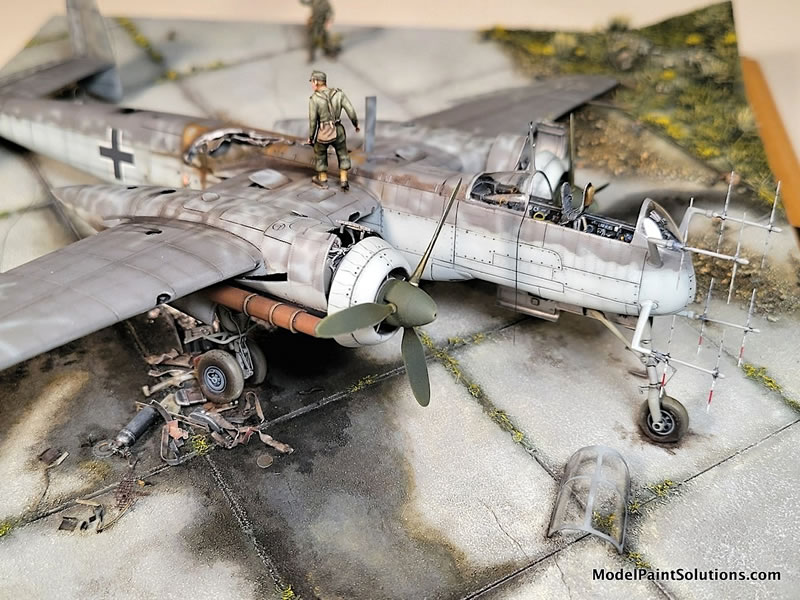
Engine compartments were airbrushed with black and silver just to cover up the few background areas that will be visible for greatest contrast with the engines and their attached parts. The engines were airbrushed black after detailing and the scratchbuilt radiators received silver. Scratchbuilt engine bearers and coolant tanks also received RLM 02.
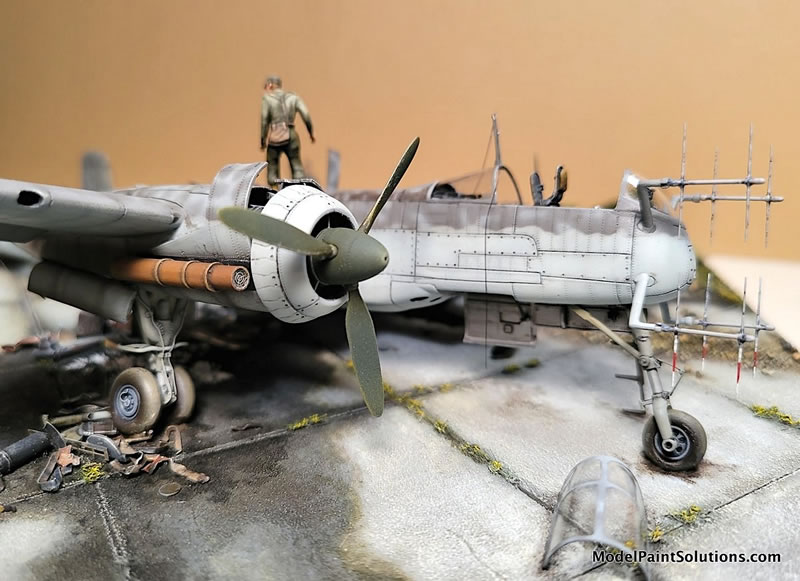
This aircraft also has several prominent wing leading edge air intakes that needed attention – screen mesh, black paint, and light gray dry-brushing (with oils) before the wings can be closed up. At this stage I’ll also airbrush the other (now) assembled main components like the landing gear (RLM 02), Props & spinners (Humbrol RLM 70 Black Green), and the engine exhausts inside and the flame dampeners outside (Humbrol #160 Red Brown).

Detail Painting
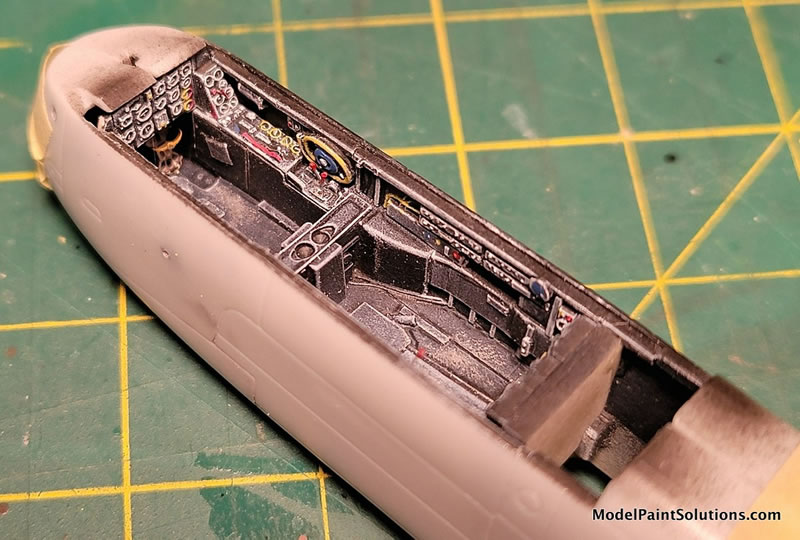
The cockpit was painted and dry-brushed using layered on oil paints. You must wait about 10 hours between each layer, or you’ll just remove the previously applied layer. Same with the wheel wells and engines. Further details were picked out with acrylic primary colors. Oil paints were used on the seat cushions and headrests, and other details. It is amazing the contrast and detail that can be achieved with only oil paints! Some spare Eduard colored photo-etched seat belts finished off the cockpit seats, both set aside for installation near the end…along with the radar installation.
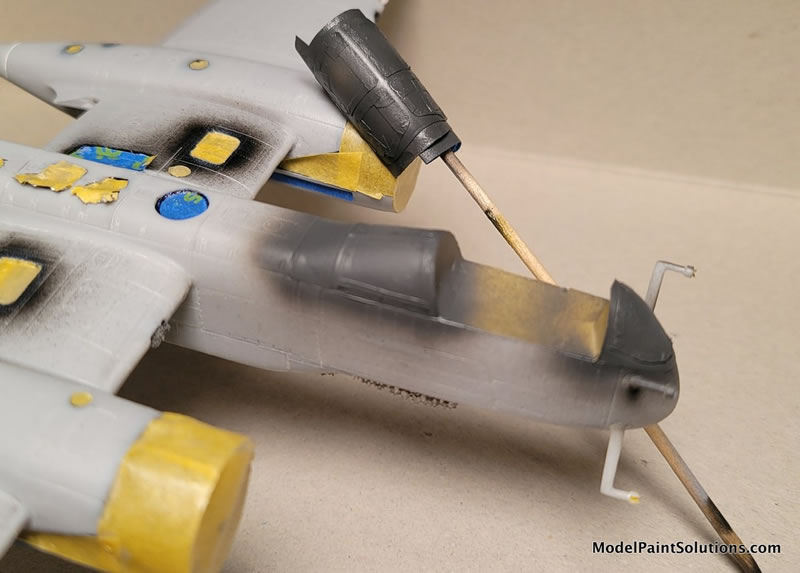
The engines received the same treatment, again using oil paints to create false shadows and attractive contrasts. Very thin solder wire was used for engine plumbing using the nice Zoukei Mura He 219 reference book for their 1/32nd scale kit for all. Insides of engine access panels received 0.10 square strip stock from Plastruct to replicate structure then painted silver and pin washed with oils. The radiators were fitted to the cowling insides, and those became separate sub-assemblies that I then made sure mated nicely with the nacelles, but then left unattached until near the end since the cowlings didn’t receive any camo colors other than RLM 76 (light bluish/Gray). Very different than the wing’s as a whole.
The fuselage interiors at the open/wrecked areas were detailed with Plastruct strip stock for structure, solder wire for the exposed wiring, and misc. parts from the parts box to represent exposed fuel tanks and other equipment. This was all painted with a variety of blacks, browns and silvers to give a good impression for what would end up being visible. This interior detailing was also all pin-washed and dry brushed with oils for contrast (if anyone shines a flashlight in there!).
Rosie the Riveter!
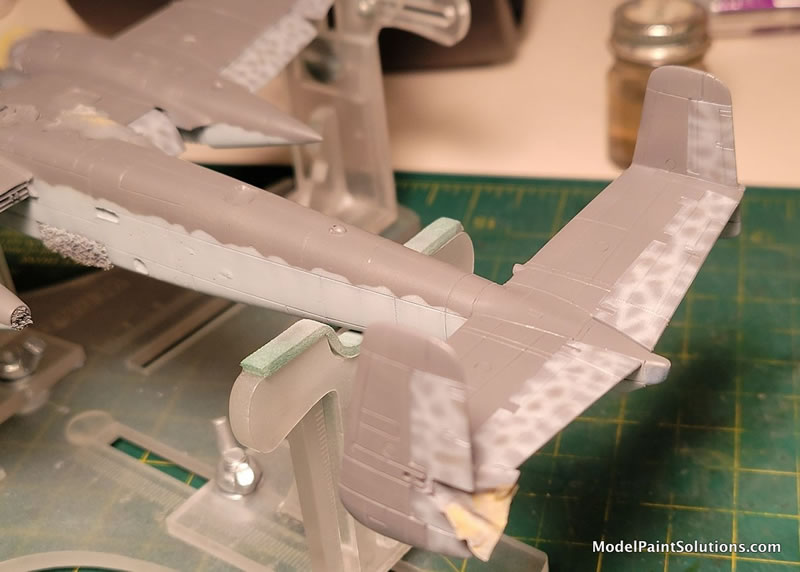
I admit it, I’m hooked on ‘riveting’ models now (Thanks Barry!). It really makes a positive difference in the final look and overall impression of the surface detail. Most don’t do this and that’s fine too of course, but I recommend you try it to add that ‘extra dimension’.
The wing tops and bottoms were ‘pre-riveted’ (before the halves were glued together) because that’s easier, and after assembly any detail that got sanded away can be easily replaced. The fuselage was riveted after assembly (but before the wings were attached) because the rivet lines that go around the fuselage need to be lined up and consistent and that was the only way to reliably ensure that continuity. The horizontal stabilizer and vertical stabs/fins were also done before final assembly. This step also adds more ‘apparent’ detail to the overall model when it’s ‘pre-shaded’ using the rivet & panel lines as a sort of underlying shadow line guide (see below).
Assembly
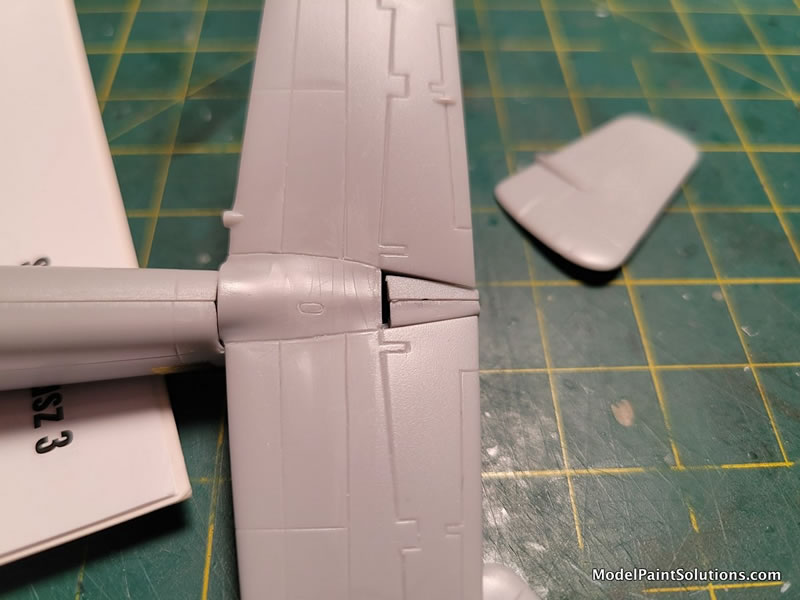
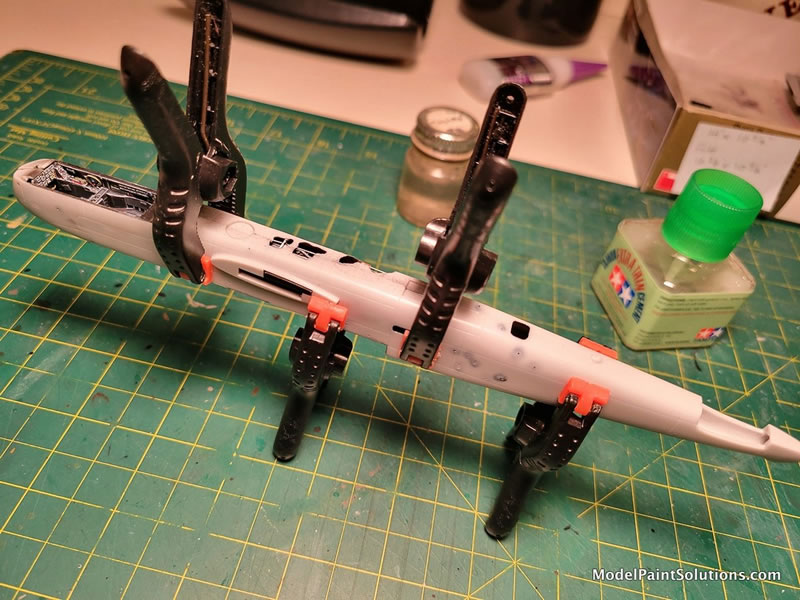
Did I mention “fit issues” above? Oh yeah,…The fuselage required some significant clamping to hold the halves together while the glue set and to maintain a straight cross section from tip to tail because otherwise there would be a noticeable ‘twist’ in the fuselage(!). The main wings also required clamping while the glue dried. The horizontal stabilizer to fuselage joint was the worst and required some significant plastic shimming and putty (I used Apoxie Sculpt) to get a reasonable result.
The wing to fuselage connections revealed even more problems that needed addressing - like inconsistent gaps, adjustment of the wing tabs that slot into the fuselage (too thick on one side, too thin on the other). So, I just adjusted the receiving holes on the fuselage sides as the fastest solution. Whew!
The clear wing tip lights also didn’t fit without big gaps and noticeable ‘steps’ if used as-is. So I drilled out the lamps from the inside of the clear wingtip part, used a toothpick to insert the proper paint color, glued them in solid, then sanded and polished both to a smooth good fit. Ugh.

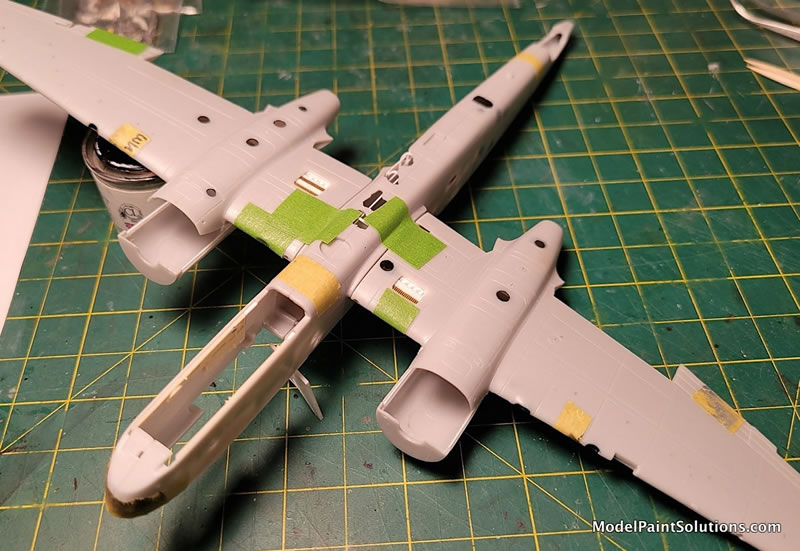
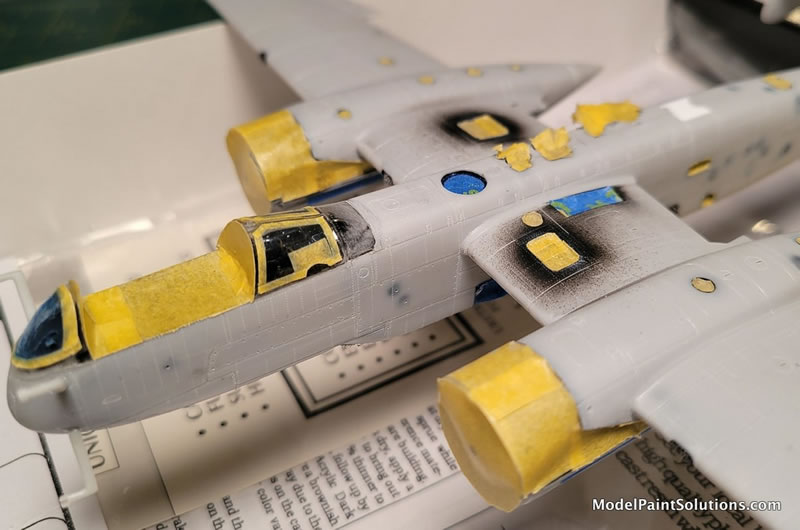
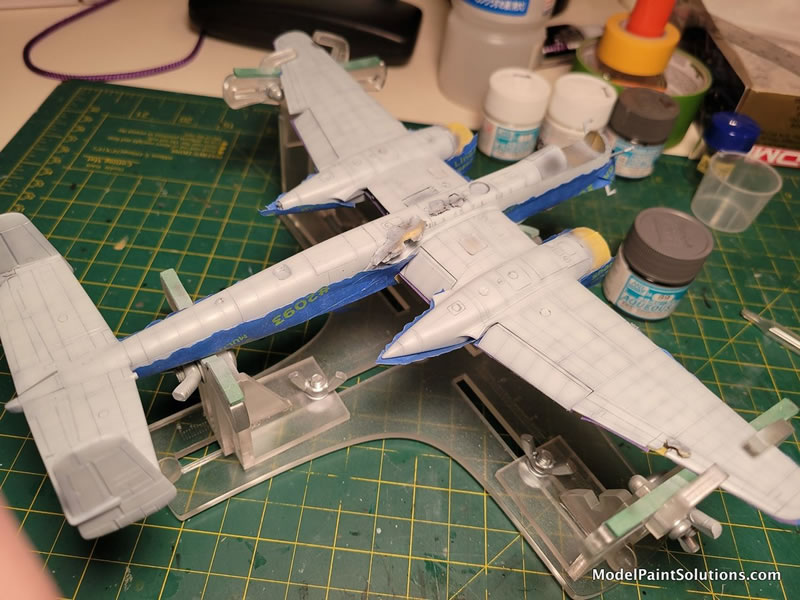
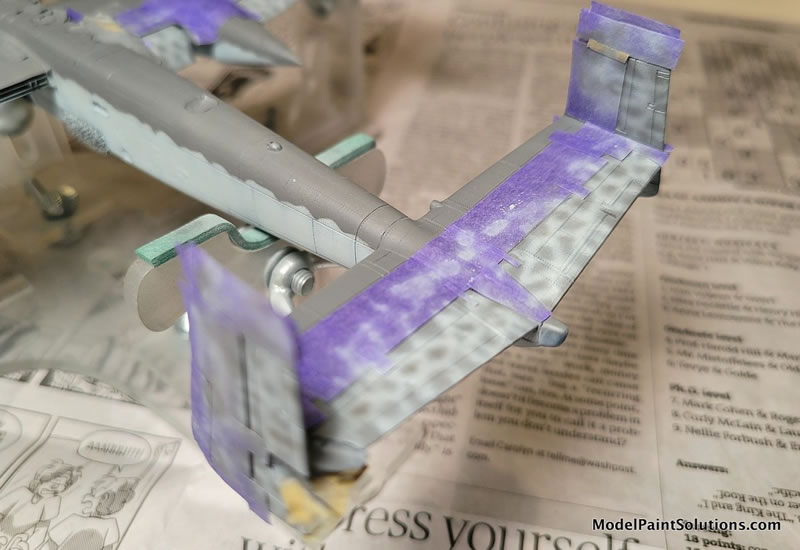
Masking
This model had A LOT of areas to be masked well beyond the usual cockpit, engines, and wheel well areas. Since it had received the gentle attentions of an apparent demolition charge, as well as appearing to be fragged and souvenired, we have many hatches and exposed areas to cover up! This was done primarily using Tamiya tape and Microscale’s liquid mask for the canopy’s clear parts, and Tamiya tape for everything else. As usual, the masking took as long, or longer than the subsequent painting!
Painting, Weathering and Finishing |
Okay, now the fun part (IMO) can begin! Since I’d attached the windscreen and rear canopy portions already, the framing needed to be dealt with first – airbrushing RLM 66 Black/Gray from the outside so it would show as the interior framing color.
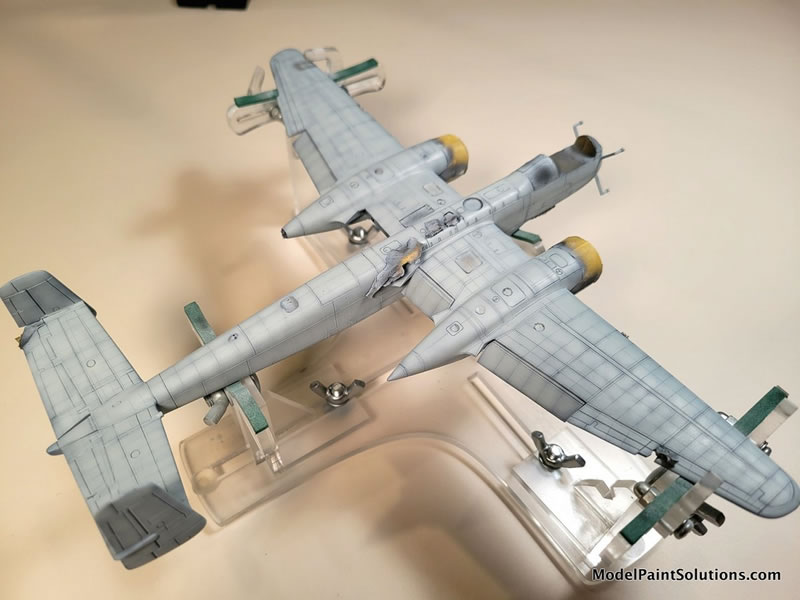
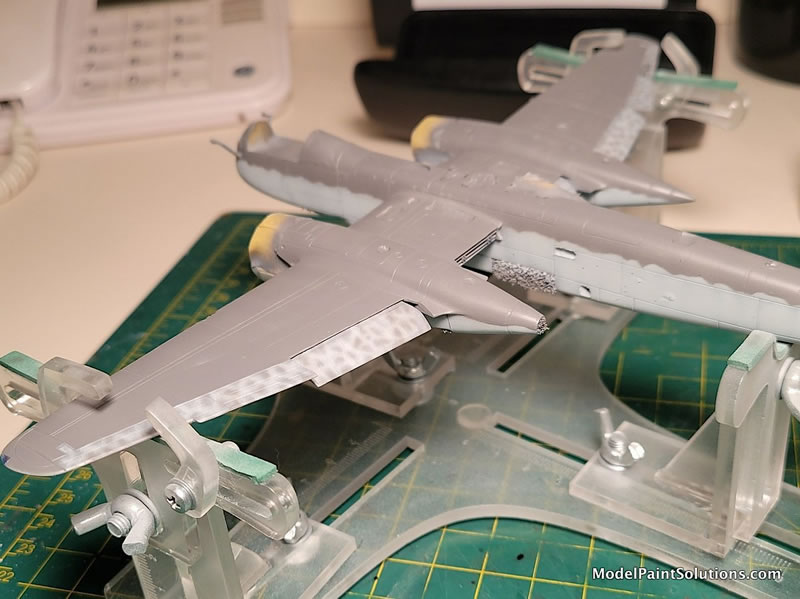
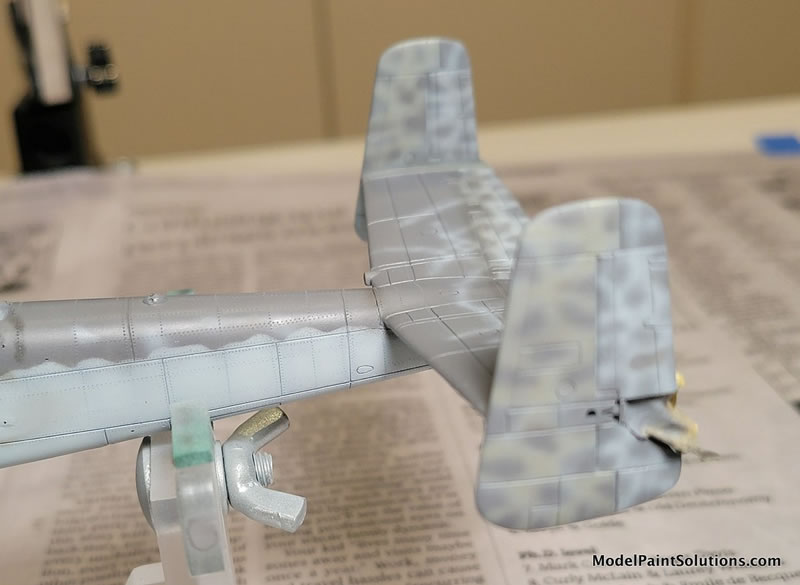
I continued with a primer/pre-shading layer of Gunze’s Mr. Surfacer 1500/Black applied to all panel and rivet lines as well as inside corners & crevices. This was done using a .20 tip & needle airbrushed at about 10psi, and with a ratio of 1/3rd Mr. Color Leveling Thinner to 2/3rds black primer.
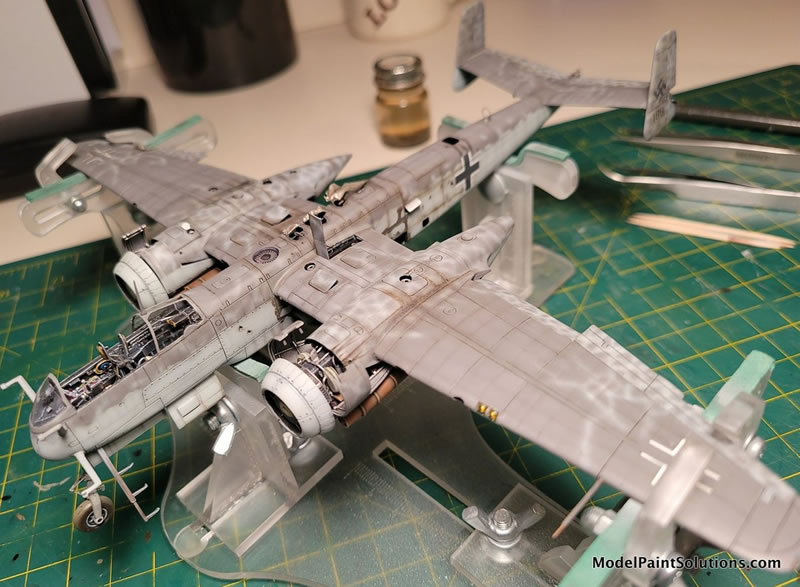
This was followed by the overall shade of RLM 76 Light Blue/Gray using Gunze’s Mr. Hobby Aqueous line. The panels sprayed previously were individually ‘filled-in’ with this color from the center outward. Tedious? Yes, but the effect is worth it, I think! Both spray beautifully when thinned with Gunze’s Mr. Color Leveling Thinner (aka: “Unicorn Tears” - per the Plastic Model Mojo Podcast guys, or just simply ‘MCLT’).
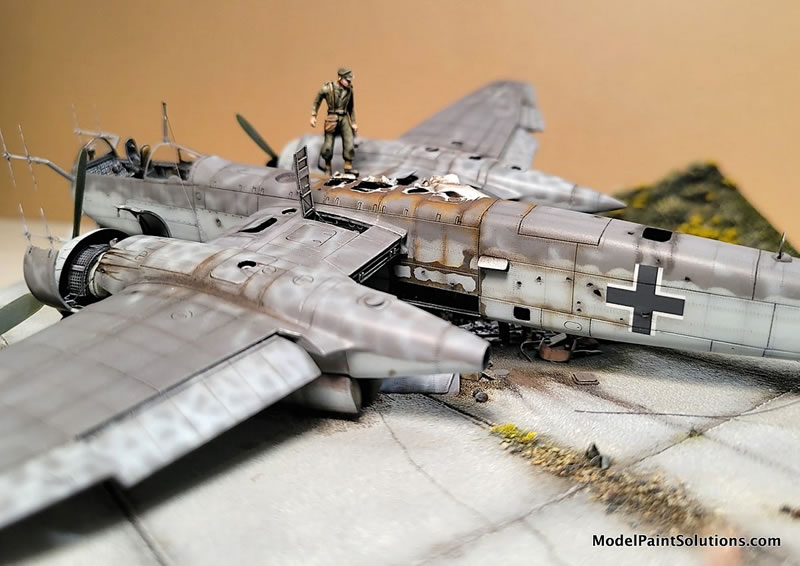
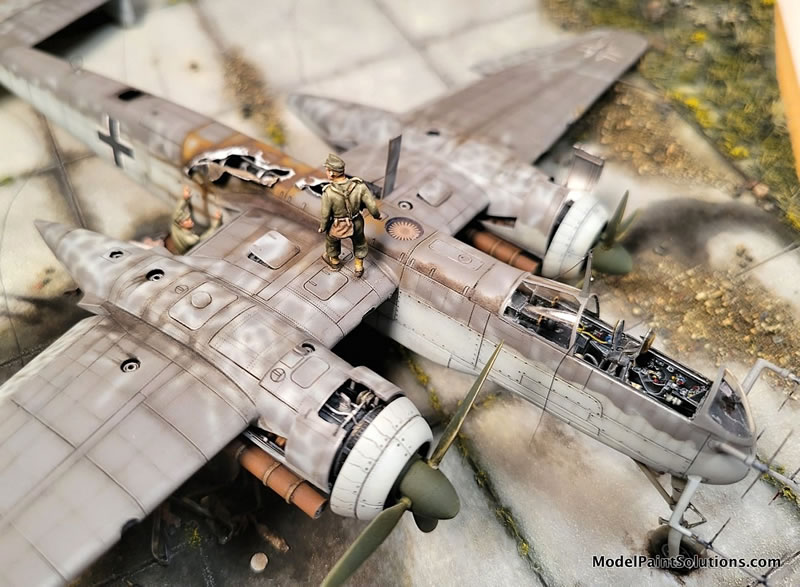
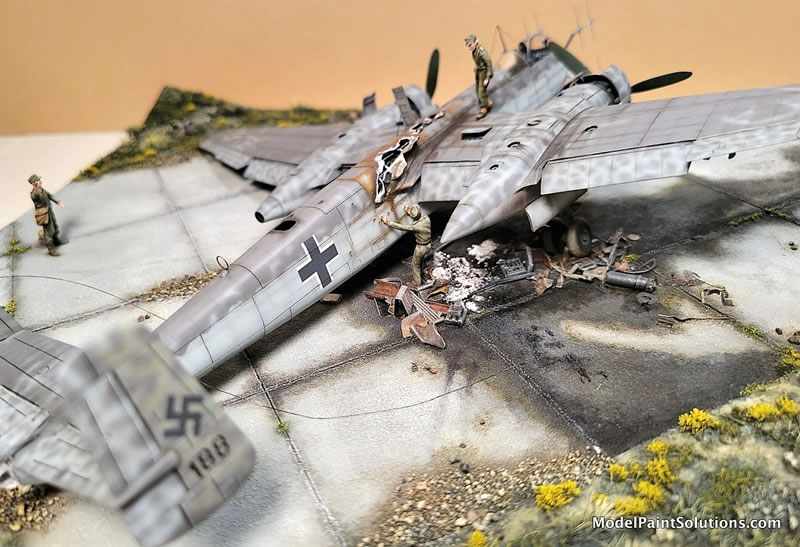
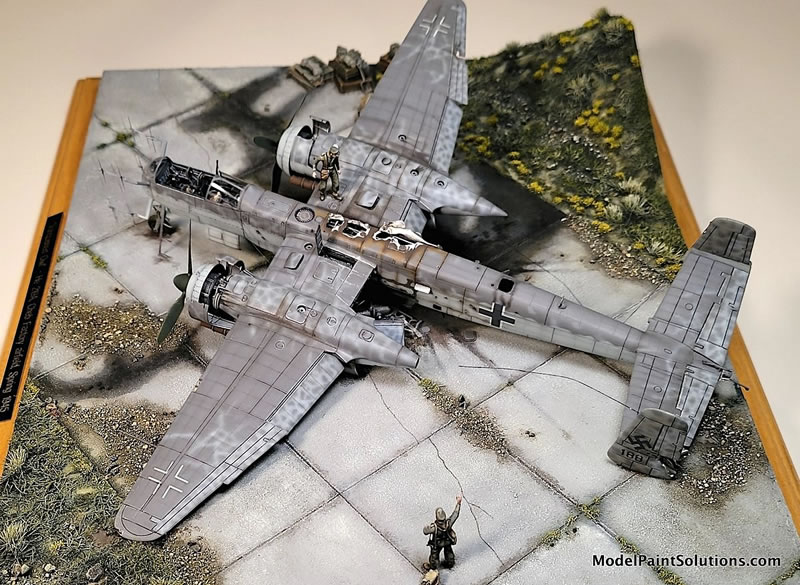
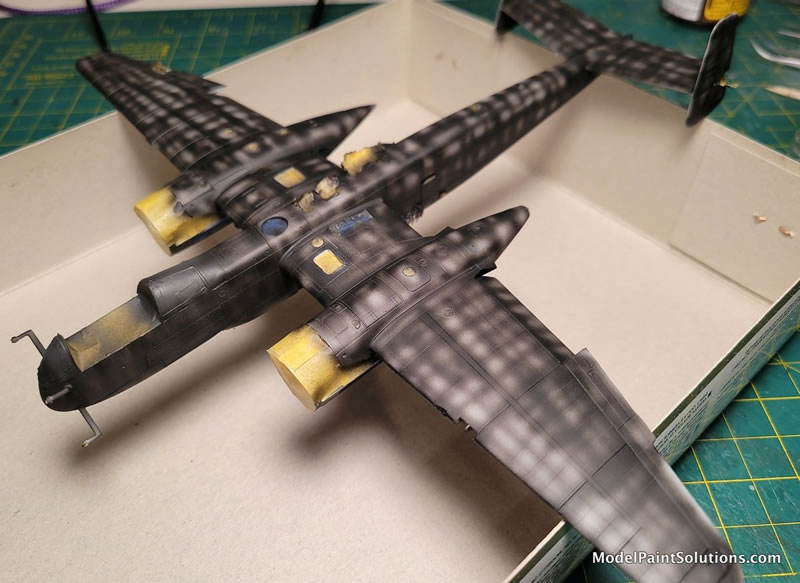
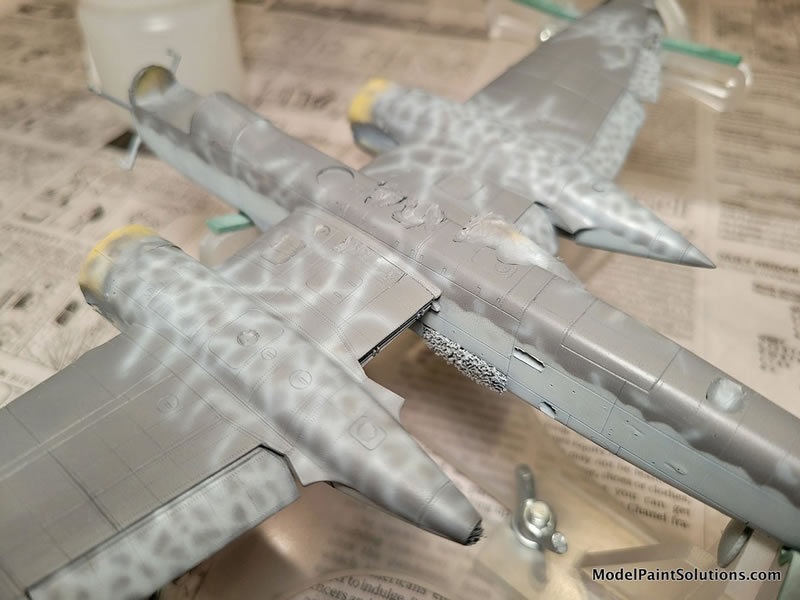
A note on late war Luftwaffe night-fighter painting practices…The previous common practice of a topsides RLM 75 Gray/Violet mottle atop an overall RLM 76 coat - gave way later in the war to the entire topsides receiving a coat of RLM 75 instead. This then was overlaid with RLM 76 sprayed in a sort of “reverse mottle” scheme using various squiggles and patterns. Very often on He 219s this resulted in a tiny but tight squarish dot pattern on the topsides that looks quite distinct compared to other nightfighter types.
In the case of this model, that practice appears to be the case as well, but (judging by the two poor photos I have) the camo application appears to be in an unfinished state. The ailerons, flaps, elevators, and vertical fins & stabilizers look as if they received ‘the full treatment’ (sub-contracted parts perhaps?), whereas the rest of the topsides appears to be mostly solid RLM 75, with only a partial application of the RLM 76 color atop that. The tops of the engine nacelles, and a bit straggling out from those is about it! Seeing as this crate was found damaged (probably intentionally by the retreating Germans) at what was the Cheb Factory airfield in the East, I’m going with the unfinished camo application story…
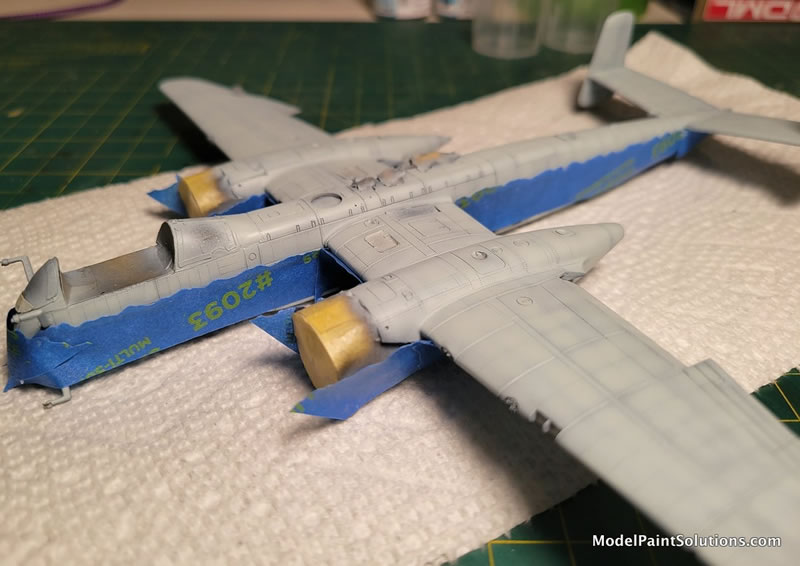
Sooooo…the next step was the application of the solid topsides in RLM 75. Here again, I used Gunze’s Mr. Hobby Aqueous line of paint thinned again with MCLT. I masked the color division line leaving the mask about 2 to 3mm above the surface so I’d get a soft, but still tight color division.
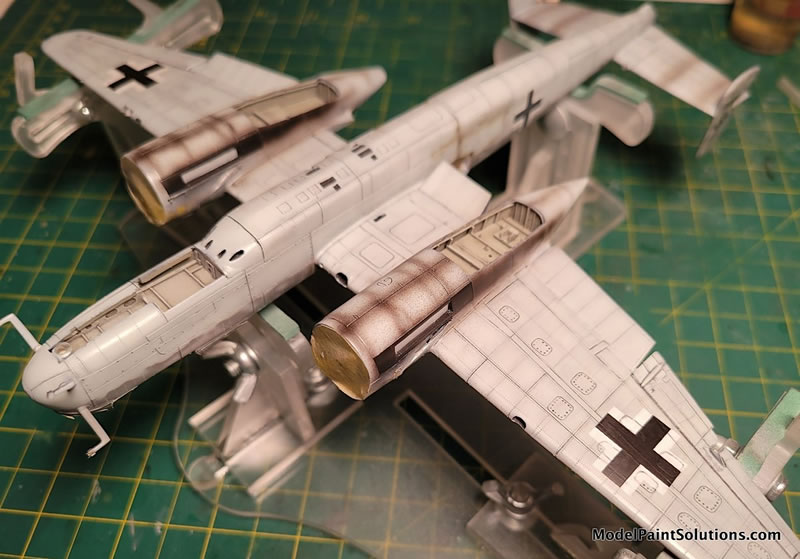
This was followed by the RLM 76 (again, using Gunze’s Mr. Hobby Aqueous) applied in a tight squiggle pattern airbrushed using a .20 tip & needle, at about 8 to 9psi pressure, thinning the paint to 20% paint to 80% MCLT. I also added 6 or 7 drops of Gunze’s Mr. Mild Retarder. After some experimentation on a ‘mule’ I had the confidence to tackle the scheme on the model proper. Since the flying/control surfaces appeared to have received ‘the full camo’ (again, from subcontractors?), I masked off the surrounding areas and painted all of these areas first.
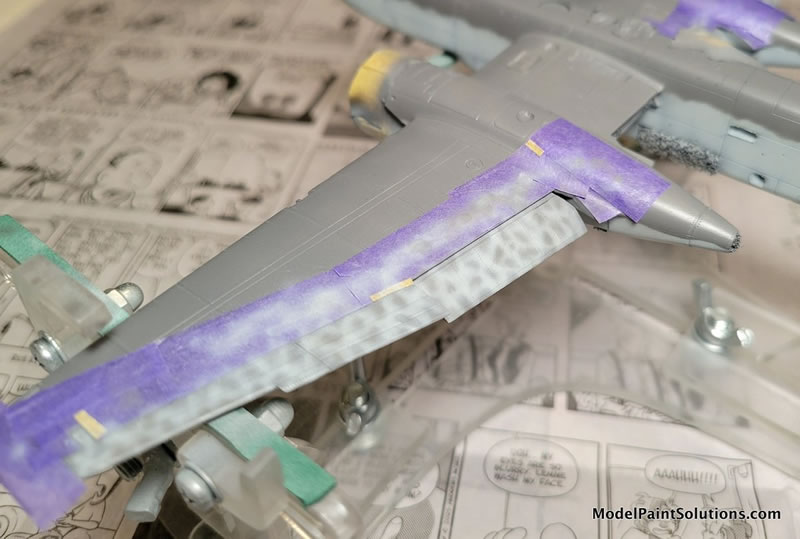
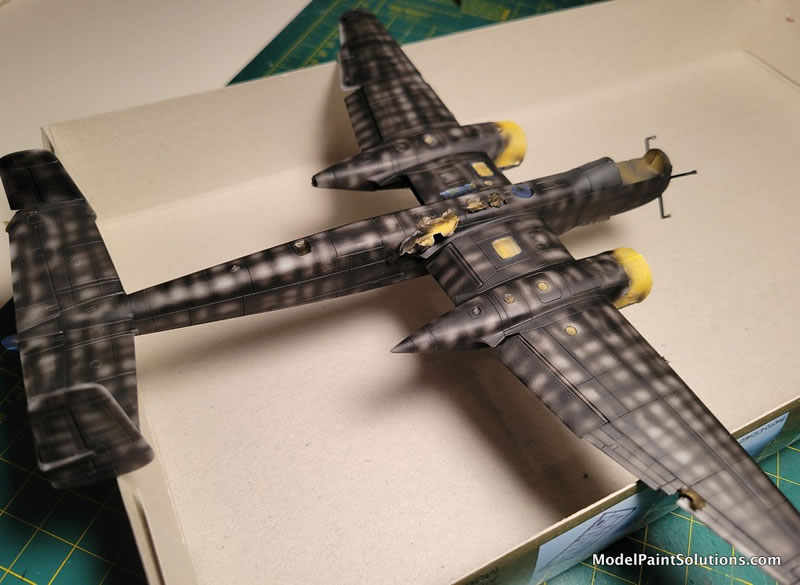
This was followed by airbrushing a similar pattern atop the nacelles and at other selected wing top areas so as to match the photos as closely as I could.
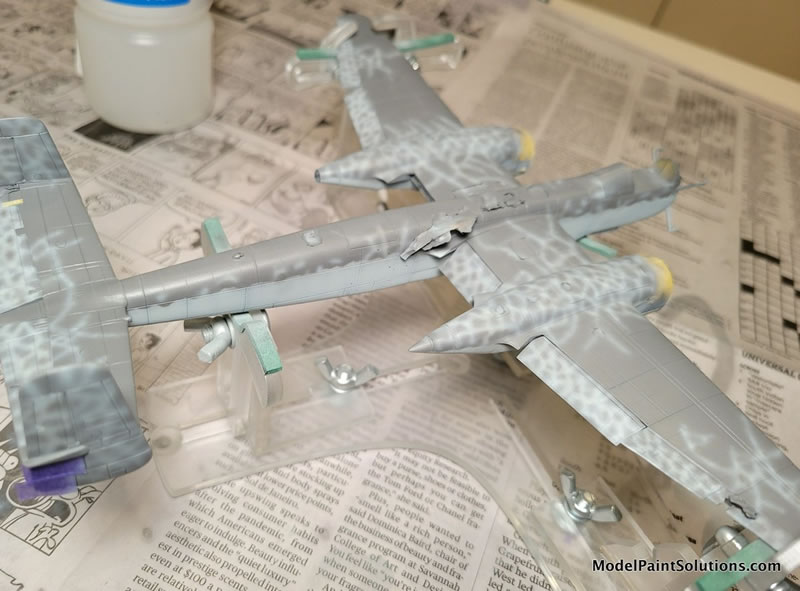
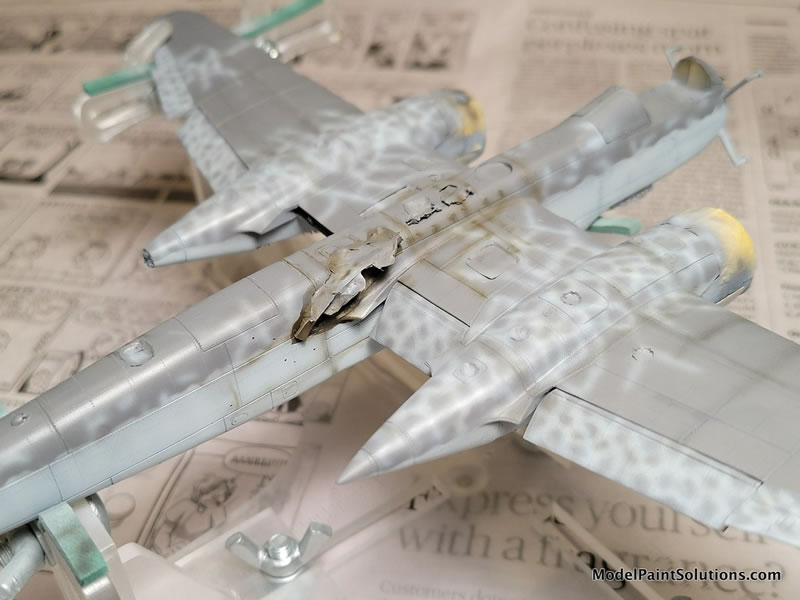
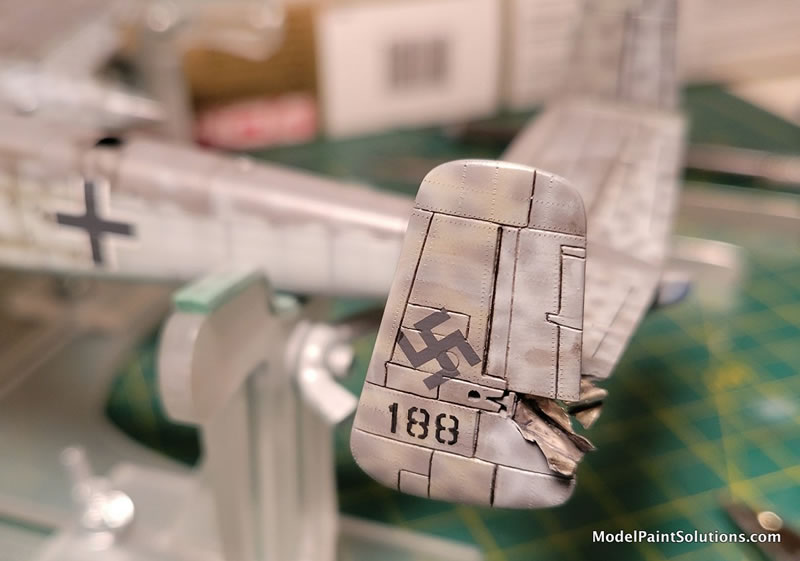
The photos I was working from also showed the vertical stabilizers in a squiggle color scheme slightly different and a bit darker from RLM 76. I interpreted this to be RLM 02 light gray/green – so that color was airbrushed over the RLM 75 in the same pattern. This part finished the overall basic camouflage scheme…
…So onto the initial weathering stages!:
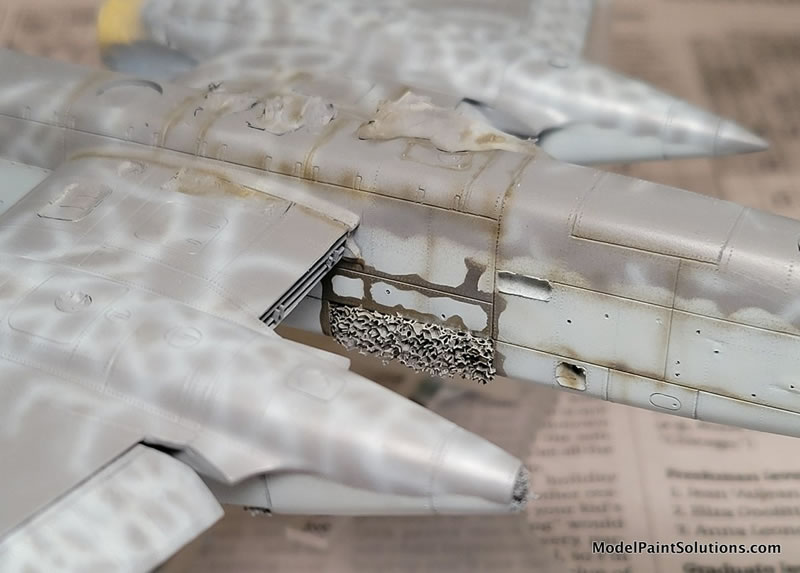
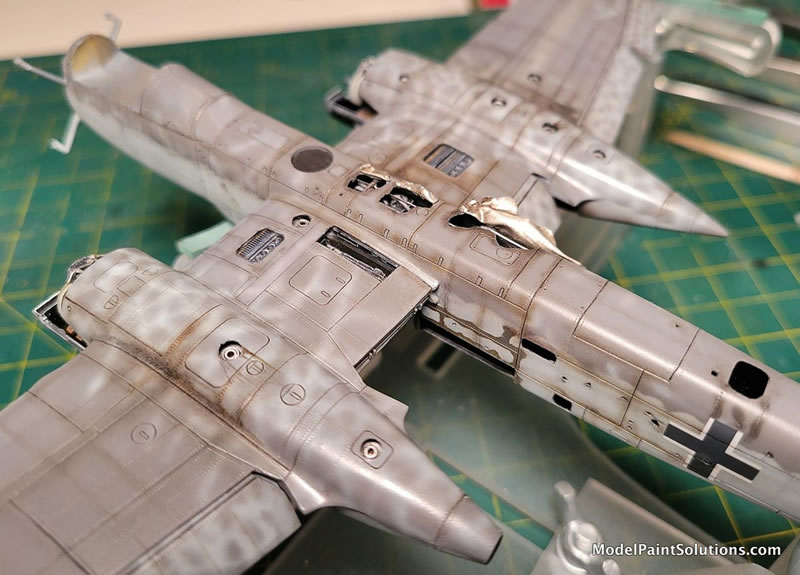
The photos (again) showed a distinctive pattern of wear and stains. Some were burned areas, others from fuel leaks or smoke, and others just age and exposure (sorta like aging modelers ourselves…). So I tried to replicate these specific patterns with the airbrush using dark browns and blacks…the most prominent of these being the exhaust stains and nacelle underside discolorations. Some were airbrushed free-hand, others were masked to a specific pattern.
After a clear acrylic gloss coat (yes, I STILL have a stock of Future floor finish!), the decals were applied. Very few were needed as it only involved the national markings and Werk Nr. on the fins. The decals were sealed in with an acrylic semi-gloss clear coat to protect them - and the paint job in preparation for the oil paint weathering stages.
I took a small detour here to teach myself how to solder. Master’s really nice turned brass FuG220/SN-2 radar set (necessary in God’s scale) is just gorgeous, but I didn’t want to rely on super glue to hold it all together. I’ve tried soldering before (unsuccessfully), so this time I watched some YouTube videos and practiced it again, and after gaining some experience – and using some Blu-tac to hold the parts steady atop a spare ceramic tile and this time - success!
Getting close now…the next step was applying oil paint pin-washes into the panel and rivet lines. These were brushed on, let dry (for maybe 10 minutes), then wiped off (partially) with torn pieces from an old T-shirt that were slightly dampened with mineral spirits. You can do specific small touch-ups with the same mixture accenting, or de-emphasizing areas as needed.
The burned areas at and around the mid-fuselage areas where the holes were painted with dark brown and light rust/ochre colors – were reinforced with oil paints applied by brush. I also added some white burned ‘chalky’ areas which is what the burned paint edges often look like in many instances.
This was followed by an overall application of Testors Dullcote applied with my ancient Paache H airbrush (that I reserve exclusively for clear coats) in a ratio of 2/3rds Dullcote to 1/3rd lacquer thinner. This results in a nice finish somewhere between flat and satin. After this, the satisfying removal of the canopy and all other masks is done. That was followed by Prismacolor pencil paint chipping the wear areas and more Prismacolor pencils to highlight edges and reinforce some shadows and crevices; trying to create subtle contrasts where possible.

The next step was getting the model fixed onto the diorama base (not a part of this story…) by pinning the wheels and wingtip with brass pegs. That was followed by the addition of the propellors, pastels & pigment stains, and reinforcing numerous ‘stained’ areas etc. The base, groundwork, vegetation, figures, and diorama planning are not part of this recital, so we’re done!
A fun project, and the DML kit is really ‘the only game in town’, so it can be done with the help of some of the nice aftermarket sets, some ‘elbow grease.” Especially if you throw enough hours at it!
Steve Hustad
(Aka “The Mad Norseman”).
For more on this review visit ModelPaintSolutions.com
Text and Images Copyright © 2025 by Steve Hustad
Page Created 25 April, 2025
Last updated
25 April, 2025
Back to HyperScale Main Page
Back to Reviews Page

|
 Home
| What's New |
Features |
Gallery |
Reviews |
Reference |
Forum |
Search
Home
| What's New |
Features |
Gallery |
Reviews |
Reference |
Forum |
Search