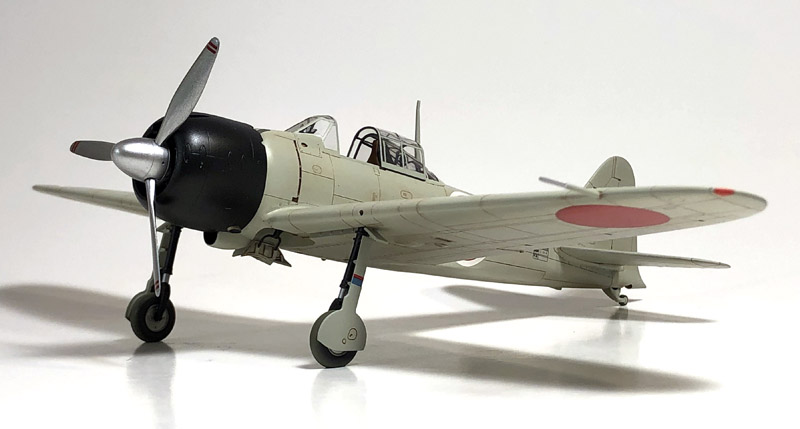
Hasegawa 1/48 scale
A6M3 Zero Type 22
by Brian Bourdon
|
Mitsubishi A6M3 Zero Type 22 |

This is Hasegawa’s quarter-scale A6M3 Model 22. It is representative of a machine assigned to the 202nd Kokutai circa January 1943.
I will admit that I’d retrieved this neglected kit from the Closet of Doom with the simple goal of converting it to a Pearl Harbour A6M2 Model 21. I concluded that I had the requisite parts to perform this magic trick after spending the better part of an evening rummaging through my spares box. For anyone who has not tackled a Hasegawa Zero, I would mention that the cockpit and a lot of the smaller parts are interchangeable throughout their entire line, from the A6M2s on up to the A6M5s.
Interior
The cockpit, as supplied, is adequate OOB, but there is always room for improvement. Luckily, I had at my disposal Eduard’s Zoom set as well as some useful remnants from an ancient brass sheet. To this, I added some supplemental details made from styrene rod and bits of wire.
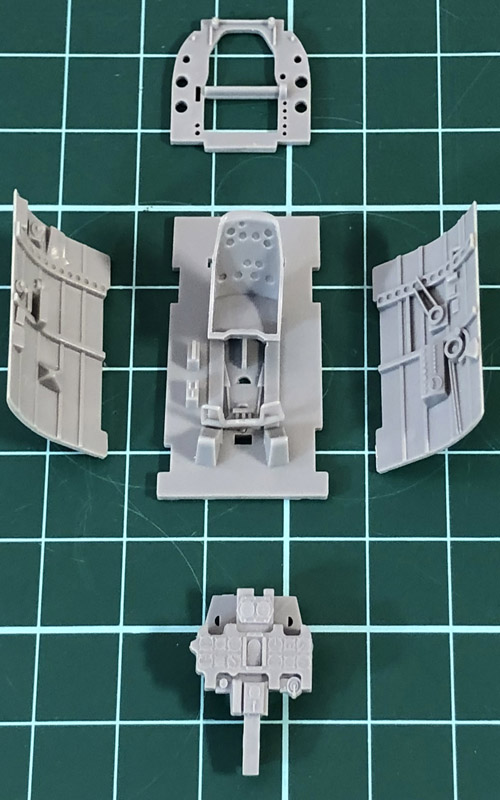
Starting with the seat, lightening holes were drilled out. This task was made simple by the dimples that have been moulded into the backrest. These served as a guide for the appropriate drill bits. I added a leather pad, which may or may not have been a feature of the real aircraft.
The IP is a thing of beauty, but needs to be tweaked for a proper fit.
The photo-etch side panel, port side, proved problematic. It was only after the second attempt to install this piece that I discovered it was oversized. In the end, I modified the kit piece by adding details. It is not accurate, but then again, at least it fits.

The most difficult item to reproduce was the ‘Emergency Fuel Pump’ located on the floor by the pilot’s seat, starboard side. This was made from styrene rod in various diameters and bits of wire. I laid a suitable mess of wire on the floor nearby to represent the associated hydraulic lines.
The choice of interior colour was dictated by Eduard’s interpretation of Mitsubishi Green as used on their IP and other components. It is quite possibly a mix of Gunze H58 Interior Green and Gunze H340 Field Green in equal amounts, as suggested in their line of A6M2 kits. Since I could not lay my hands on the aqueous version of H340, I opted to use Gunze H303, which is close enough.
Three coats of Pledge prepared the surfaces for a Tamiya XF-27 pin wash. MIG Ultra Flat Varnish finished the job.
Power Plant
I swore I would never again super detail a Nakajima Sakae engine. I learned long ago that most of it would be hidden once the cowl is in place and the spinner is installed. Famous words, as it turned out.

I added push rods and wired the front cylinders before I was able to stop myself.
Exterior Details
Here is where I discovered that an A6M2 oil cooler (Part J3) does not actually fit onto an A6M3 fuselage because the latter is probably two or three mm shorter to accommodate the longer cowl. Unfortunately, I only discovered this once the cockpit tub was welded into the new fuselage - and I will take this opportunity to make mention of the solidly spectacular job I did here.
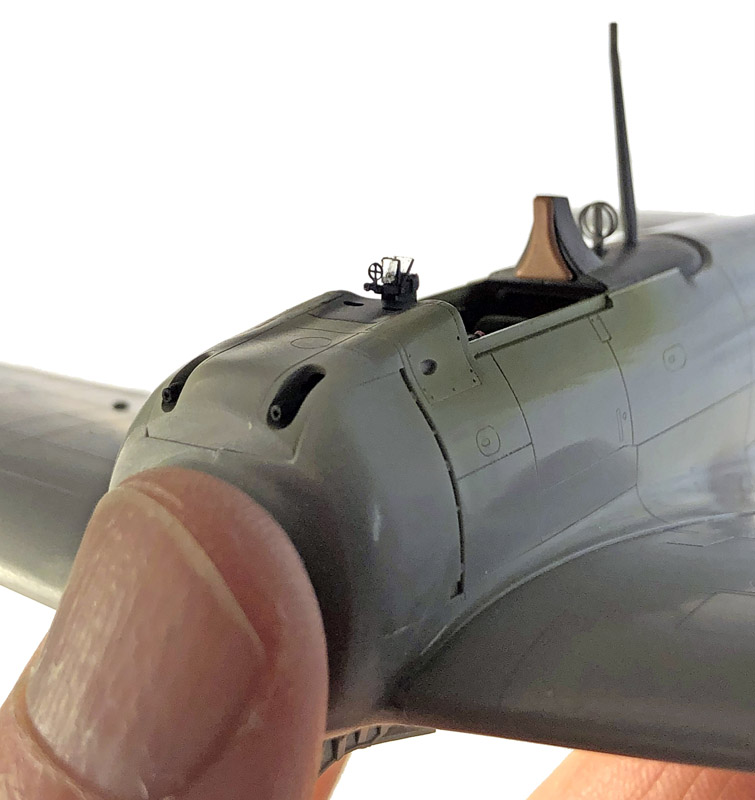
‘Once I grudgingly accepted that I’d have to build an A6M3, I would note that the fit was typical of Hasegawa kits, which is to say most gaps were dealt with a little liquid putty and some light sanding.
My kit did not come with any usable decals, which is why it was consigned to the Closet of Doom in the first place. A little research opened the door to several interesting possibilities. For anyone looking to model IJN or IJA aircraft, I would highly recommend Pacificwrecks.com. It is an excellent reference.
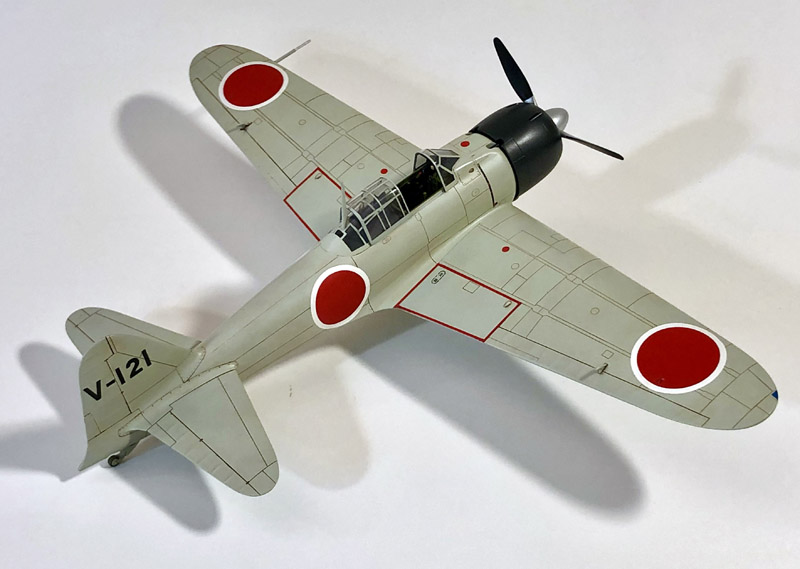
I eventually settled for a mid-production machine, one of many that would have been rushed to the Solomons to support the intense fighting over Guadalcanal. It is within the realm of possibilities that this Model 22 could have sported white-edged Hinomaru along with simplified tail codes.
This A6M3 was painted Tamiya XF-76 overall, considerably lightened with white. The cowl was painted XF-69 NATO Black. Three coats of Pledge prepared the surface for a wash and a bit of weathering.
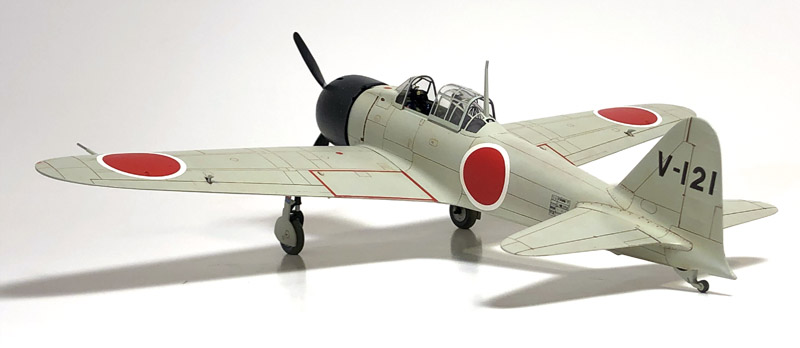
The markings were sourced from my decal file. Some of these were 35 plus years old and benefitted from an application of Microscale Liquid Decal Film. Follow the instructions and this stuff will work exceedingly well.
Hasegawa Zeros are a lot fun to build. They are a little dated, true, but with a little work, a decent result can still be achieved.
Text and Images Copyright ©
2026 by Brian Bourdon
Page Created 11 August, 2026
Last Updated
11 August, 2026
Back to HyperScale Main Page

|
 Home
| Whats New | Features | Gallery | Reviews | Reference | Resource Guides | Forum |
Home
| Whats New | Features | Gallery | Reviews | Reference | Resource Guides | Forum |