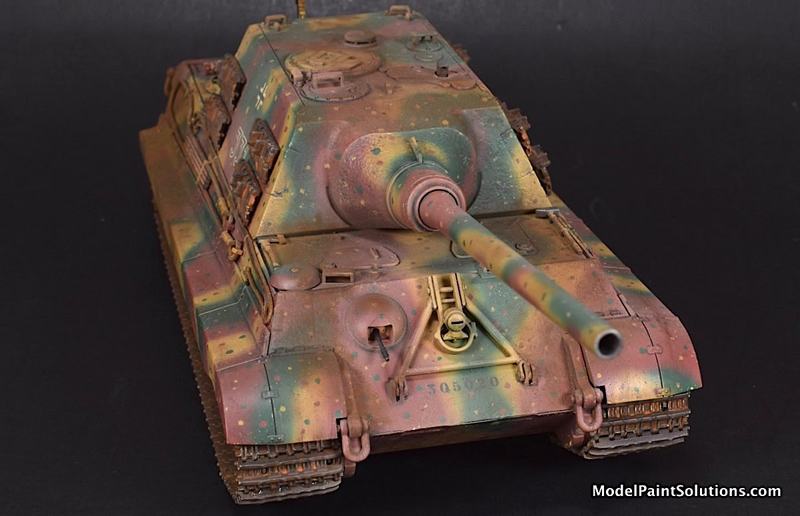
Panzerjäger Jagdtiger (Sd. Kfz.186) Frühe Produktion
Tamiya 1/48 scale
by John Miller

Tamiya 1/48 Panzerjäger Jagdtiger (Sd. Kfz.186) Frühe Produktion Kit #: 32569
Scale: 1/48
Review Type: Build
Advantages: Being a Tamiya kit, the build was quick and easy.
Disadvantages: None noted.
Introduction:
Let me say upfront, I’m not much of an armor modeler. I enjoy building the occasional armor kit as a break from aircraft and tend to use it as an opportunity to expand my repertoire of airbrushing and weathering tricks. I’m fortunate to have experienced armor modelers like Mike “The Weatherman” Millette and Eric “The Tank Man” Christianson in my modeling circle to answer questions and provide armor inspirado. Speaking of inspiration, I like the looks of the Jagdtiger, especially when decked out in the dotted Ambush scheme. This is my first attempt at replicating this scheme and using weathering techniques to this degree. I learned a lot that will come in handy on my next armor build.
Background
The Jagdtiger ("Hunting Tiger"; officially designated Panzerjäger Tiger Ausf. B) is a German case-mate-type heavy tank destroyer(Jagdpanzer) of World War II. It was built upon the slightly lengthened chassis of a Tiger II. Its ordnance inventory designation was SD.Kfz.186. The 72-tonne Jagdtiger was the heaviest armored fighting vehicle (AFV) used operationally by any nation in WWII and the heaviest combat vehicle of any type to be produced during the conflict. It was armed with a 12.8cm Pac 44 L/55 main gun which could out-range and defeat any AFV fielded by the Allied forces. It saw brief service in small numbers from late 1944 until the end of the war on both the Western and Eastern Fronts. Although 150 were ordered, only around 80 were produced. Due to an excessive weight and an underpowered drivetrain system, the Jagdtiger was plagued with mobility and mechanical problems. Three Jagdtigers survive in museums.
Text edited from Wikipedia.
https://en.wikipedia.org/wiki/Jagdtiger
The Tamiya 1/48th Jagdtiger is all you can expect from a Tamiya kit; a minimum number of parts, really good fit, sufficient detail and easy assembly. There is a nicely rendered cast metal texture on the mantlet, a good selection of pioneer tools and easily assembled link and length tracks.
As is the norm on my bench, all sprues were soaked in a 50:50 solution of Windex and Denatured Alcohol (DA) to remove mold release prior to any parts removal. Note, the Windex is the original formula with ammonia and the DA should be labeled “For Cleaning Glass,” and not be intended as a fuel (Wrong Type!). After a 2 hr soak in Windex/DA, the sprues were rinsed with warm water and set aside to dry.
All parts were removed from sprues with God Hand Parts Nippers (how did we ever build models without this tool?). Parts were cleaned up with a new #11 blade, micro-files, a ceramic blade and both #600 and 1,000 grit synthetic sandpaper from Alpha Abrasives. The kit was assembled with mostly Tamiya Thin Cement except when affixing smaller parts when Medium-Thick CA Glue (Bob Smith Industries) was used.
Construction begins with the lower hull and wheels, which come together quickly. Tamiya includes four metal bars that are affixed inside the lower hull giving the model appreciable weight; nice touch. All of the road wheel crank arms are molded in situ saving a lot of time. Once assembled, the wheels are added to the lower hull prior to adding the upper hull. This provides good access for the builder to assemble the track links onto the wheels making the whole process pretty easy.
The barrel is composed of halves so a little sanding and buffing is required to deal with the lengthwise seam. For the job I used a Flexi-File with a Fine Grit tape followed by 3,600 and 4,000 Micro Finishing Pads. The Flexi-File is an ideal tool for sanding and buffing rounded or curved surfaces. All abrasives were used with soapy water.
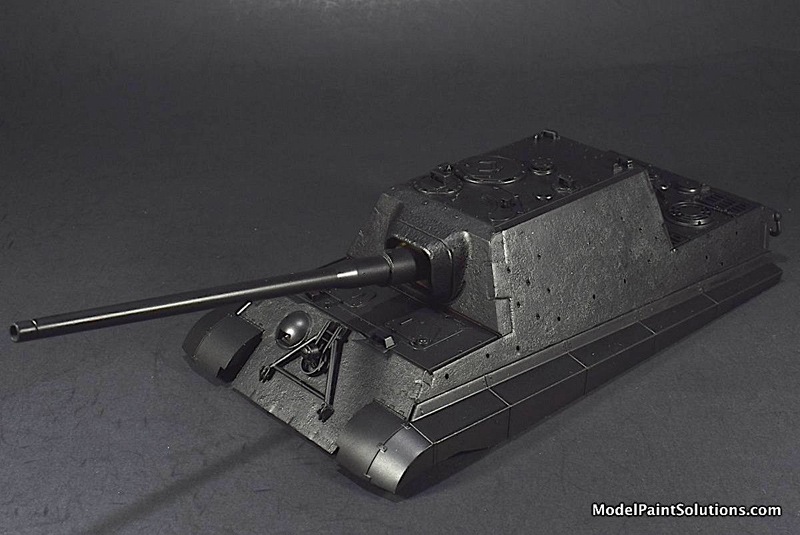
Note: To allow for easier handling, I primed and painted the upper and lower hulls separately. They were joined after some initial painting and weathering was done.
Primer and Paint
The hulls (upper and lower) and the track parts were first shot with Mission Black Primer diluted 1:1 with Mission Thinner containing 10% Liquitex Flow-Aid. This was applied at ~15psi as a Dry followed by a Wet coat with an H-S Evolution fitted with a 0.28mm tip (see Technical Notes below).
The track lengths were left attached to short lengths of sprue to facilitate handling while painting. I snipped the parts free from the sprues later and touched up accordingly with paint before assembly. After priming, the tracks were shot with a custom “Track Mix” composed of 60% Mission Standard Rust, 30% Rotbraun and 10% Worn Tire, equaling a ratio of 6:3:1 respectively. This was diluted, and sprayed as described in the Technical Notes below.
After the tracks were dry, they received a wash of enamel-based AK Light Rust (AK 046), which was sealed with a light, Dry Coat of 30% Mission Clear Primer or CP30 for short (see Technical Notes, below). Dark Brown enamel filter (AK076) was then carefully applied with a pin brush for shadows. Excess was removed using a cotton bud moistened with Mono Lisa Odorless Thinner. When this was dry, pigments (Vallejo Burnt Umber 73.110 and Vallejo Light Sienna 73.104) were dabbed on with a short-bristled brush and locked in place with AK Pigment Fixer diluted to ~25% with Mona Lisa. This was applied as small drops using a medium-sized Micro-brush (the disposable kind that come in white, yellow and green). Wear areas on the tracks were highlighted using with a micro brush and silver ink (Color Box). When the ink was dry (12hrs), the tracks were sealed with another Dry coat of Mission Clear Primer.
To finish the assembly, the painted road wheels were first installed on the lower hull. The painted and weathered tracks were then assembled onto the painted road wheels using CA glue. While doing this, I was careful to remove paint and primer from mating surfaces. Good light and magnification helped here.
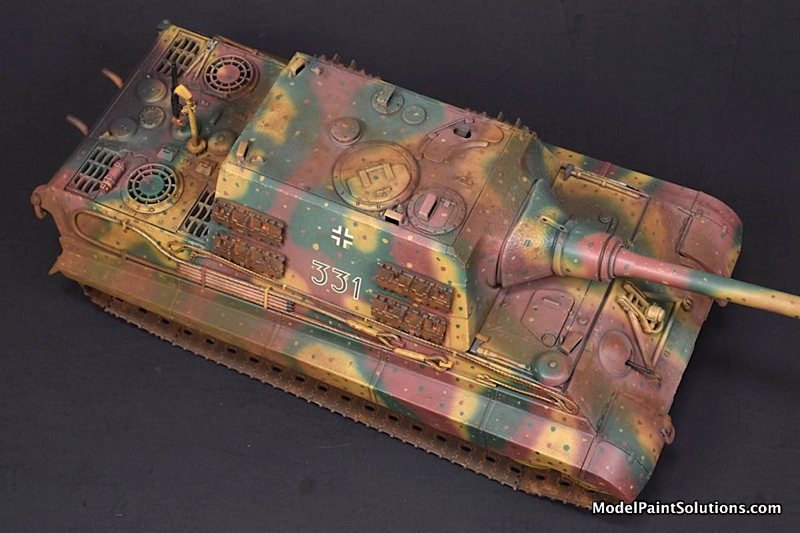
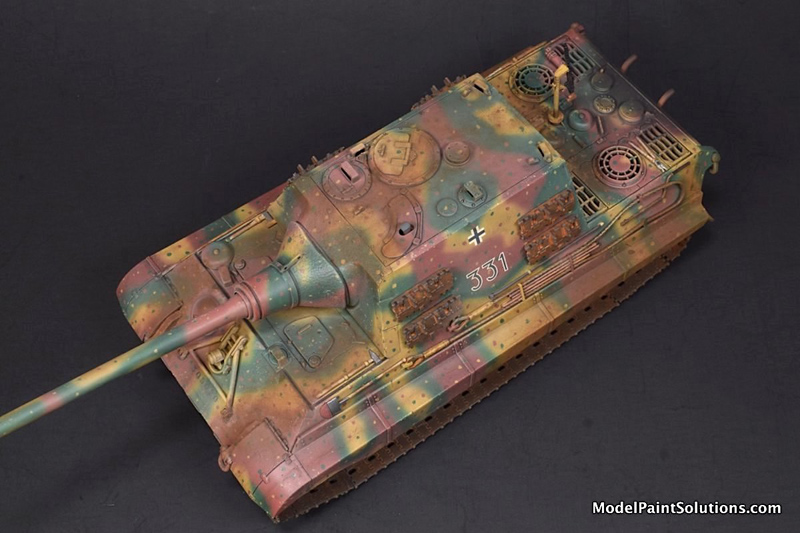
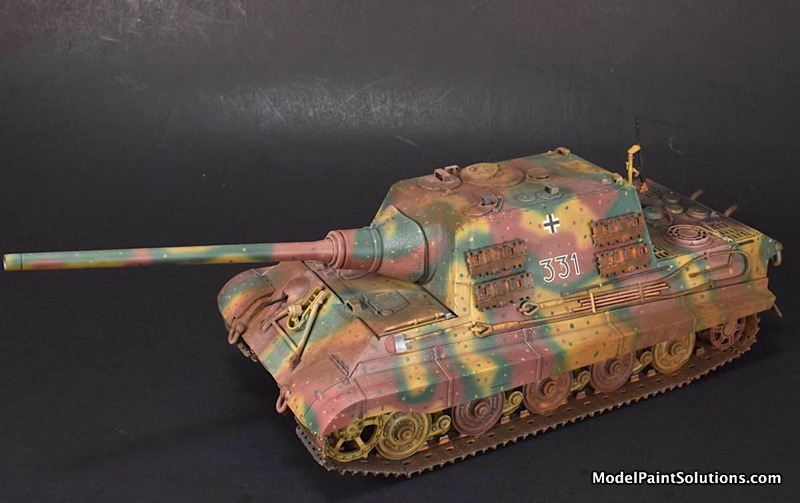
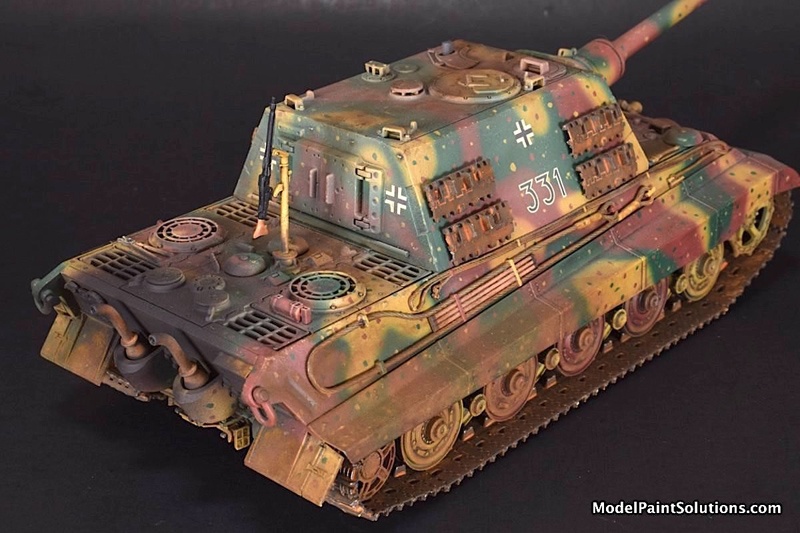
The Ambush scheme was applied to late-war German armor in an effort to better conceal it from Allied aircraft. The scheme is characterized by small dots or similarly-sized irregular mottles over the base scheme of Dunkelgelb (Dark Yellow), Dunkelgrün (Dark Green) and Rotbraun (Red-Brown). There are many variations of this scheme, some more difficult to replicate than others. I opted for, what I think is, the easiest version; simple dots of Red and Green over Yellow with Yellow and Red dots over Green etc…
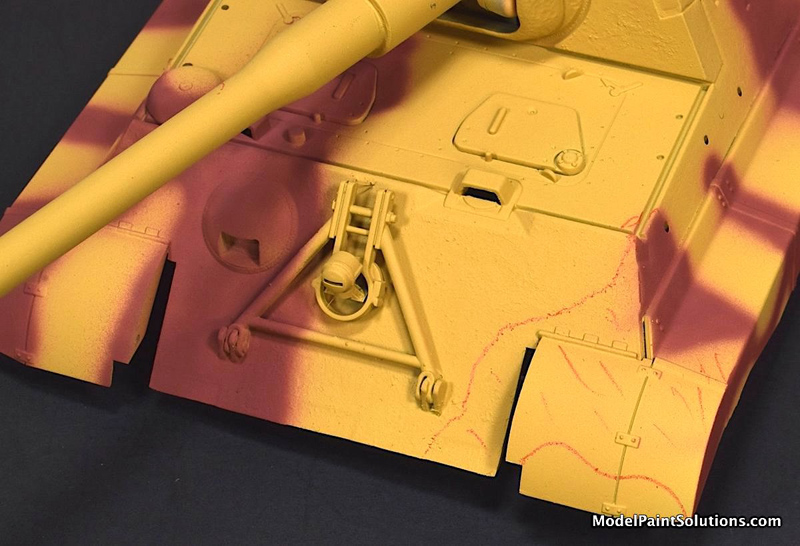
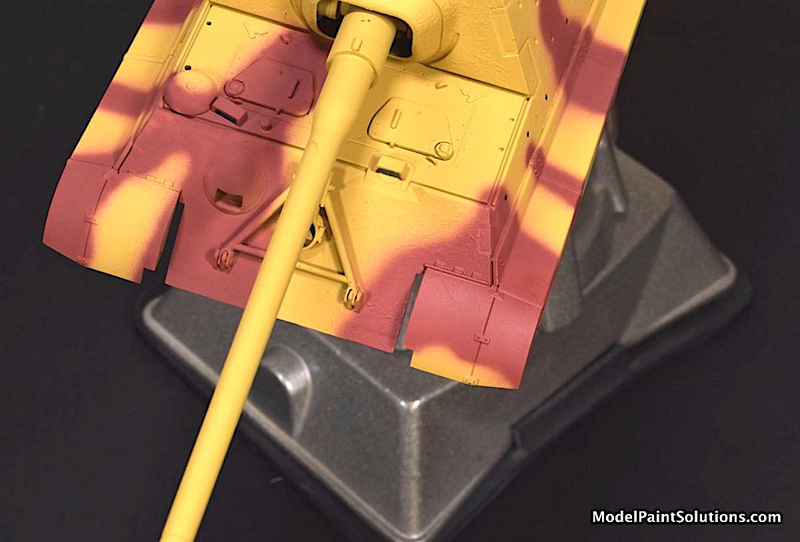
The scheme was started by shooting the entire model Mission Dunkelgelb (MMP-011). This was applied with an Evolution fitted with a 0.28mm tip. See Technical Notes below for details on how the Mission paint was diluted and applied.
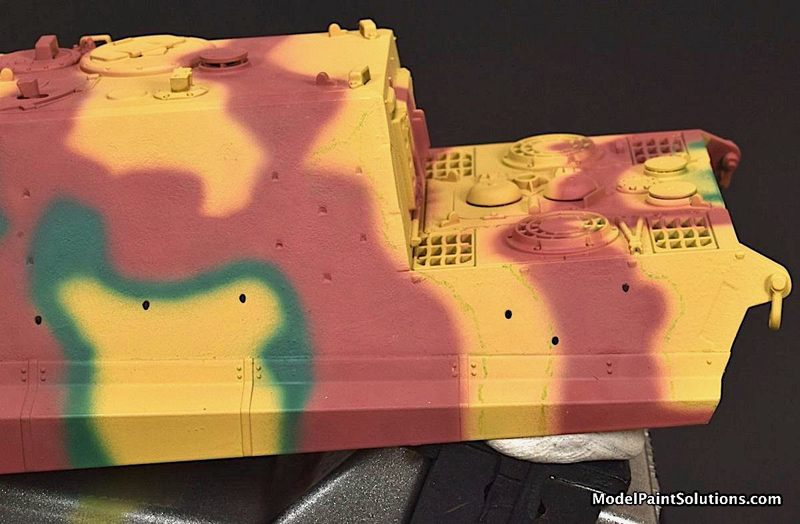
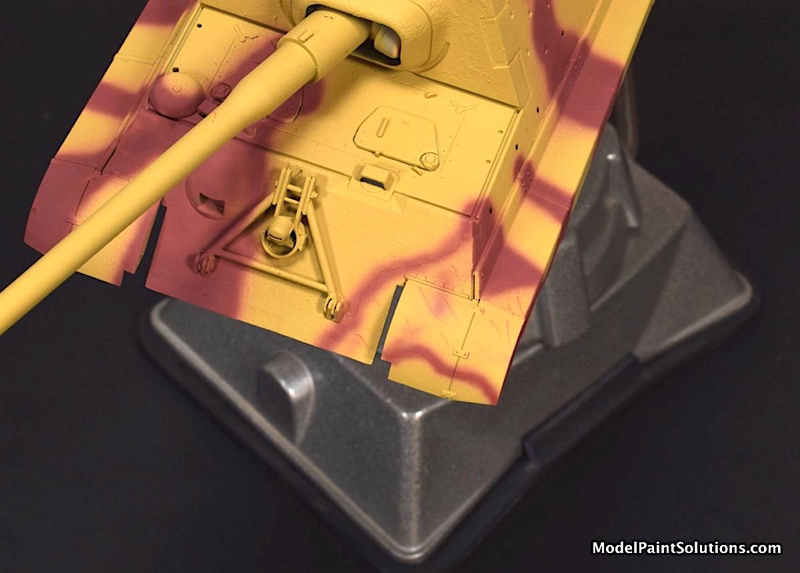
When the Dunkelgelb was dry (~1hr), I lightly sketched the outlines of the Rotbraun pattern (provided in the painting instructions) onto the hull using a Medium Rust AK Weathering Pencil (#10012). Please note the use of the word “lightly” in the previous sentence. A light or faint pencil line will be covered by a coat of paint. This is especially true if the color of the line is similar to the intended paint, hence the use of a red-colored pencil. If the line is too dark, heavy or wide, the pencil marks can show through a coat of paint… Light pencil marks are also made within the outline to sort of color it in. I do this to keep from spraying paint on the wrong side of a line thereby ruining the patten. Yes, I’ve done this. Using the pencil pattern as a guide, Mission Rotbraun (MMP-015) was applied using an H-S Evolution fitted with a 0.28mm tip (see Technical Notes below).
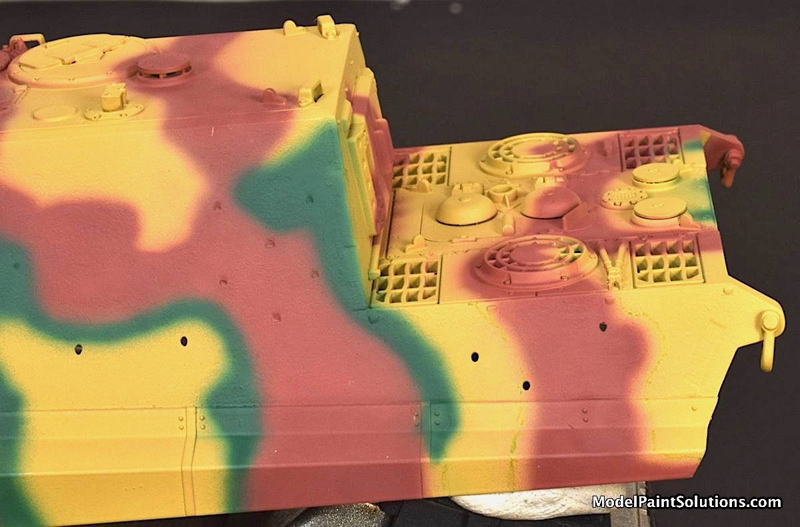
Once the Rotbraun was dry, I lightly sketched the Dunkelgrün patters onto the model using a Light Green AK Weathering Pencil (#10007). There’s that “lightly” again. Mission Dunkelgrün (MMP-054) was then applied using an H-S Evolution fitted with a 0.28mm tip (see Technical Notes below). Note: I wanted to keep the paint lines soft between the three colors so adjusted my working distance and air pressure accordingly; no fine-line stuff here.
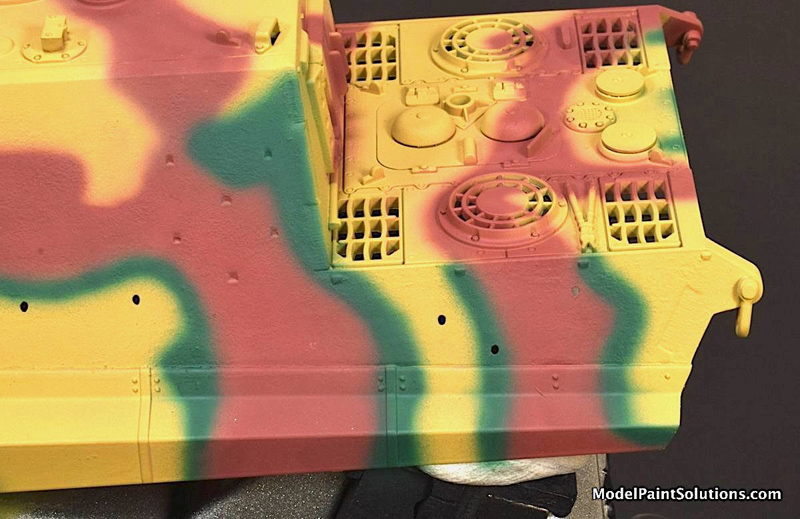
With the three colors applied, I set about applying the small paint dots. The same three Mission paints (Dunkelgelb, Rotbraun and Dunkelgrün) were applied straight from the bottle using a medium size Micro Brush (yellow). I tried multiple techniques and settled on first dipping the Micro brush in the paint followed by a couple of dabs onto a paper towel (to remove excess paint). Then I would lightly dab the brush onto the model. In this way I got small, controlled dots and not blobs of wet paint. Once I stumbled onto this trick, it was a matter of going a little dot-crazy applying colored dots all over the hull.
In preparation for weathering, the model was first shot with CP-30 (30% Mission Clear Primer; see Technical Notes). CP30 dries to a semi-gloss finish, which is good for doing panel liners and washes. Recesses, shadows, and surface details were then picked out with Tamiya Black and Dark Brown Panel Liners. Excess liner was removed with a cotton bud moistened with Mona Lisa Odorless Thinner (good stuff).
Dirt and general nastiness was replicated with pigments; Vallejo Burnt Umber (73.110) and Vallejo Light Sienna (73.104). I combine the pigments in a small ceramic bowl and dab them onto the model using a stiff, short-bristled brush (made from a retired paint brush). I try to place more dirt and wear on those areas of the upper hull that would be frequently walked on. In some areas, I locked the pigments in place with AK Pigment Fixer diluted to ~25% with Mona Lisa.
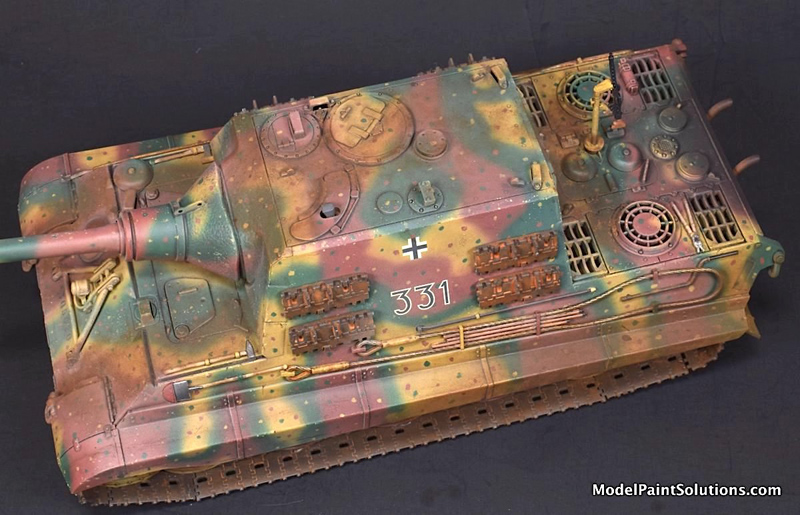
The black, sooty exhaust staining on the rear of the tank was replicated using a mix of Mission Black with a bit (~5%) of Green and Brown added. This was diluted and sprayed as described in the Technical Notes (below).
Exterior details such as the tow cable, pioneering tools and machine gun were hand-painted (read hairy stick) with Mission and Vallejo acrylics and affixed with Medium Thick C.A. (Bob Smith). The spare track lengths were painted and weathered with the main tracks and after another quick wash with a custom mix of enamel light rust (mixed from multiple AK enamel rust washes), they were affixed with thick C.A.
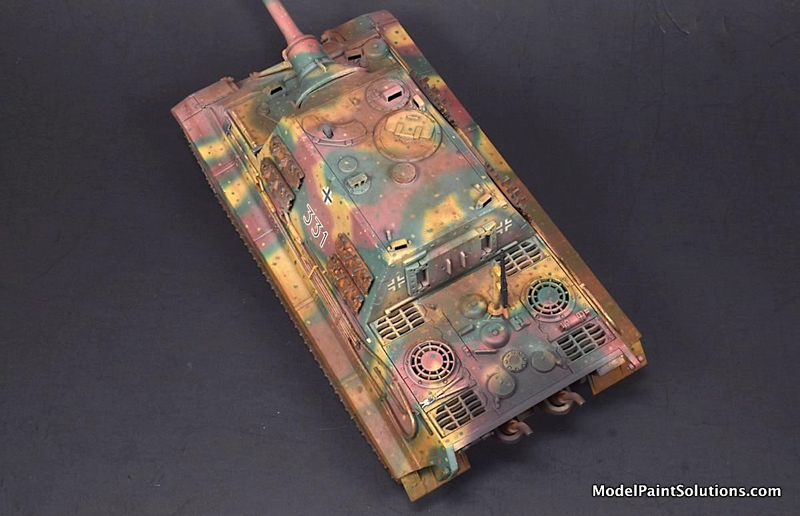
After a little more blending with weathering pigments, the entire model was shot with a Coat of CP30 (to help lock the pigments down). When dry, the model was shot with a light, Dry Coat of ye olde Testors Dull Coat, diluted to 30% with Mr. Color Thinner (Note not “Leveling Thinner”). This served to knock the shine down to a solid matte finish.
That was a lot of fun! I say that every time I break from my usual strict diet of aircraft models and try something different:) Variety is the spice of life and apparently, this applies to modeling. And, as usual after an armor kit, finishing this build required me to dust off all my jars of weathering pigments and washes and to learn a few more tricks that’ll I’ll be using on my next build be it a car, armor or a thing with wings.
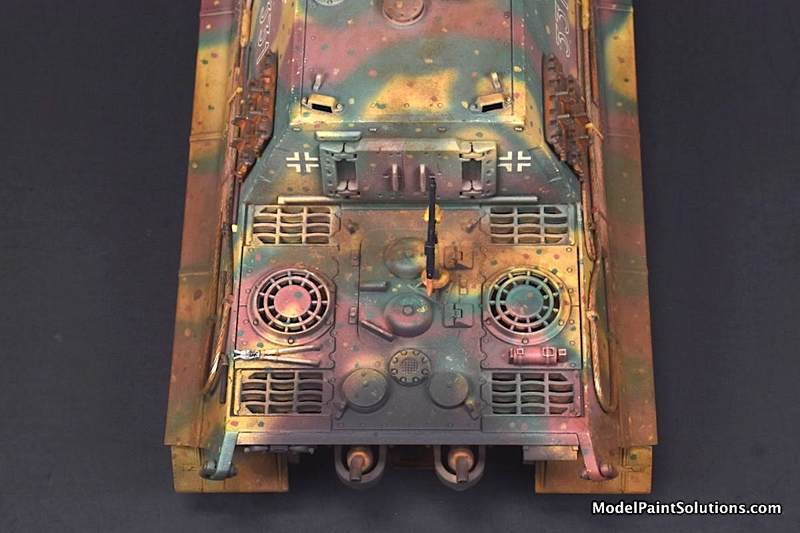
Continually learning and having fun; two of the main reasons I’ll be starting a new kit in short order:)
Keep your airbrush wet!
John
For more on this review visit ModelPaintSolutions.com.
https://modelpaintsol.com/builds/tamiya-48-jagdtige-32569
Text and images copyright ©2026 by John Miller/Model Paint Solutions.
Mission Models Primers
For spraying, I prepare Mission Primers by diluting them 1:1 with Mission Thinner containing 10% Liquitex Flow-Aid. I usually apply them at 12-15psi as a Dry Coat followed by a Wet Coat using an H-S Evolution fitted with either a 0.28, 0.45 or 0.60mm tip, depending on the size of the model.
Mission Models Paints
Mission Models Paints require a binding agent like Mission Polyurethane Mix Additive or, my preference, Mission Clear Primer, added to the mix prior to spraying. To do this, I prepare a large volume (100ml) of what I refer to as CP30, which stands for Mission Clear Primer diluted to 30% with Mission Thinner containing 10% each of Liquitex Flow-Aid and -Slow-Dry. So, for 100ml of CP30, I combine 30ml of Mission Clear Primer with 50ml of Mission Thinner and 10ml each of Liquitex -Flow and -Slow. I store this in a 120ml bottle marked with the date and mix details. Once prepared, the solution is stable with a good shelf life. CP30 can also be shot straight from the bottle as a handy Semi-Gloss Clear Coat.
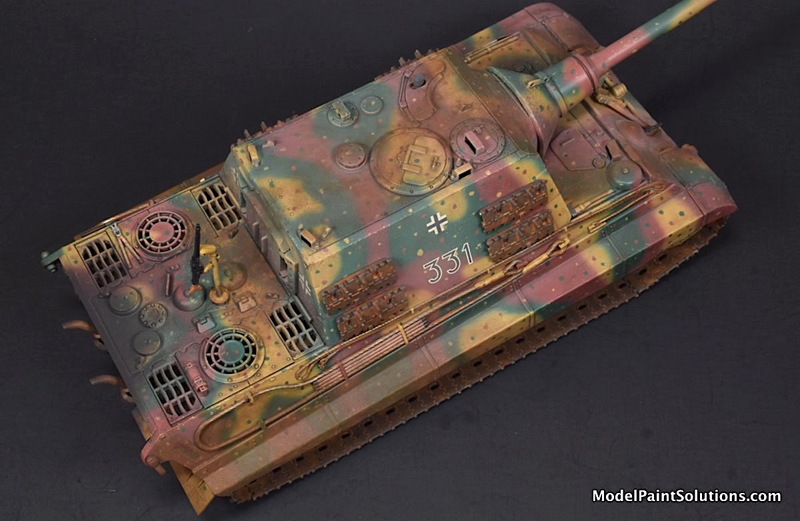
For general airbrushing jobs, Mission paints are mixed 50:50 (1:1) with CP30 and sprayed at ~12psi. For fine-line jobs (lines ~1mm wide), I prefer diluting Mission paints to ~30% with CP30 and spraying at ~10psi with an appropriately small tip.
For more on this review visit ModelPaintSolutions.com.
https://modelpaintsol.com/builds/tamiya-48-jagdtige-32569
Text and images copyright ©2026 by John Miller/Model Paint Solutions.
For more on this review visit ModelPaintSolutions.com https://modelpaintsol.com/builds/tamiya-48-jagdtige-32569
Model, Images ad Text Copyright © 2026 by John Miller / Model Paint Solutions
Page Created 3 July, 2026
Last Updated 4 July, 2026
Back to HyperScale Main Page
|
 Home
| What's New | Features | Gallery | Reviews | Reference | Resource Guides | Forum |
Home
| What's New | Features | Gallery | Reviews | Reference | Resource Guides | Forum |