Tamiya 1/35 Schwimmwagen
by John Miller

Tamiya 1/35 VW Schwimmwagen Type 166
Kit No. 224
Scale: 1/35
Review Type: Build
Advantages:
The build was quick and easy with practically no time spent removing flash or refreshing parts. The detail abounds and parts-fit was spot-on.
Disadvantages
To be a bit nit-picky, the fit of the arms for the cloth top to the sides of the body is a little finicky but manageable with patience and test fitting.
I’m a Volkswagen/Porsche-kinda-guy and was fortunate to own a beautifully restored 1960 Beetle 3/4 rag-top that was the subject of an amazing build by my buddy Brad “Model Car Czar” Huskinson.
Having owned multiple Beetles, I was jazzed about building the Tamiya Schwimmwagen Type 166 as part of a group build by my modeling posse, the Tuesday Morning Irregulars, which have been meeting regularly every Tuesday morning for many years. This is a great group of guys and all are very good modelers. Some of the Schwimmwagen they built will be presented in an upcoming article “Schwimmwagenpalooza.” Stay tuned :)

My contribution to the group build was straight from the box with the exception of a few pieces of PE, a resin K98 Mauser, and a small “map” added to the passenger’s seat. This build was a lot of fun and gave me the opportunity to try some new weathering techniques that will come in handy on my next project, be that aircraft or armor.
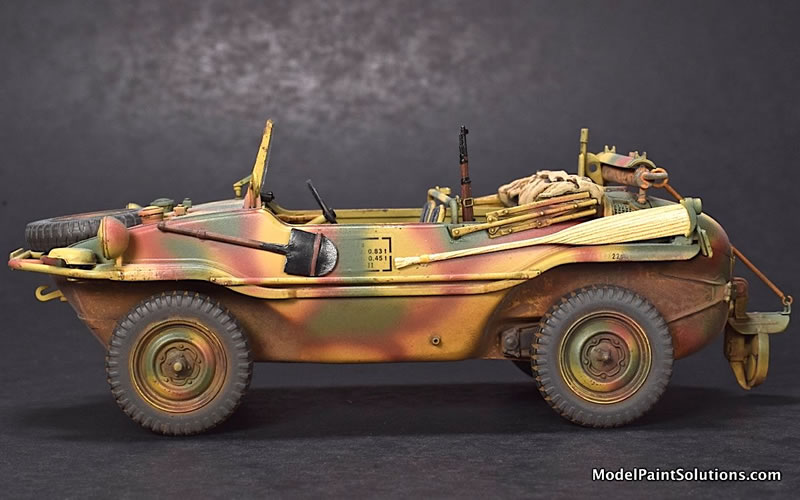
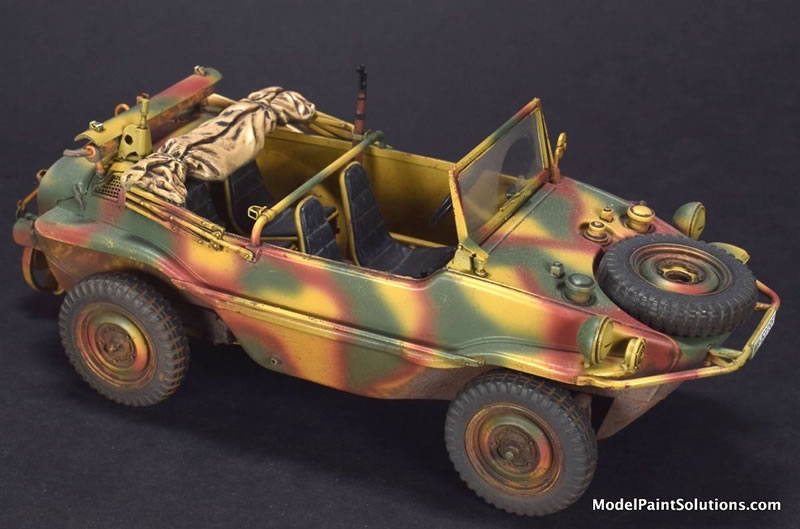
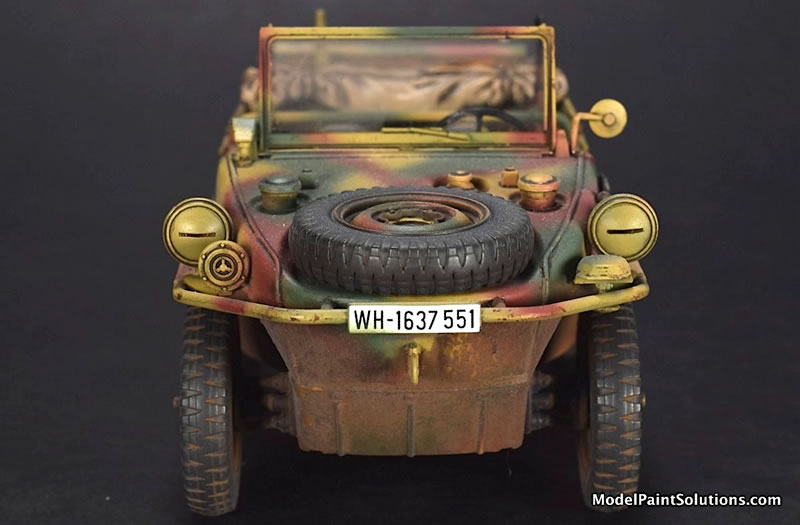
The Volkswagen Schwimmwagen ('swimming car') is a light four-wheel drive amphibious car, used extensively by German ground forces during WWII. With over 15,000 units built, the Schwimmwagen is the most-produced amphibious car in history. Prototyped as the Type 128, it entered full-scale production in 1941 as the Type 166.
Development
The Porsche/Volkswagen Schwimmwagen used the engine and mechanicals of the VW Type 86 four-wheel drive prototype of the Kübelwagen, also used for the Type 87 four-wheel drive 'Kübel/KDF' Command Car (Kommandeurswagen), which in turn were based on those of the civilian KDF-Wagen. Erwin Komenda, Ferdinand Porsche’s first car-body designer, was forced to develop an all-new unitized body tub structure, since the flat floorpan chassis of the existing VW vehicles was unsuited to smooth movement through water.
The initial Type 128 prototype Schwimmwagen was based on the full-length Kübelwagen wheelbase of 2.40 m (7 ft 10 in). Pre-production units of the 128, fitted with custom welded body-tubs, demonstrated that this construction was too weak for off-road use. It had insufficient torsional rigidity, and easily suffered hull-ruptures at the front cross-member, as well as in the wheel-wells. This was unacceptable for an amphibious vehicle. The large-scale production models (Type 166) had a reduced wheelbase of 2.00 m (6ft 7in) which resolved these issues.
Schwimmwagens were produced by the Volkswagen factory at Fallersleben/Stadt des KdF-Wagens and Porsche's facilities in Stuttgart; with the bodies (or rather hulls) produced by Ambi Budd in Berlin. 15,584 Type 166 Schwimmwagen were produced from 1941 through 1944; 14,276 at Fallersleben and 1,308 by Porsche. The VW 166 is the most-produced amphibious car in history. Only 189 Schwimmwagen are on the registry today and of them only 13 have survived without restoration work.
All Schwimmwagen were four-wheel drive in first gear (and reverse gears on some models) and had ZF self-locking differentials on the front and rear axles. As with the Kübelwagen, the Schwimmwagen had rear portal axels, which provided increased ground clearance, while at the same time reduced drive-line torque stresses with their gear reduction at the wheels. The Schwimmwagen had a top speed of 50 miles per hour (80 km/h) on land.
When crossing a body of water a screw propeller could be lowered down from the rear deck/engine cover. When in place a simple coupling provided drive straight from an extension on the engine's crankshaft. This meant that screw propulsion always drove forward. The Schwimmwagen had a top speed of 10 km/h (6 mph) in the water. For reversing in the water there was the choice of using the standard equipment paddle or running the land drive in reverse, allowing the wheel-rotation to slowly take the vehicle back. The front wheels doubled up as rudders, so steering was done with the steering wheel both on land and on water.
Text and pics edited from Wikipedia
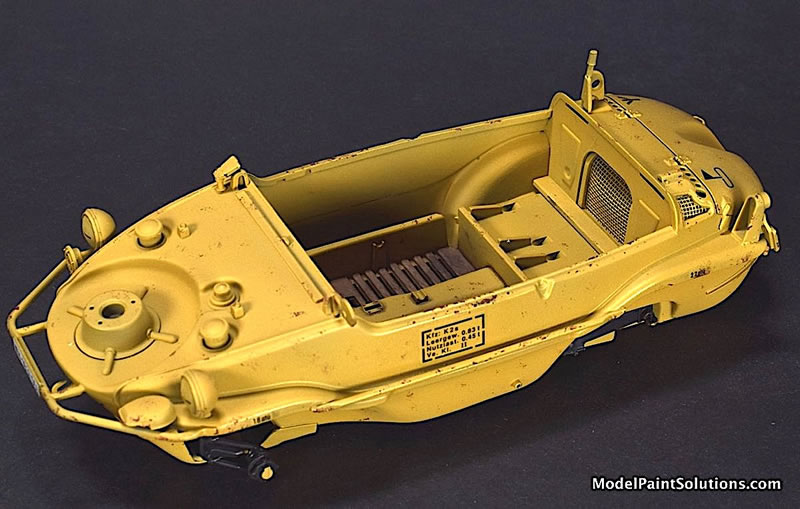
As is my norm, the sprues were first soaked in a 1/1 solution of Denatured Alcohol and Windex followed by rinsing with warm water. Being a Tamiya kit, there was little-to-no flash and most parts fit perfectly. The kit gives you the option to build it with the rear deck lid raised showing the nicely detailed VW engine. I chose to build the kit with the deck lid closed.
Most parts were removed from sprues using GodHand nippers and prepped for assembly with Profile Accessories 400 and 600 grit sandpaper used with soapy water. There were very few molding seams to deal with, excluding the tires, which have a seam around their circumfrence that needs taming.
Tamiya Thin Cement and gap-filling CA glue (Bob Smith) were used during assembly. The one exception is the windshield, which was affixed with UV-activatable glue (link).
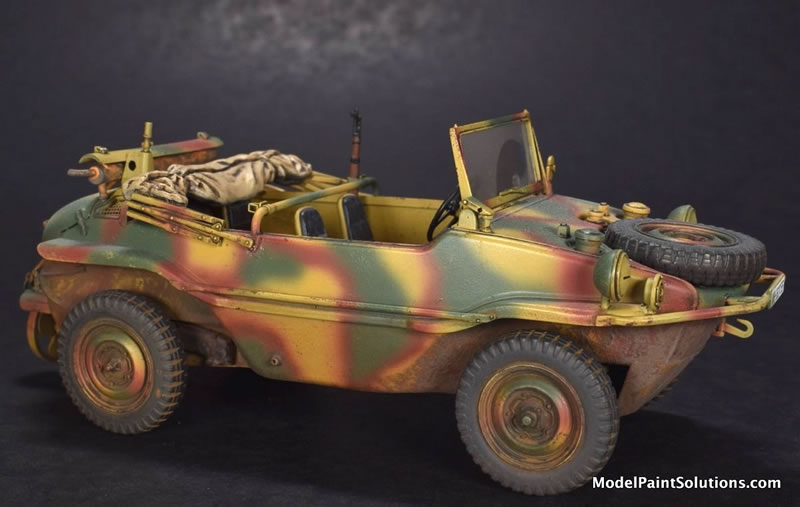
The only modification to the kit was the addition of photo-etch rifle restraints (Hauler Models; below). These were added to the cross-bar just behind the front seats. If you add rifle restraints, you gotta add rifles and these were sourced from Zebrano (below), which makes beautifully cast 1/35th K98 Mausers.
For priming and some painting, smaller parts were affixed to a piece of wood with white putty. As per my usual painting sequence, the kit was first shot with Mr. Surfacer 1,000 diluted to ~30% with Mr. Color Leveling Thinner or MLT for short. This was applied at ~15psi with an H-S Evolution-2024 fitted with a 0.28mm tip. The larger parts were buffed with 6,000 grit Micromesh (used with soapy water) prior to painting.
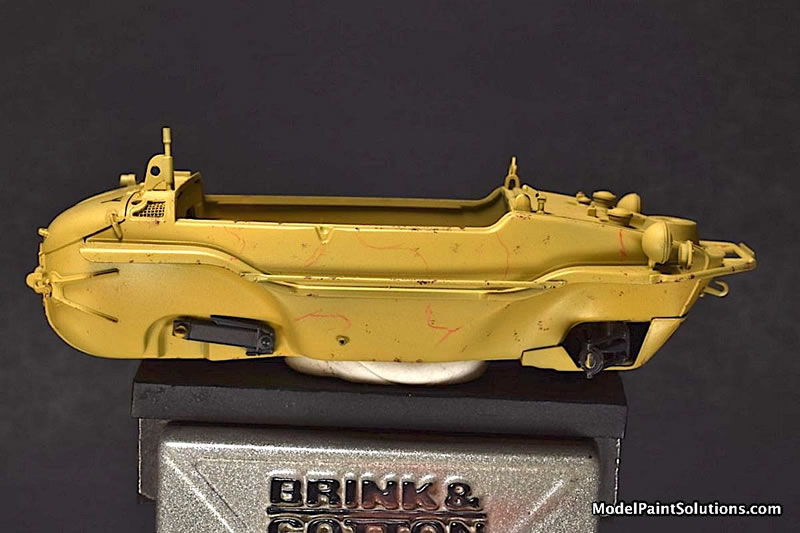
After 24hrs of drying time, the kit was given a coat of AK Real Colors Dunkelgelb diluted to ~30% paint with MLT. This was applied as a Dry Coat followed, a few moments later, with a Wet Coat at ~12psi with an Evolution fitted with 0.28mm tip.
Sponge Chipping
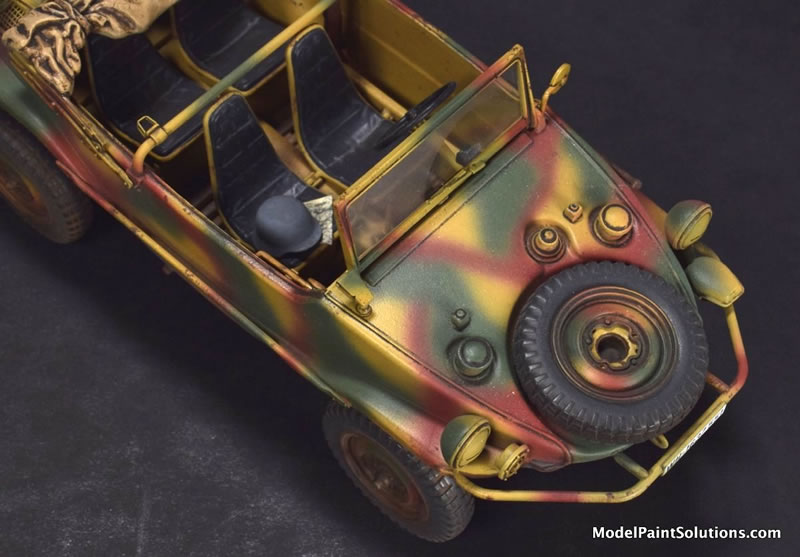
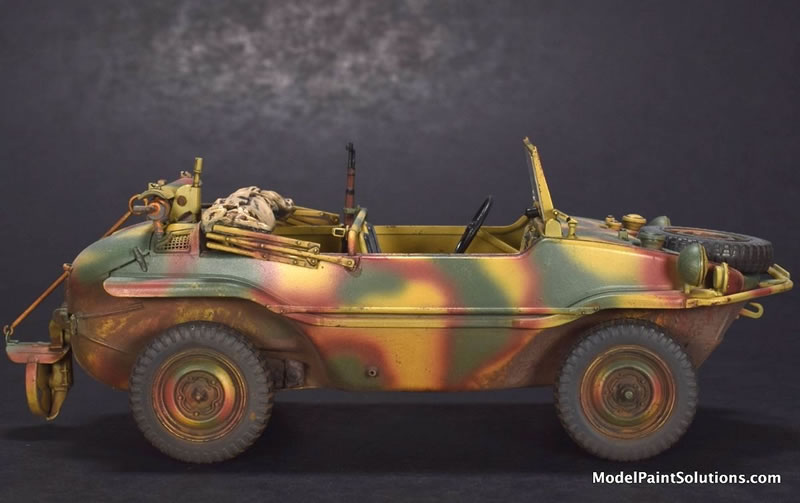
In an effort to make my Schwimmwagen look as though the Rotbraun and Dunkelgrün were applied in the field (after the car had a little wear and tear), I applied the few decals used onto the coat of Dunkelgelb using conventional techniques (Mr. Softer and Mr. Setter). After the decals were dry, chipping of the Dunkelgelb was done using the “Sponge Technique” and Mission Models German Red Oxide. To do this, a small piece of packing foam (~5mm in diameter) was held in a pair of tweezers. After dipping the foam into Mission Red Oxide, most of the paint was removed by pressing the foam into a Kimwipe or paper towel. The foam was then used to replicate chipping by lightly pressing it onto the model in those areas prone to wear. In my hands, removing most of the paint from the foam with a paper towel prior to touching the model allows you to make chips, not paint blobs. In addition, the Mission was used straight from the bottle with no Polymix or Clear Primer added as a binding agent. This allowed any chips that turned into blobs to be easily removed with a moistened Q-tip.
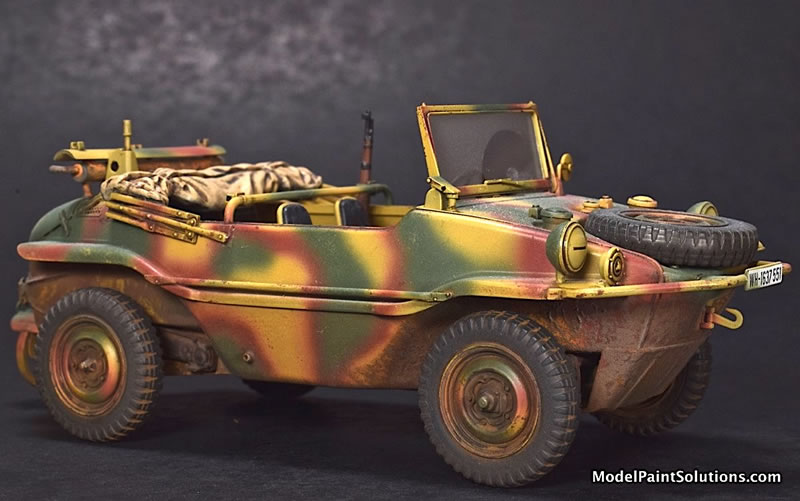
When I was satisfied with the chipping, the pattern of Rotbraun was lightly outlined using a Red Primer AK Weathering Pencil. With the pattern established, AK Real Colors Rotbraun was diluted to ~30% paint with MLT and applied at ~12psi with an Infinity-2024 fitted with a 0.22mm tip.
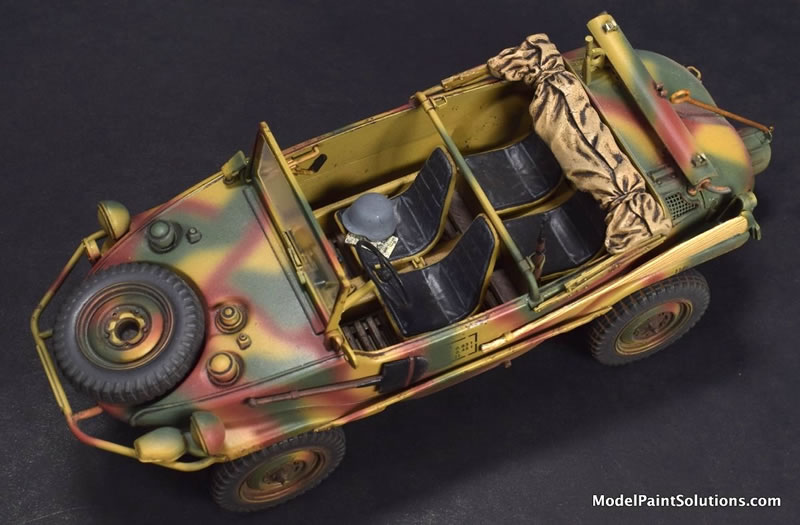
After the Rotbraun was dry, the Dunkelgrün pattern was lightly outlined on the frame with a Dark Green AK Weathering Pencil. AK Real Colors Dunkelgrün was then applied with an Infinity-2024 diluted and sprayed as described above for the Rotbraun.
When the Dunkelgrün was dry (24hrs) the model was given a coat of Mission Clear Primer, diluted to 30% with Mission Thinner containing 5% each of Liquitex Slow-Dri and Flow-Aid. I like to apply an acrylic “barrier coat” prior to using enamel panel liners and performing other enamel-based weathering tricks (below).
A Little Weathering
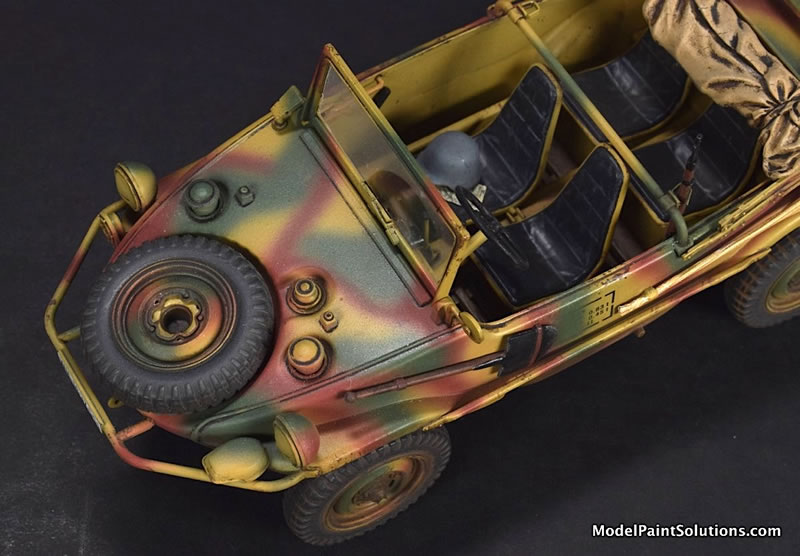
To bring out surface details, Tamiya Dark Brown Panel Liner was carefully applied with a small brush. After the panel liner was allowed to dry for ~15 minutes, excess liner was carefully removed with a Q-tip moistened with Mona Lisa Odorless Thinner (this thinner is awesome for this job).
After the panel liner was sealed with a light coat of 30% Mission Clear Primer (described above), Vallejo Burnt Umber (#73.11) and Vallejo Light Siena (#73.104) weathering pigments were combined until a color was achieved that looked good to my eye. The blended pigments were then mixed with a sufficient volume of Mona Lisa Odorless Thinner to make a slurry, which was stored in a 20ml paint jar until used. The pigment slurry was liberally brushed onto the areas of wheels and chassis were dirt would be expected to accumulate. Many thanks to Eric “The Tank Man” Christianson for advice on preparing and applying the pigment slurry. For more great tips on weathering, check out Eric’s Das Werk’s 1/35 8.8cm Flak Gun/Vomag Truck, AFV Club 1/35 Magach 6B GAL and Dragon Models Sd.Kfz. 1381 Geschutzwagen 38 H fur s. JG.331.
After the slurry was allowed to dry (~3hrs), streaks and smudges were made with a stiff-bristled brush and Q-tips. Additional pigment slurry was applied, allowed to dry and removed as described until the finish looked sufficiently “dirty.”
Finishing Up
After masking the area of the windshield that would be swiped clean by the single wiper, AK Flat, diluted to ~20% in Mr. Color Thinner, was lightly applied. Note that since I was diluting Clear Flat, Mr. Color Thinner (not Leveling Thinner) was used. After this was dry the windshield was unmasked and glued in place using photoactivatable glue. This stuff is great for affixing clear parts as it doesn’t harden until exposed to a specific wavelength of light and it doesn’t craze clear parts before or after drying.
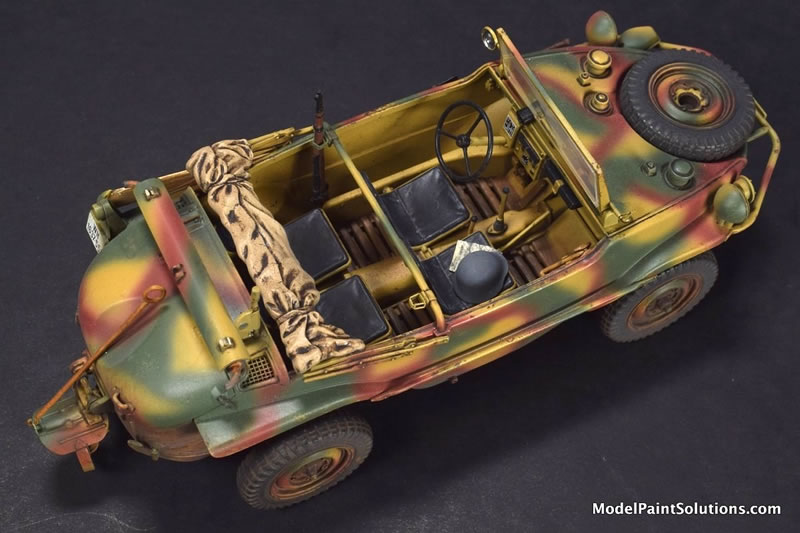
The beautifully cast resin Mauser, by Zebrano, was painted Mission Brown (lightened with Mission White) and Mission Black. The black areas (breech and barrel) were rubbed with powdered pencil lead to replicate gun metal. Approximately 2mm had to be removed from the rear of the gun stock to get the correct fit of the Mauser in the PE restraint.
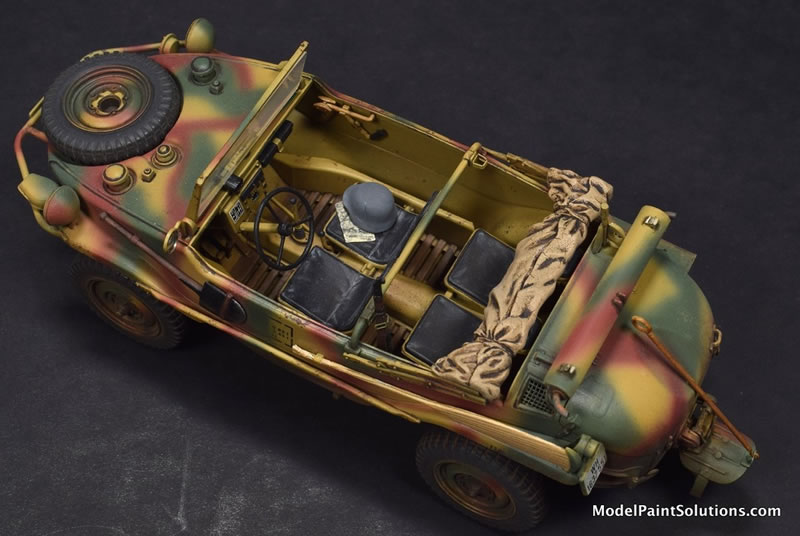
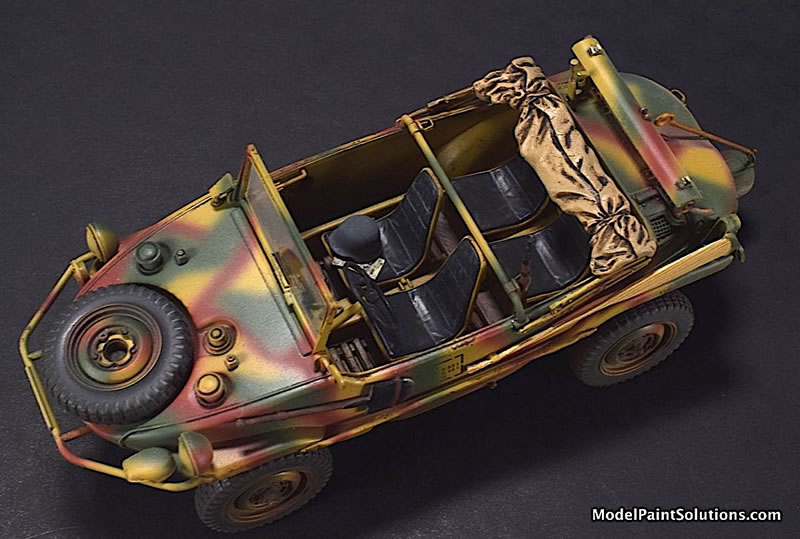
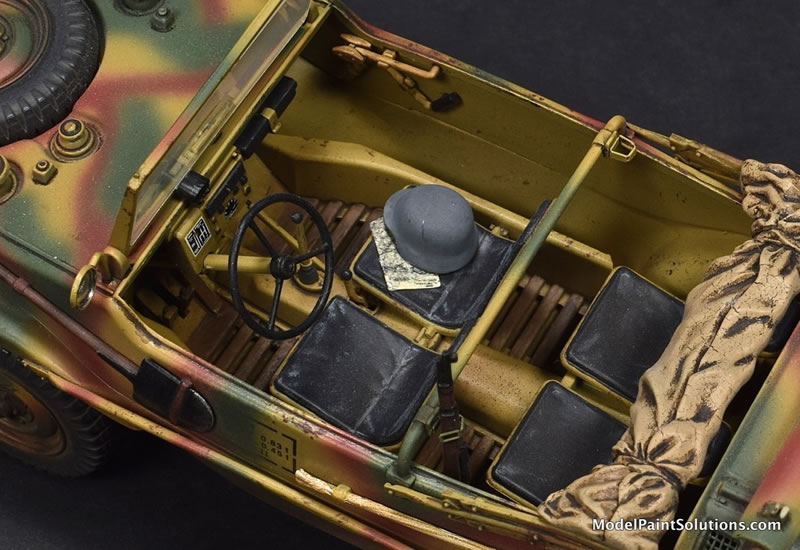
A small map from Minimali Productions was glued onto the passenger seat with a dab of CA. The map was partially covered with the helmet that came with the kit after painting it Mission Panzer Grey lightened with a little Mission White.
The oar was first painted Mission Tan (lightened with a little Mission White) followed by application of a wood-grain decal by Uschi van der Rosten. I wanted to display the propeller in the down position and gizomotized a PE attach bracket for the lowering rod from parts I found in my spares box.
The finished model was given a light coat of AK Flat only on those areas that looked too shiny. This was shot at ~12psi with an Infinity-2024 fitted with a 0.22mm tip.
Aftermarket Kits Used:
-
Zebrano 1/35 k98 Resin Carbine Mauser x6 (#ZA35212).
-
Hauler Models 1/35 GERMAN SCHWIMMWAGEN Photo Etch Detail Set (#HLU35026).
-
Minimali Productions No.010 1/48 Staff Maps.
That was fun! The kit was a joy to build and served as a great way to experiment with new weathering techniques like the slurry of weathering pigments. That trick will come in handy on future builds. I suspect this will be the first of multiple 1/35 scale WWII VW vehicles that will be rolling off my bench. Next up, a Kübelwagen!
Keep your airbrush wet!
—John
For more on this review visit ModelPaintSolutions.com
Model, Images and Text Copyright © 2026 by Model Paint Solutions
Page Created 2 January, 2026
Last Updated 2 January, 2026
Back to HyperScale Main Page

|
 Home
| What's New | Features | Gallery | Reviews | Reference | Resource Guides | Forum |
Home
| What's New | Features | Gallery | Reviews | Reference | Resource Guides | Forum |